Category Archives: hands-on activity (easy)

Salt fingers in my overturning experiment

You might have noticed them in yesterday’s thermally driven overturning video: salt fingers!

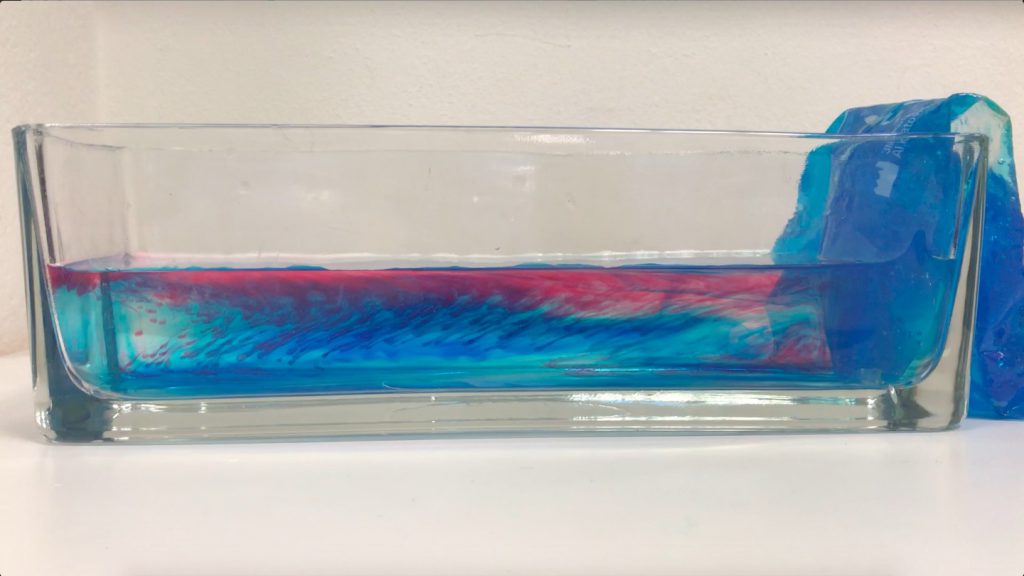
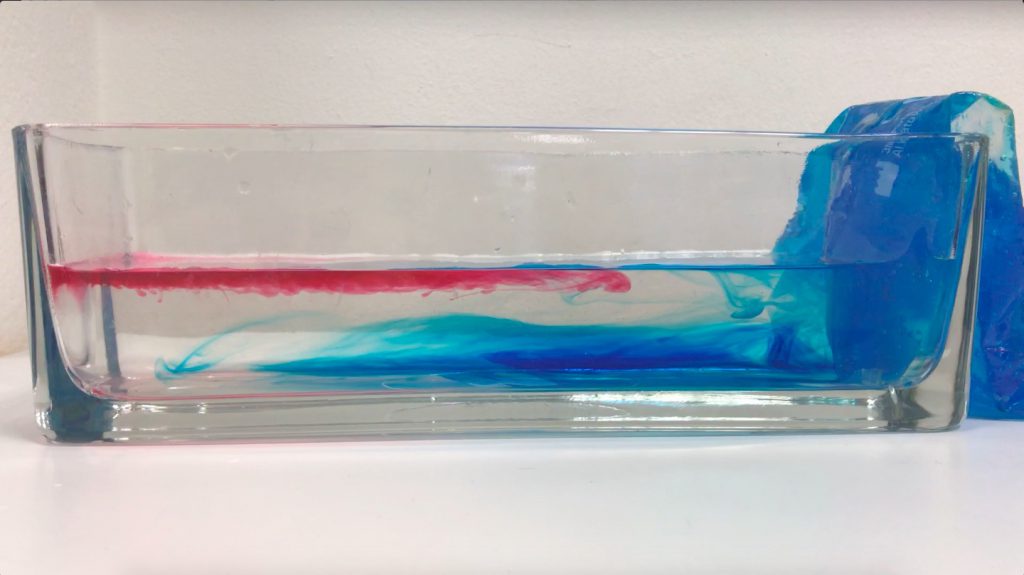
In the image below you see them developing in the far left: Little red dye plumes moving down into the clear water. But wait, where is the salt? In this case, the “double” in double diffusion comes from heat and dye which are diffusing at different rates. As temperature’s molecular diffusion is about 100x faster than that of salt (or other things that have to physically change their distribution, rather than just bump into each other to transfer energy), the red and clear water quickly have the same temperature, but then the red dye makes the red water more dense, hence it sinks.

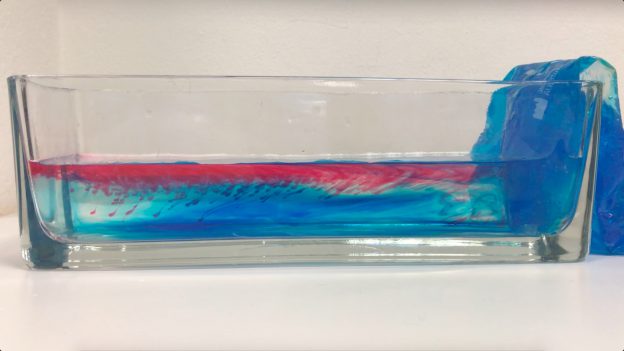
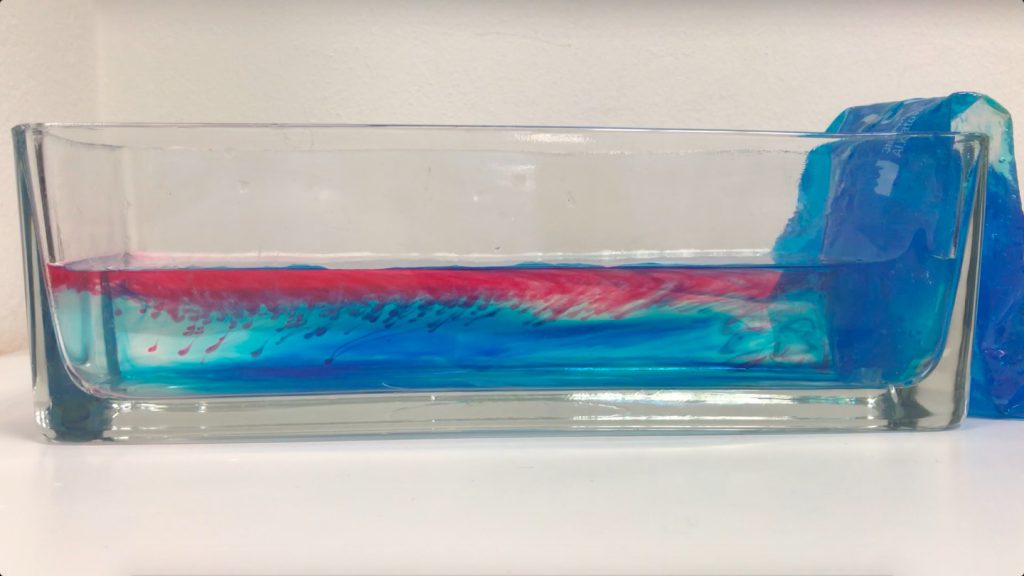
Over time, those fingers become more and more clearly visible…

Until after a couple of minutes, we see that they are really contributing to mixing between the two layers.

Even though double diffusive mixing happens in the ocean, too, the scaling of these fingers is of course totally off if we think of this tank as for example the northern half of the Atlantic. But then so is the density stratification… But it’s always good to keep in mind that while this experiment is showing some things quite nicely, there are also things that are artefacts of the way the experiment is set up and that aren’t analogous to how things work in the ocean.

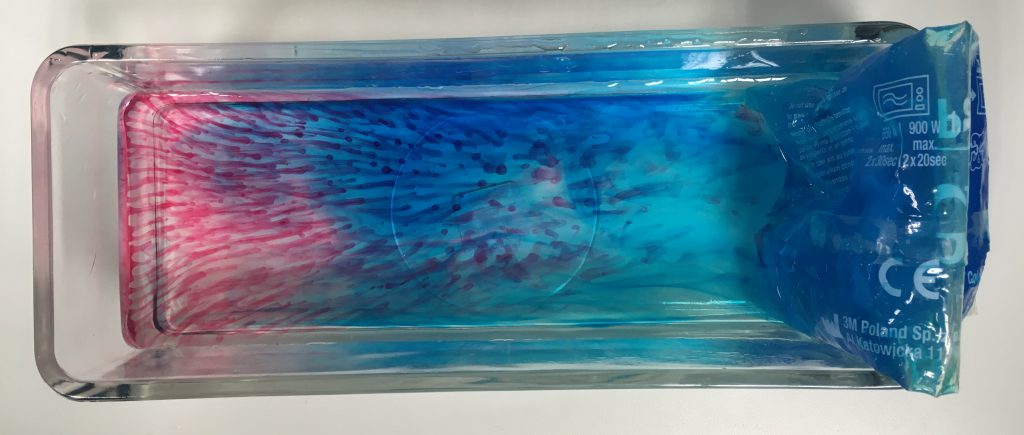
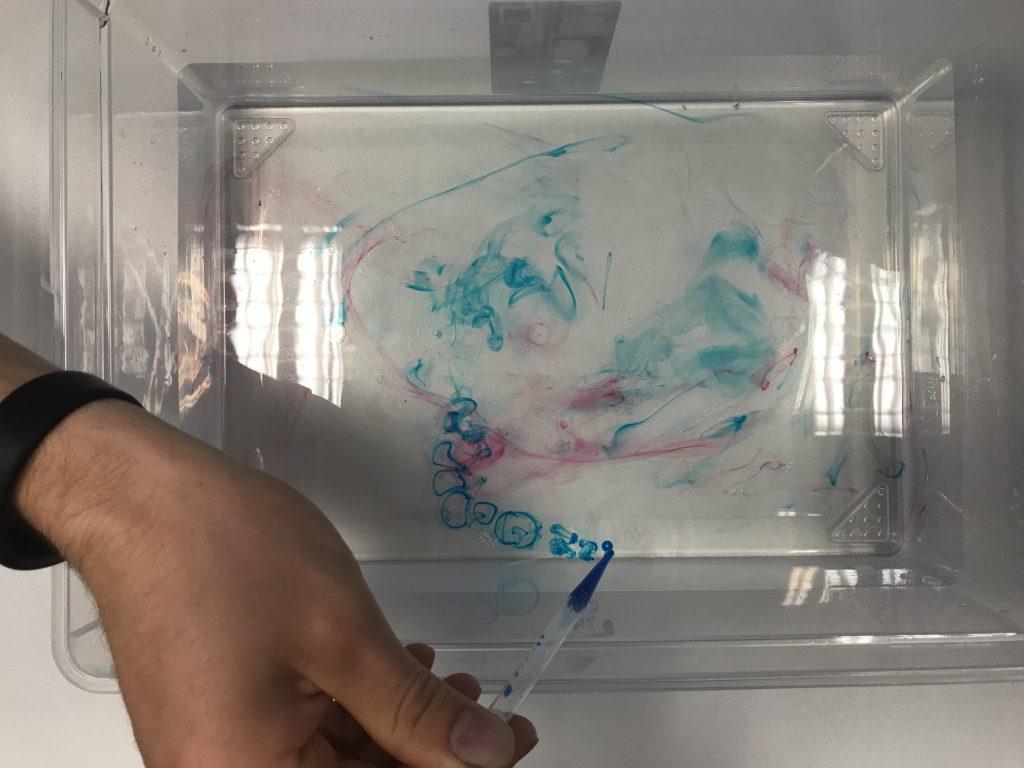
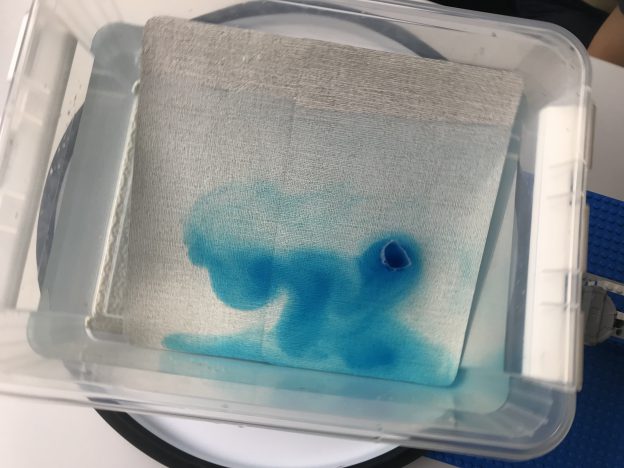
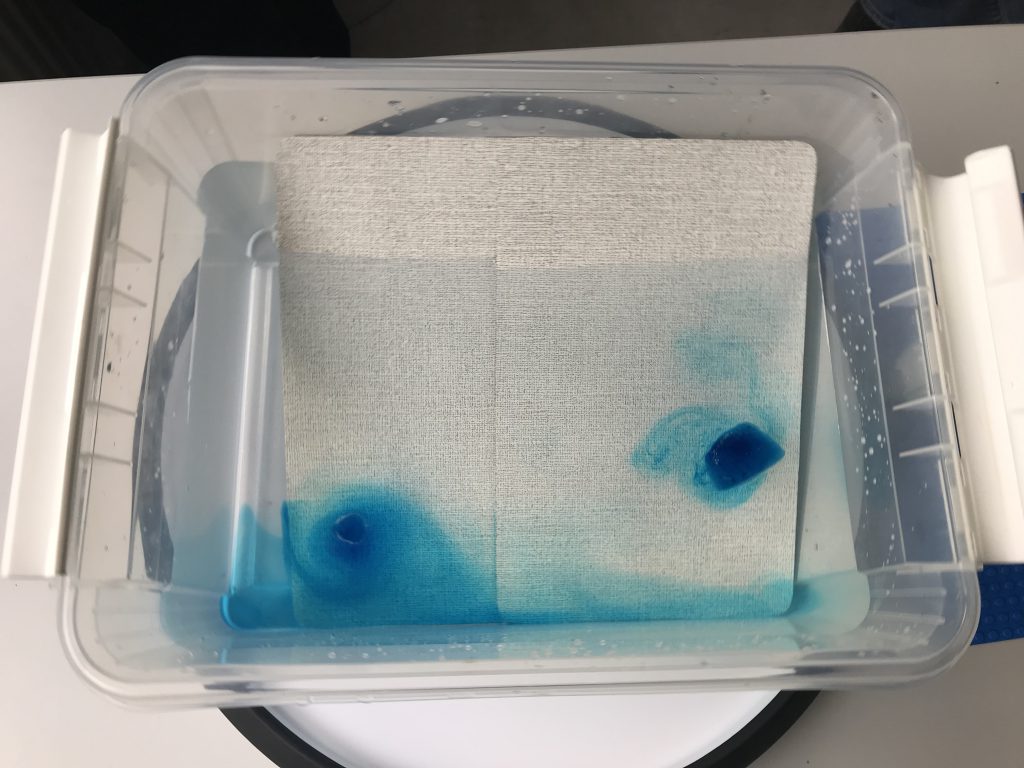
A really nice and very new-to-me way of observing them is from above:

This is a picture that was taken fairly early in the experiment, when the layers hadn’t propagated far yet and the salt fingers weren’t being pulled back by the shear between the layers. But it’s nice to see how the dye is concentrated in those downward moving fingers, isn’t it?

Thermally driven overturning circulation

Today was the second day of tank experiments in Torge’s and my “dry theory 2 juicy reality” teaching innovation project. While that project is mainly about bringing rotating tanks into the theoretical teaching of ocean and atmosphere dynamics, today we started with the non-rotating case of a thermally driven overturning circulation.

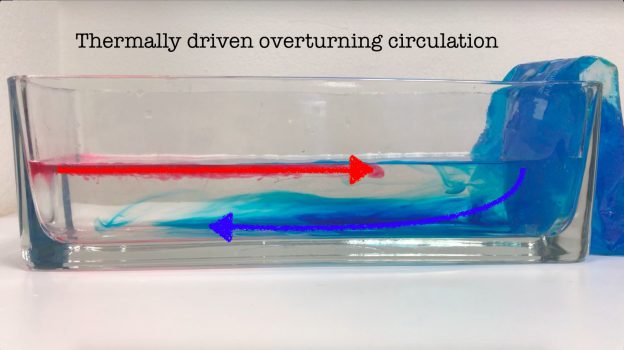
Very easy setup: A rectangular glass vase filled with luke-warm water. A frozen cool pack for sports injuries draped over one end (which we’ll think of as the northern end) provides the cooling that we need for deep water formation. The deep water is conveniently dyed blue with food dye. Red food dye is warmed up and added to the “southern end” of the tank, and voilà! An overturning circulation is set up.

Watch the sped-up movie to see what happens:

As you will notice, this circulation won’t last for a very long time. Since we are adding neither warming nor mixing, the cold water will eventually fill up the tank. But it’s still quite a nice experiment!

(And should you have noticed the “salt fingers” forming towards the end of the movie, I’ll write about those tomorrow)

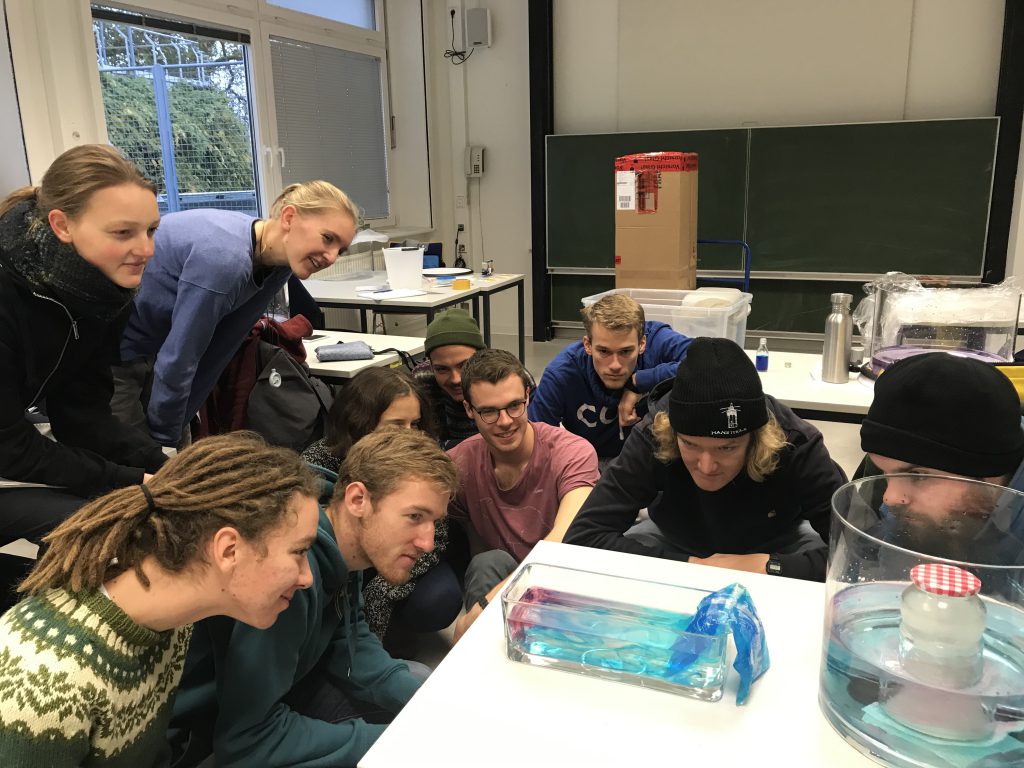
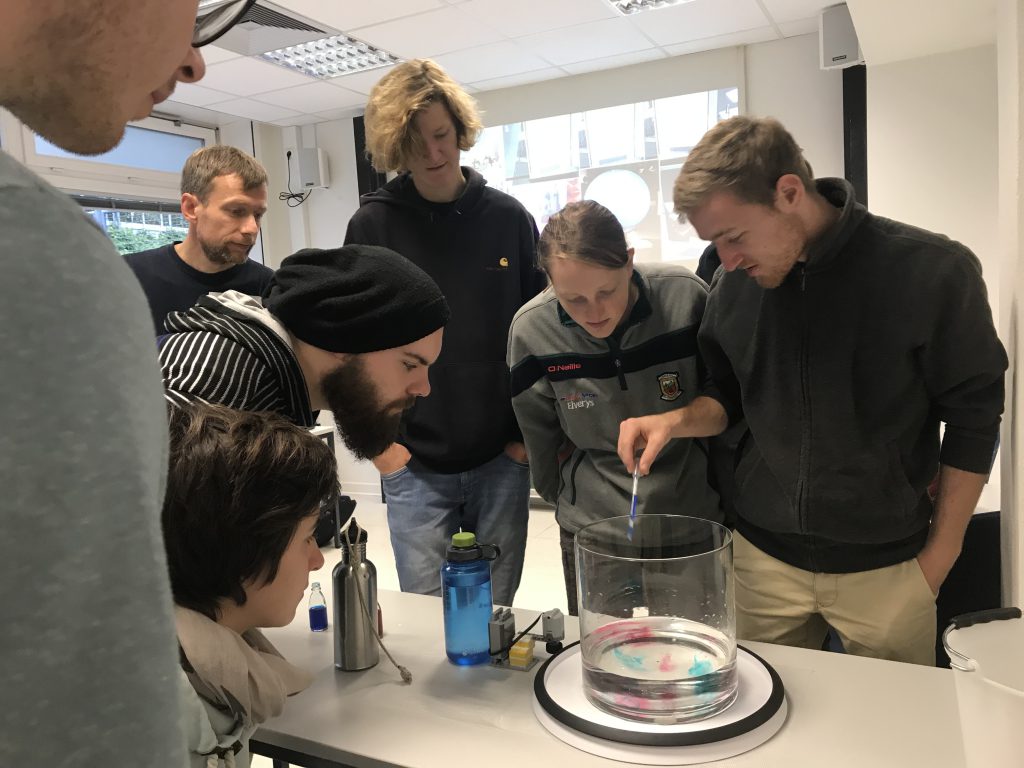
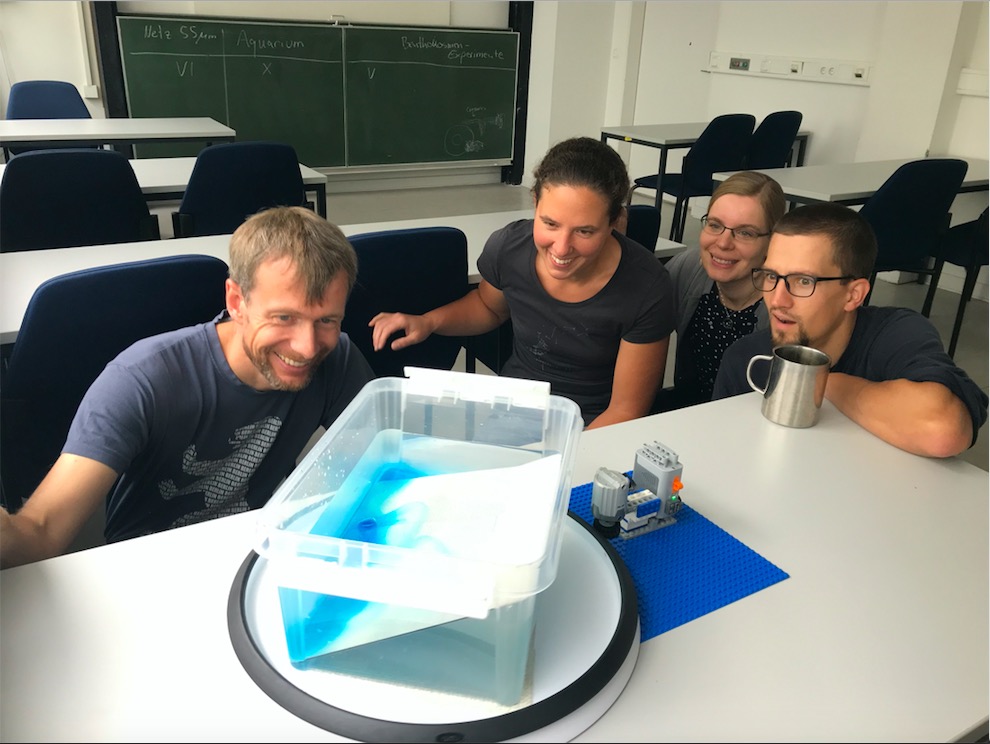
And here is the nice group of students that humoured me and posed for this picture. It’s fun with such a motivated group that comes up with new things to try all the time! :-)

If one rotating table is awesome, four rotating tables are…?

I’m actually at a loss for words. Amazing? Spectacular? So much fun? All of that!

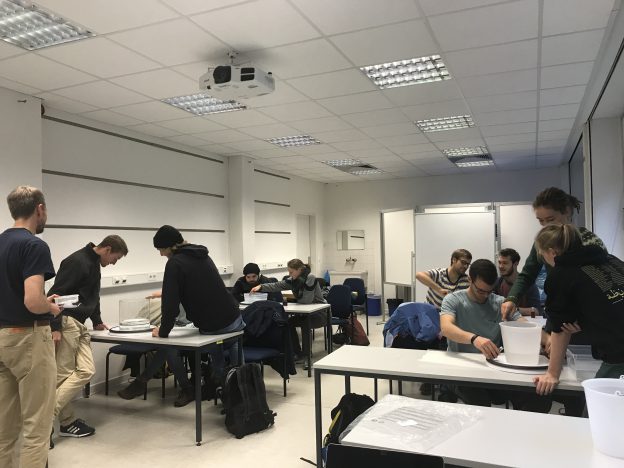
Today was the first time Torge and I tried our four DIYnamics-inspired rotating tables in teaching. (Remember? We want to use 4 rotating tables simultaneously so students can work in small groups rather than watching us present experiments, and also so we could quickly see how slightly different conditions might lead to different results. Having 4 tanks running at the same time cuts down on a lot of spin-up wait time! And we wanted affordable rotating tables so a) we could afford them and b) students would really just be able to play without them, or us, being afraid that they might break something). And it went even better than we had hoped, and we were already pretty convinced that it would be awesome!

It all started out, even before class started, with one of the students asking if it was me who had done the recent takeover of Kiel University’s Instagram account with the awesome tank experiments in Bergen. Yep, that was me, and it was great that she remembered she had seen the experiments and even recognized me! Made me very happy. If I had needed convincing that social media is awesome, here it was!

But then the students started playing, and they got really into it. We started out with just tanks filled with water on the Lazy Susans, and the students moved them by hand to get a feel for how water behaves under rotation. We looked at deformation of surfaces, how confetti as tracers behaved on the surface and on the bottom, all the good stuff. Already with such simple experiments there is so much physics to discuss!

And then we moved on to turbulence in a non-rotating and rotating system. Look at the cool vortex rings you can make with food coloring :-)

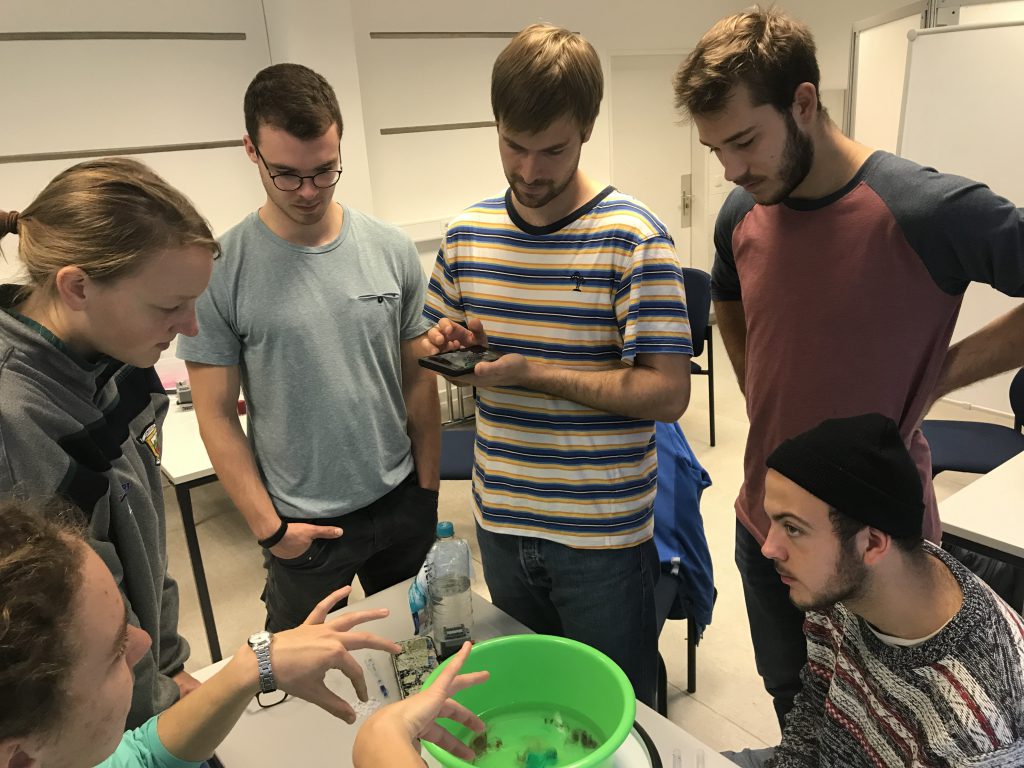
And then we moved on to turbulence in the rotating system. Our final tanks haven’t arrived yet, so we made do with whatever we had at hand (see the green bowl as tank below…). Students also started improvising to include a topography and other modifications that we hadn’t planned for. This is so great if students are so keen to figure things out that they take the initiative to make it happen themselves!

Judging from what I could observe, students were really enjoying themselves and got into deep discussions, trying to connect their observations to the theory they had learned. Additionally, there were lots of “oh wow!”s and “coooool”s everywhere. And I overheard this one exchange between two students: “careful, don’t drop the phone into the tank!” “oh, it’s ok, it’s waterproof” “I don’t care about the phone, I don’t want you to mess up the experiment!” :-D

Btw, note below the small Lego motor that drives the Lazy Susan. That’s really the whole setup. Speaking of affordable and easy. And portable. And all-around awesome!

And it was great fun for Torge and me, too, to observe what the students were up to, and to discuss with them. There were already several curious questions as to what experiments we are planning to do throughout the course. The next sessions, Torge will connect the experiments we did today to theory, and start on the theory we need for the next set of experiments we are planning to run, but I can’t wait to continue working with the tank experiments with such a motivated group of students! :-)

Phase and group velocities in deep and shallow water

When Tor came to visit me in GFI’s basement lab a couple of days ago, he told me about an experiment he had seen in Gothenburg in the seventies. So Elin and I obviously had to recreate it on the spot. Therefore today, we are comparing phase- and group velocities in deep and shallow water!

Waves are excited by means of an oscillating, hand-helt beer can, curtesy of the beer brewing club at GFI. The experiments are filmed and wave lengths and phase velocities are determined from the videos, which is a lot easier than measuring them directly while the experiment is being run.

Shallow water waves

For shallow water, we are using a water depth of 10 cm. Waves are very easy to see and phase velocities are equally easy to measure.

There is another experiment on (standing) shallow water waves being run at GFI the year before students attend GEOF213, which I described back in 2013.

Deep water waves

For deep water waves, we use a water depth of 42.5 cm (the exact number only matters when the tank filling is also used to fiddle with the dead water experiment, as I had been when the idea for this experiment came up).

Typical wave lengths that are easy to do are between 10 and 25 cm (wave lengths obviously have to be short enough that the water is still “deep”, i.e. H>>wave length) — Elin’s instruction to me for the kind of waves she wanted was “Allegro!” :-D Elin, you are really the coolest and most fun person to play with tanks with!

In deep water, we now have the added difficulty that the phase speed is twice as fast as the group speed. This makes observing the whole thing a lot more difficult. Also amplitudes are a lot smaller now, since the tank was so full and we wanted to keep the water inside…

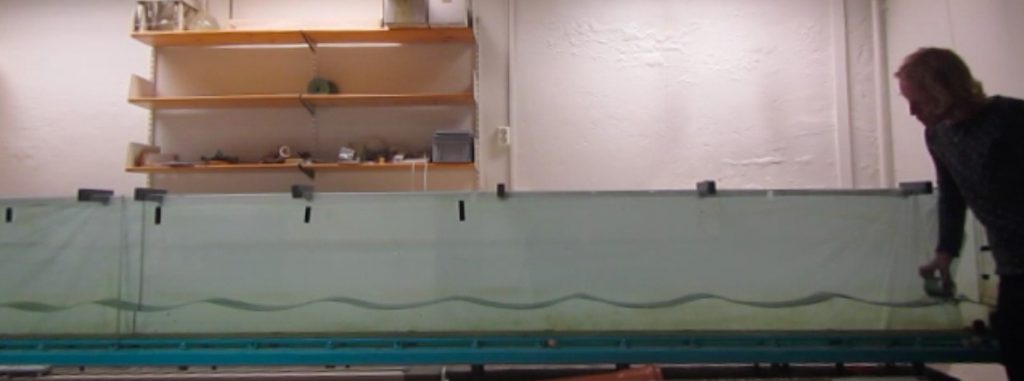
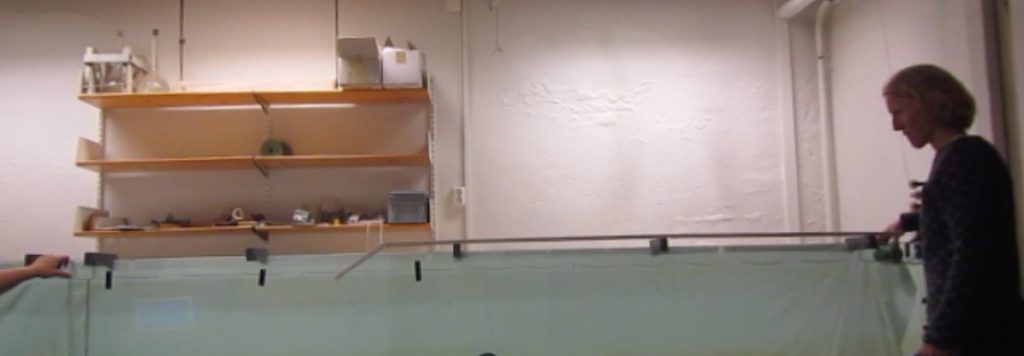
Here is t0 — Elin has just dipped the beer can into the water for the first time

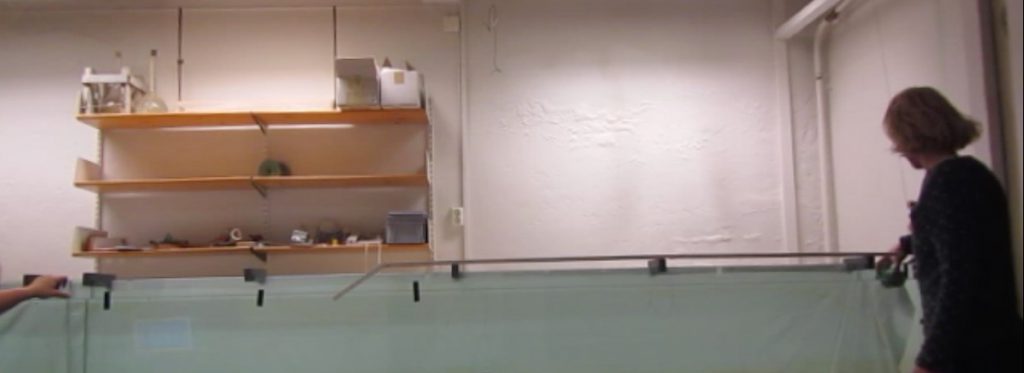
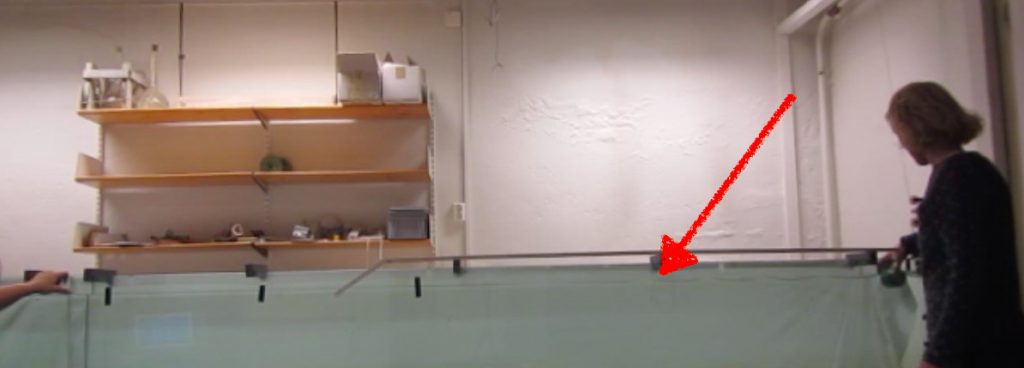
t1 — can you see the wave signal has propagated up to where the red arrow is pointing to?

t2 — the signal has reached my thumb at the left edge of the picture.

From timing this, we can calculate the group speed. We can also measure the wave length on the video and then calculate a theoretical phase speed from that. For the experiments Elin and I did, the results were pretty good, as in phase speed was usually about twice as fast as group speed. And I am curious to hear how well this works out when the students run the experiment!

Ice cubes melting in fresh water and salt water

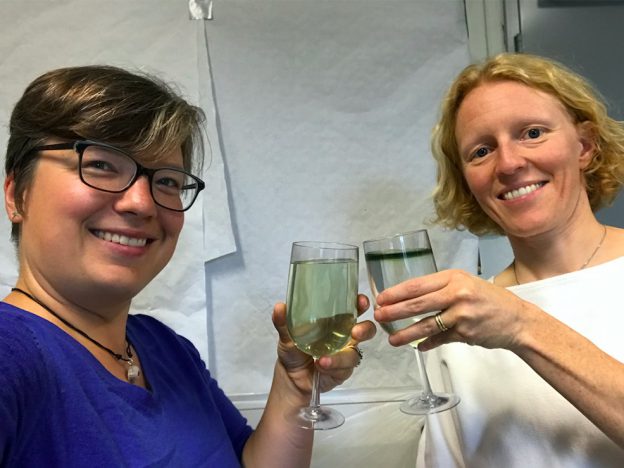
Today we are doing the melting ice cubes experiment in fancy glasses, because Elin is giving a fancy lecture tonight: The Nansen Memorial Lecture of the Norwegian Science Academy in Oslo! Cheers!

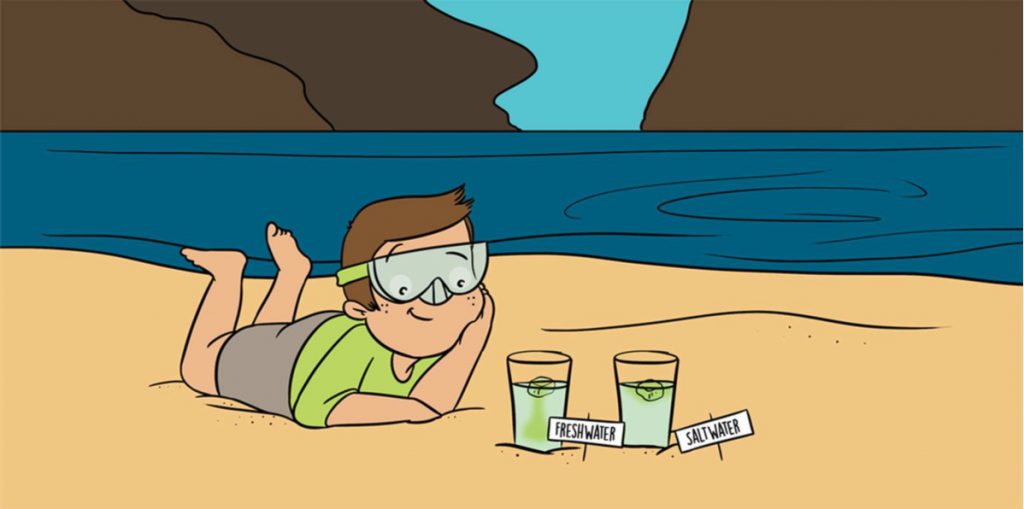
We each had green ice cubes in our glasses, but one of our glasses contained fresh water and the other one salt water, both at room temperature. Can you figure out who got which glass?

This time lapse might give you a clue…

To read more about this experiment, check out this blog post!

Planetary Rossby waves on Beta-plane. A super easy tank experiment!

This is seriously one of the easiest tank experiments I have ever run! And I have been completely overthinking it for the last couple of weeks.

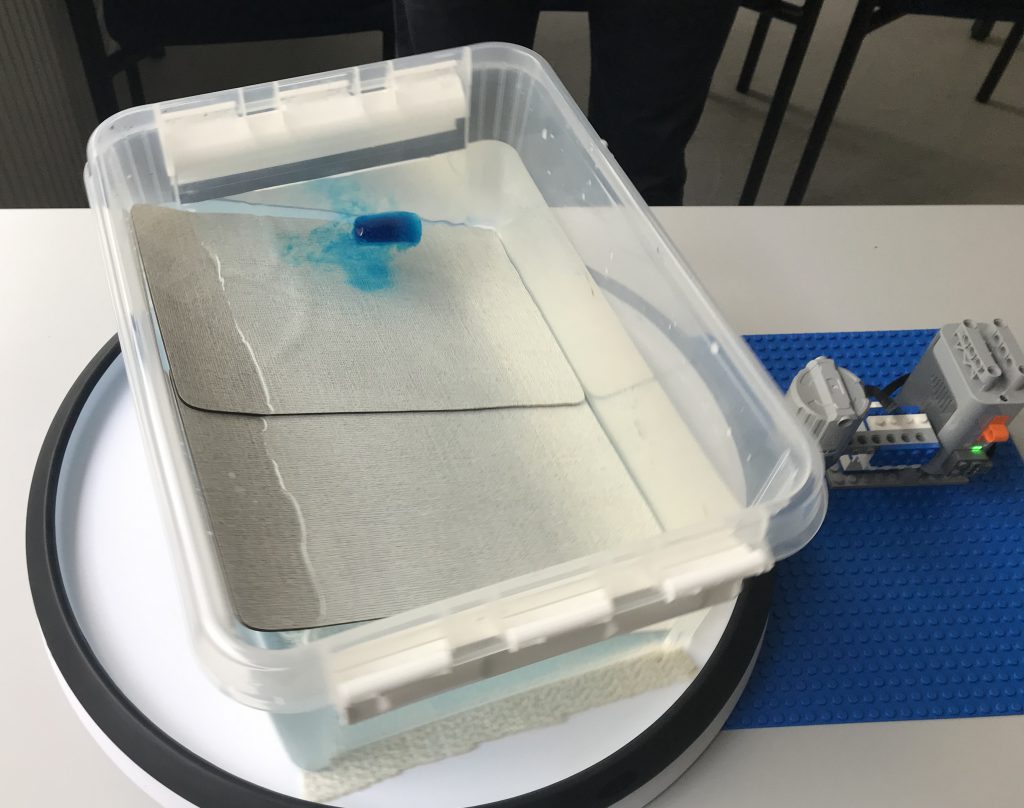
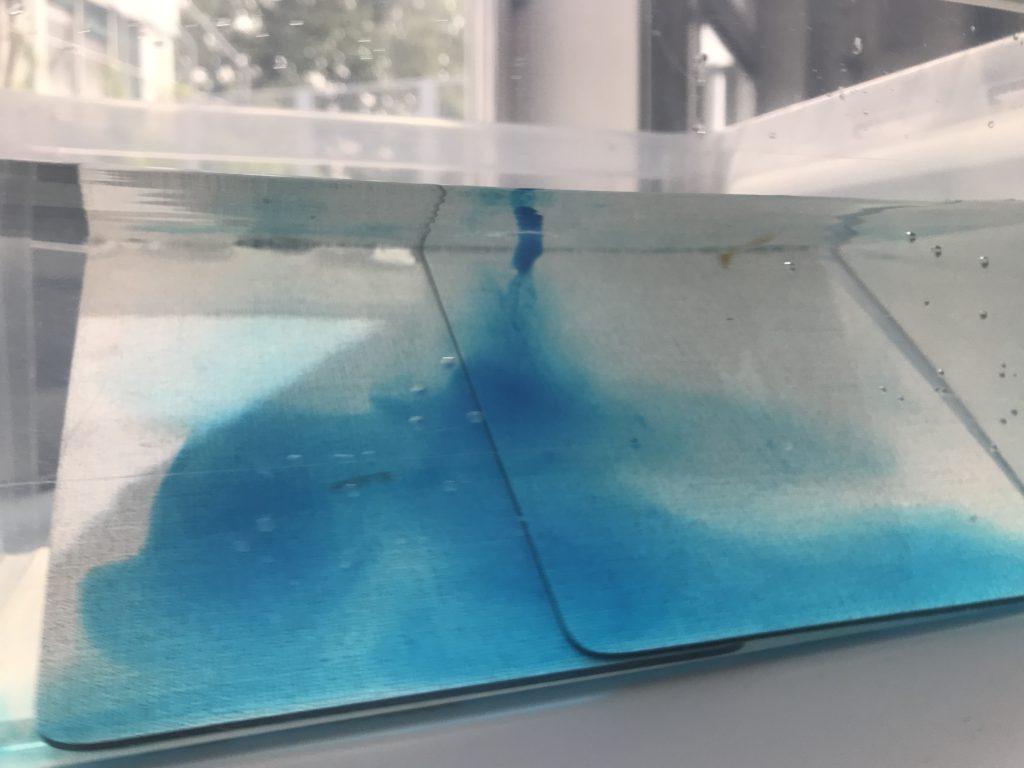
Quick reminder: This is what we think hope will happen: On a slope, melt water from a dyed ice cube will sink, creating a Taylor column that will be driven down the slope by gravity and back up the slope by vorticity conservation, leading to a “westward” movement in a stretched, cyclonic trajectory.

We are using the DIYnamics setup: A LEGO-driven Lazy Susan. And as a tank, we are using a transparent plastic storage box that I have had for many years, and the sloping bottom is made out of two breakfast boards that happened to be a good size.

Water is filled to “just below the edge of the white clips when they are in the lower position” (forgot to take measurements, this is seriously what I wrote down in my notes. We didn’t really think this experiment would work…)

The tank is then rotated at the LEGO motor’s speed (one rotation approximately every 3 seconds) and spun into solid body rotation. We waited for approximately 10 minutes, although I think we had reached solid body rotation a lot faster. But we had a lot of surface waves that were induced by some rotation that we couldn’t track down and fix. But in the end they turned out to not matter.

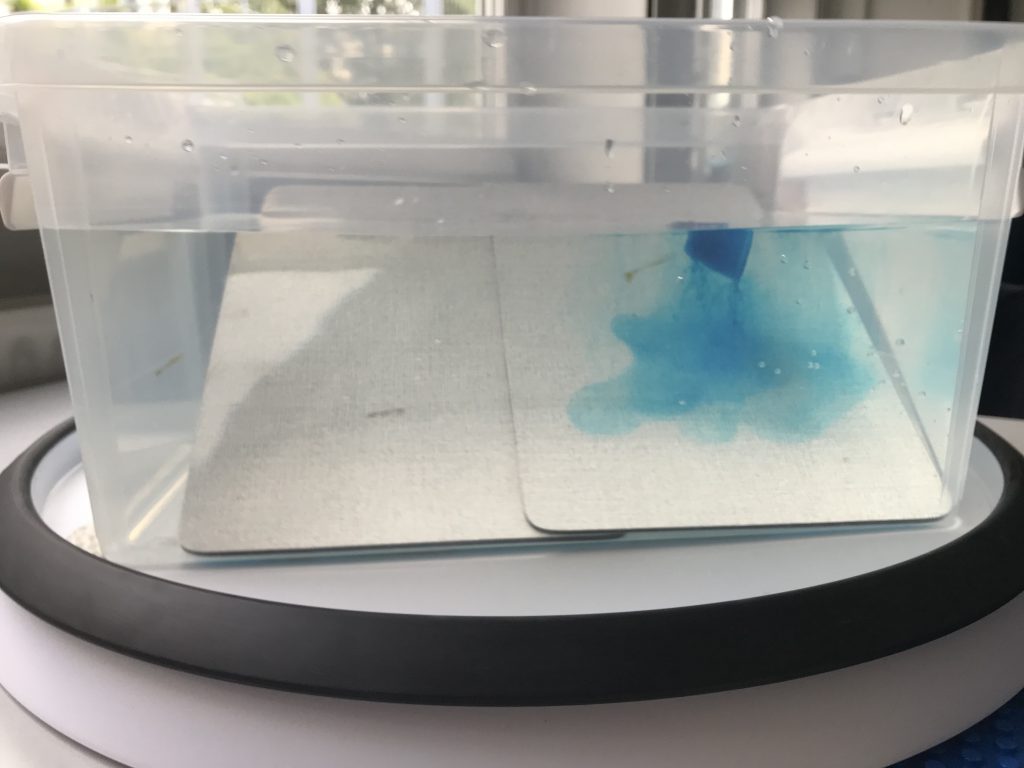
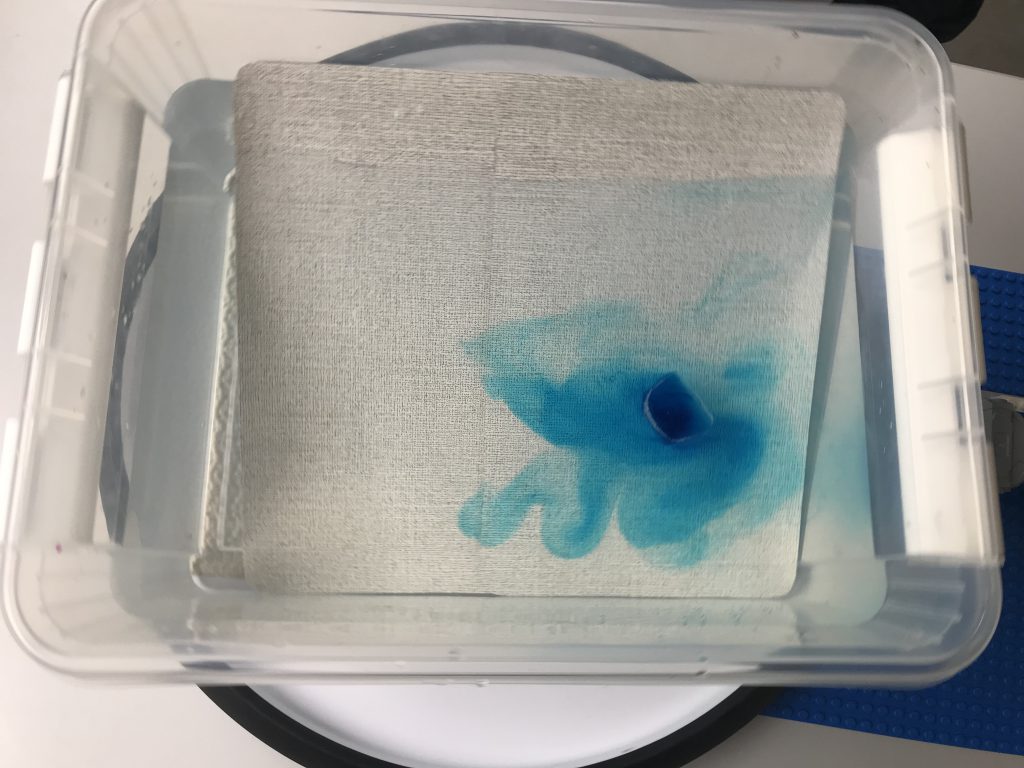
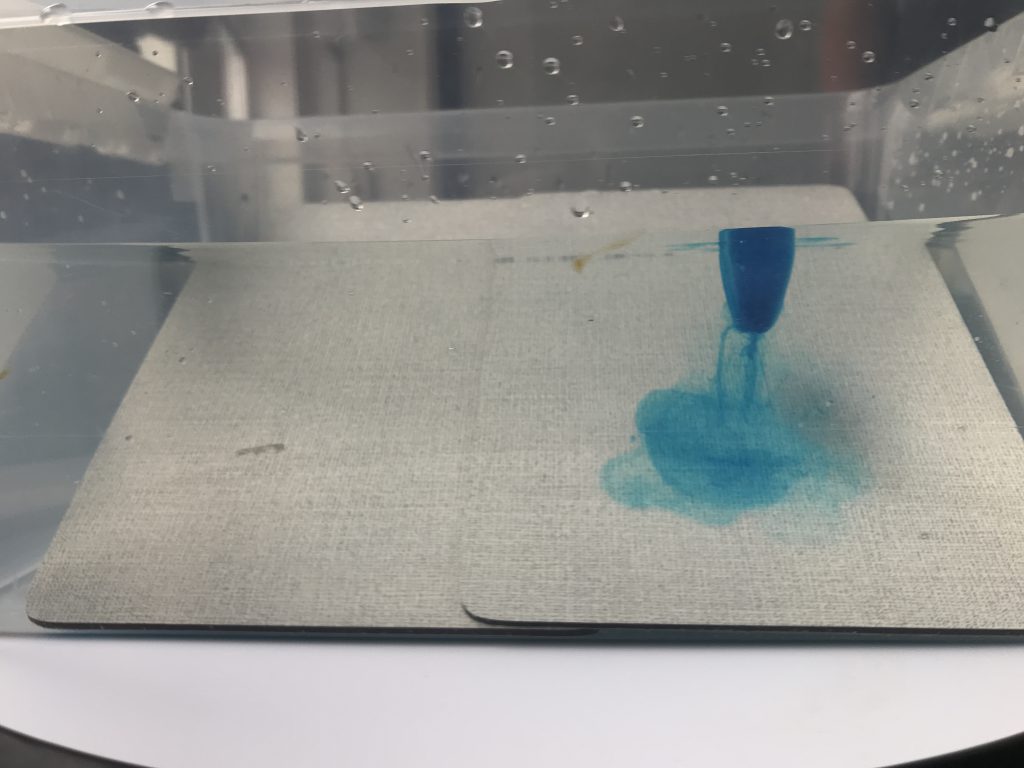
To start the experiment, Torge released a blue ice cube in the eastern corner of the shallow end. As the ice cube started melting, the cold melt water sank down towards the ground, where it started flowing towards the bottom of the tank. That increased the water column’s positive relative vorticity, which drove it back up the slope.

This was super cool to watch, especially since the ice cube started spinning cyclonically itself, too, so was moving in the same direction and faster than the rotating tank.

You see this rotation quite well in the movie below (if you manage to watch without getting seasick. We have a co-rotating setup coming up, it’s just not ready yet…)

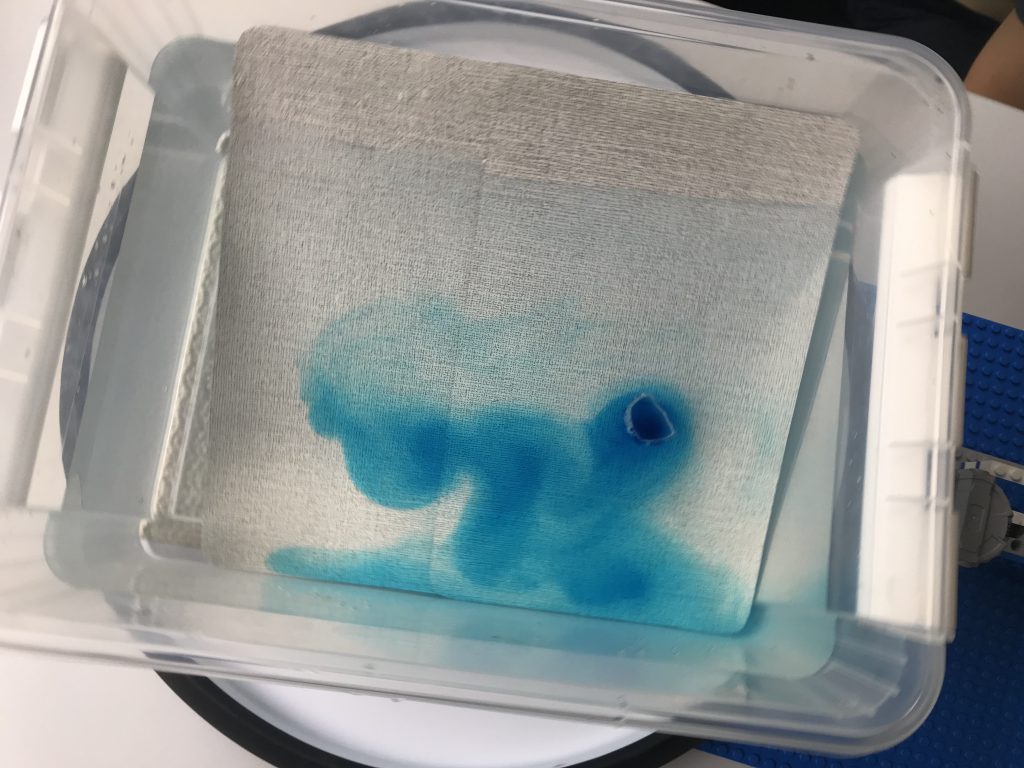
Very soon, these amazing meandering structures appear: Rossby waves! :-)

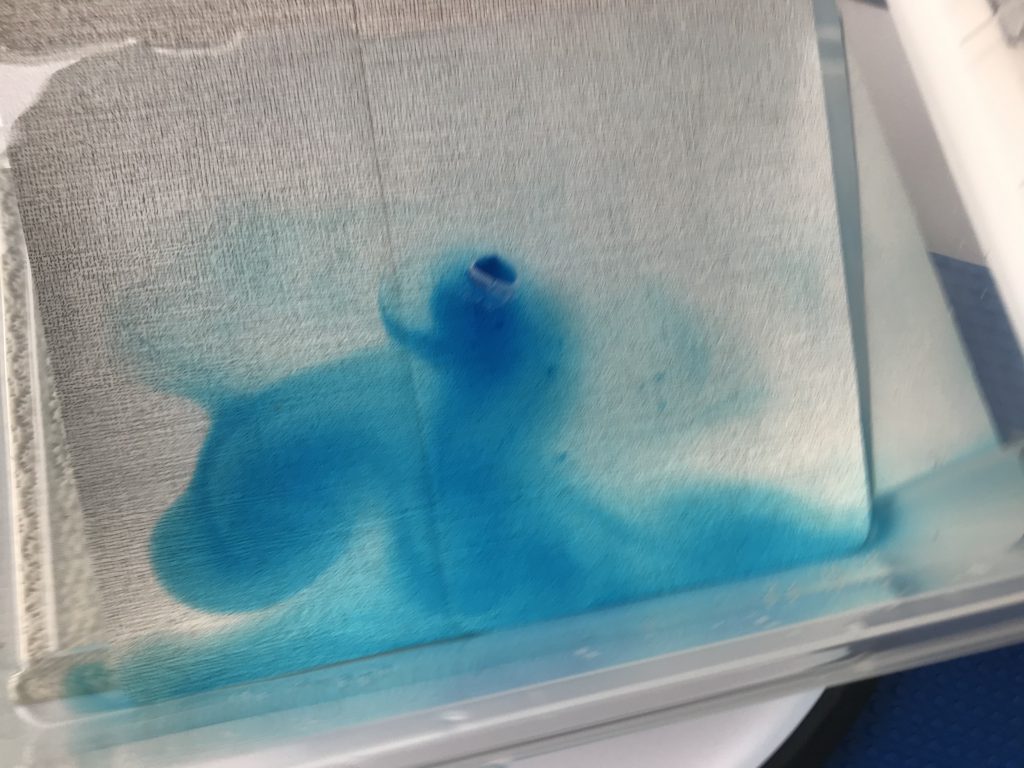
And over time it becomes clear that the eddies that are being shed from the column rotating with the ice cubes are constant throughout the whole water depth.

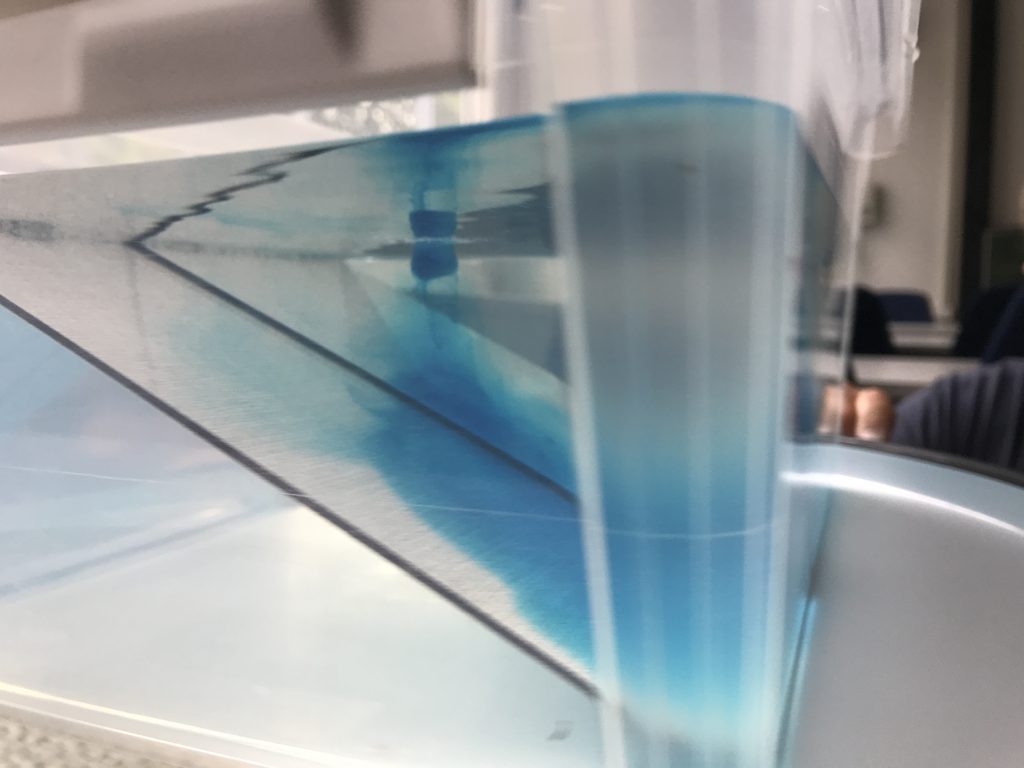
It is a little difficult to observe that the structure is really the same throughout the whole water column since the color in the eddies that were shed is very faint, especially compared to the ice cube and the melt water, but below you might be able to spot it for the big eddy on the left.

Or maybe here? (And note the surface waves that become visible in the reflection of the joint between the two breakfast boards that make up the sloping bottom. Why is there so much vibration in the system???)

You can definitely see the surface-to-bottom structures in the following movie if you don’t let yourself be distracted by a little #HamburgLove on the back of the breakfast boards. Watching this makes you feel really dizzy, and we’ve been starting at this for more than the 8 seconds of the clip below ;-)

After a while, the Taylor column with the ice cube floating on top starts visibly moving towards the west, too. See how it has almost reached the edge of the first breakfast board already?

And because this was so cool, we obviously had to repeat the experiment. New water, new ice cube.

But: This time with an audience of excited oceanographers :-)

This time round, we also added a second ice cube after the first one had moved almost all the way towards the west (btw, do you see how that one has this really cool eddy around it, whereas the one in the east is only just starting to rotate and create its own Taylor column?)

And last not least: Happy selfie because I realized that there are way too few pictures like this on my blog, where you see what things look like (in this case in the GEOMAR seminar room) and who I am playing with (left to right: Torge, Franzi, Joke, Jan) :-)

Guest post by Dan Wallace: A machine learning system playing a game to super-human levels, using only plastic boxes and beads

Hi, I’m Dan Wallace, a PhD student at the Institute of Sound and Vibration Research in Southampton, UK. I’m interested in lots of areas of acoustics — here I am working on a prototype 3D audio system in one of our anechoic chambers, as part of my Masters project.
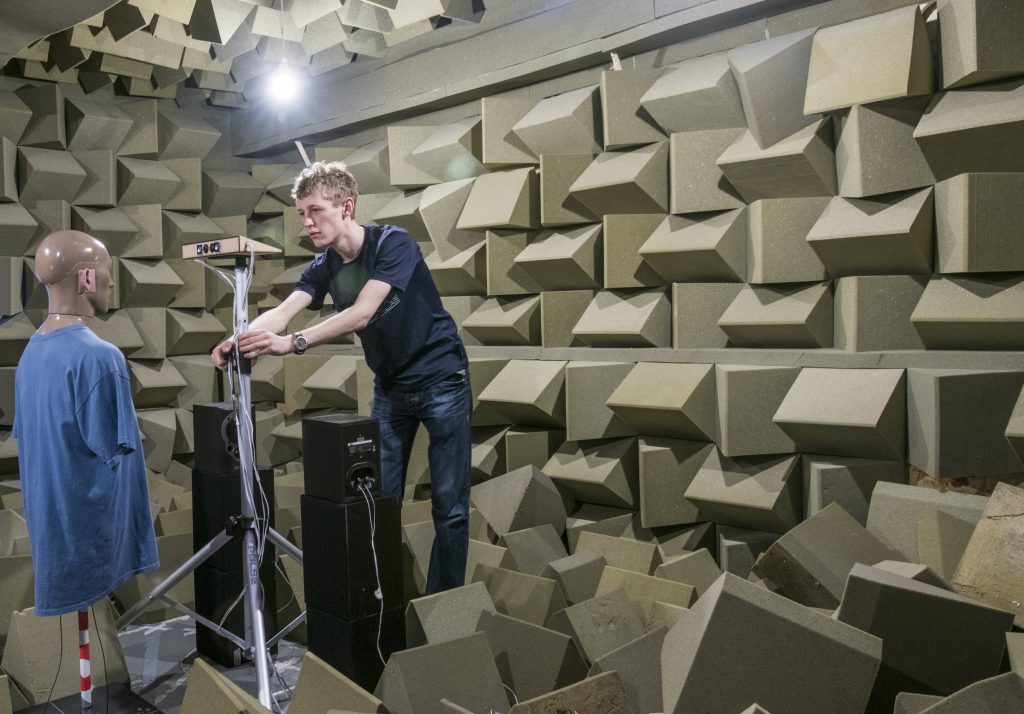
Dan inside an anechoic chamber. Photo credit: Dan Wallace

Dan inside an anechoic chamber. Photo credit: Dan Wallace/University of Southampton

Today though, I’d like to talk about a machine I’ve designed, the CHocolate Oriented Machine-learning Processor (or CHOMP for short). CHOMP is a machine learning system designed to play a table-top game to super-human levels, with no silicon chips, no neural networks, not even any electricity… Introducing CHOMP!
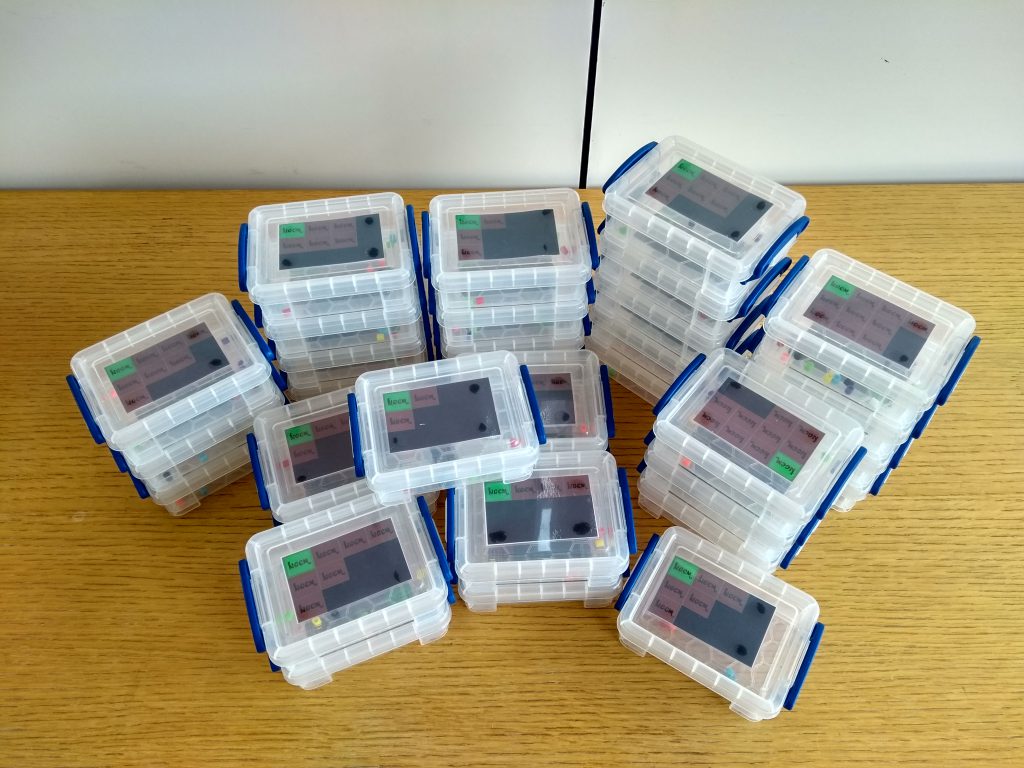
Chomp's hardware: A bunch of plastic boxes. Photo credit: Dan Wallace

Chomp’s hardware: A bunch of plastic boxes. Photo credit: Dan Wallace

This pile of plastic boxes has triumphed over PhD’s, employees of Google DeepMind, numerous seven-year olds and our University Vice-Chancellor – all it takes is a little training.

First, let’s introduce the game we’re playing. Like all the best games, our game is played with a big bar of chocolate, but for sustainability (of our waistlines), ours is 3D printed. By the way, NGCM stands for Next Generation Computational Modelling. NGCM is the Centre for Doctoral Training who are supporting me throughout my PhD with training, equipment and funding.
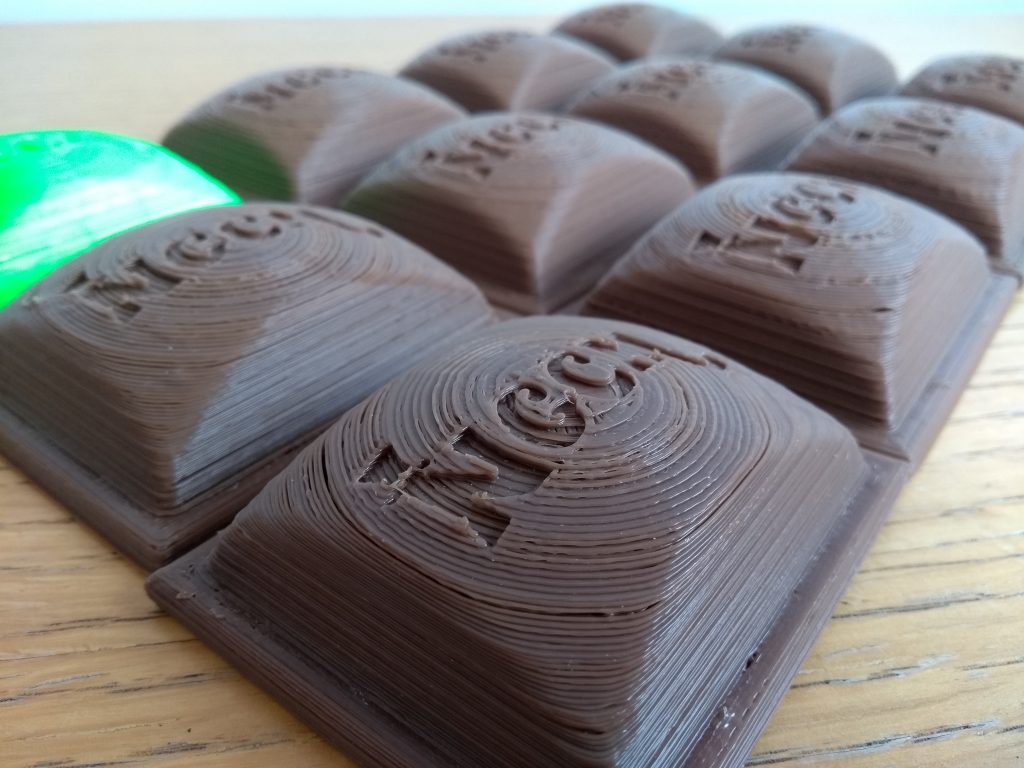
3D-printed chocolate bar. Photo credit: Dan Wallace

3D-printed chocolate bar. Photo credit: Dan Wallace

Players alternate taking bites out of the bar of chocolate from the bottom right corner, and the aim of the game is to avoid the poisoned square in the top left corner. Bites can be as big as you like, provided you follow one simple rule: Pick a square, remove it, then remove all squares below it and to the right.
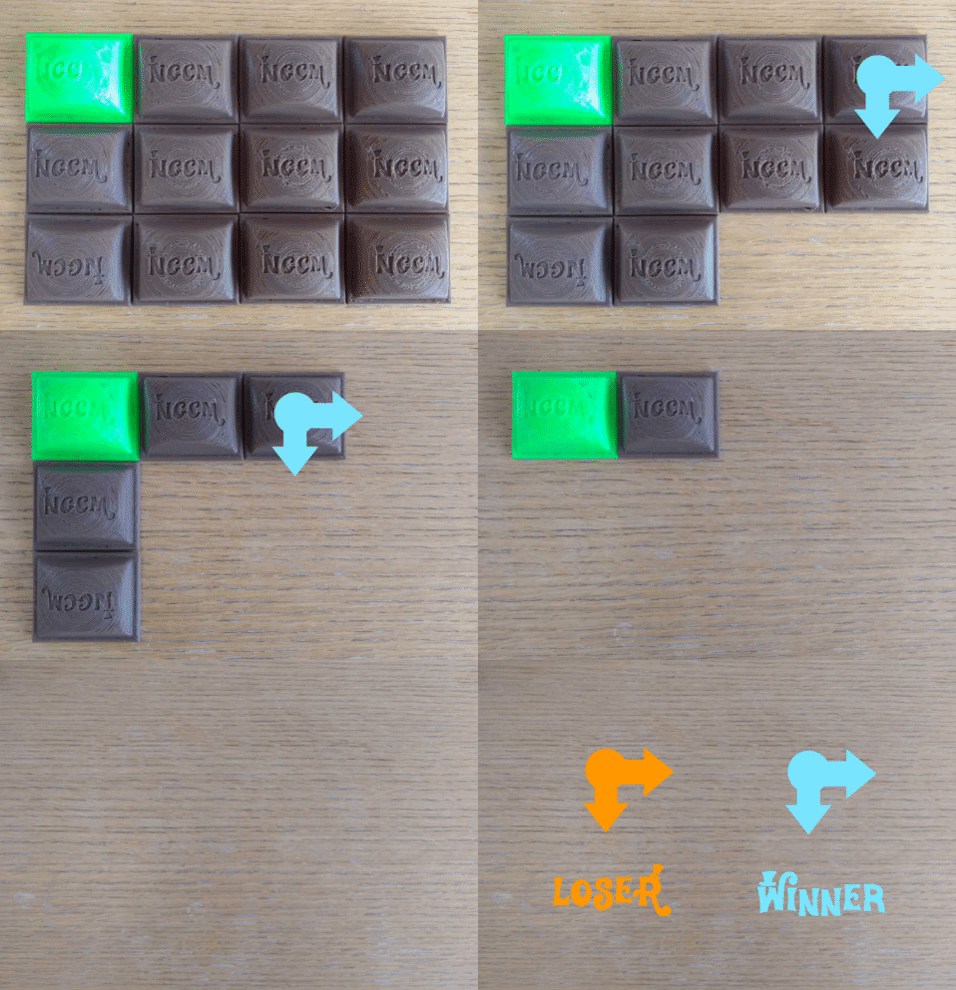
Animated gif showing a game of chomp. Photo credit: Dan Wallace

A game of chomp. Photo credit: Dan Wallace

Let’s look a little closer at CHOMP to see how the machine makes decisions. Each of the 33 boxes which make up CHOMP is labelled with a picture of the chocolate bar in a different state, and in every box are some coloured beads.
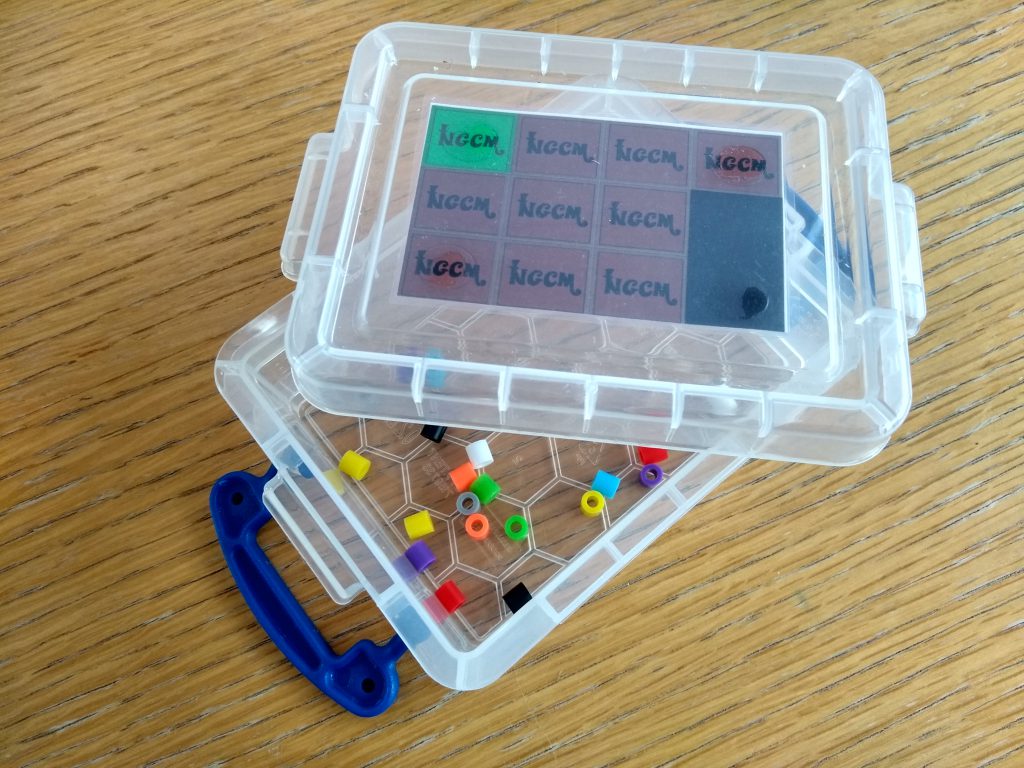
A glance inside the inner workings of Chomp: one of Chomp's plastic boxes with colored beads inside. Photo credit: Dan Wallace

A glance inside the inner workings of Chomp: one of Chomp’s plastic boxes with colored beads inside. Photo credit: Dan Wallace

Each different coloured bead represents a different sized bite out of the chocolate bar – remember the rule: Pick a square, remove it, then remove all squares below it and to the right. When playing against people, we provide a handy map to show which coloured bead refers to which square. CHOMP lacks the dexterity to choose moves for itself, so we let players help by picking a bead at random from the correct box.
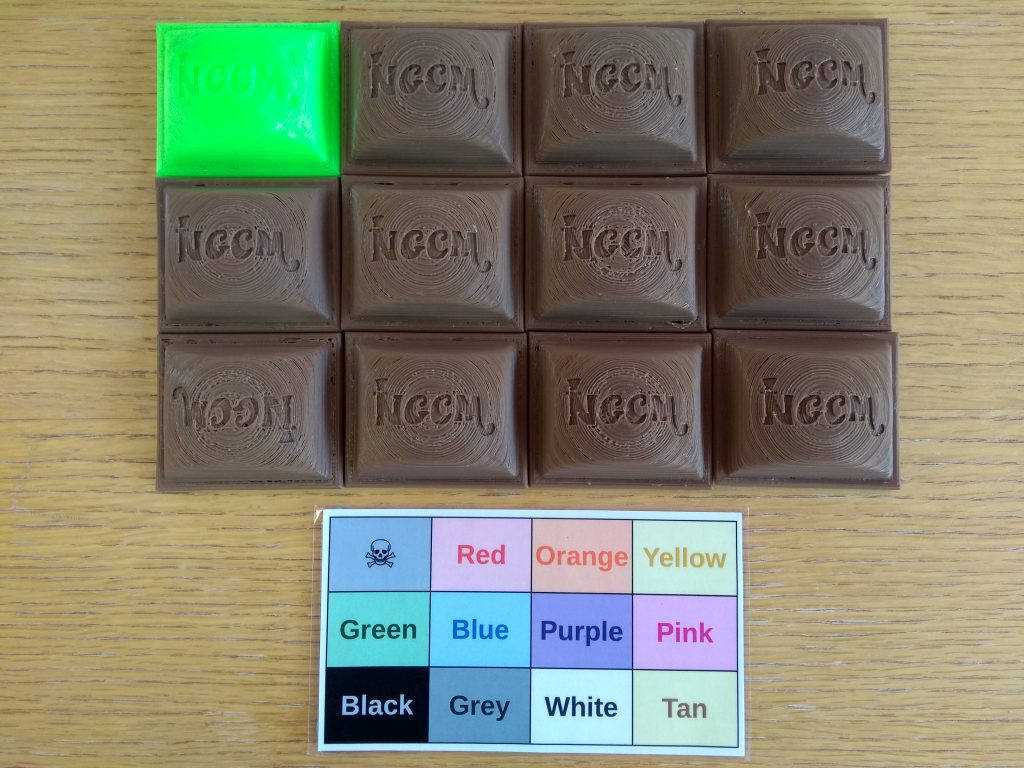
Which color bead corresponds to which move? Showing the Chomp bar and a map. Photo credit: Dan Wallace

Which color bead corresponds to which move? Photo credit: Dan Wallace

As we play the game, we record the moves which are played by each player by placing the chosen bead on top of the box it came from. At the end of the game, we have two lists of moves, one of which ended in a loss (in this case, made by the human) and another which ended in a win (for CHOMP!)
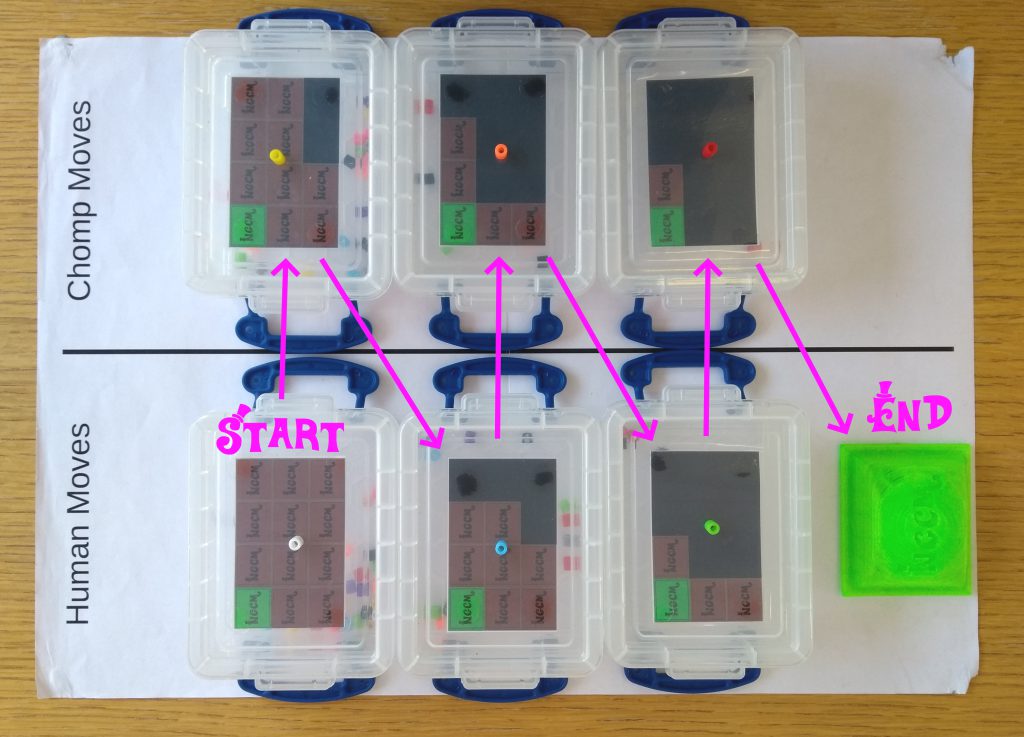
Documenting a single game of Chomp. Displaying the moves that got chosen by the human and "the machine". Photo credit: Dan Wallace

Documenting a single game of Chomp. Displaying the moves that got chosen by the human and “the machine”. Photo credit: Dan Wallace

This information about good and bad moves enables us to train the machine.

Every losing move is removed from the game, decreasing the probability that CHOMP would choose that move, from that position, in the next game. Every winning move is returned to its box, with two extra beads, increasing the probability that CHOMP will make good moves. Through this process alone, called “Reinforcement Learning”, CHOMP learns the winning strategy.
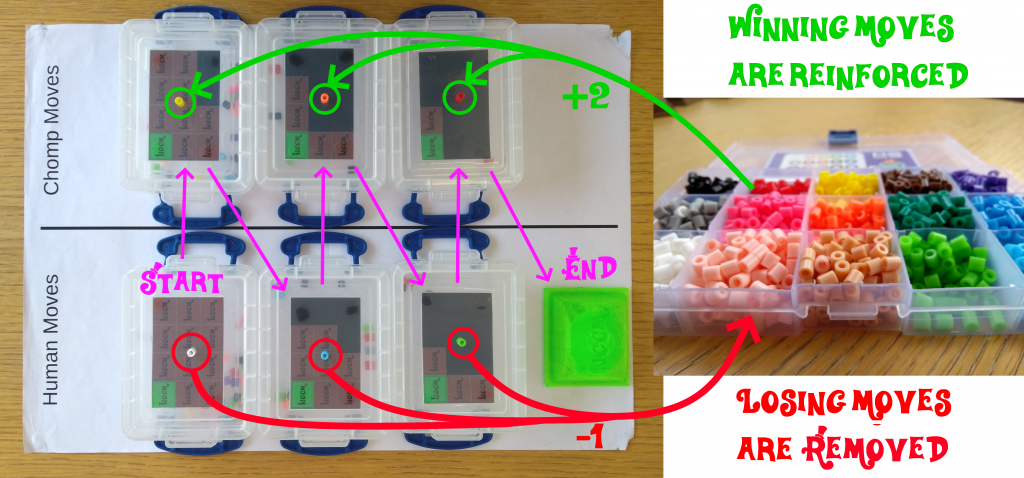
Showing boxes and beads: Winning moves are reinforced by adding more beads the color of the winning move. Photo credit: Dan Wallace

Winning moves are reinforced by adding more beads the color of the winning move. Photo credit: Dan Wallace

And it works! We have recorded every game we’ve played with CHOMP since spring of 2018, marking games off in sets of seven. Human wins are marked in orange from the top of a set, and CHOMP wins are marked in green from the bottom. At the start of each tournament (the leftmost column in each chart) we reset CHOMP so that every bead in each box is equally likely to be chosen. The results show that while CHOMP might win a game by chance, six times out of seven, humans win. Over time though, CHOMP gets stronger and stronger, winning five or six games out of seven after around 70 games worth of training.

Charts documenting how the probability of winning against Chomp decreases the more Chomp has been trained. Photo credit: Dan Wallace

Documenting how the probability of winning against Chomp decreases the more Chomp has been trained. Photo credit: Dan Wallace

We usually give our opponents a Cadbury’s Chomp bar as a prize for beating the machine. If they lose, we still give them chocolate as a thank-you gift for helping to train up CHOMP. We are #notsponsored by Cadbury’s yet!
Showing a pile of Cadbury bars. If you are lucky you win a Cadbury bar when winning against Chomp! #notsponsored by Cadbury (yet?). Photo credit: Dan Wallace

If you are lucky you win a Cadbury bar when winning against Chomp! #notsponsored by Cadbury (yet?). Photo credit: Dan Wallace

The beauty of CHOMP is that it is simple enough for a five-year-old to play, but powerful enough to surprise a professor. We’ve taken CHOMP to schools, science centres, university events and academic conferences, receiving some brilliant feedback from our defeated opponents. I’ll leave you with some quotes:

“So often, communication about AI and technology centres on the amazing tech, this game removes all that and shows how these machines operate beneath the algorithm!”

“Great presentation and concept. I loved seeing the “analogue” version of something so often thought of as digital!”

“Very interesting, it tears apart the fear of AI, because it’s just plastic boxes!”
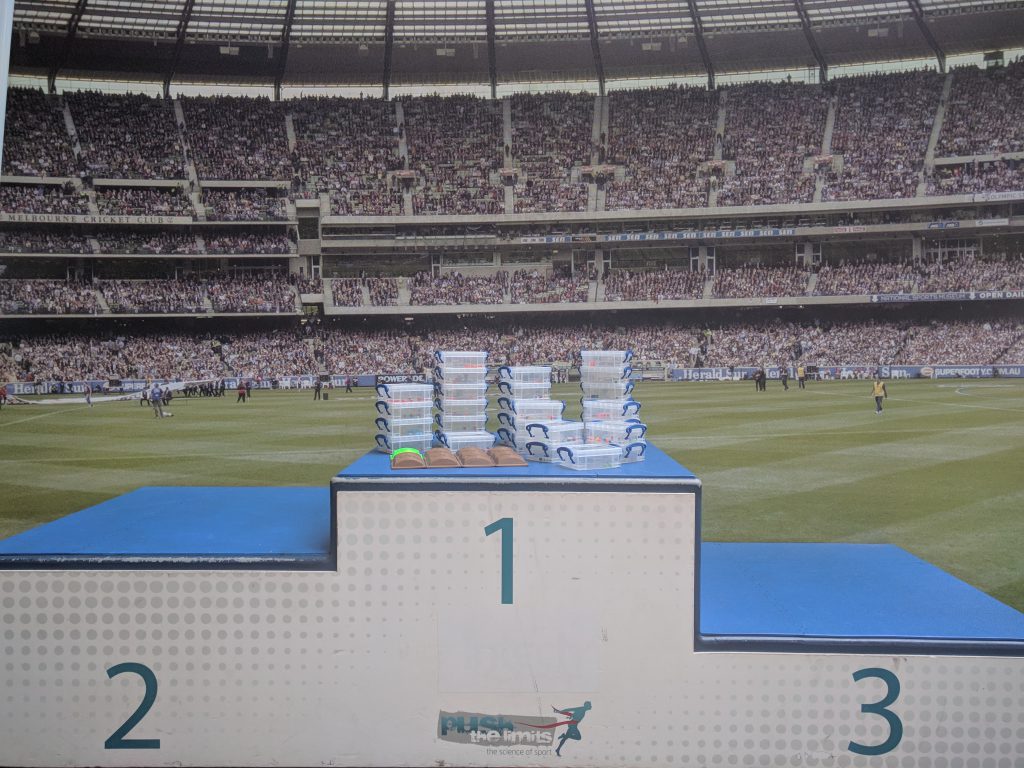
Chomp on a winner's podium in a large arena (rank 2 and 3 are empty). Photo credit: Dan Wallace

Chomp on a winner’s podium. Photo credit: Dan Wallace

CHOMP is fully open-source, and instructions on how to make your own set can be found at www.github.com/dw-ngcm/chomp. If you’re running an event and you’d like CHOMP to feature, please contact me at D.Wallace@soton.ac.uk.
Tidal mixing on a (fjord’s) sill

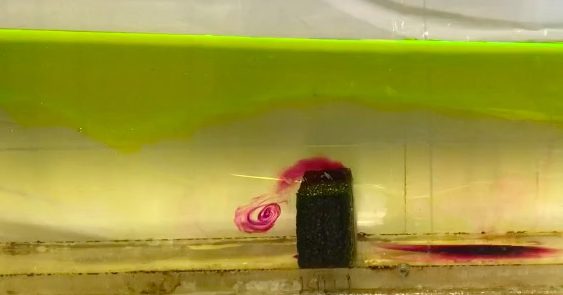
A pink swirl going across a styrofoam block underneath a layer of yellow water? What’s going on here?

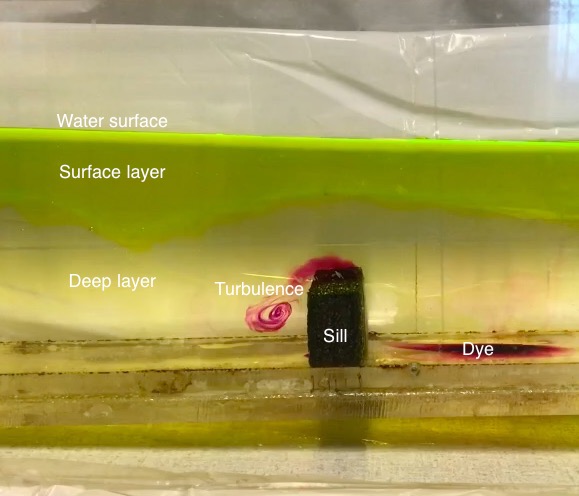
The picture was taken in a water tank, simulating the circulation of water masses in a fjord. A fjord is a long and narrow bay, usually with a sill that is separating the bay from the open ocean. And those sills play an important role in on the one hand preventing water exchange between the fjord and the open ocean (because everything below sill depth has a really hard time getting across the sill) and on the other hand mixing water masses inside and outside of the fjord (which we see visualized with the pink dye).

And here is why the sill is so important: Every time the tide goes in or out of the fjord (so pretty much all the time), the sill acts as an obstacle to the water that wants to go in or out. And flow across a ridge tends to create mixing downstream of the ridge.

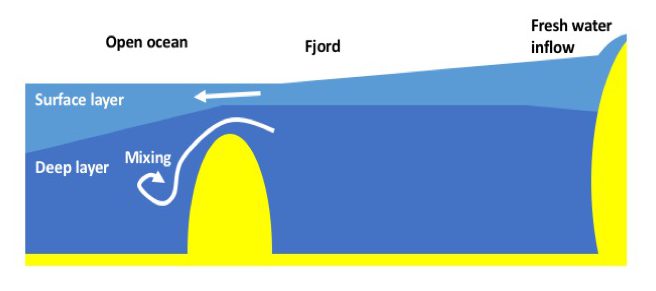
In the picture below, we see a sketch of the situation in an outgoing tide, which is what we also see represented in the photo above: Water wants to push out of the fjord and has to accelerate to get through the much smaller cross section where the sill is located. This leads to strong currents and strong mixing “downstream” of the obstacle.

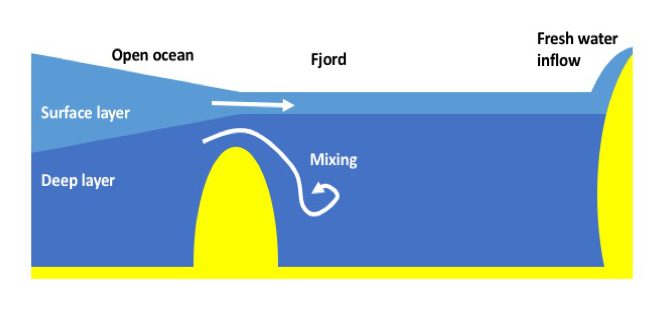
Except that “downstream” is on the other side of the sill only a couple of hours later, when the tide is pushing water into the fjord, but is again hindered by the sill.

So what is happening is this: The tidal current goes in and out, and mixing occurs on one or the other side of the sill. So the situation looks like this:

This is what that looks like in our tank (the “tidal waves” are generated by lifting the right end of the tank and then just slushing back and forth):

Of course, in reality we don’t see pink swirls, and the surface layer isn’t a different color from the deep layer, either. But that’s why tank experiments are so cool: They show us what’s going on deep below the waves, that we can otherwise only deduce from complicated measurements of temperatures, salinities or mixing rates, which require highly specialized equipment, a research ship, and lots of technical know how to process and analyse and display. Which, of course, is also being done, but this demonstration gives a quick and easy visual representation of the processes at play at sills all around the world.

P.S.: The photos in this blog post were taken when I ran the fjord circulation experiment with Steffi and Ailin at GFI earlier this year. I am posting about this again now because I wanted to use the picture for other purposes and realized that I never actually wrote about this feature in as much detail as it deserves!


Melting ice cubes experiment published in kids’ journal Frontiers Young Minds

On publishing in a journal peer-reviewed by kids, and suggesting it as a first journal new PhD students should be asked to write for

You guys might remember my favourite experiment with the ice cubes melting in freshwater and saltwater. This experiment can be used for almost any teaching purpose (Introduction to experimenting? Check! Thermohaline circulation? Check! Lab safety? Check! Scientific process? Check! And the list goes on and on…) and for any audience (necessary observation skills start a taking the time it takes ice cubes to melt in the easiest case, to observing the finest details of the melt). In short, I love this experiment!

A different format of science communication

After using it in all kinds of settings for years, I wrote up the experiment for Frontiers Young Minds, a journal which is written for, and peer-reviewed by, kids (link to my article). I love the idea of not only tailoring your science communication to the audience of young readers, but making sure that it actually works well for them by including them in the process. Additionally, the peer-reviewers get a great insight into how a publishing process (and thus an important step in science) works, too.

The whole peer-review and publication process was a really positive experience. Speciality chief editor for “Earth and its resources“, Mark Brandon, and the whole team were super responsive and helpful all the way from initial article idea until publication.

Writing for and being peer-reviewed by young readers

Having my writing peer-reviewed by the “young readers” was super interesting. For example, on one of my articles, they commented on how, as kids growing up in the US, they were not familiar with metric units and could I please give them units they could actually relate to? This is an issue I should probably have been aware of, but I totally wasn’t.

Another example from the other article: a different young reader commented that English was their second language, and could I replace difficult words like “puddle” and “dye” with easier words. As a non-native English speaker myself, this feedback was super helpful — I thought that I was writing in an easy language already, but clearly my perception of “easy language” has drifted into specialized vocabulary — super valuable feedback!

And then both teams reviewing both my articles had a science mentor helping them, and also commenting him/herself on the article and how the review process with the kids went and suggesting further edits, that would make it easier for kids to work with the article.

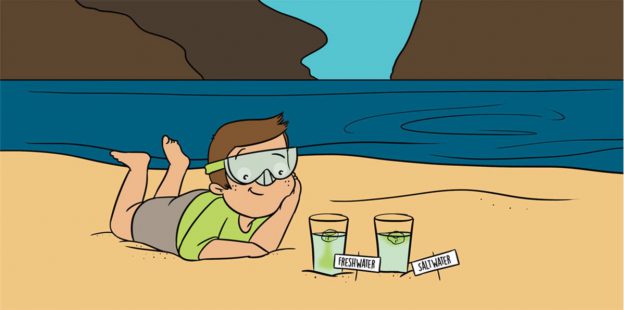
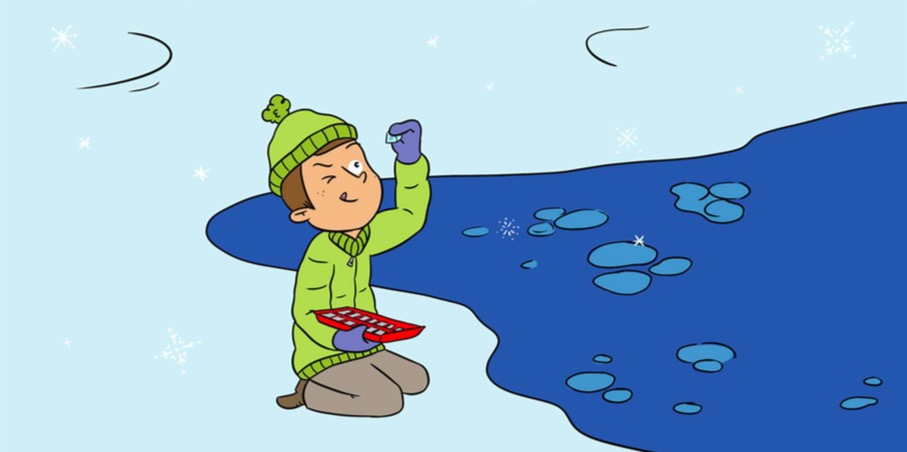
Illustration by Jessie Miller for Frontiers Young Minds, used with permission

And then, of course, there are Jessie Miller‘s super cute illustrations! After seeing what she did for my first article, I couldn’t wait to see what would happen for this one, and I am super excited about another illustration that makes me feel completely understood and seen.

Writing your first ever article for FYM?

So all in all, publishing with FYM is something I would totally recommend to anyone. And I would even go so far as to recommend it as the first article that PhD students should be asked to write. Why?

  • Articles for FYM can be written on “core concepts”, which can mean basically writing a literature review on the topic you are about to write a PhD thesis on, and one that is broken down so far that you will really have to have understood things. There is this saying attributed to basically all science educators in one form or another, that only if you can explain your topic to a child, do you actually understand it yourself. So explaining to children is actually a super helpful step in the process of getting into a topic yourself.
  • Writing something that is designed to be understood by a wide variety of audiences is really useful for another reason, too: to give to all your family and friends as an easy insight into what it is you are spending all your time on.
  • The feedback you get on how you talk about your topic will be helpful for all future communications about it; Practicing scicomm as early as possible is always a good idea :-)
  • Having a really positive publishing experience is a great start into a PhD, because surely other kinds of experiences will follow sooner or later. The submission through the uploads and forms and stuff works the same way for FYM as for all other journals (including the “oh crap, they want the images in a different format than I prepared them in! Let’s google how to convert them”, “Really? They need an abstract? Maybe I should have read the instructions more carefully…”, or “They are really counting the words on the submission! So now I need to cut an extra paragraph that I thought I could get away with…” surprises that are typical for the “Let me quickly submit this article and go for lunch! Oh wait, half a day later and I am still nowhere near the end of the process” experience that is so common when submitting articles. At the same time, the stakes feel a little lower for this kind of article, since as an early PhD student, you are writing about other people’s work, not yet your own (at least when writing a core concept article, there is also the “cutting edge research” article type, in which you are writing about some newly published article of yours). And then, as I described above, the whole process is really positive and friendly and supportive throughout, even though all the steps are the same as for any other journal (Waiting for the editor to send the article out to the reviewers. Seeing that stuff is waiting on a desk somewhere and compulsively checking every day whether it has been moved on and the email notification just didn’t make it through. Replying to a reviewer. That kind of things). So I believe that it’s a really good way to be introduced to the publishing process without being pushed into super cold water right away, building up confidence for later submissions of your own work.
  • FYM announces new articles on their social media (with lovely tweets!), which have a fairly wide reach, well above what most of us have, and that’s a great opportunity to be seen as authority on a topic by a large number of potentially interested people. Great opportunity to expand your network!
  • And, as I said before, I just love the illustrations and I would imagine that having something like this when you start working on a new topic would be super exciting and motivating :-)

What do you think? Will you suggest writing a FYM article to all your new PhD students now?

P.S.: Here are the links to my FYM articles again: “How does ice form in the sea?” and “When Water Swims in Water, Will it Float, or Will it Sink? Or: What Drives Currents in the Ocean?“.

My kids’ article on the formation of sea ice is out!

I recently published an article about how sea ice forms which, I think, turned out pretty well. But the coolest thing is the illustration that Jessie Miller did to go along with the article:

Illustration by Jessie Miller for my article published in Frontiers Young Minds, used with permission

Seeing this illustration (and, of course, having the article published) was a super nice surprise during the busy run-up to my big event, which is actually happening right now (good thing I know how to schedule blog posts ;-)). The illustration makes me suuuuper happy because to me it really captures what the article is about and, more importantly, what my goal in writing the article was. And I feel seen and understood in a profound way, and reminded of who I am. Never underestimate the power of #scicart! Thank you, Jessie!

Reference:

Glessmer, M. S. (2019) How Does Ice Form in the Sea? Front. Young Minds 7:79. doi: 10.3389/frym.2019.00079