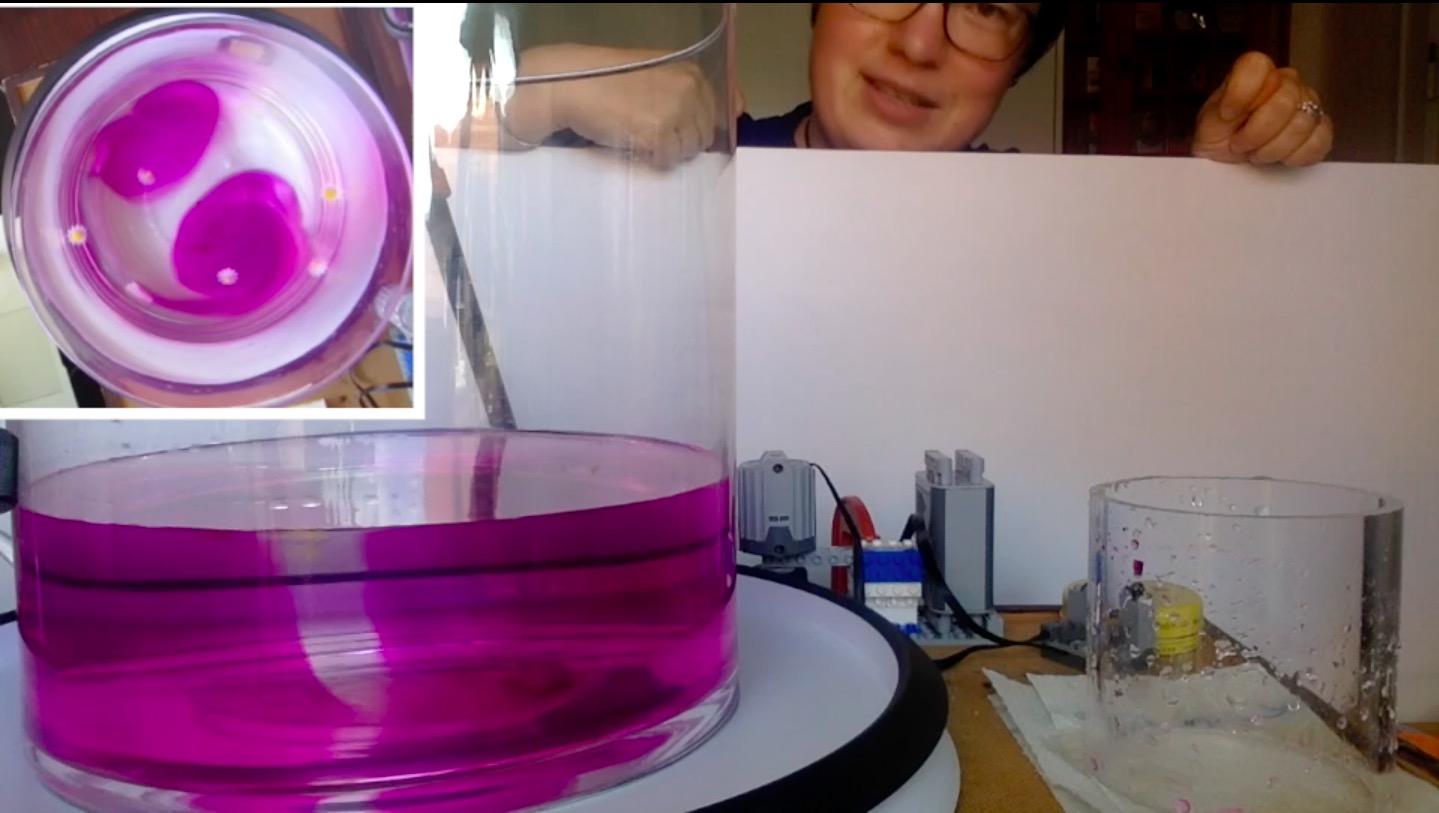
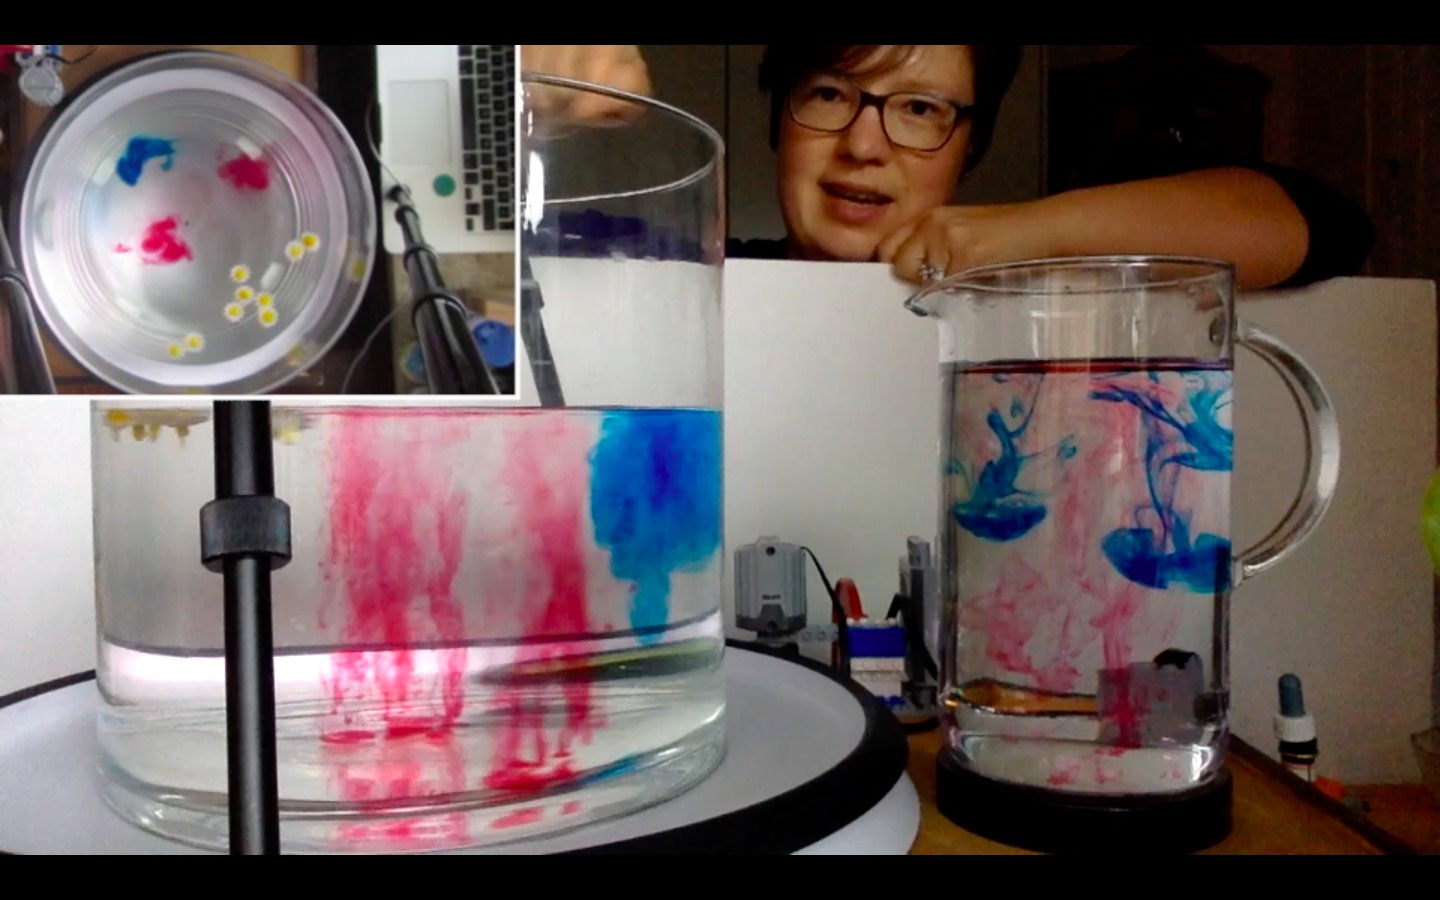
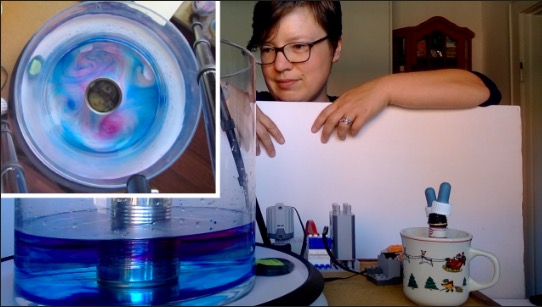
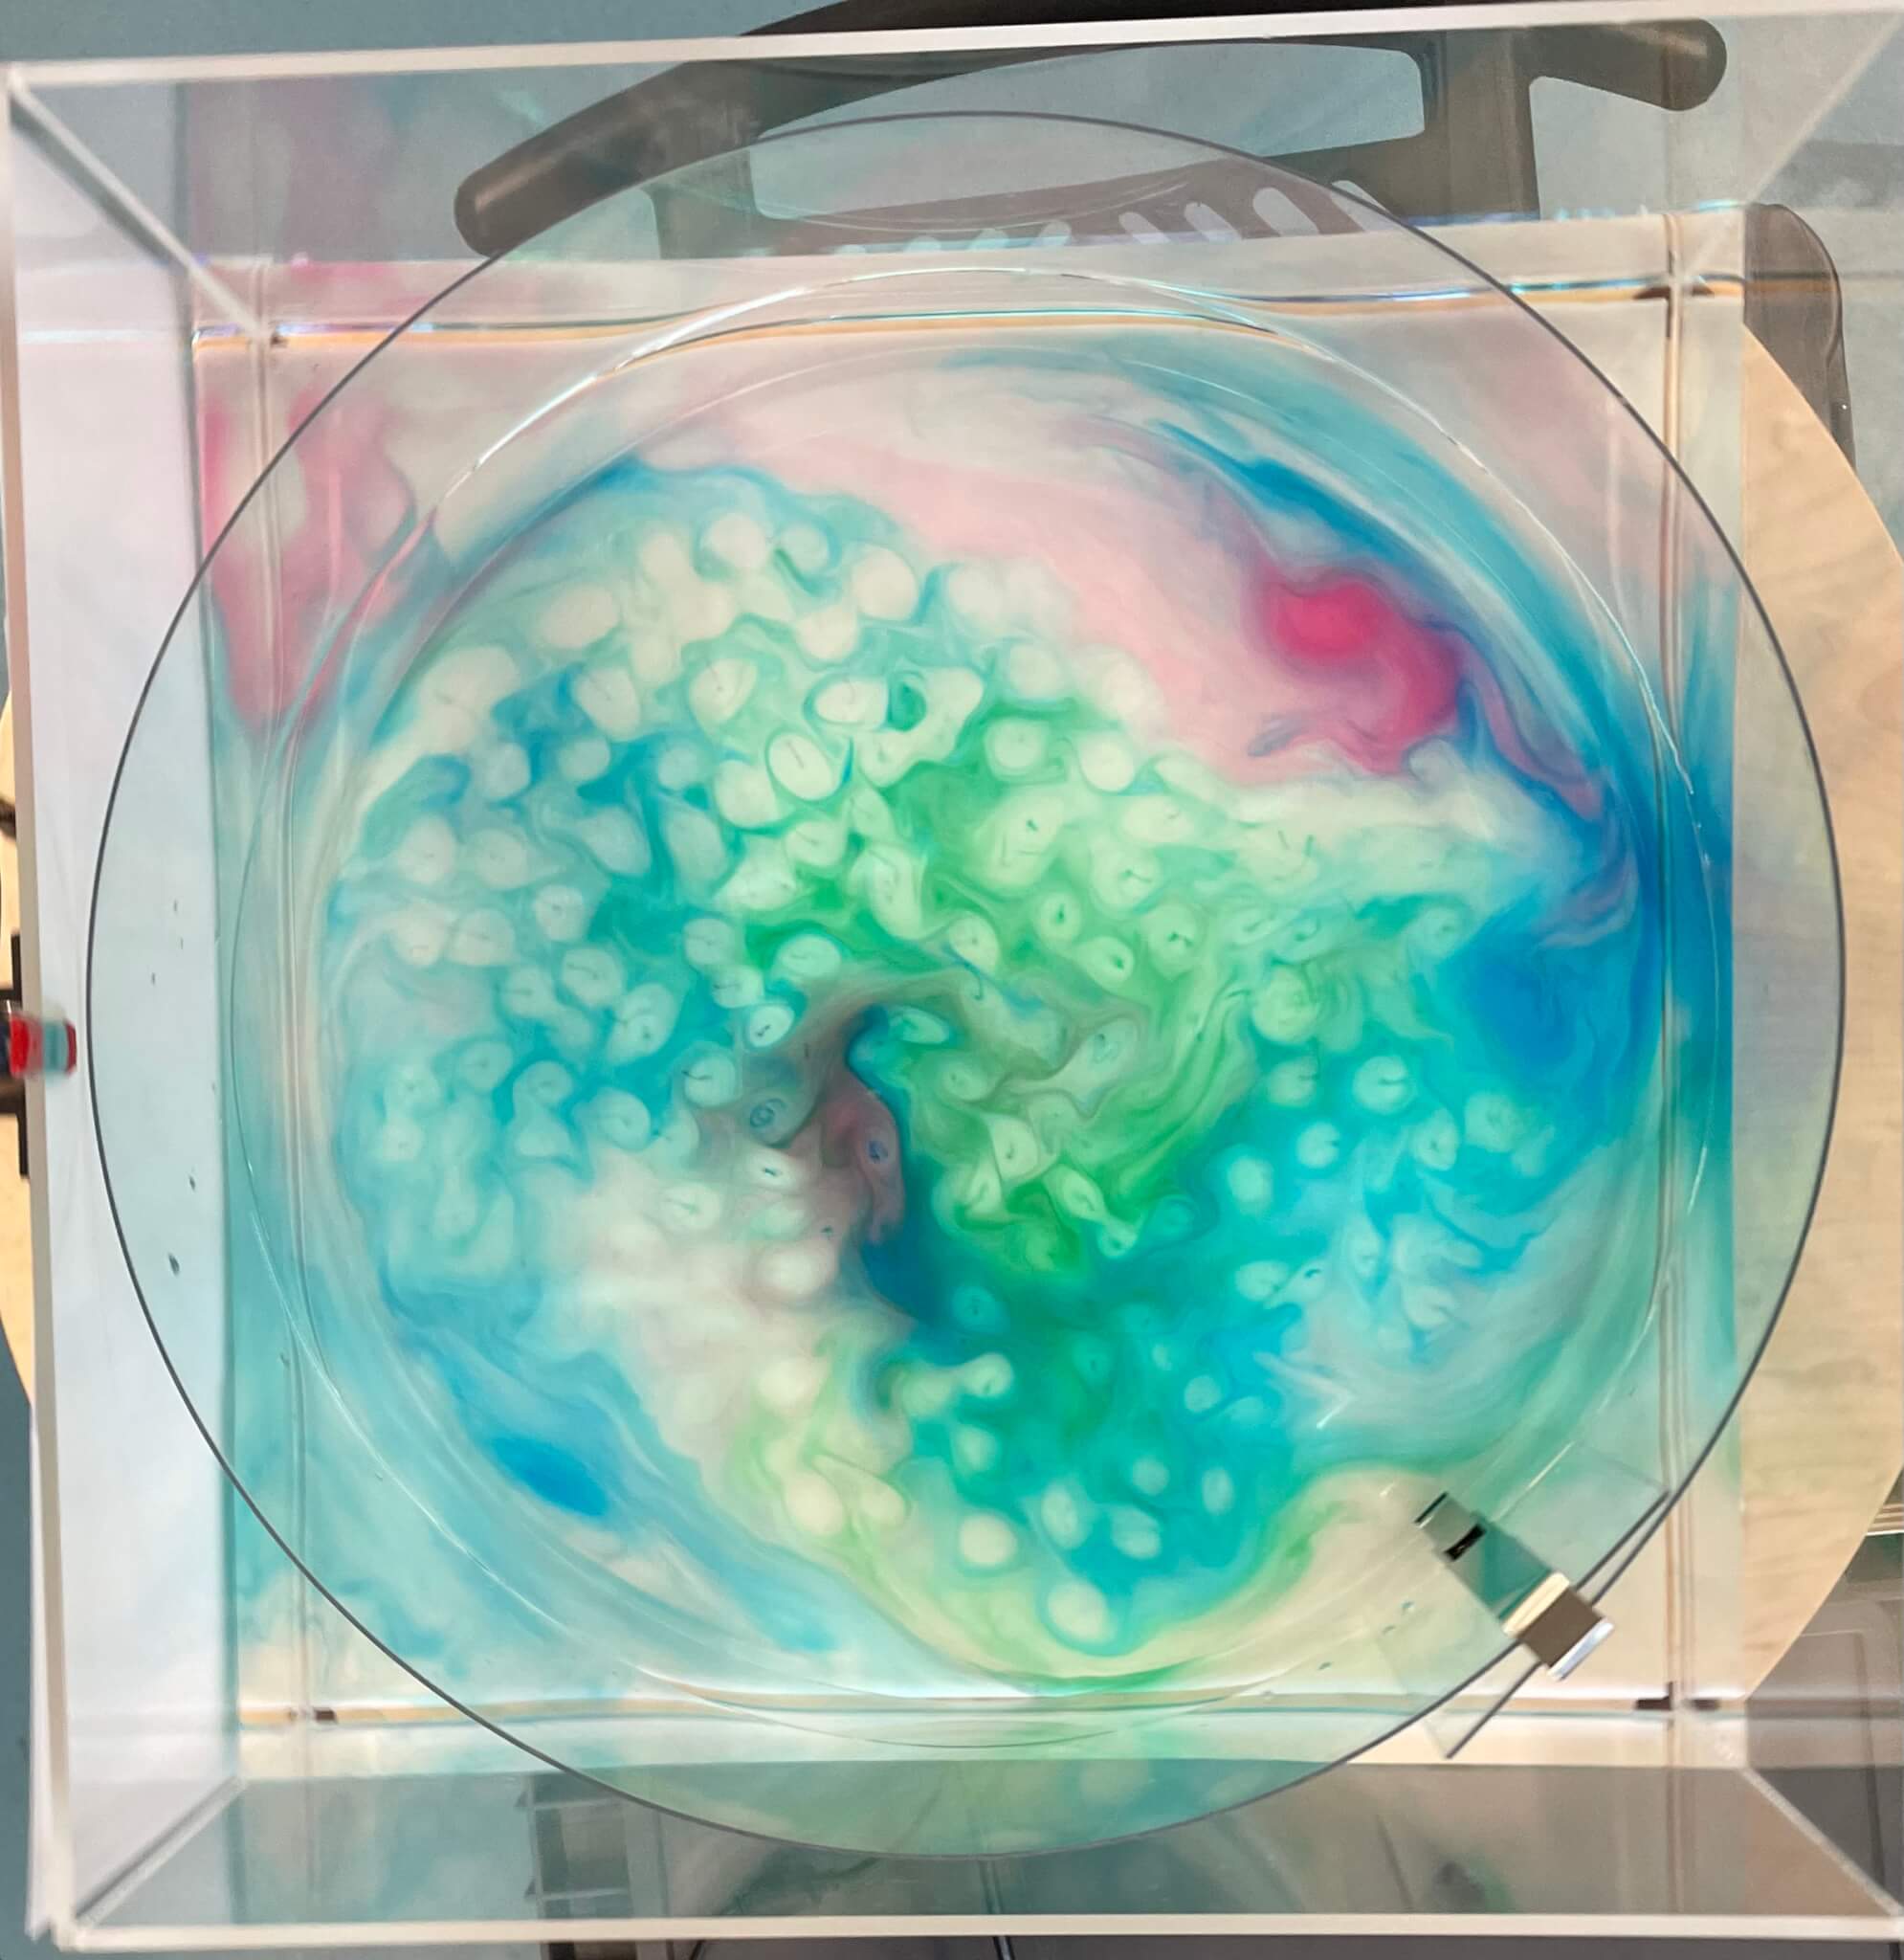
For all of you who know and love my “24 days of #KitchenOceanography” series (and for those who need to quickly look up what that was about and then fall in love with it ;-)) — you can now buy it as a book!
The book contains 24 easy experiments, embedded in the bigger context of the world ocean, that can be done using only common household items.
I did this demo for my freediving club Active Divers (and if you aren’t following us on Insta yet, that’s what I am taking all these pretty pictures for!): 1.5l PET bottle with holes punched in every 2cm, then filled with water. Looks cool and works pretty well (except the second hole from the bottom up, which I punched in a part of the bottle’s wall that wasn’t vertical, so the resulting jet doesn’t come out horizontally in the beginning and messes up the picture. Should have thought that through before…).
Since our Denmark Strait tank experiment from 2013 (see here in a post from 2014!) is still the one I refer to when I want to point to pictures of such an overflow experiment, I decided to do the experiment again to take new (and hopefully better) pictures. Three experiments later, I am not sure if the pictures are any better, but I tried…
For the Christmas party of my freediving club, Active Divers, I made a freediving-themed #KitchenOceanography “escape game” (of sorts). If you are interested to use it for your own purposes, please feel free to contact me for detailed instructions and material lists etc!
This is how it went:
We formed teams with three players in each, and each team came up with a team name, which they wrote on the same cards that they would later also write their “code” on.
Then, everybody got written instructions for three tasks (download here in English or Swedish). Each of the tasks includes an experiment and in the end, one of three answers to a question must be chosen, which ultimately make out a winning code. I had prepared two “hints” for each of the experiments that people could have requested had they gotten stuck, but that did not happen. Clearly, next time we have to up the challenge!
The experiments are not chosen randomly, they all connect to freediving experiences that the Active Divers group had together, and were embedded in a story:
I have been a bit quiet on here recently, because I had so many exciting projects going on that I did not manage to document them in real time (well, not on here anyway, but partly on my Insta).
One of those projects is on #KitchenOceanography with coffee, where I have compiled a lot of interesting experiments into a postcard. And the postcards arrived yesterday! (Thanks, Vanja, for picking them up!)
My super cool new postcards in front of the first slide of my presentation, because I had to take a picture when they arrived and that was the only background available :-D
Juuust in time for the “Hammer talk” presentation that I was scheduled to give at the Geo department of the University of Oslo. Where — you guessed it — I invited people to play with coffee!
Lots of things happening in coffees everywhere!
And I was so excited to see how well people played, and how beautiful the stratifications turned out!
Diffusive layers formed by double-diffusive mixing in a milk-coffee mixture
Here is even an internal wave on the stratification!
I thought I had posted the picture below some time in winter already, but when I recently searched for it, I couldn’t find it. So either I didn’t post it, or I didn’t post any sensible search terms with it, in any case: It’s useless. So here we go again.
Below you see two tea bags that were placed into cold (left) and hot (right) water at the same time. On the left, the tea is sinking down in streaks, while at the same time on the right everything is completely mixed through and through, showing how molecular diffusion depends on the temperature. Which is why we usually make hot tea.
Funnily enough, as I was about to write this blog post and had the picture already open on my laptop, I felt thirsty and decided to prepare a cold brew tea, which you see in the picture below. Here again you see the tea spreading from the tea bag, but it comes out in those plumes and only slowly diffuses throughout the whole carafe.
This would of course be easier to see had I chosen a white background, but since I am still so touched that my friends showed up at the train station with a flower and a flag on Friday, and also since this is literally the spot I put the tea down after I had prepared it, you get to enjoy a view of my flower and flag!
Also that fake flower on the left makes for really interesting reflections on the carafe. Especially the top two that are joint in the middle!
When you post pictures of your* coffee on social media, the coolest things can happen!
Yesterday I got a copy of this Chinese oceanography textbook for pupils in the mail. It’s called 探海观澜:海洋观测的奥秘 (“watching waves and exploring the ocean: the secret of ocean observations” — how cool a title is that??) and it’s featuring a picture of diffusive layering in a coffee that I took! I am so excited! How awesome is it to see my coffee in a Chinese textbook? This will definitely come up as anecdotal evidence in all conversations about the usefulness and reach of science communication on social media from here on onwards!
Thank you, Zhiwu Chen, for reaching out and giving me this super cool opportunity! The book will definitely live in a place of honour among my oceanography-themed books! And I am very much intrigued about the context of the picture (I spot salt fingering and more double-diffusive mixing on the same page) and the rest of the book. I wish I could read Chinese!
*Actually, I think it was @chirinegramke‘s coffee and I just made her let it get cold because the layers were so cool and I wanted to take the picture ;-)
A “fortune teller” for #WorldOceanDay! What would you work on if you were an ocean scientist? And if you are an ocean scientist — are you doing the work you were destined for? ;-) Your favourite drink can give you the answer!
Click on the image below to download a printable .pdf, and find out!
I would really appreciate it if you could give me a 3-minute feedback (click here!) so I can improve future versions of the “fortune teller” as well as my science communication in general!
For some reason my workflow regarding all things #KitchenOceanography and #WaveWatching changed at the beginning of this year. I started editing frames on the pictures I’m posting on Instagram, and, since I was most likely doing this on my computer anyway, scheduling the posts through a program on my computer, which meant that I was typing captions on the computer, too, writing a little more. But somehow that meant that I had already written everything I wanted to write about the pics and didn’t feel the urge to blog later, so … I didn’t. Until now, that is!
Here is a collection of my Instagram posts on coffee in #KitchenOceanography!
Enjoying your lazy first morning coffee of the year (or already back from your New Year’s morning walk, but forgot to take pictures — what’s wrong with you, 2021?)? Then it’s a perfect opportunity to look at wind-induced currents in your coffee! Gently blow across the cup and observe how two counter-rotating eddies develop. This becomes especially clear if you take milk in your coffee (or something else that creates a surface film). Enjoy!
Maybe not The Best Thing about morning coffee, but definitely very important: Observing what happens when you pour milk or cream in! Here the cold milk is denser than the coffee, so it sinks down to the bottom of the glass (it would probably even shoot to the bottom of the glass if it was the same density as the coffee since it’s coming in with a lot of momentum). Hitting the bottom, it shoots along the curved rim of the glass and up in these cute little turbulent billows. But eventually, it will settle on the bottom of the glass, forming a denser layer under the less dense coffee — that’s what we call a stratification, both in density and in coffee&milk. And it’ll stay like that for a little bit, until other processes come into play. So stay tuned for those :-D
Actually, not only internal waves, but also current shear! When you pour milk into coffee, the milk will form a layer at the bottom of the coffee. Similarly to when you poured the coffee in and it surface leveled out, the surface of the milk wants to level out. And similarly to the waves that you probably observed initially on the coffee when you poured it in, waves appear on the interface between milk and coffee. Except that these waves have larger amplitudes, move more slowly and persist for longer. That is because the density difference between milk and coffee is orders of magnitude smaller than that between coffee and air. Those waves are called “internal waves”. And what we see in the pic, too, is that the milk layer is moving relative to the coffee layer, therefore the wave crests are being pulled into these sweeping strands. Pretty awesome!
My sister & nieces made this mug for me for Christmas. Isn’t it just perfect together with the swirl in the last bit of my coffee? I’m considering making this my logo and profile pic and EVERYTHING because I think it is Just. Perfect.
I’ve been playing around with different glasses and different ways of lighting them in order to get clearer pictures of the things I want to point out: The behavior of the fluids, not reflections on the side walls of the tanks I am using. At least here there are only two stripes where the light is reflected? And the internal waves on the interface between milk at the bottom and coffee on top come out quite clearly. Even from this photo you can see how dynamic the system is!
Again, there is a milk layer at the bottom of the coffee. And those mushroom-y milk fingers appear when the milk is warming up and its density is thus decreasing. As it gets less dense than the coffee, the stratification becomes unstable and milk starts rising until it reaches a level of its own density.
Today there is some interesting surfactant on my coffee. It might be due to oils in last night’s tea that I didn’t clean off, or maybe it’s the cream (but I would think that that’s the little blobs of oil you see). In any case, the surface film behaves in very interesting ways: It is showing us a front in the coffee, with lots of small instabilities on the front! The front must be related to me drinking from the mug somehow, but I’m not sure how. Thanks to the surface film, we also see convection occuring in the top left, where we get all those small-scale structures in the color, lighter areas indicating convergence zones where the surface film gets pushed together, darker areas where it is pulled apart.
A little while ago I posted a picture of the front you see in my coffee here. And what I did then was twist the mug a little bit: I wanted the front to be in the picture more nicely together with the little boat. BUT: exciting things happened (predictably): As I was twisting the mug, it did not behave as a solid body together with the coffee. Rather, it twisted while the coffee was not! And this created shear between the sidewalls of the mug and the coffee, which is what we see all around the edge: shear instabilities breaking into eddies! And all that due to inertia of the coffee.
At the end of last year, I did a poll on Twitter, asking what people would like to see more of in 2021: Kitchen oceanography, wave watching, teaching & scicomm tips, and other things. And 2/3rds of the respondents said they wanted more kitchen oceanography!
So obviously my strategy was to do a photo shooting and prepare … Instagram posts (did I mention I asked that question on Twitter? Yeah. Don’t ask me about the logic behind that). Anyway, below is the beginning of that series (which, on Instagram, is not posted consecutively, in case you are wondering about how often people want to see me grinning at the exact same experiment…). Enjoy!
So people tell me they want to see more #KitchenOceanography. Get ready for 2021, I come prepared! Carrying a non-alcoholic experiment with me (doesn’t look like it, does it?). Can you tell which of the glasses contains salt water and which fresh water? Both were at room temperature before I put in the (now mostly melted) ice cubes… Happy New Year! May your 2021 be full of curiosity and new experiences!
What do I love so much about #KitchenOceanography? Discovering oceanography EVERYWHERE. . When people think of oceanography, they think of endless oceans, weeks and weeks at sea on research ships, something that feels remote and unconnected to their everyday lives. But for me, it is anything but! And #KitchenOceanography is a great tool to bring the ocean and a normal everyday life closer together, both for myself and others. The concept of #KitchenOceanography is simple: you use what you find at home to simulate oceanic processes. Usually this involves some kind of “tank” (anything from a tupper ware container to the wine glass as in the picture), obviously water (usually varying temperature or salinity to change density), food dyes (or anything that can safely be used in food storage containers and that can act as coloring, e.g. dark red fruit juice, black coffee, …). And then you put it together, observe, and relate the physics happening in your kitchen to the things that happen on much larger scales in the ocean. Fun! #KitchenOceanography works really well as a fun activity at home, but is also a great tool in teaching, both in-person and remote. Over the next couple of posts I’ll tell you how and why to use it, and give you plenty of ideas for #KitchenOceanography experiments, so please check back!
It might not be immediately obvious to you why I am grinning stupidly at the camera in the picture above, while holding green ice cubes over two glasses full of water, so let me explain. I am about to drop the two ice cubes into the two glasses of water. But those two glasses are not filled with the same stuff. Even though it’s water at room temperature in both, one is fresh water and the other one is salt water at approximately a typical oceanic salinity (e.g. 35g of salt per liter water, or 7 tea spoons per liter). When the ice cubes are dropped into the water, they’ll both melt (in fact, they have already started, which is why I had green finger tips for days after this picture was taken). But they won’t melt in the same way. I’ve done this experiment dozens of times, alone or with people from preschool age to professional oceanographers, so I know what will happen. But what I don’t know is what EXACTLY it will look like, and what I might discover for the first time, or see more clearly than before. Even though the experiments are simple, there is ALWAYS something new to discover, because even such a simple system is still chaotic. Plumes of melt water will never look exactly the same, nor will the condensation on the glass. Discovering all those small featuers and contemplating the physics behind them makes me happy, and it’s easy to engage most people once they get over the “you are looking at two ice cubes and two plastic cups!?” threshold and actually start observing, questioning, and trying to explain, which is why #KitchenOceanography is such a great tool in teaching & outreach!
Eliciting! . #KitchenOceanography is a great tool in teaching and outreach of ocean and climate topics, because we are using a simple system — one that people think should be easy enough to intuitively understand. But this is often not the case for many reasons, one being that many people have “misconceptions” about physical processes: ideas that they formed and that worked well to explain their observations until now, but that aren’t correct and that will break down in the context of the physics we are trying to teach. . But in order for those misconceptions to be changed into correct understanding of physics, they first need to be brought to light and be made conscious. . For example by asking: In front of me you see two glasses, one filled with salt water, the other with fresh water, both at room temperature. If I drop the ice cubes in, which one will melt faster, the one in fresh water or the one in salt water? . At this point, it is not important that students give the correct answer, but that they articulate their beliefs. And what happens next? Look out for my upcoming “confront” post!
Confronting! In my previous “eliciting” post, I talked about the importance of realizing WHAT it is that we believe about how the world works. But what if our beliefs are wrong? Then, #KitchenOceanography is a great tool to confront a prediction of what SHOULD happen with what actually DOES happen. It’s surprisingly difficult to observe something that is not what we expect to observe! But when we manage to make observations that contradict what we expected to see, we come to the “confronting” step: Realising that there is a conflict between our interpretations of the world and how the world really works. So what now? Look out for my upcoming “resolving” post!
Resolving! . In previous posts, we have eliceted a misconception by asking what we believe would happen in an experiment and making predictions about the outcomes. We then confronted our prediction with an actual observation. . Now we need to somehow resolve the cognitive dissonance — what we thought should happen did not happen — and build new, correct ideas about physics into our belief system. This happens best by explaining how things fit together, either to others or to ourselves (I think the main reason I like blogging and social media is because it forces me to explain things to myself, thus helping me to understand them better!). . So this is where we talk through what we observed, what did happen, how we can explain it, what might have happened if the boundary conditions had been different. Another thing that’s great about #KitchenOceanography is that in many cases, it is very easy to test what happens when you change the boundary conditions: You CAN force the ice cubes to the bottom of the glasses and observe what happens, you CAN add salt to the water before making the ice cubes, you CAN change the water’s temperature. And then observe what happens, and see if it fits with what we expected to see. . Of course, once we get playing with #KitchenOceanography, we easily get stuck with it, changing one thing, then the next. So if you use this in teaching, be aware that it will — and should! — take a lot longer than just running an experiment once, and then moving on. But, since the experiments are so easily done with household items, students can always continue discovering outside of class, too; no fancy lab needed! Perfect! :)