Category Archives: observation

Wave watching by proxy — looking at how waves focus light on the sea floor

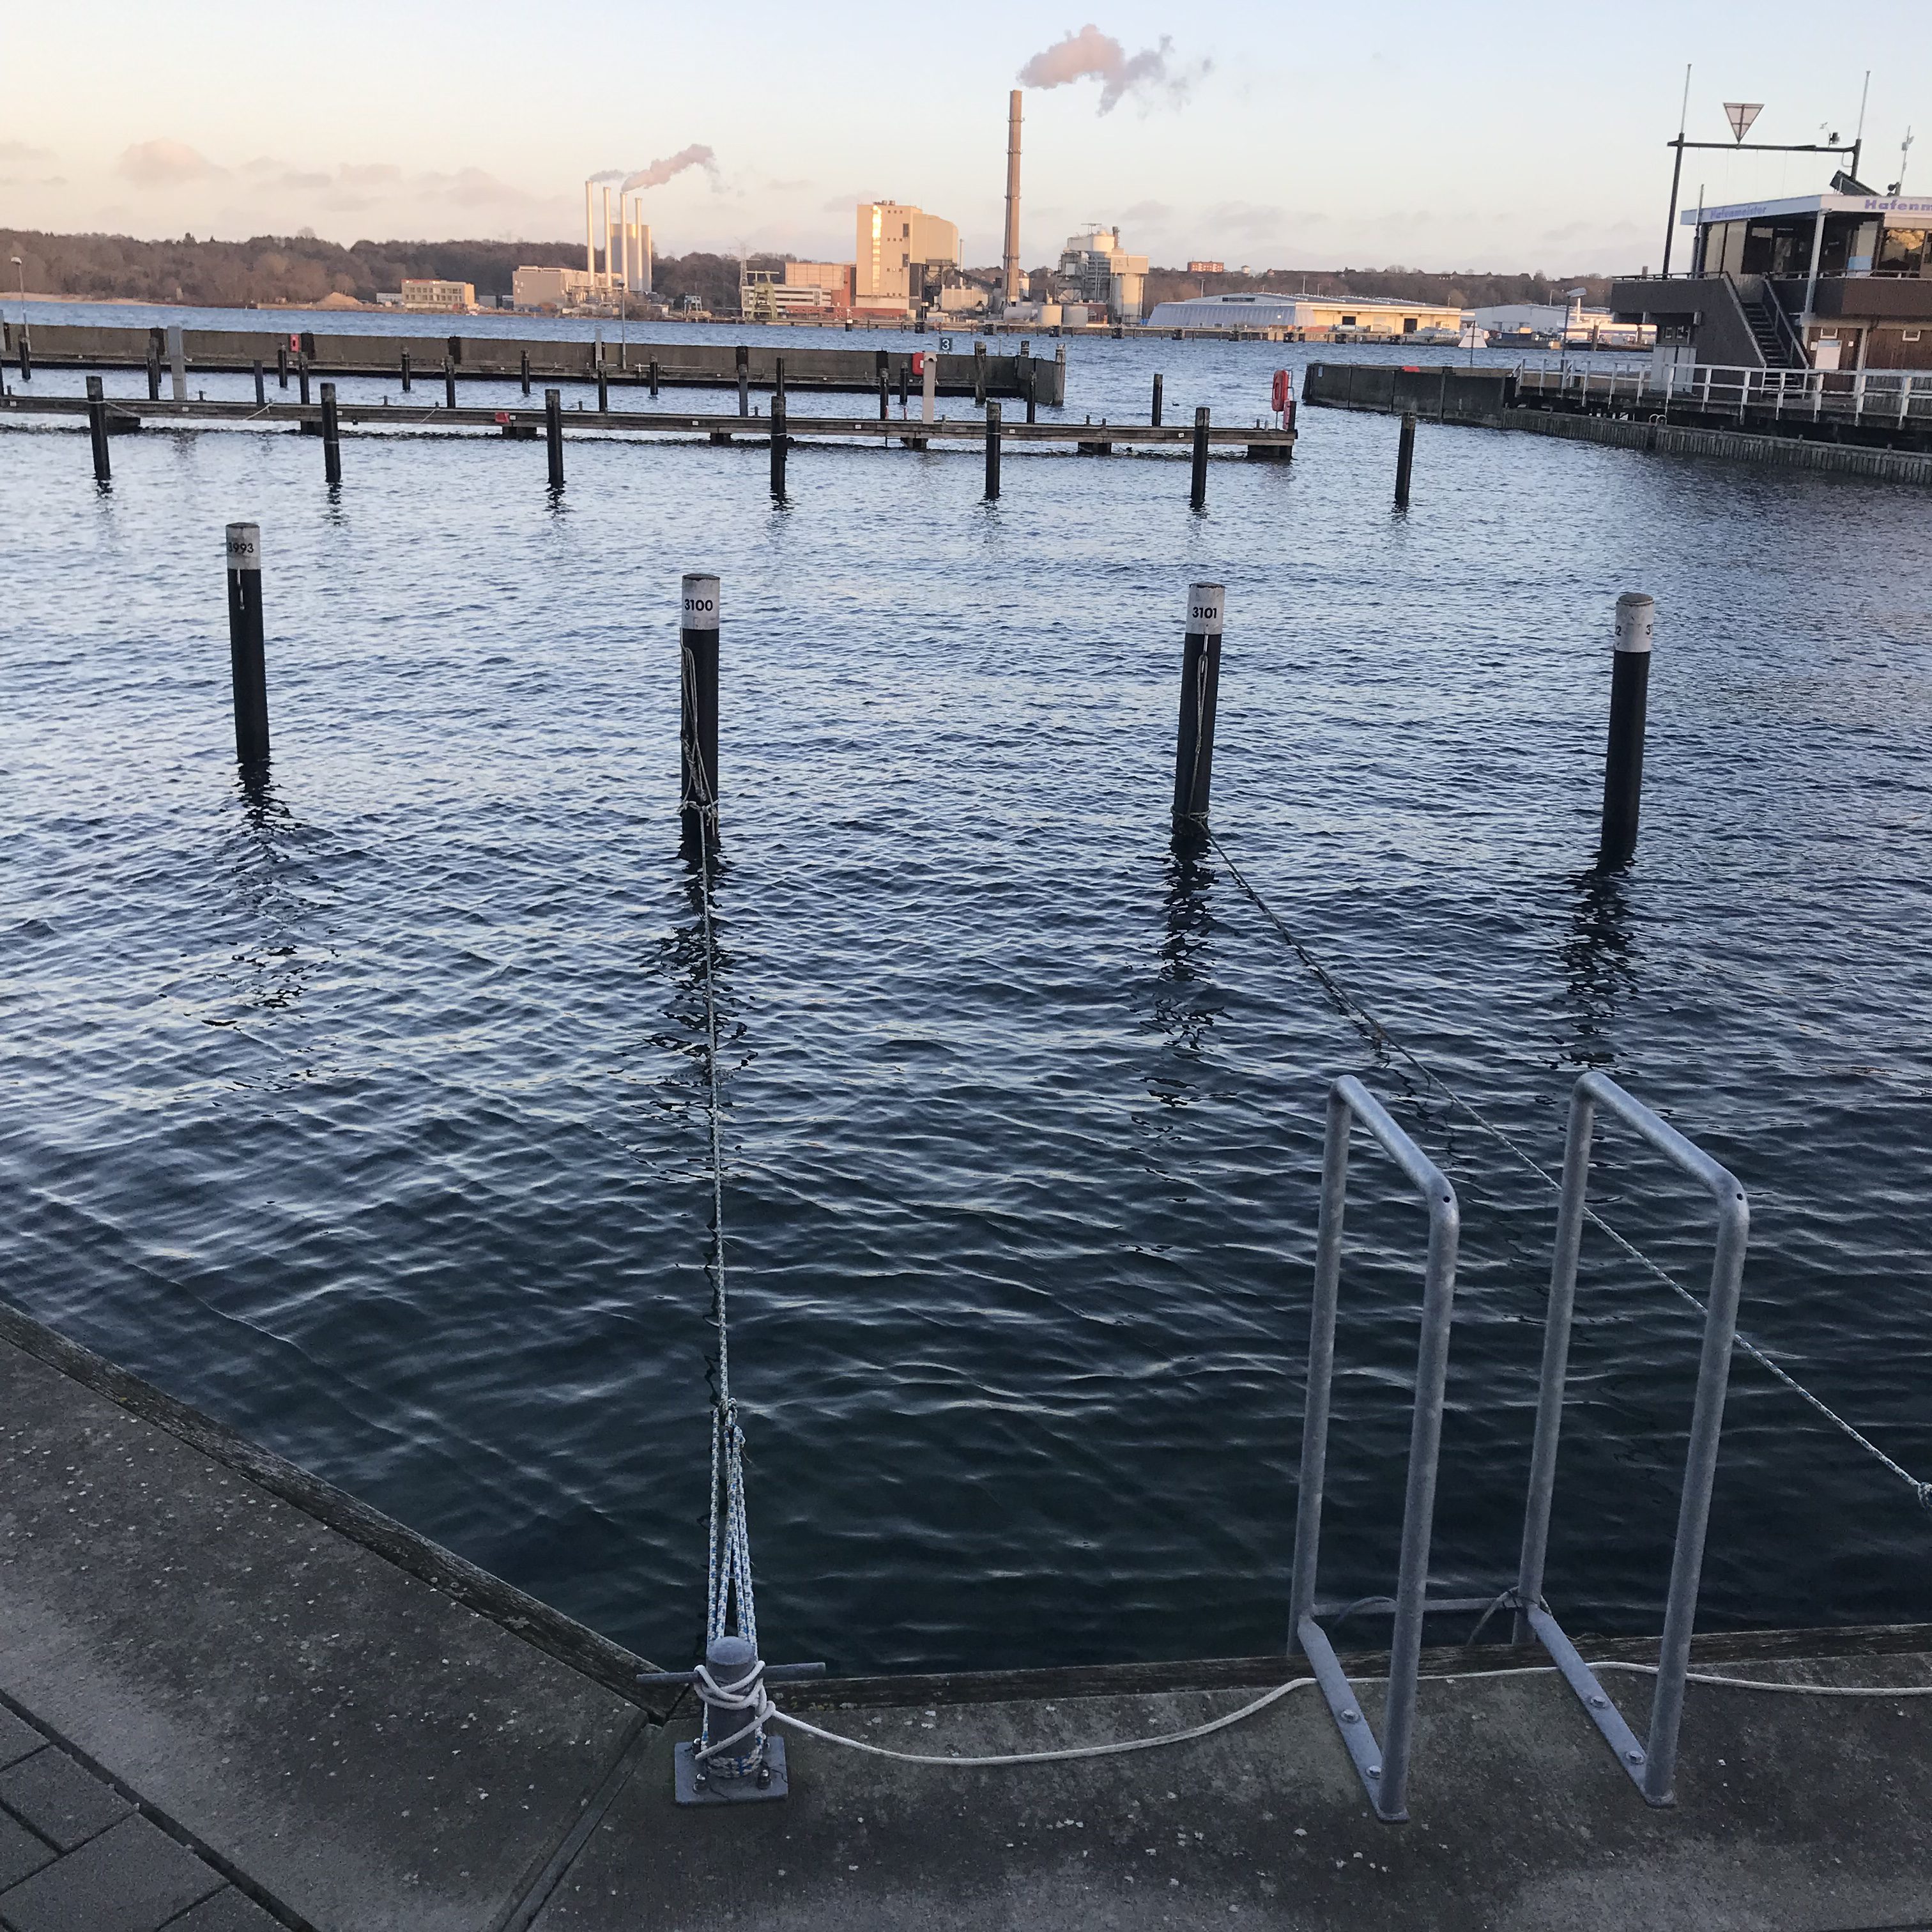
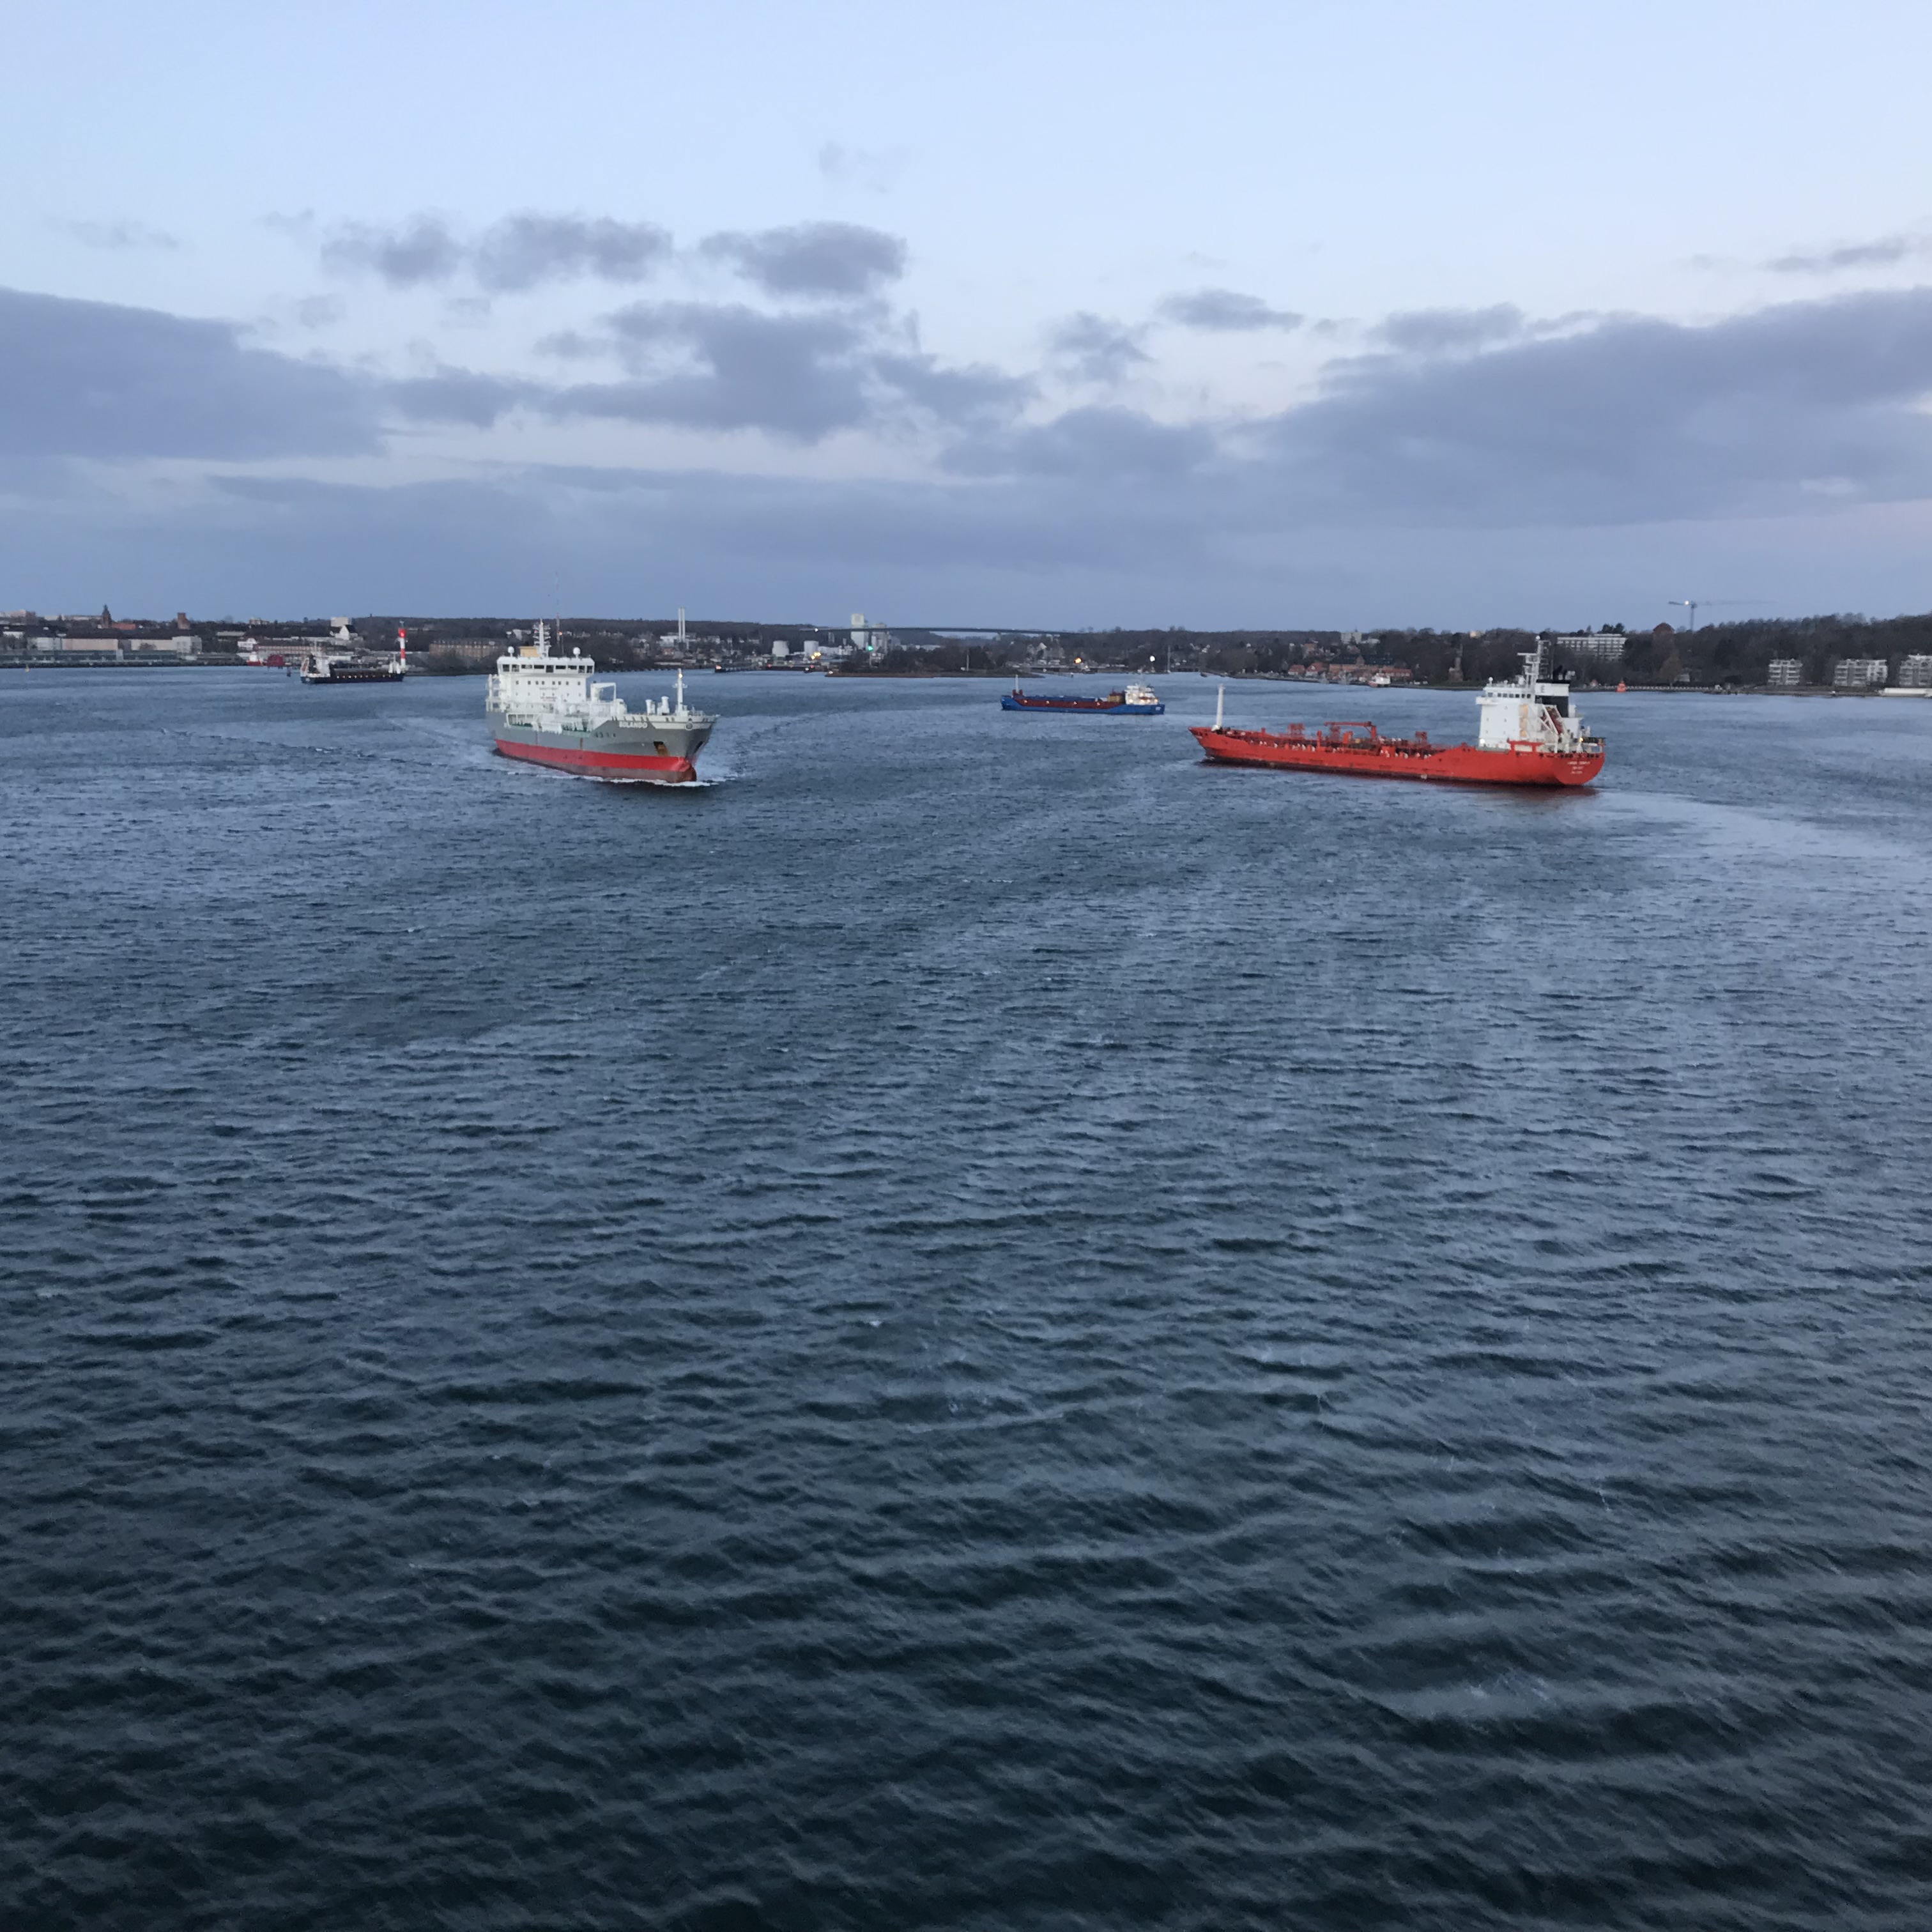
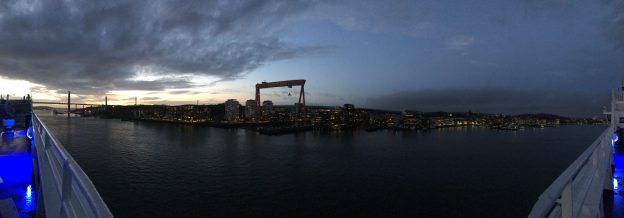
What is it that we actually look at when we go wave watching? Water is pretty much clear (or at least it is in the spots where I like to go wave watching), so how come we are able to see waves?

What we are looking at are not actually the waves themselves, but at how surfaces oriented in different directions reflect light from different directions towards us, and usually the light isn’t uniformly distributed, so we see lighter and darker areas on the waves that are associated with certain orientations of the surface, i.e. the slopes going up and down to and from the crests.

But this only happens if we look at water at a small angle — then the water surface acts to reflect most of the light from above. However if we look at water at a steep angle, we are actually able to look inside. See this in the picture above? This is due to a phenomenon called total internal reflection.

Now that light easily gets in and out of the water, the water surface does something weird: It acts as a lens and focusses light on the sea floor so we see bright areas and not so bright areas. And looking at how the brightness is distributed on the sea floor, we can figure out what the waves must be to have focussed the light in exactly that way, even though we can’t see the water surface.

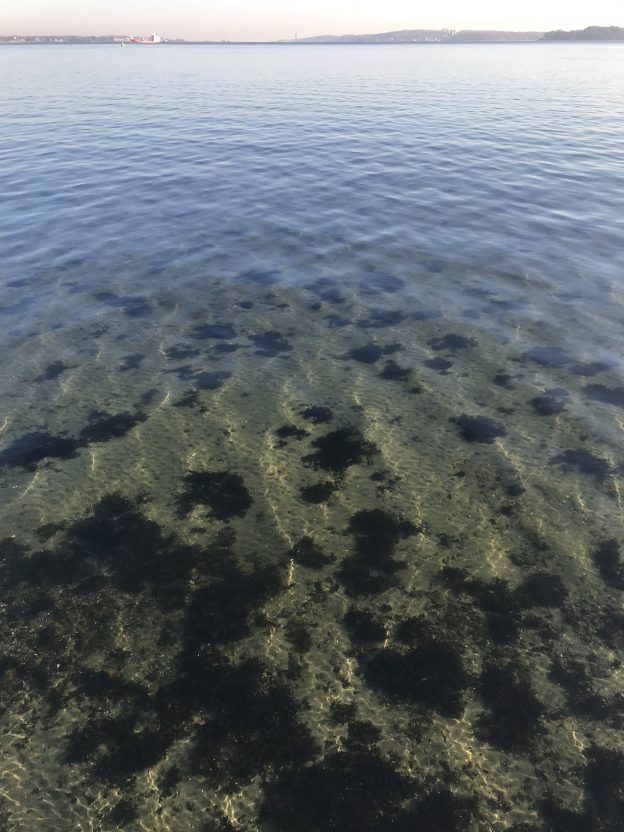
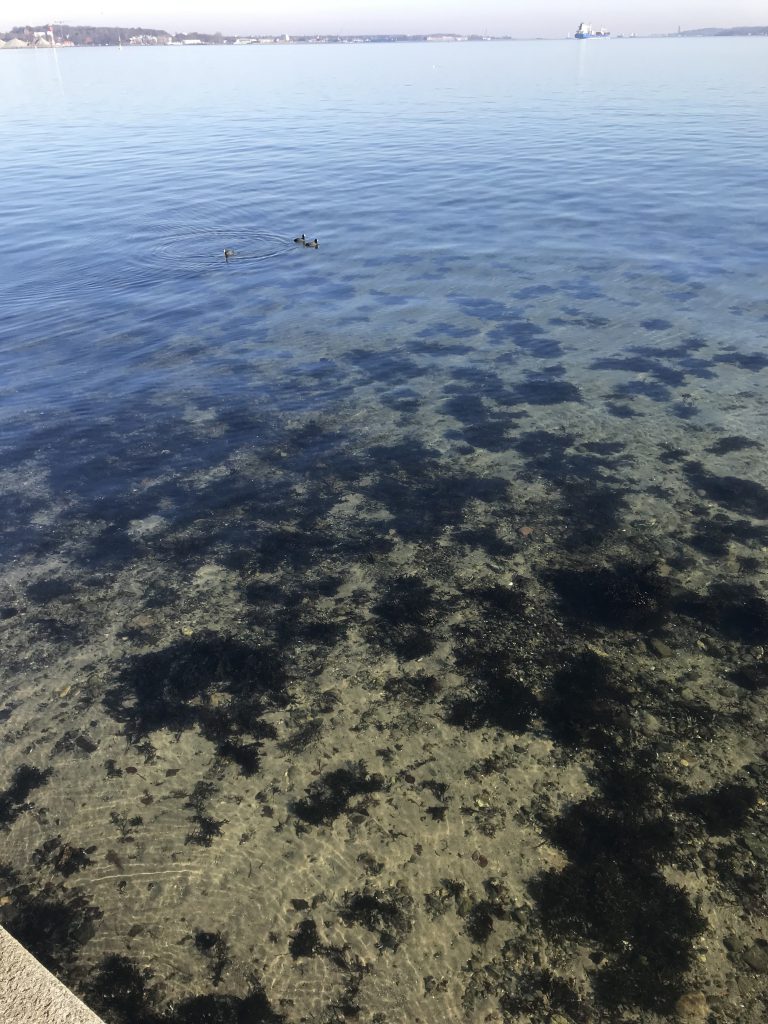
Let’s start with an easy example. Below, you see the half circles of concentric waves radiating away from some obstacle at the bottom of the sea wall. The further away from the center you look, the more other waves you notice as the concentric circles become more and more difficult to see.

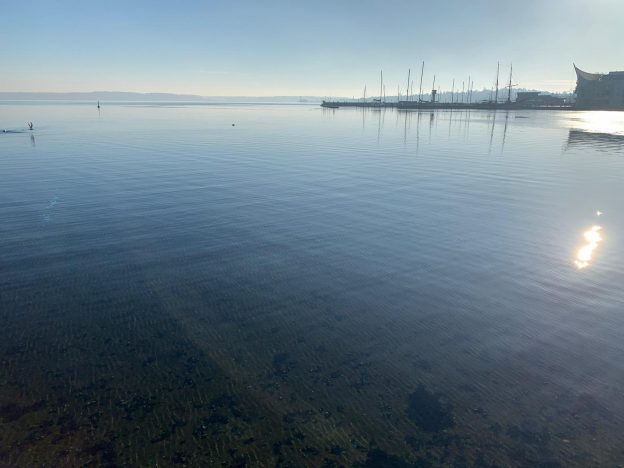
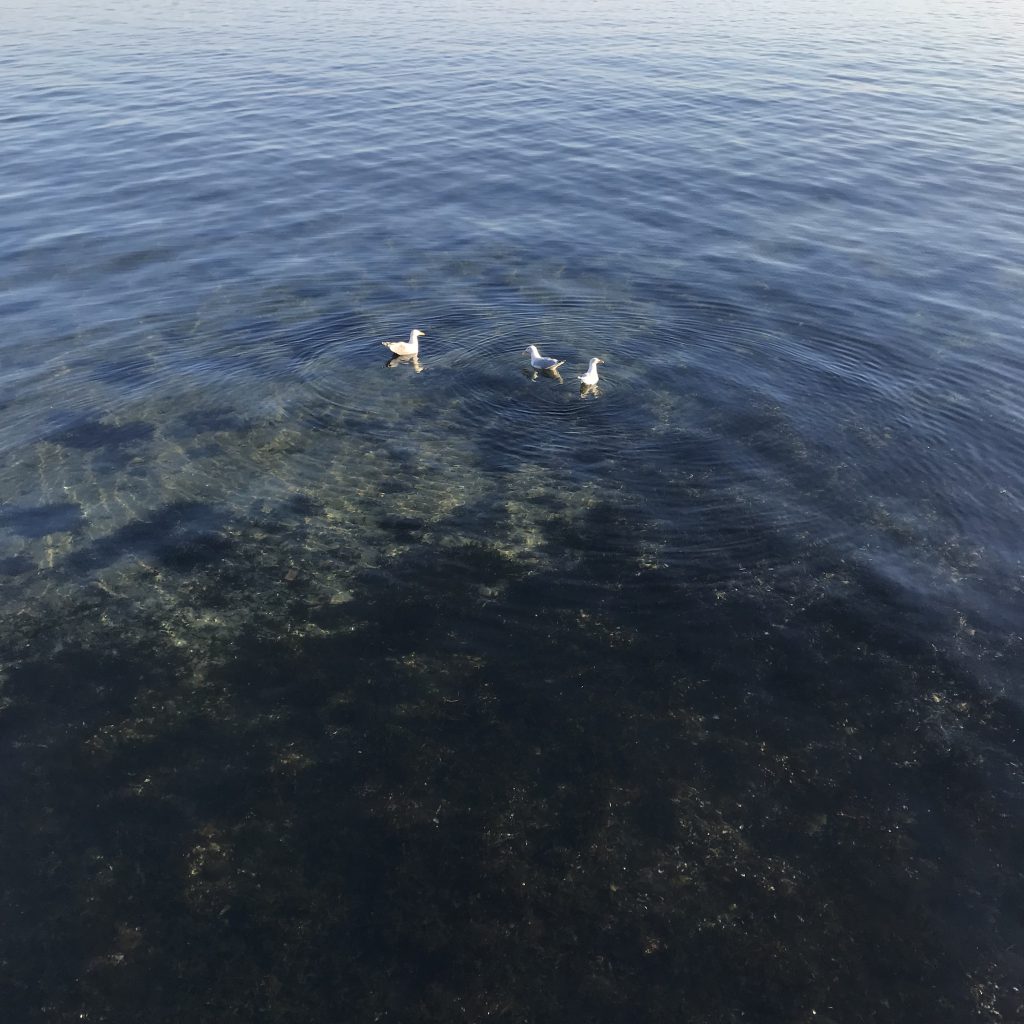
Moving on to a slightly more difficult case below.

You see the waves radiating away from the seagulls. Behind them, at a shallow angle, you mainly see the ambient light of the sky reflected on the waters surface to let you see the waves. Towards us, though, at a steeper angle, it gets more and more difficult to see the water surface and the waves, but we start seeing the light focussed on the sea floor, mirroring the circles of the waves above.

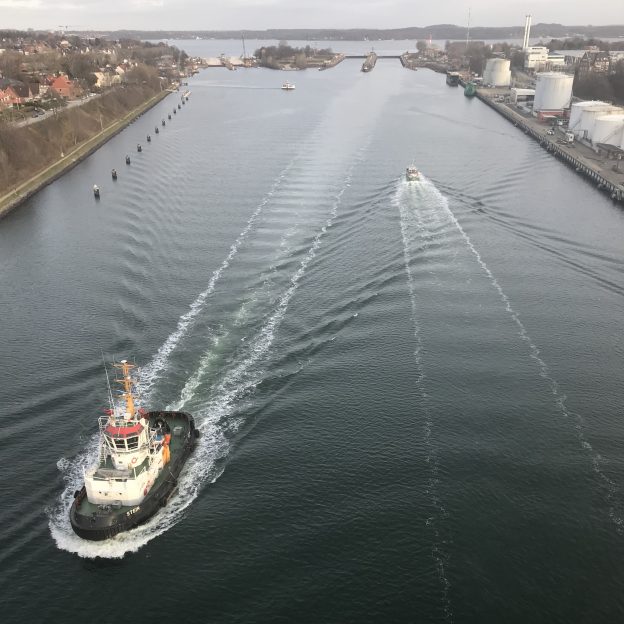
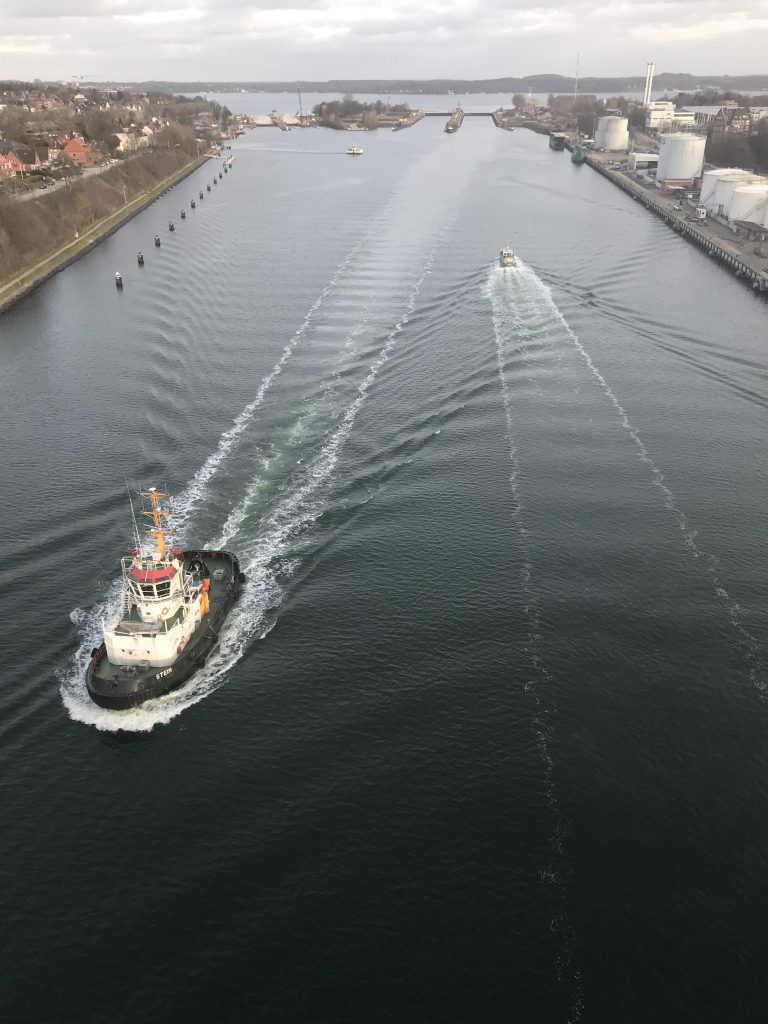
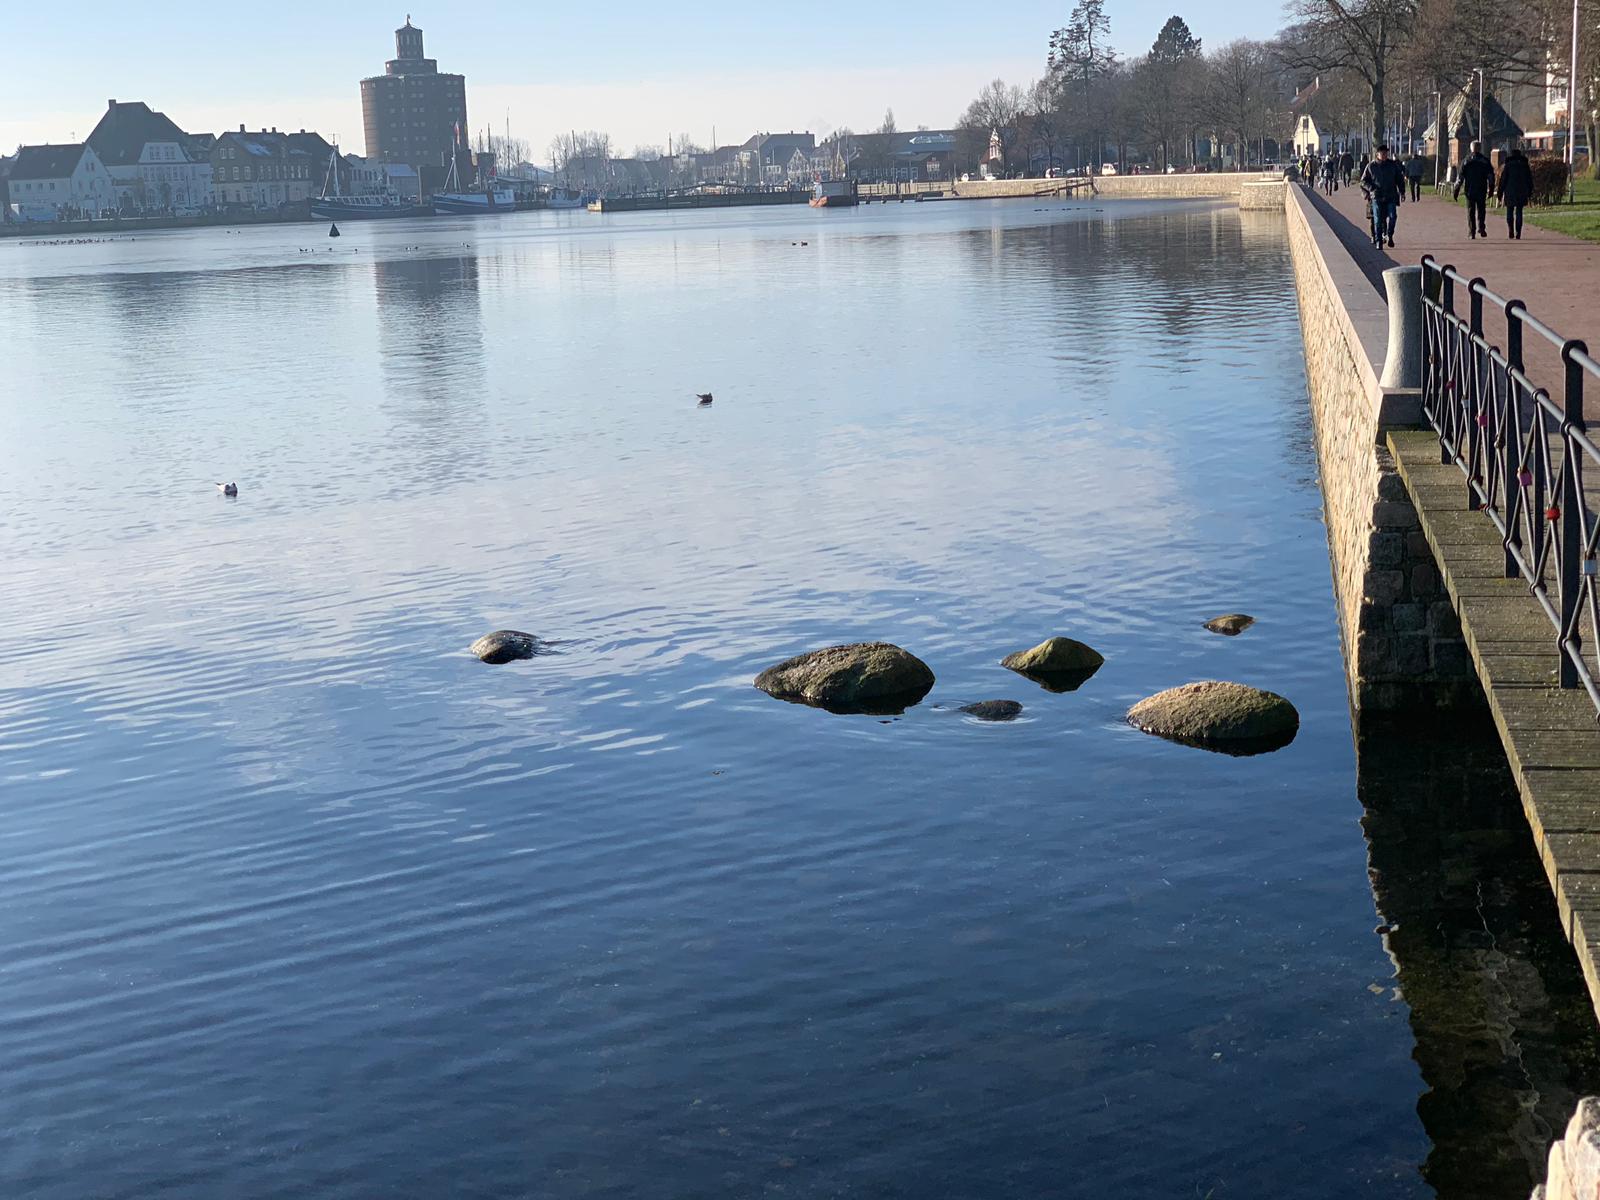
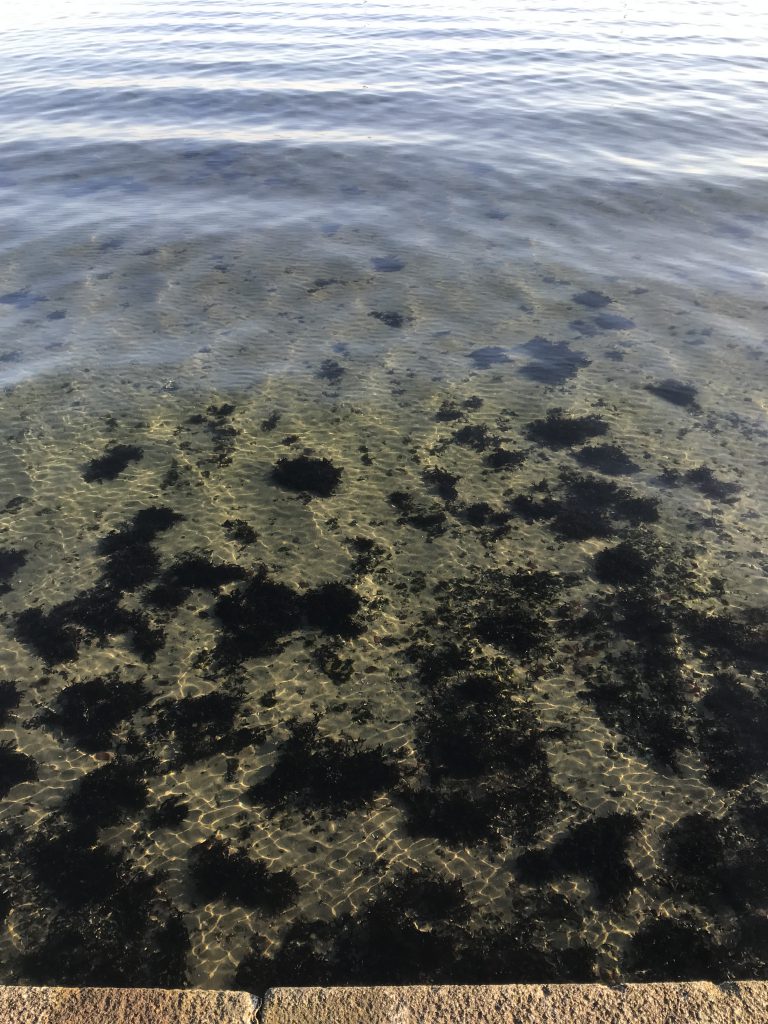
Here is another example of waves , except this time we see because of reflection of light on the surface further out, vs focussing of light on the sea floor closer to us, except that this time we are not looking at the same waves any more. The waves further out are wind waves and waves the birds made, the waves further in are similar to the ones in the second picture — created by an obstacle at the base of the sea wall.

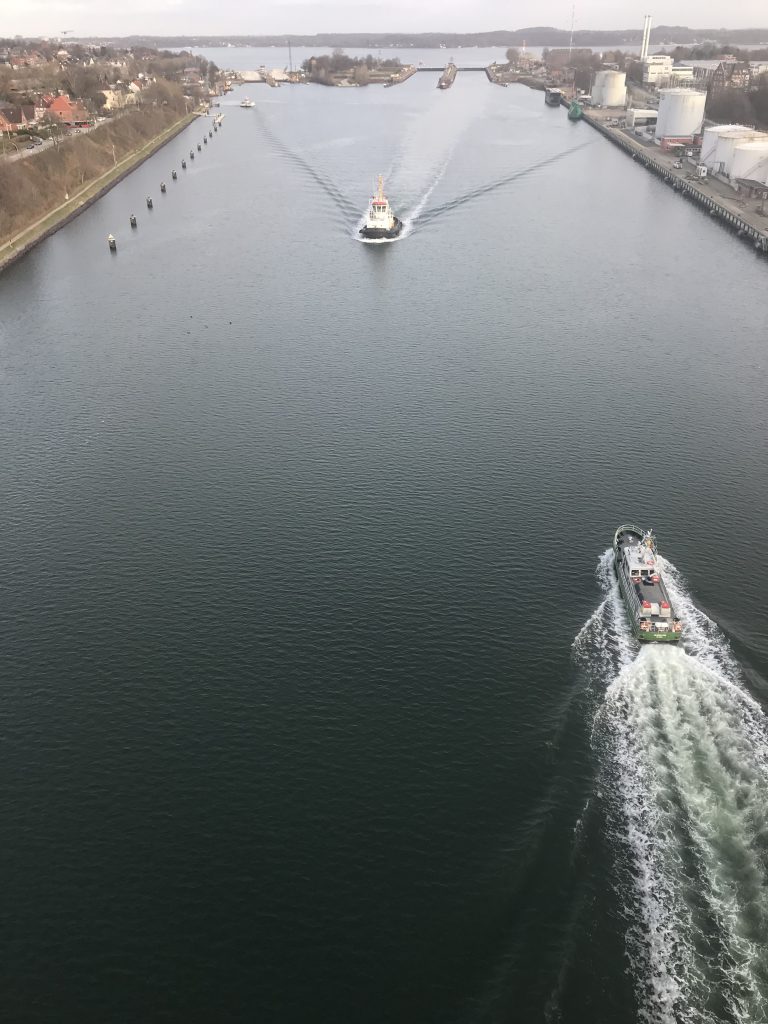
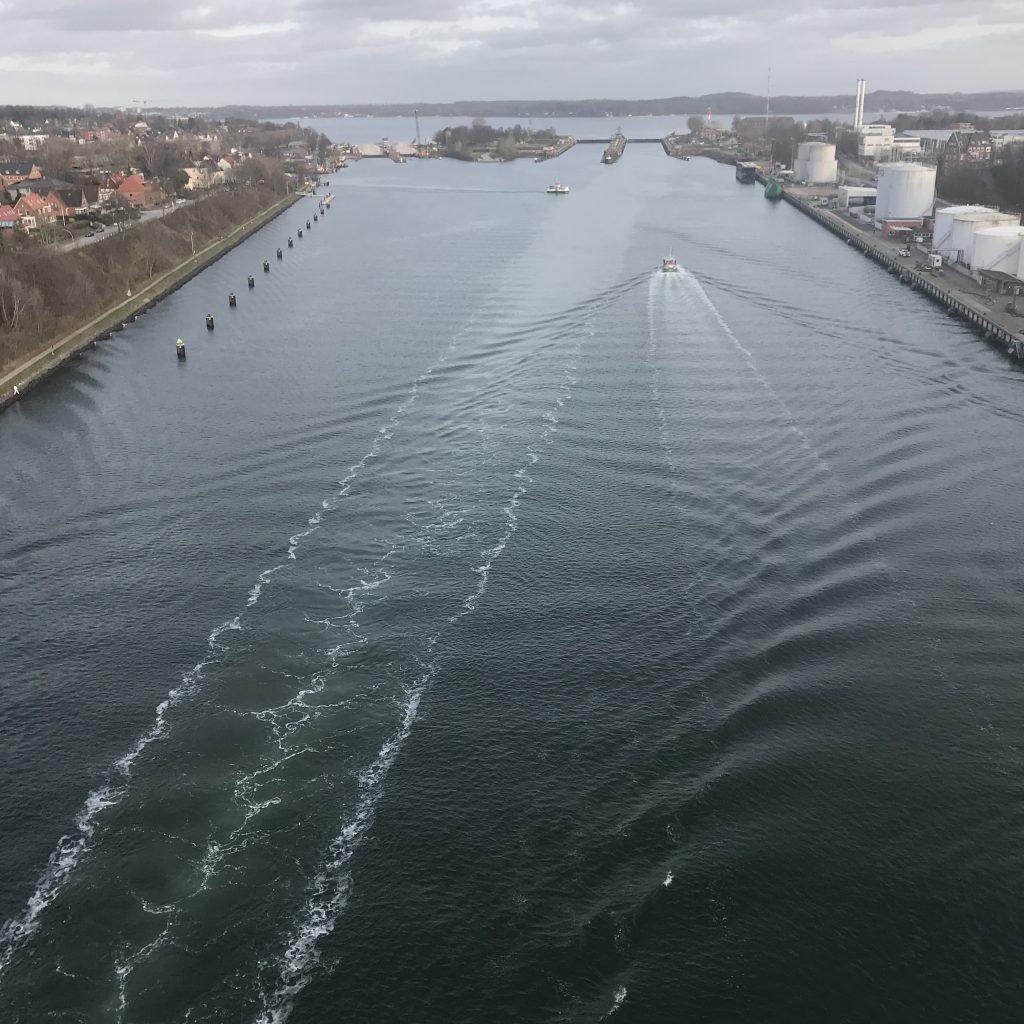
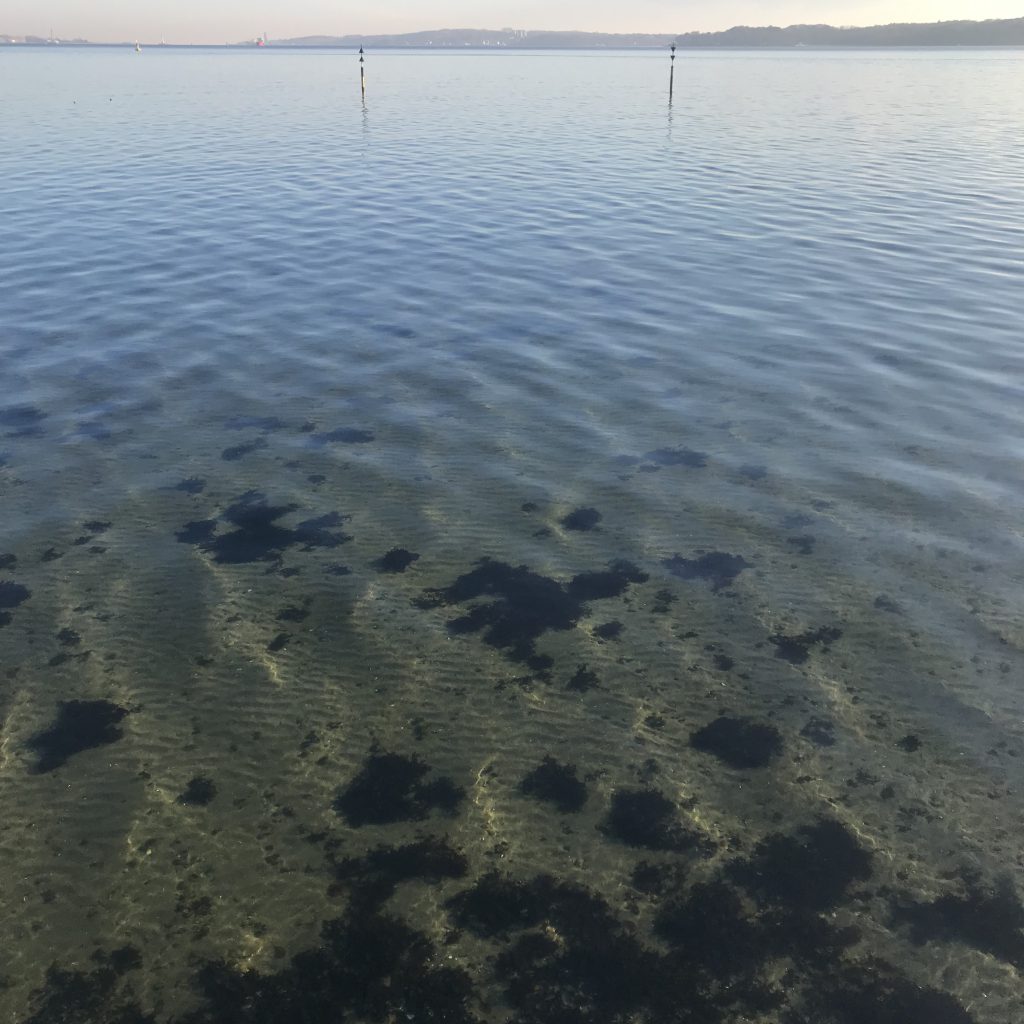
But then sometimes it gets really difficult to reconcile the waves we see through these two different phenomena. Below, the wave field we see by looking at the light reflected at the surface seems to be dominated by wave crests coming towards us, with the crests being more or less parallel to the sea wall at the bottom of the picture. There is some small stuff going on on top of that, but it doesn’t seem very important.

But now looking at the pattern of light on the sea floor, we pick out something very different: The dominant wave crests are now perpendicular to the sea wall when you look at the middle of the picture below (towards the bottom we see those half circles again that we saw above, too)! Where do those wave crests come from that are perpendicular to the sea wall?

There are actually two things I can think of.

First: they are actually an important part of the wave field, we just don’t pick them up very well because — in contrast to the waves coming towards us with the side going up towards the crest reflecting the dark land behind us and the side going down towards the trough reflecting the bright sky — waves going perpendicularly to that field would mainly reflect the sky, so it would be hard to make out their crests and troughs since they appear to be the same color.

Second: I’m not actually sure this makes sense any more. I was going to say that the surface shape of wave crests moving away from the sun might be more suited to focus light than wave crests moving in a perpendicular direction. But looking at all the examples of circular waves that I posted above and that show up as circles, not just in areas where the wave crest was in specific directions, this probably doesn’t make sense. If anyone is reading this, what do you think??

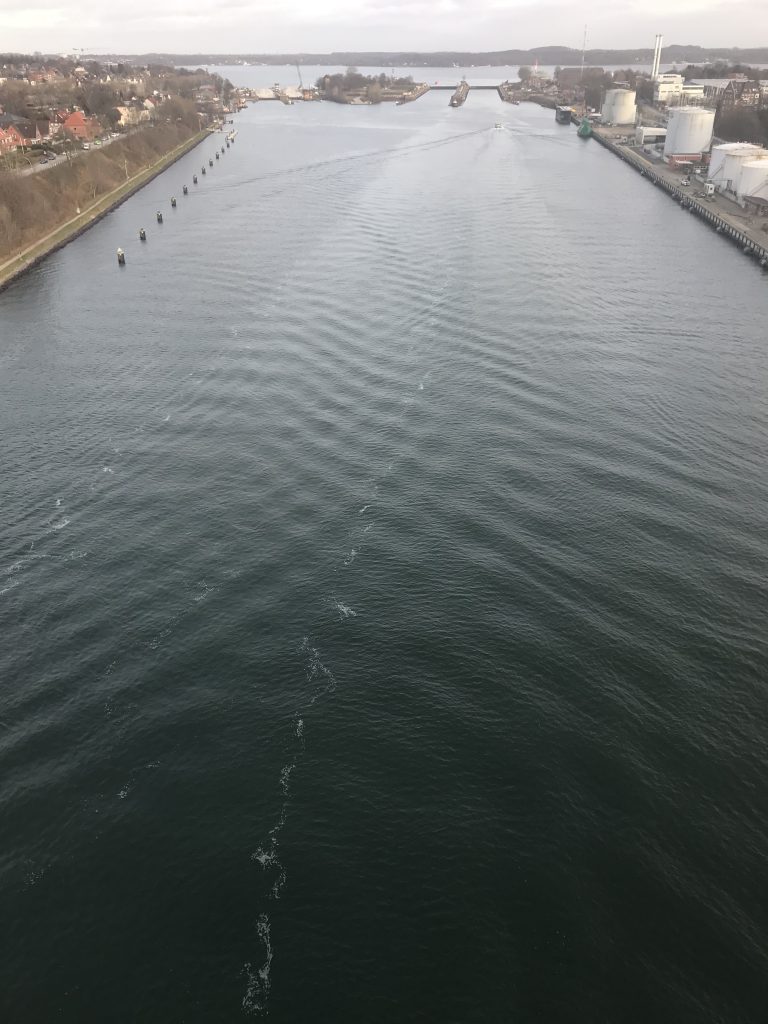
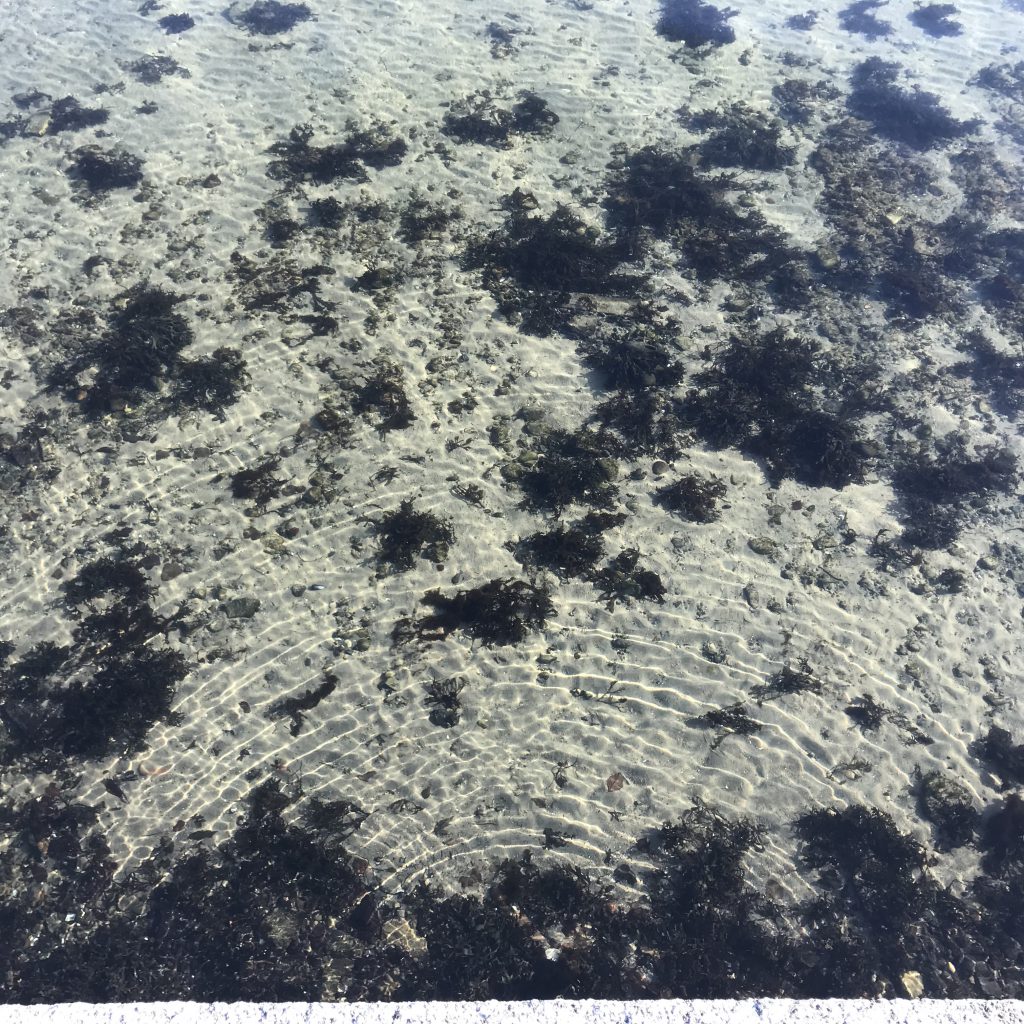
Below is another example: Here we see a crisscross of waves, a checkerboard pattern of an incoming wave field and its reflection — as long as we look far out onto Kiel fjord. If we look into the water at a steep angle, we see again wave crests that don’t seem to match what we saw on the surface! (btw, don’t let yourself be distracted by the ripples in the sand that might look like they are also caused by light being focussed by the water surface. They are just ripples in the sand…)

Clearly I need to think about this some more to figure out what’s going on here. I’m grateful for any input anyone might have!

Wave watching at the locks in Kiel Holtenau

Yes, we are back to wake watching! Today I went to a new-to-me wave watching spot: The bridge across Kiel canal close to the Holtenau locks, which you see in the background of the picture below. And I should have checked out my favourite ship tracking app for better timing, I had to wait for quite some time before there were any ships apart from the small ferry which you see crossing right at the locks! But the wait was well worth it in the end!

In these pictures, you see very clearly the different parts of the wake. The turbulent wake right behind the ship where the ship has displaced a large volume of water and where the ship’s propeller has induced a lot of turbulence. The turbulent wake is bound by the foam created by the breaking bow waves. And outside of all of this, the V of the feathery wake opens up with the ship at its tip.

I am super excited about these pictures. Do you see the wake reflecting on the right (south) side of the Kiel canal?

And while it was pretty easy to interpret the pictures above, and the one below is still fair game because the turbulent wake of the third ship is still clearly visible, even though the ship is not, it is getting more and more complicated, isn’t it?

But now, with two of the three ships gone, it has suddenly gotten a lot more complicated. And it doesn’t help that the sides of the canal aren’t completely straight which leads to the mess in the lower right corner…

This is definitely a new favourite wave watching spot which you might see more of in the future! This stuff makes me so happy :-)

Vernissage of water sculpture photography by Wlodek Brühl, with explanations of the physics behind the pictures by yours truly!

I am a huuuge fan of Wlodek Brühl’s liquid art: Pictures of water sculptures that are created with focus on the tiniest of details, that only persist for milliseconds, but that are captured forever in all their fragile beauty. And I think these pictures are an awesome tool in science communication — I see so much physics in them (some of which I wrote about here already), and even if you come to an exhibition for the art, who wouldn’t love to learn some physics while they were there, too?

Well, we are about to find out! There is a new exhibition being opened (with brand new pictures!) on March 3rd in Preez. And I will actually give the opening speech for the liquid art half of the exhibition! I haven’t seen all the pictures yet so I can’t tell you exactly what I will be talking about, but whatever I say will definitely have to involve lots of fun physics :-)

Click for pdf

Roll waves, one of the more complicated #friendlywaves I’ve gotten over the years…

#friendlywave is the new hashtag I am currently establishing. Send me your picture of waves, I will do my best to explain what’s going on there!

When it rains, it pours, especially in LA. So much so that they have flood control channels running throughout the city even though they are only needed a couple of days every year. But when they are needed, they should be a tourist attraction because of the awesome wave watching to be done there! As you see below, there are waves — with fronts perpendicular to the direction of flow and a jump in surface height — coming down the channel at pretty regular intervals.

Roll waves on Verdugo Wash. Photo by Mike Malaska

Even though this looks very familiar from how rain flows in gutters or even down window panes, having this #friendlywave sent to me was the first time I actually looked into these kinds of flows. Because what’s happening here is nothing like what happens in the open ocean, so many of the theories I am used to don’t actually apply here.

Looks like tidal bores traveling up a river

The waves in the picture above almost look like the tidal bores one might now from rivers like the Severn in the UK (I really want to go there bore watching some day!). Except that bores travel upstream and thus against the current, and in the picture both the flow and the waves are coming at us. But let’s look at tidal bores for a minute first anyway, because they are a good way to get into some of the concepts we’ll need later to understand roll waves, like for example the Froude number.

Froude number: Who’s faster, current or waves?

If you have a wave running up a river (as in: running against the current), there are several different scenarios, and the “Froude number” is often used to characterize them. The Froude number Fr=u/c compares how fast a current is flowing (u) with how fast a wave can propagate (c).


Side note: How do we know how fast the waves should be propagating?

The “c” that is usually used in calculating the Froude number is the phase velocity of shallow water waves c=sqrt(gH), which only depends on water depth H (and, as Mike would point out, on the gravitational constant g, which I don’t actually see as variable since I am used to working on Earth). (There is, btw, a fun experiment we did with students to learn about the phase speed of shallow water waves.) This is, however, a problem in our case since we are operating in very shallow water and the equation above assumes a sinusoidal surface, small amplitude and a lot of other stuff that is clearly not given in the see-saw waves we observe. And then this stuff quickly gets very non-linear… So using this Froude number definition is … questionable. Therefore the literature I’ve seen on the topic sometimes uses a different dispersion relation. But I like this one because it’s easy and works kinda well enough for my purposes (which is just to get a general idea of what’s going on).


Back to the Froude number.

If Fr<1 it means that the waves propagate faster than the river is flowing, so if you are standing next to the river wave watching, you will see the waves propagating upstream.

Find that hard to imagine? Imagine you are walking on an elevator, the wrong way round. The elevator is moving downward, you are trying to get upstairs anyway. But if you run faster than the elevator, you will eventually get up that way, too! This is what that looks like:

If Fr>1 however, the river is flowing faster than waves can propagate, so even though the waves are technically moving upstream when the water is used as a reference, an observer will see them moving downstream, albeit more slowly than the water itself, or a stick one might have thrown in.

On an escalator, this is what Fr>1 looks like:

But then there is a special case, in which Fr=1.

Hydraulic jumps

Fr=1 means that the current and the waves are moving at exactly the same velocity, so a wave is trapped in place. We see that a lot on weirs, for example, and there are plenty of posts on this blog where I’ve shown different examples of the so-called hydraulic jumps.

See? In all these pictures above there is one spot where the current is exactly as fast as the waves propagating against it, and in that spot the flow regime changes dramatically, and there is literally a jump in surface height, for example from shooting away from where the jet from the hose hits the bottom of the tank to flowing more slowly and in a thicker layer further out. However, all these hydraulic jumps stay in pretty much the same position over pretty long times. This is not what we observe with tidal bores.

On an escalator, you would be walking up and up and up, yet staying in place. Like so:

Roll waves

Tidal bores, and the hydraulic jumps associated with their leading edges, propagate upstream. But they are not waves the way we usually think about waves with particles moving in elliptical orbits. Instead, they are waves that are constantly breaking. And this is how they are able to move upstream: At their base, the wave is moving as fast as the river is flowing, i.e. Fr=1, so the base would stay put. As the base is constantly being pushed back downstream while running upstream at full force, the top of the wave is trying to move forward, too, moving over the base into the space where there is no base underneath it any more, hence collapsing forward. The top of the wave is able to move faster because it’s in “deeper” water and c is a function of depth. This is the breaking, the rolling of those waves. The front rolls up the rivers, entraining a lot of air, causing a lot of turbulent mixing as it is moving forward. And all in all, the whole thing looks fairly similar to what we saw in the picture above from Verdugo Wash.

But the waves are actually traveling DOWN the river

However there is a small issue that’s different. While tidal bores travel UP a river, the roll waves on Verdugo Wash actually travel DOWN. If the current and the waves are traveling in the same direction, what makes the waves break instead of just ride along on the current?

What’s tripping up these roll waves?

Any literature on the topic says that roll waves can occur for Fr>2, so any current that is twice as fast as the speed of waves at that water depth, or faster, will have those periodic surges coming downstream. But why? It doesn’t have the current pulling the base away from underneath it as it has in case of a wave traveling against the current, so what’s going on here? One thing is that roll waves occur on a slope rather than on a more or less level surface. Therefore the Froude number definitions for roll waves include the steepness of the slope — the steeper, the easier it is to trip up the waves.

Shock waves: Faster than the speed of sound

Usually shock waves are defined as disturbances that move faster than the local speed of sound in a medium, which means that it moves faster than information about its impending arrival can travel and thus there isn’t any interaction with a shock wave until it’s there and things change dramatically. This definition also works for waves traveling on the free surface of the water (rather than as a pressure wave inside the water), and describe what we see with those roll waves. Everything looks like business as usual until all of a sudden there is a jump in the surface elevation and a different flow regime surging past.

If you look at such a current (for example in the video below), you can clearly see that there are two different types of waves: The ones that behave the way you would expect (propagating with their normal wave speed [i.e. the “speed of sound”, c] while being washed downstream by the current) and then roll waves [i.e. “shock waves” with a breaking, rolling front] that surge down much faster and swallow up all the small waves in their large jump in surface elevation.

Video by Mike Malaska

In the escalator example, it would look something like this: People walking down with speed c, then someone tumbling down with speed 2c, collecting more and more people as he tumbles past. People upstream of the tumbling move more slowly (better be safe than sorry? No happy blue people were hurt in the production of the video below!).

Looking at that escalator clip, it’s also easy to imagine that wave lengths of roll waves become longer and longer the further downstream you go, because as they bump into “ordinary” waves when they are about to swallow them, they push them forward, thus extending their crest just a little more forward. And as the jump in surface height gets more pronounced over time and they collect more and more water in their crests, the bottom drag is losing more and more of its importance. Which means that the roll waves get faster and faster, the further they propagate downstream.

Speaking of bottom drag: When calculating the speed of roll waves, another variable that needs to be considered is the roughness of the ground. It’s easy to see that that would have an influence on shallow water. Explaining that is beyond this blog post, but there are examples in the videos Mike sent me, so I’ll write a blogpost on that soon.

So. This is what’s going on in LA when it is raining. Make sense so far? Great! Then we can move on to more posts on a couple of details that Mike noticed when observing the roll waves, like for example what happens to roll waves when two overflow channels run into each other and combine, or what happens when they hit an obstacle and get reflected.

Thanks for sharing your observations and getting me hooked on exploring this cool phenomenon, Mike!

My escalator analogy for Froude numbers

The Froude number Fr=u/c is the ratio of a typical velocity of a current (u) and the phase velocity of the typical waves in that area (c). It thus describes whether a flow is subcritical for Fr<1 (i.e. with a current that is slower than the waves, so waves can propagate in any direction), or supercritical for Fr>1 (the current is moving faster than the waves, so waves can’t propagate upstream and are washed downstream with the current), and the transition between the two, where a hydraulic jump occurs (Fr=1).

Since many people find this hard to imagine, I like to use the “escalator analogy” (and please don’t try this at home or wherever you find the next elevator). But I think it works rather well as an analogy.

For Fr<1, the person on the elevator is walking faster than the elevator is moving. The person can thus get to where it wants to get, even though the elevator is running the opposite direction.

At Fr=1, the escalator moves as fast as the person, so the person is stuck in place.

And then for Fr>1, the escalator is moving faster than the person is, so the person gets “washed downstream” with the elevator.

What do you think? Is this analogy working for you? If yes, I might spend some more time on the animations. If no, well, I still had fun :-)

Commissioned wave watching: Eckernförde edition on a beautiful calm and sunny Sunday!

Recently, more and more of my friends send me pictures of waves they spotted when walking along a lake side or taking a ferry ride. I love how contagious wave watching is, and I love sharing my fascination with you! :-)

Here are some pictures that Fred sent me of his lovely Sunday walk today. There are at least five interesting things that I notice in the picture below. How about you?

  1. Look at the beautiful interference pattern where two wave fields are almost perpendicular to each other, creating the checkerboard pattern! As you see in the picture below, there is one wave field coming in at a 45ish° angle to the sea wall, so its reflection is at 90ish° to the original wave field.
  2. In the background you see the surface roughness changing and the water seeming darker where there is a breeze going over the water, creating small ripples that reflect the sky in a different way than the smooth surface closer to us.
  3. See the waves the seagull made where it landed on the water?
  4. Looking at the foreground, do you see the tiny ripples that show up not so much on the surface of the water, but rather at the sandy ground, because they focus the light?
  5. And notice how you can look into the water in the foreground but not in the background? That’s the awesome phenomenon of total internal reflection where, if you look at water at an angle that is smaller than a critical angle, you cannot look into the water any more but just see light reflected at the surface! One of the things I never understood we had to learn about in school, but that I find super cool now.

And in the picture below, what do you see?

What I find most interesting in the picture above is how the reflection of that storehouse tower looks different in areas with different surface roughnesses. Where there is a breeze on the water in the background and in the foreground, it’s a lot more spotty than in the calm and smooth surface in between. And the checkerboard waves pattern (now you see the seawall that created the reflection, btw) carries through to the reflections, too, with the blue crisscross going into the white area where a cloud is reflected.

And then the phenomenon of total internal reflection is really clearly visible here with a lot of reflections on the water (or just more interesting things to reflect than just a blue sky in the previous picture) and a view down to the ground only in the very foreground of the picture.

Thanks for sharing these beautiful pics, Fred!


How to use home-made surface drifters to teach oceanography

Very early knowledge about oceanography stems from beach finds that had to have been transported to that beach from far away because the finds themselves (pieces of trees, or coconuts, or whatever) were not native to their finding places so the ocean must have provided a connection between their place of origin and the beach they ended up on. And in early oceanographic research, messages in bottles or even wood pieces marked with identifying numbers were deployed at known times and regions and then recovered wherever they made landfall to get a better idea of ocean currents. And as oceanography got more and more sophisticated as a discipline, such lagrangian (i.e. current-following) data has become an important part of oceanographic research, especially over the last two decades with profiling ARGO floats.

Position of 3930 ARGO floats that were active in the 30 days before January 18th, 2019. Source: http://www.argo.ucsd.edu

ARGO data is available to anyone and, via its Google Earth interface, easily accessible in teaching. But of course this is only a passive resource, you cannot deploy drifters wherever you would like for teaching purposes. Now imagine if you had cheap drifters* available for use in teaching, how cool would that be?

Last year I was involved in discussing the design of home-made surface drifters and later got the chance to join the student cruise (as part of Lars Henrik and Harald‘s GEOF105 class at the University of Bergen, Norway) where the drifters were tested, both in their functions as drifters and as a teaching tool. They are an amazing addition to the student cruise and a great learning opportunity! But there are also a lot of challenges that arise when with working with drifters — or opportunities to think about interesting problems! What more could an instructor (or a student!) want? :-)

Building home-made surface drifters

While in our case the drifters were developed and built before the class started, discussing design criteria with students would be a really interesting task in an applied oceanography course. The design we ended up working with with is described here.

Building those relatively cheap drifters provided us with the opportunity to have students handle them to learn to use oceanographic instrumentation without them, or us, being too concerned about the welfare of the instrumentation. It also provided us with a fleet of four drifters that we could deploy and recover on four day-long student cruises and have them right in the vicinity of where we were taking Eulerian measurements at the same time, so we would end up with a complementing data set and could discuss the benefits of each of the two kinds of measurements and how, when they come together, they tell a much more interesting story than any of them could on their own.

Where to deploy the drifters

If you have a limited number of drifters available (four in our case), you have to think long and hard about where to deploy them. Of course you can just dump them into the water anywhere and see where they end up. But in order to figure out the best spot, it is really helpful to have a clear idea of what influences the currents in the regions you are interested in, and what path the drifters might take, depending on the location of their deployment.

On the three first days of the student cruise, we saw the drifters move against the predicted tidal current (“predicted” tidal currents, because we didn’t look at direct observations of the tidal current, so we don’t actually know if it is behaving the way the prediction predicted) and, at times, also against the main wind field. Nevertheless, we expect the wind to have a large influence on the flow in the surface layer, hence the day at sea starts with a briefing on the weather forecast.

Students presenting the weather forecast for the cruise day in the ship's messe

Students presenting the weather forecast for the cruise day in the ship’s messe

In addition to thinking about a deployment strategy for specific weather conditions, it is helpful to think about how trajectories from different days will be compared to each other. Therefore we chose to deploy on two sections over four days, thus repeating each section twice.

How to track your drifters

There are many ways to track drifters. In the early days, acoustic signals were used to know where drifters moved within an array of sound sources. These days, most tracking is done using GPS. In our case, we used readily available GPS tracking units that were then mounted on the drifters (see below).

GPS units being fixed to the drifters onboard RV Hans Brattstrøm

GPS units being fixed to the drifters onboard RV Hans Brattstrøm

Looking at the features of the GPS units we used, they were apparently mainly designed to tracking cars when you’ve lend them to your kids. In any case you can set alarms if velocities are too high, if they leave a pre-defined area, etc.. Interesting to see what kind of products are on the market!

Looking at how to track the drifter, i.e. the specifications of the GPS sender, might also be a very interesting exercises to do with students. How often should it “call home”, what battery lives are needed, how will the data be transferred, where and how can it be accessed, stored, processed?

How to deploy your drifters

Even when you know where to deploy the drifters, that doesn’t tell you how to deploy them. And even from a small research ship like the Hans Brattstrøm it is not immediately obvious how to do it.

Deploying a drifter

Very good reality check on how difficult it is to get instrumentation in place to measure oceanographic data!

How to interpret your data

Speaking of oceanographic data — how do you actually interpret it? Below you see a snapshot of our four drifters in action. This is actually on of the more interesting times when it comes to velocities: We do have two drifters moving with 4km/h and then one with less than 3km/h (which shows up as not moving because of some algorithm in the website). But what does this actually tell us?

Position and approximate velocities of our four drifters at the end of day 4

Interpreting drifter data becomes very difficult very quickly when you are in a flow field that changes over time. We did have the tidal forecast and the wind forecast, but both only in a coarse resolution in space and time and so it gets really difficult to imagine how they might have influenced the currents and thus the trajectories of the drifters!

How to protect your drifters from damage

Even in a fjord that is sheltered from the wind and big waves of the open ocean, the sea is still a harsh environment and large forces will act on the drifters. If we want to be able to recover the drifters in one piece, we have to make sure that they are actually sturdy enough to stay in one piece.

One of our drifters capsized for unknown reasons. Luckily Algot was still able to recover it!

Another point to consider is how much buoyancy a drifter will need to stay afloat, yet to be submerged enough into the water to actually follow the surface current rather than being pushed through the water by winds, or pushed over by the winds as the one above.

How to find your drifters again

As we think about how to protect the drifter from damage, we also need to think about how we can make sure the drifter stays upright so the GPS antenna stays above the water level. Even with fairly good visibility and low waves, and despite the brightly colored flags and radar reflectors on the drifters, they were pretty difficult to spot!

Even though we can see the drifter’s position through an app on my phone, it is really difficult to spot it out on the water!

How to recover your drifters

Even on a small vessel like the one we used for the student cruise, the water is actually pretty far away from where you can stand on the deck, so recovering a bulky and heavy item out of the sea is not as straight forward as one might think!

Technician Algot and a student recovering one of the surface drifters

Making sense of your drifters’ trajectories

This is not something I can cover in this post, of course — it’s what Inga will do for her Master’s thesis. Below, you see her plotting trajectories from the four days together with the predicted wind fields of the respective days.

, and think about how we can make sure the drifter stays upright so the GPS antenna stays above the water level.

Inga looking at analyses of the drifters’ trajectories which she will explain in her Master’s thesis

But there are several aspects I find especially interesting for discussions with students:

  • At which depth range did we place the anchor of the drifter, i.e. what “surface current” are we actually tracking, the real surface, or an average over the top 0.5 meters, or the top 1 meter? And what would “average” even mean? Or something else?
  • When we have Eulerian data from, say, tidal gauges, weather stations, etc, how do we bring those together with the Lagrangian data provided by the drifters?
  • Knowing what we know now, what could we learn for future deployment strategies?

There are so many super interesting questions to be discussed using this fairly inexpensive instrumentation that it is a great opportunity that should not be missed!

*of course, ARGO uses profiling floats that actively measure data and send them home, whereas we use surface drifters that only send their position and nothing else. But maybe we can mount data loggers on them next time? :-)

Forget about big waves, today we are focussing on the details!

Today we are focussing on tiny waves right near the shore inside the sheltered harbor. See how below there are two wave fields, one with longer waves with crests that are parallel to the water’s edge, and then shorter ones propagating at a right angle relative to the first field?

Where the rope swims on the water you see how the short wind waves are stopped and only start forming again at a distance downwind of the rope.

The same here: Where there are ropes floating on the water, the water’s surface looks a lot smoother because the wind waves that propagate perpendicularly to the ropes are erased. But there are some wave crests parallel to the rope, formed by the rope hitting the surface and being pulled out again!

Below, the ropes don’t actually touch the water’s surface, but we have cool reflections of waves with crests parallel to the two walls that form the corner. The water level is right at the height where there is a little ledge on the wall that gets flooded with wave crests arriving and then falls dry during wave troughs. This causes this cool pattern of wave crests that seem to be interweaved right at the corner.

Sometimes looking really closely at small scale pattern is even more fun than looking at the sea and all the big and flashy (or splashy?) stuff going on there!

More wave watching, this time in Kiel

Beautiful morning arriving back in Kiel… Looking downwind, the weather might seem pleasant (especially when focussing on the sunrise).

But looking upwind however, the wind rows on the water as well as the white caps on the waves indicate that it’s quite windy!

Very cool: the turbulent wake of a ship interrupts the wave field and therefore, with its different surface roughness, is clearly visible!

And below you see so many things: The sand bank running from the lighthouse towards the next headland becomes visible as waves are breaking  on it. The turbulent wake of that blue ship we saw above already is still clearly visible, as is its V-shaped wake. And you see our own wake as the feathery pattern that runs all the way from the bottom edge of the picture to way behind the blue ship!

And here our own wake becomes even more prominent as we turn. Laboe in the background…

Here is another ship, waiting to enter the locks of the Kiel canal. It’s moving only very slowly (so hardly any wake visible), but you see how it’s sheltering the water from the wind so the downwind water appears completely smooth right at the ship!

And here are some more wakes and sheltered spots of water surfaces. Locks of the Kiel canal in the background!

And another look at the locks. Do you notice how the wind rows still indicate that it’s quite windy, but how it’s a lot less windy than it was further out?

And then we are in the Kiel fjord. This is the upwind shore — see how waves are only slowly forming and building up with longer and longer fetch?

And then in the sheltered port a different kind of waves: Our bow propellers mixing the inner Kiel fjord!

Sunset wave watching in Gothenburg. Wakes under different light conditions!

Wave watching from high up gives you a whole new perspective on wakes, and depending on the lighting, features in the wave field become more prominent or fade away.

See for example below the ferry: You very prominently see the turbulent wake right behind the ship, and you see the waves of the wake opening up in a V-shape.

Above, there is still a lot of ambient light from the sky. Below though, the same ferry, similar spot, 30 minutes later: The turbulence is a lot harder to see since colors fade away, but the V-shaped wake becomes really clear since one slope of the waves reflects the city’s lights while the other reflects the darkness.

Another ferry coming in, another wake… Below the surface roughness becomes clearly visible with the turbulent wake right behind the ferry and the bow waves fanning out.

That was one brilliant mini cruise! Thanks for joining me, Frauke, and for staying out on deck with me — despite the freezing temperatures — until we were far out of the port and the light was gone completely. The sacrifices we bring in order to wave watch… ;-)