Category Archives: demonstration (easy)

Tidal mixing on a (fjord’s) sill

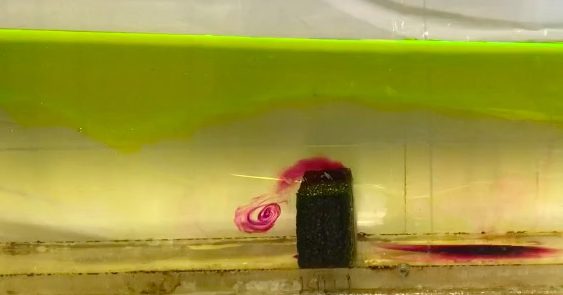
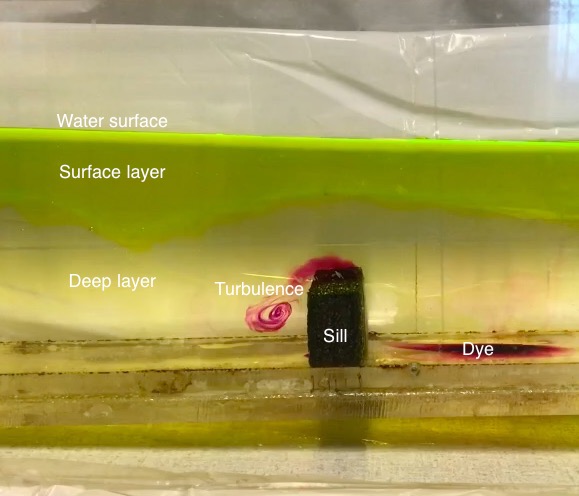
A pink swirl going across a styrofoam block underneath a layer of yellow water? What’s going on here?

The picture was taken in a water tank, simulating the circulation of water masses in a fjord. A fjord is a long and narrow bay, usually with a sill that is separating the bay from the open ocean. And those sills play an important role in on the one hand preventing water exchange between the fjord and the open ocean (because everything below sill depth has a really hard time getting across the sill) and on the other hand mixing water masses inside and outside of the fjord (which we see visualized with the pink dye).

And here is why the sill is so important: Every time the tide goes in or out of the fjord (so pretty much all the time), the sill acts as an obstacle to the water that wants to go in or out. And flow across a ridge tends to create mixing downstream of the ridge.

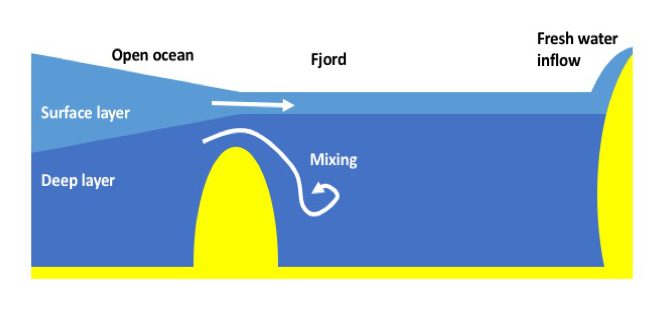
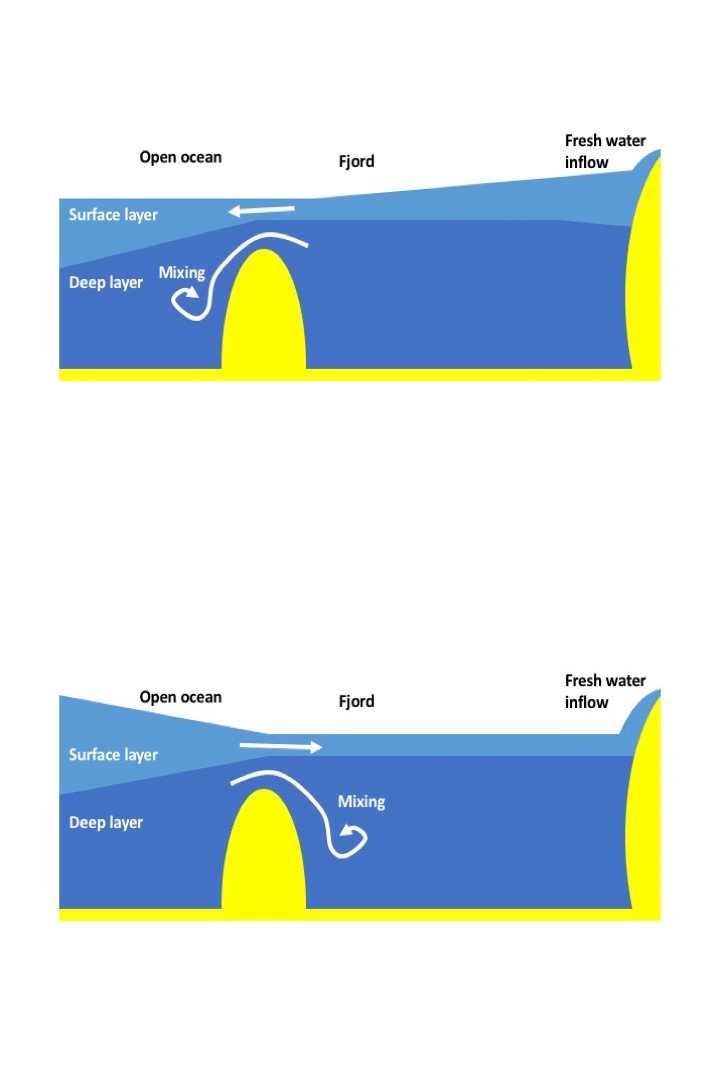
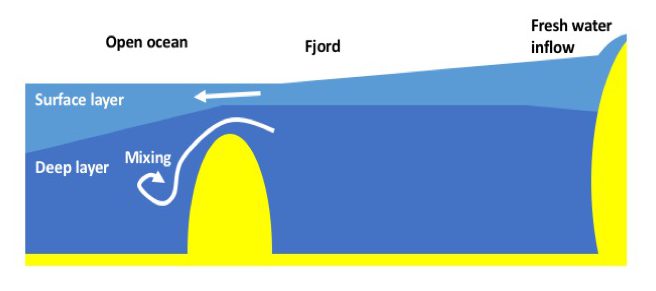
In the picture below, we see a sketch of the situation in an outgoing tide, which is what we also see represented in the photo above: Water wants to push out of the fjord and has to accelerate to get through the much smaller cross section where the sill is located. This leads to strong currents and strong mixing “downstream” of the obstacle.

Except that “downstream” is on the other side of the sill only a couple of hours later, when the tide is pushing water into the fjord, but is again hindered by the sill.

So what is happening is this: The tidal current goes in and out, and mixing occurs on one or the other side of the sill. So the situation looks like this:

This is what that looks like in our tank (the “tidal waves” are generated by lifting the right end of the tank and then just slushing back and forth):

Of course, in reality we don’t see pink swirls, and the surface layer isn’t a different color from the deep layer, either. But that’s why tank experiments are so cool: They show us what’s going on deep below the waves, that we can otherwise only deduce from complicated measurements of temperatures, salinities or mixing rates, which require highly specialized equipment, a research ship, and lots of technical know how to process and analyse and display. Which, of course, is also being done, but this demonstration gives a quick and easy visual representation of the processes at play at sills all around the world.

P.S.: The photos in this blog post were taken when I ran the fjord circulation experiment with Steffi and Ailin at GFI earlier this year. I am posting about this again now because I wanted to use the picture for other purposes and realized that I never actually wrote about this feature in as much detail as it deserves!


Melting ice cubes experiment published in kids’ journal Frontiers Young Minds

On publishing in a journal peer-reviewed by kids, and suggesting it as a first journal new PhD students should be asked to write for

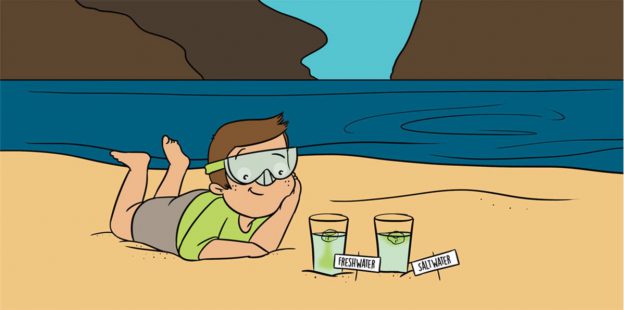
You guys might remember my favourite experiment with the ice cubes melting in freshwater and saltwater. This experiment can be used for almost any teaching purpose (Introduction to experimenting? Check! Thermohaline circulation? Check! Lab safety? Check! Scientific process? Check! And the list goes on and on…) and for any audience (necessary observation skills start a taking the time it takes ice cubes to melt in the easiest case, to observing the finest details of the melt). In short, I love this experiment!

A different format of science communication

After using it in all kinds of settings for years, I wrote up the experiment for Frontiers Young Minds, a journal which is written for, and peer-reviewed by, kids (link to my article). I love the idea of not only tailoring your science communication to the audience of young readers, but making sure that it actually works well for them by including them in the process. Additionally, the peer-reviewers get a great insight into how a publishing process (and thus an important step in science) works, too.

The whole peer-review and publication process was a really positive experience. Speciality chief editor for “Earth and its resources“, Mark Brandon, and the whole team were super responsive and helpful all the way from initial article idea until publication.

Writing for and being peer-reviewed by young readers

Having my writing peer-reviewed by the “young readers” was super interesting. For example, on one of my articles, they commented on how, as kids growing up in the US, they were not familiar with metric units and could I please give them units they could actually relate to? This is an issue I should probably have been aware of, but I totally wasn’t.

Another example from the other article: a different young reader commented that English was their second language, and could I replace difficult words like “puddle” and “dye” with easier words. As a non-native English speaker myself, this feedback was super helpful — I thought that I was writing in an easy language already, but clearly my perception of “easy language” has drifted into specialized vocabulary — super valuable feedback!

And then both teams reviewing both my articles had a science mentor helping them, and also commenting him/herself on the article and how the review process with the kids went and suggesting further edits, that would make it easier for kids to work with the article.
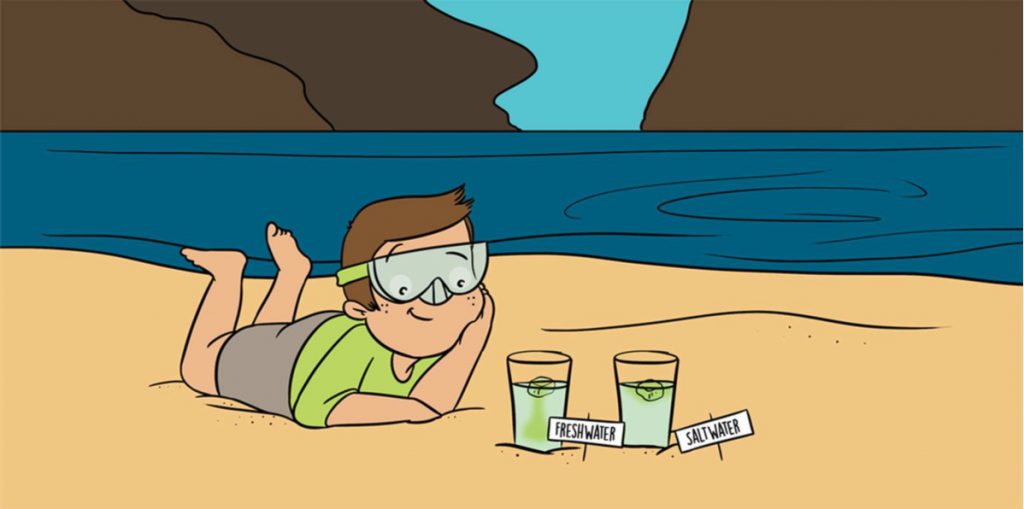
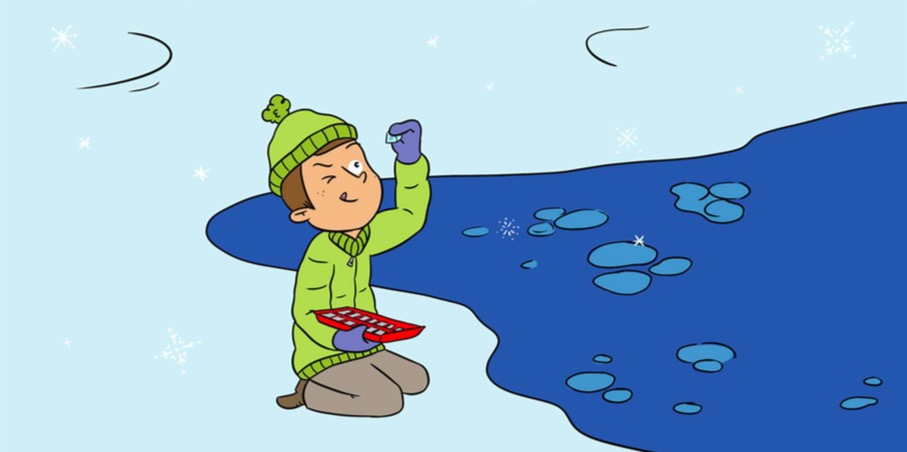
Illustration by Jessie Miller for Frontiers Young Minds, used with permission

And then, of course, there are Jessie Miller‘s super cute illustrations! After seeing what she did for my first article, I couldn’t wait to see what would happen for this one, and I am super excited about another illustration that makes me feel completely understood and seen.

Writing your first ever article for FYM?

So all in all, publishing with FYM is something I would totally recommend to anyone. And I would even go so far as to recommend it as the first article that PhD students should be asked to write. Why?

  • Articles for FYM can be written on “core concepts”, which can mean basically writing a literature review on the topic you are about to write a PhD thesis on, and one that is broken down so far that you will really have to have understood things. There is this saying attributed to basically all science educators in one form or another, that only if you can explain your topic to a child, do you actually understand it yourself. So explaining to children is actually a super helpful step in the process of getting into a topic yourself.
  • Writing something that is designed to be understood by a wide variety of audiences is really useful for another reason, too: to give to all your family and friends as an easy insight into what it is you are spending all your time on.
  • The feedback you get on how you talk about your topic will be helpful for all future communications about it; Practicing scicomm as early as possible is always a good idea :-)
  • Having a really positive publishing experience is a great start into a PhD, because surely other kinds of experiences will follow sooner or later. The submission through the uploads and forms and stuff works the same way for FYM as for all other journals (including the “oh crap, they want the images in a different format than I prepared them in! Let’s google how to convert them”, “Really? They need an abstract? Maybe I should have read the instructions more carefully…”, or “They are really counting the words on the submission! So now I need to cut an extra paragraph that I thought I could get away with…” surprises that are typical for the “Let me quickly submit this article and go for lunch! Oh wait, half a day later and I am still nowhere near the end of the process” experience that is so common when submitting articles. At the same time, the stakes feel a little lower for this kind of article, since as an early PhD student, you are writing about other people’s work, not yet your own (at least when writing a core concept article, there is also the “cutting edge research” article type, in which you are writing about some newly published article of yours). And then, as I described above, the whole process is really positive and friendly and supportive throughout, even though all the steps are the same as for any other journal (Waiting for the editor to send the article out to the reviewers. Seeing that stuff is waiting on a desk somewhere and compulsively checking every day whether it has been moved on and the email notification just didn’t make it through. Replying to a reviewer. That kind of things). So I believe that it’s a really good way to be introduced to the publishing process without being pushed into super cold water right away, building up confidence for later submissions of your own work.
  • FYM announces new articles on their social media (with lovely tweets!), which have a fairly wide reach, well above what most of us have, and that’s a great opportunity to be seen as authority on a topic by a large number of potentially interested people. Great opportunity to expand your network!
  • And, as I said before, I just love the illustrations and I would imagine that having something like this when you start working on a new topic would be super exciting and motivating :-)

What do you think? Will you suggest writing a FYM article to all your new PhD students now?

P.S.: Here are the links to my FYM articles again: “How does ice form in the sea?” and “When Water Swims in Water, Will it Float, or Will it Sink? Or: What Drives Currents in the Ocean?“.
My kids’ article on the formation of sea ice is out!

I recently published an article about how sea ice forms which, I think, turned out pretty well. But the coolest thing is the illustration that Jessie Miller did to go along with the article:

Illustration by Jessie Miller for my article published in Frontiers Young Minds, used with permission

Seeing this illustration (and, of course, having the article published) was a super nice surprise during the busy run-up to my big event, which is actually happening right now (good thing I know how to schedule blog posts ;-)). The illustration makes me suuuuper happy because to me it really captures what the article is about and, more importantly, what my goal in writing the article was. And I feel seen and understood in a profound way, and reminded of who I am. Never underestimate the power of #scicart! Thank you, Jessie!

Reference:

Glessmer, M. S. (2019) How Does Ice Form in the Sea? Front. Young Minds 7:79. doi: 10.3389/frym.2019.00079

Ostfriesentee — Double diffusion in a tea cup

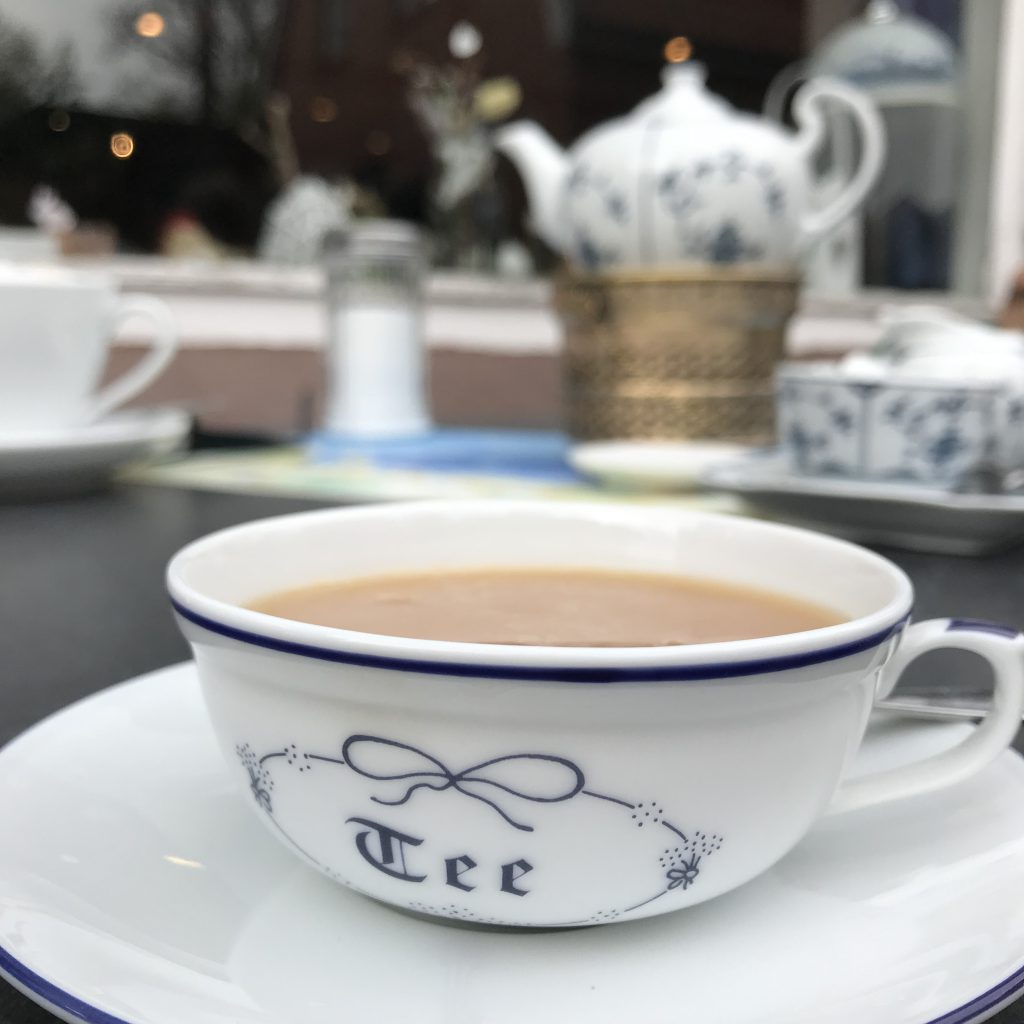
Showing double-diffusive mixing in tank experiments is a pain if you try to do it the proper way with carefully measured temperatures and salinities. It is, however, super simple, if you go for the quick and dirty route: Cream in tea! Even easier than the “forget the salt, just add food dye” salt fingering experiment I’ve been recommending until now.

The result of double-diffusive mixing of cream in tea is probably familiar to most (see above), but have you ever looked closely at the process?

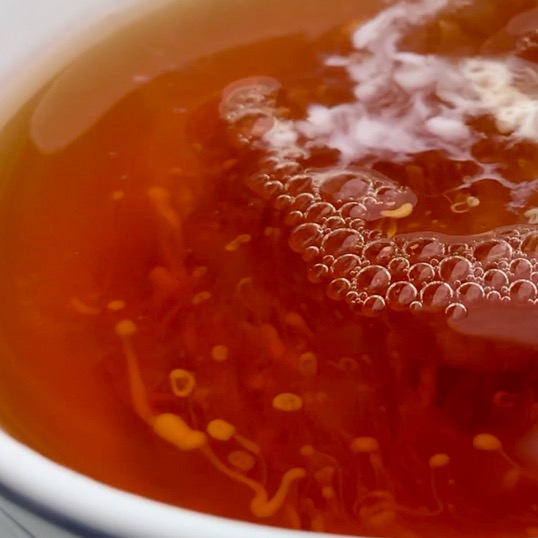
Below, we pour cold cream into hot tea. The cream initially sinks to the bottom of the tea cup, but then quickly heats up and fingers start raising to the surface of the cup. They are visible as fingers because while the heat has quickly diffused into the cream, the actual mixing of substances takes longer and the opaque milk stays visible in the clear tea. Only when the fingers have risen to the surface the substances begin to mix due to shear and diffusion of substances. Hence the name “double diffusion”: First diffusion of heat, then of particles afterwards.

Pretty cool, isn’t it?

If you happened to stir the tea before pouring the cream, it looks even more awesome. Home-made galaxies :-)

And isn’t it fascinating how the blob of cream in the middle of the cup stays intact for quite some time?

So now you know the only reason why I am drinking black tea: So I can do salt fingering experiments with it! :-)

#kitchenoceanography or #bathtubphysics? Playing with cool phenomena, water and dye

Some bathtub magic today!

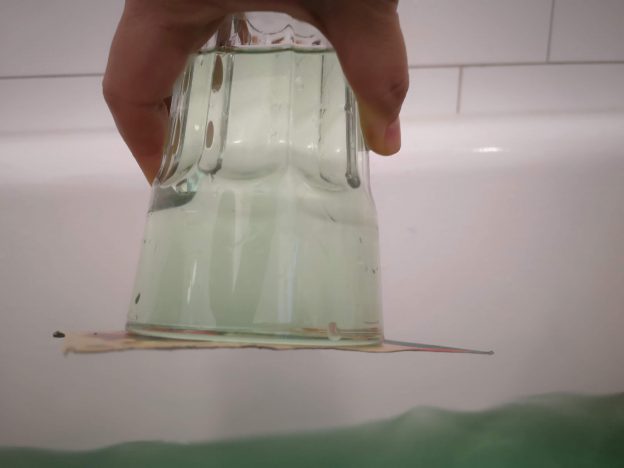
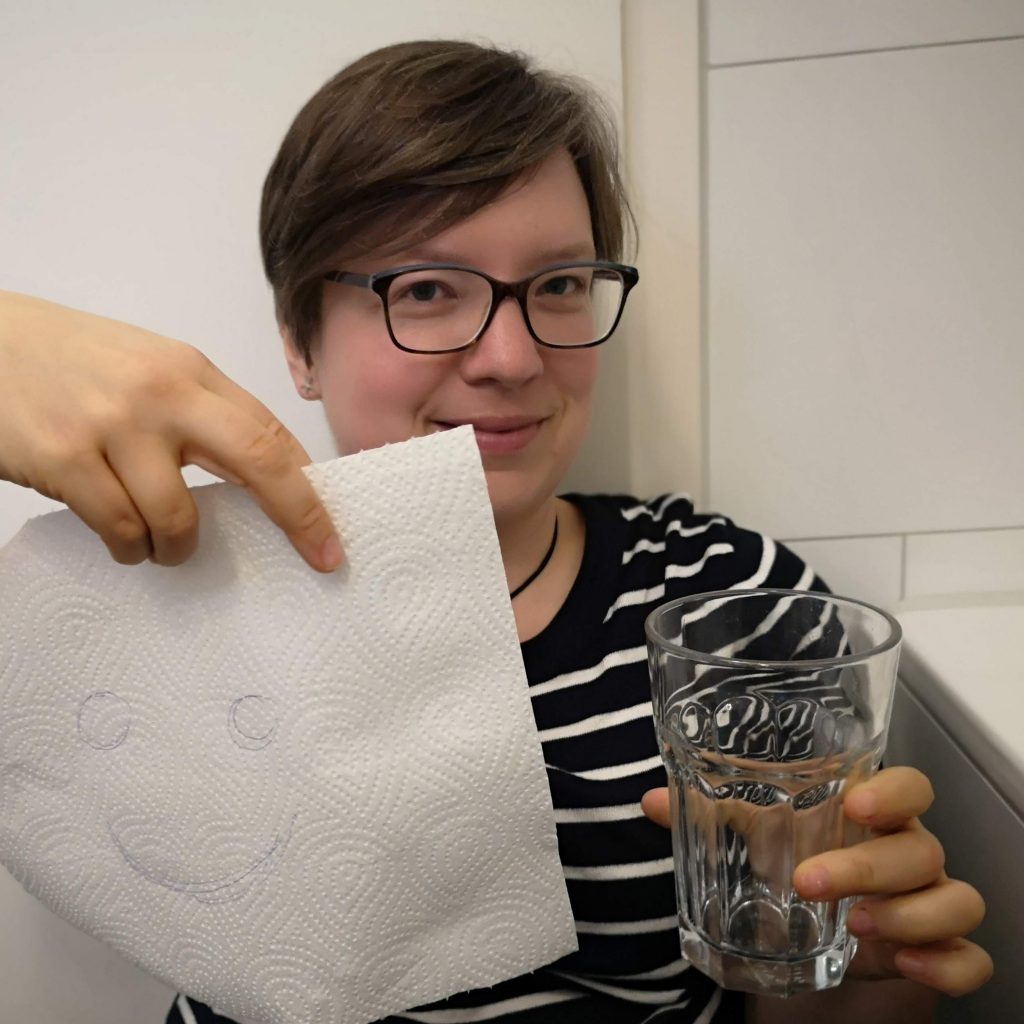
Let’s take a paper kitchen towel and an empty glass.

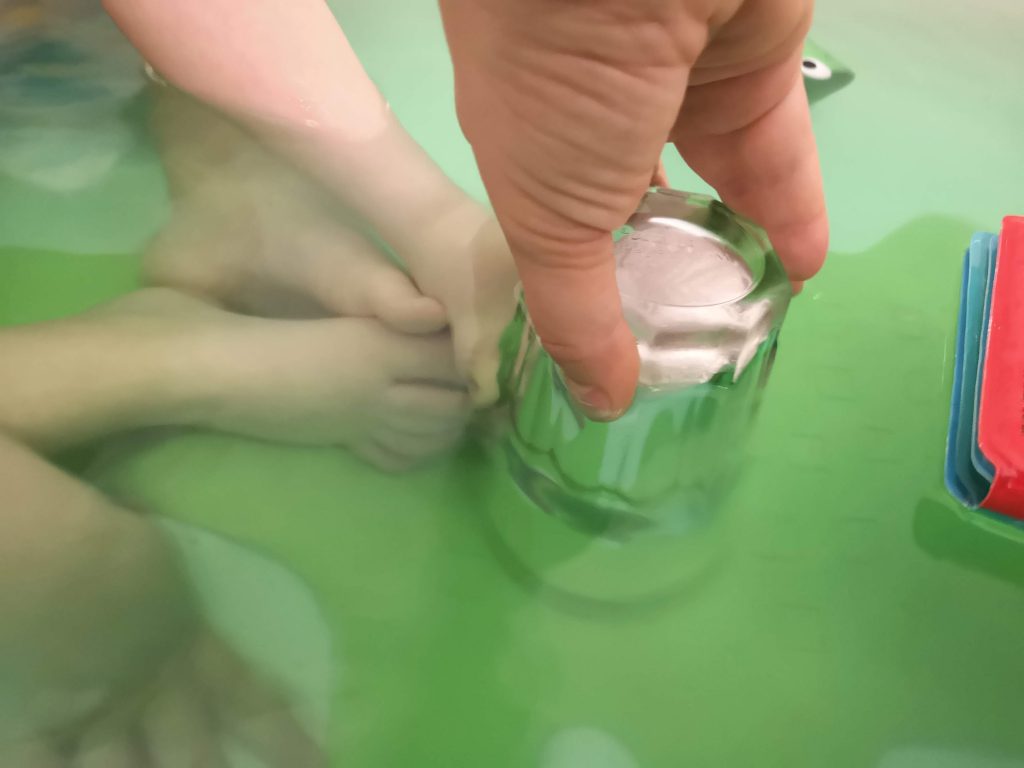
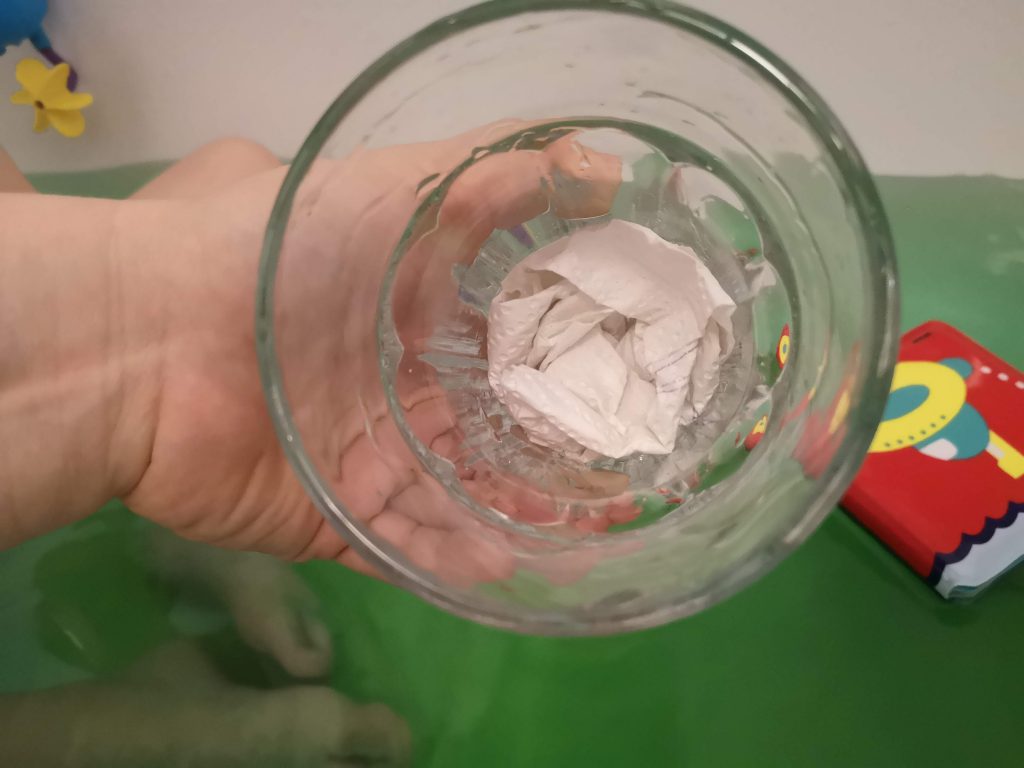
Squish the paper towel into the empty glass, submerge it upside down into the water aaand…

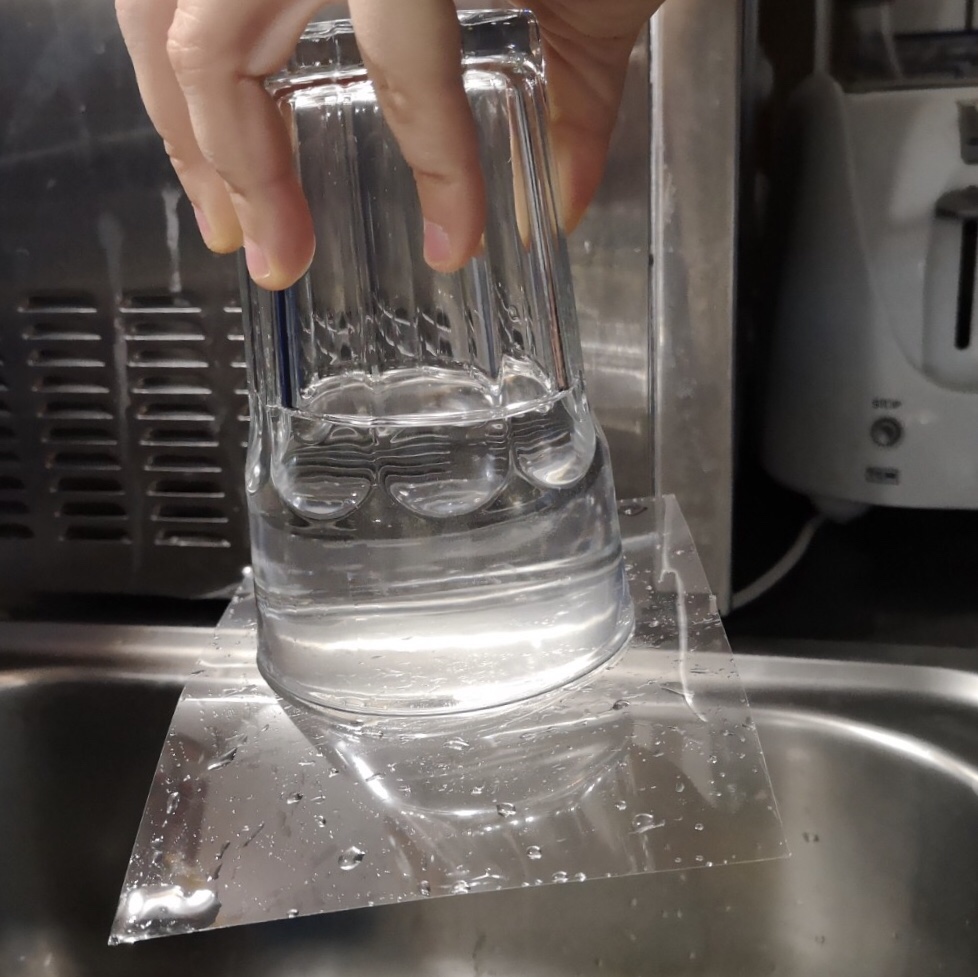
…when you take it up again, the paper towel is still completely dry! Surprise!

And then my all time favourite, of course:

#KitchenOceanography with Judith and her hot chocolate

Let’s talk about zonal jets! They keep popping into my life all the time right now, and that has got to mean something, right?

Zonal jets, for all that are not quite familiar with the term, are fast-flowing currents (i.e. “jets”) that move along lines of constant latitude (therefore “zonal”). The occur in the ocean (e.g. the Antarctic Circumpolar Current, or the Gulf Stream after separating from the coast) and in the atmosphere (e.g. the subtropical jets stream). And you might be familiar of pictures of Saturn with all the belts around it? Yep, zonal jets!

In December I went to the Science and Industry Museum in Manchester (a.ma.zing place!) and they had one exhibit there that shows zonal jets: A sphere sitting inside a transparent sphere with some sort of fluid between the two. You can put the outer sphere in rotation and, through friction, this puts the fluid in motion. But instead of all the fluid moving with the outer sphere, there is of course also friction with the inner sphere, so a shear flow develops, which breaks up into those zonal jets (which then break up into all the eddies when the outer sphere slows down again).

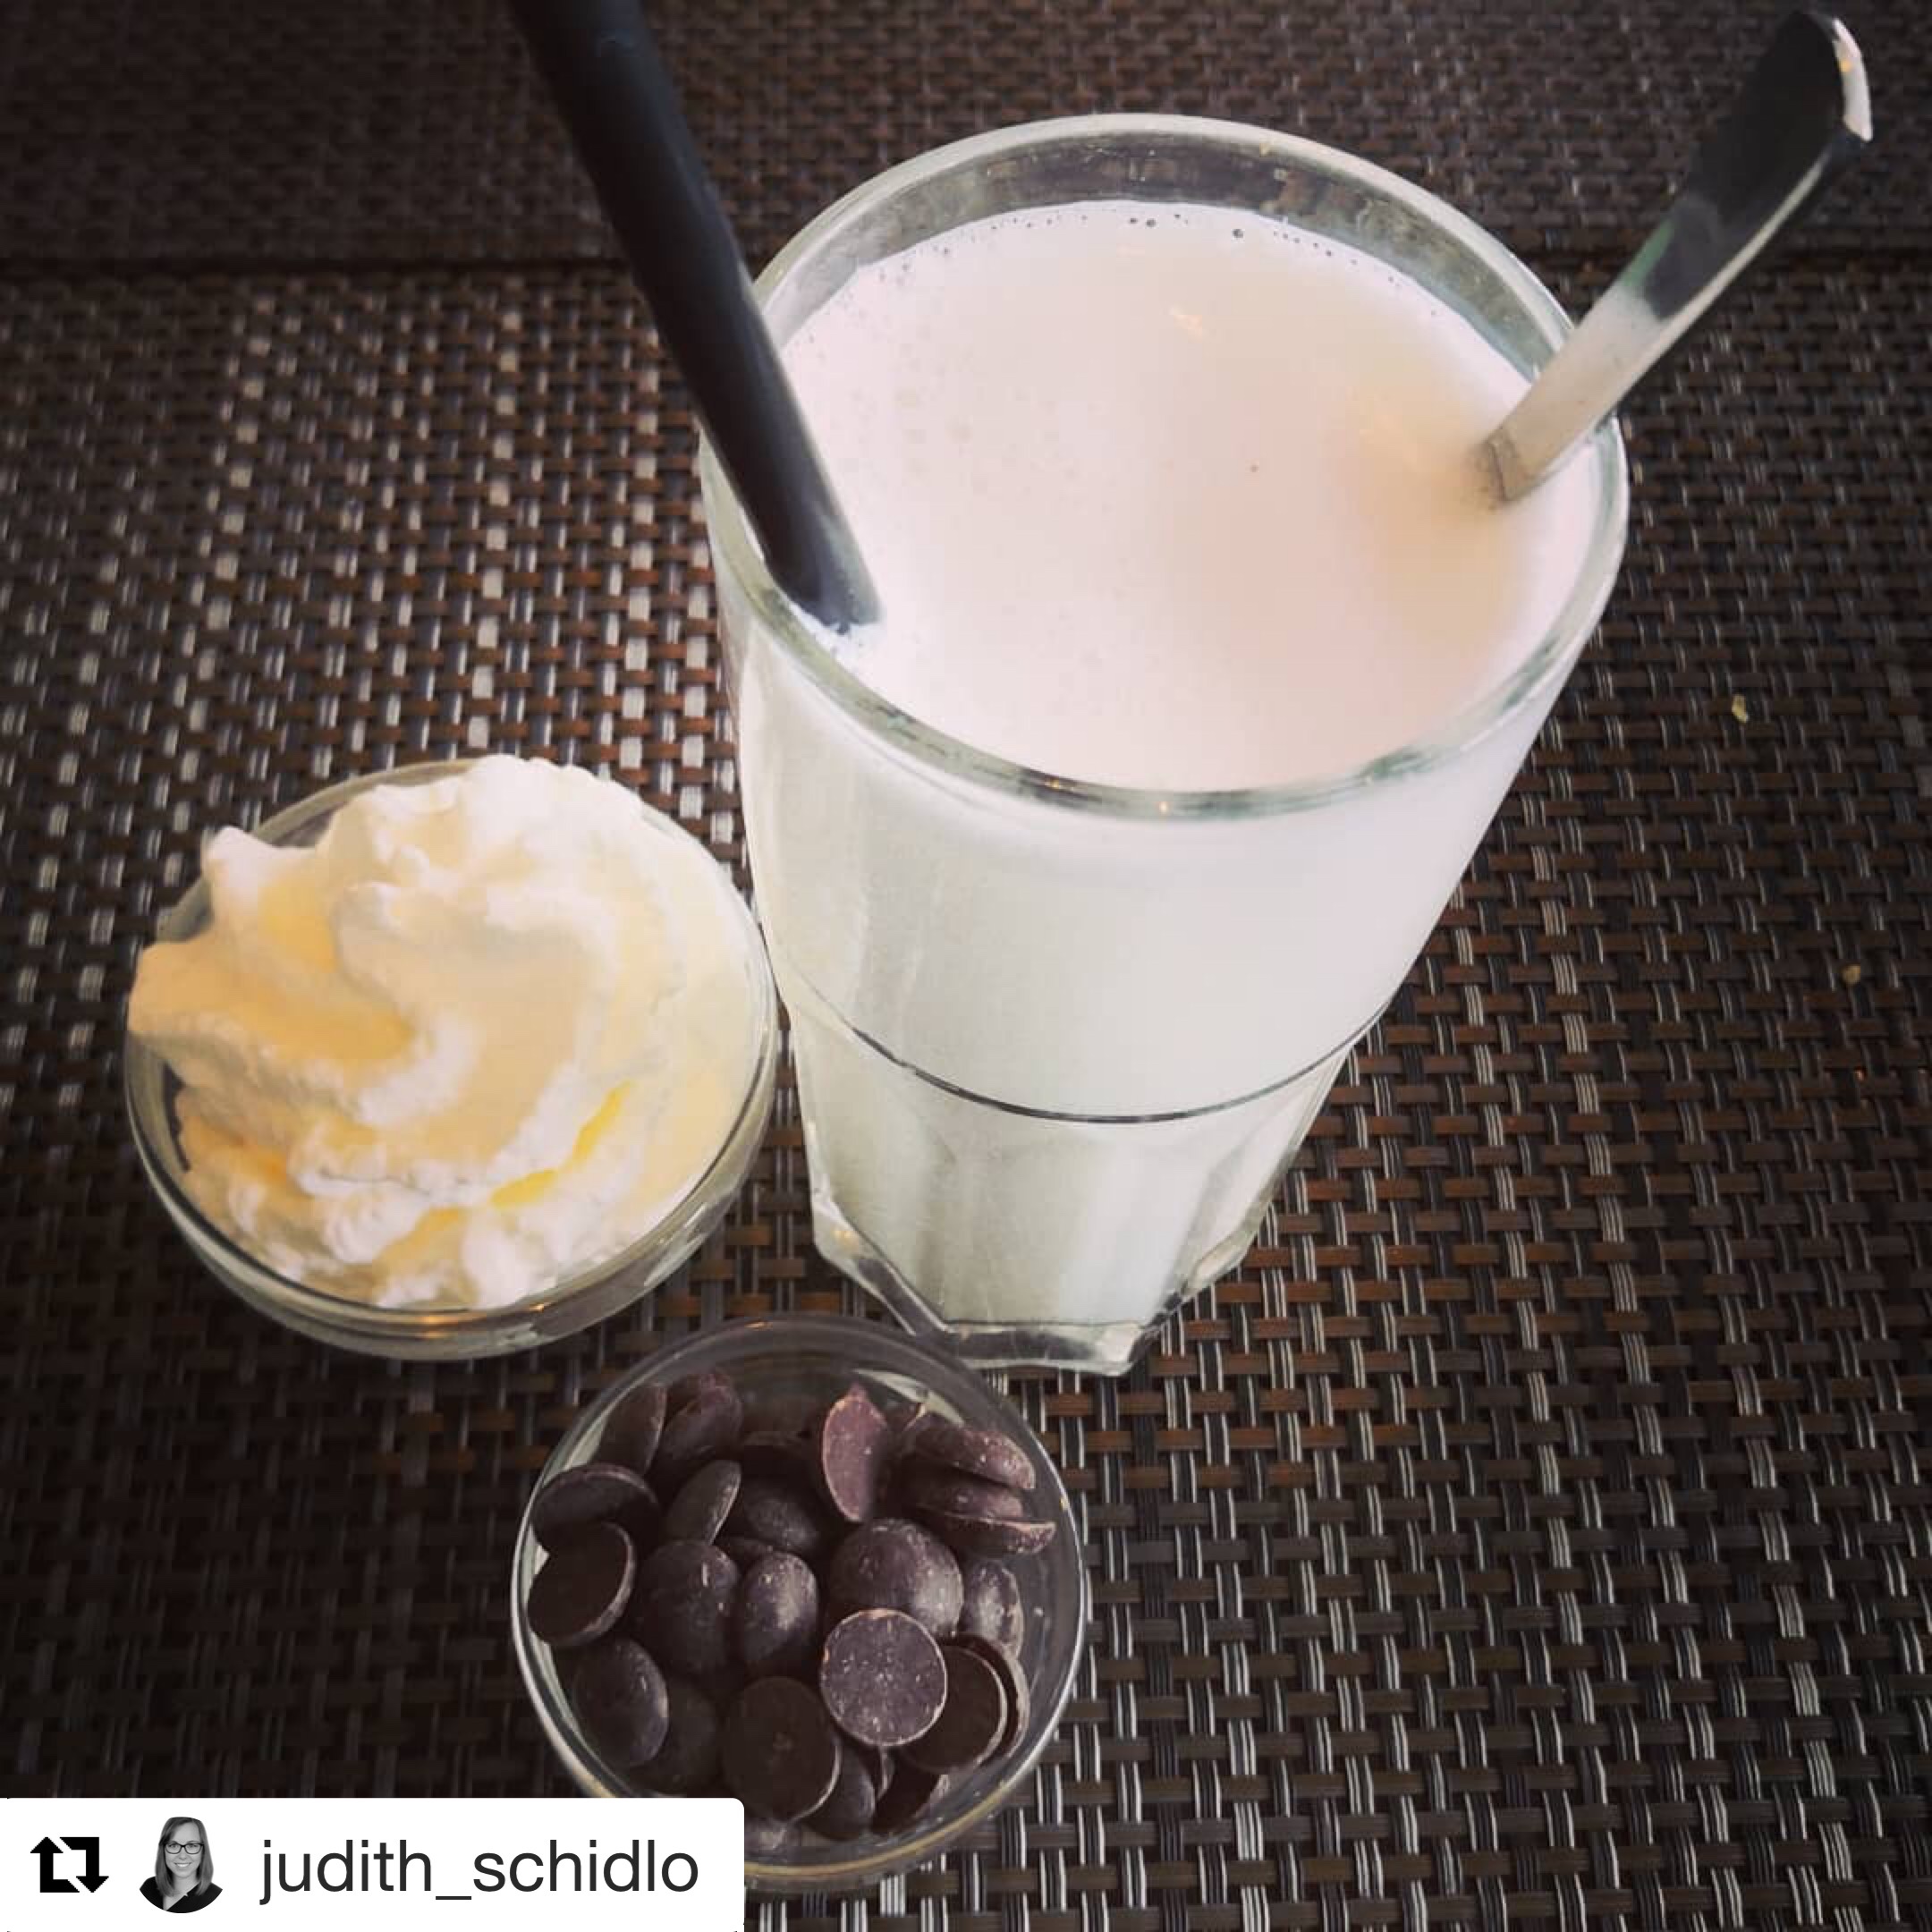
Please excuse the crappy video. You see the largest part of the upper half of the sphere, but I was filming with one hand and turning the thing with the other… And I didn’t plan on writing anything about it, but then this happened: My friend Judith (check out her Instagram!) and I went on a mini cruise (all the way across Kiel canal!) in freeeeezing temperatures, and therefore obviously ended up with this:

Picture by Judith Schidlo (check out her Instagram!)

And this is where kitchen oceanography comes in. What do you think happens when you drop in that yummy chocolate and start stirring? This!

Do you see how the fluid doesn’t move solid body-ish, but how there are jets and then more stagnant areas? Doesn’t this make you want to have a hot chocolate, and Right Now? For scientific purposes, of course…

Guest post: Alice shows magic tricks and explains refraction of light in water

My friend Alice Langhans runs a super cool science communication Instagram (@edu_al_ice), where she posts about her experiences as PhD student in physics education research. And there is a lot more going on on that Instagram than just pretty (but oh so pretty!) pictures. I make sure to read all her posts, because there are always interesting, motivating, inspiring thoughts hidden behind that “read more” button. And now she’s even started a new series of physics experiments on #experimentalfriday, and I am super excited that she wrote this guest post for me!

But now look at the picture below, and then read about some magic! :-)

Alice writes:

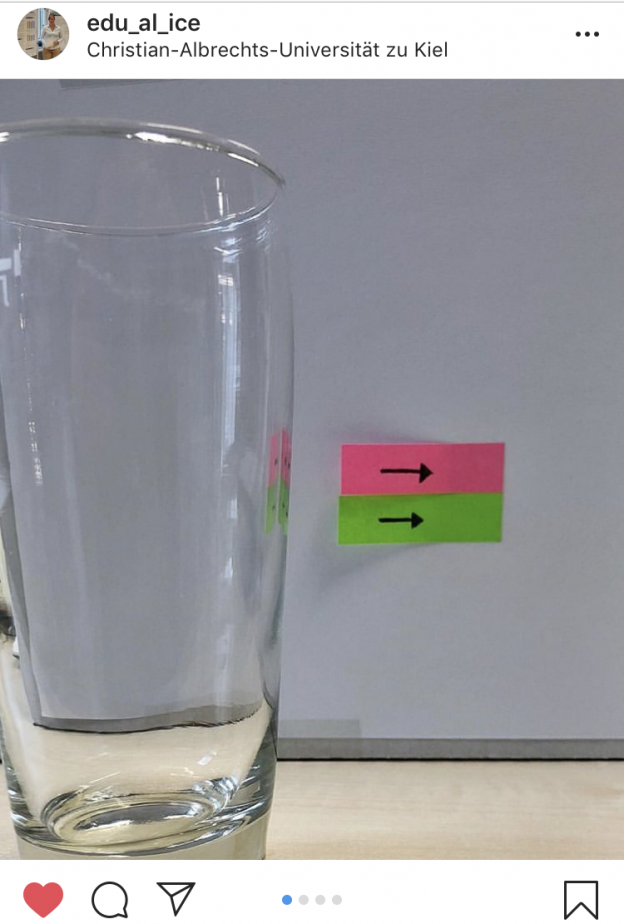
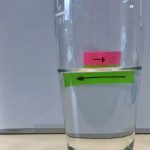
Magic! One of the arrows changes its direction and here is why:

Click for large picture. Picture by Alice Langhans.

First, the arrows are unchanged and visible through the glass.

Click for large picture. Picture by Alice Langhans.

Adding water to the glass, the image of the arrow gets bigger and appears mirrored!

Click for large picture. Picture by Alice Langhans.

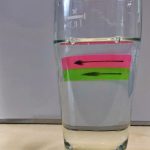
With even more water even the second arrow appears bigger and mirrored.

Click for large picture. Picture by Alice Langhans.

The waterglass I used is round and the refraction of light in water is different than in air, which makes the water glass act like a positive (converging) lens. This is why the image of the arrow appears bigger and mirrored.

Think of the arrow as many points, each of which is the source of a divergent bundle of light. The light coming from the point that is the arrowhead on the right, is refracted through the waterglass and reaches our eye to the left. The light from the left end of the arrow refracts in such a way that it now enters our eye on the right side.

Notice, how you can also see how the upper arrow appears even bigger? The glass is more wide at that height, magnifying properties of the water glass lens are therefore increased.


Isn’t that a super nice demo? I love it! Thank you for writing this guest post, Alice! :-)

P.S.: Alice has just been interviewed for a podcast. Curious what she’s talking about on there? Me too, but that’s why I follow her Instagram (@edu_al_ice) — to never miss out on all the cool stuff she’s up to! :-)

Bottom Ekman layer without a rotating table

Can you do a bottom Ekman layer demonstration without a rotating table? That’s the kind of challenge I like :-)

The way I’ve previously showed bottom Ekman layers is by spinning up a cylindrical tank on the rotating table until it reaches solid body rotation, adding dye crystals to visualise the circulation later, and then stopping the tank to create friction at the bottom (and the sides, but we are mainly interested in the bottom since we want a bottom Ekman layer) as the water continues moving but comes under the influence of friction. But what if we just invert the whole thing?

Move the “bottom”, not the water

My initial idea was to use a Lazy Susan (you know, the kind of tray on a swivel base that you can use for your jam and honey etc on your breakfast table, but which you shouldn’t turn too rapidly (ask me how I know)) and to have a cylindrical vase sit on it, which will then be put in rotation and will rotate around and under the (initially still stagnant) water. The friction with the moving vase will then lead to a bottom-intensified circulation.

Problem here: While I have a Lazy Susan at home as well as a vase that would work as “tank”, I am currently in Bergen where I don’t have access to my own equipment. Instead, though, I have access to a rotating table in GFI’s basement which I used to simulate my Lazy Susan idea (Cool, eh? Simulating a non-rotating-table situation on a rotating table ;-)).

That worked quite well, didn’t it?

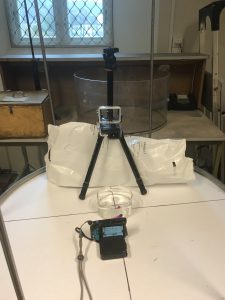
This, btw, is what the setup looked like:

So how would that work as kitchen oceanography without an actual rotating table?

The physics themselves obviously work in this setup. However, they will be really difficult to observe for several reasons:

  • Scales. A small dish (like the one I used; for comparison see the usual tank in the background in the picture above) makes it a lot more difficult to see what’s going on, and in my case the circulation is quickly influenced by the sides of the dish (which is obviously not what we wanted).
  • Rotation. It’s not difficult to set a Lazy Susan into rotation, but I imagine it will be quite difficult to keep it at a constant rotation for any length of time. But you will only see the nice spiral for as long as you keep the rotation constant. As soon as it changes, so will your currents and that will be clearly visible in the dye (which is why you put it in in the first place).
  • Documentation. If you want to document your experiment, if want to have your cameras co-rotating with the Lazy Susan, it’s going to be quite difficult to install them (but maybe you would just want one that sits stationary above the center of rotation? That would obviously be easy to do with a tripod)

So all in all: it was a nice idea, but either I haven’t thought it through well enough, or it is a whole lot easier to do with a rotating table. I would imagine that it’s quite hard to observe when you don’t know very well what you are looking for, so it is unfortunately not useful as a demonstration to introduce people to the topic. What do you think? Any suggestions on how to improve this and make it work at home?

Update on freezing ice cubes and the temperature distribution in our freezer

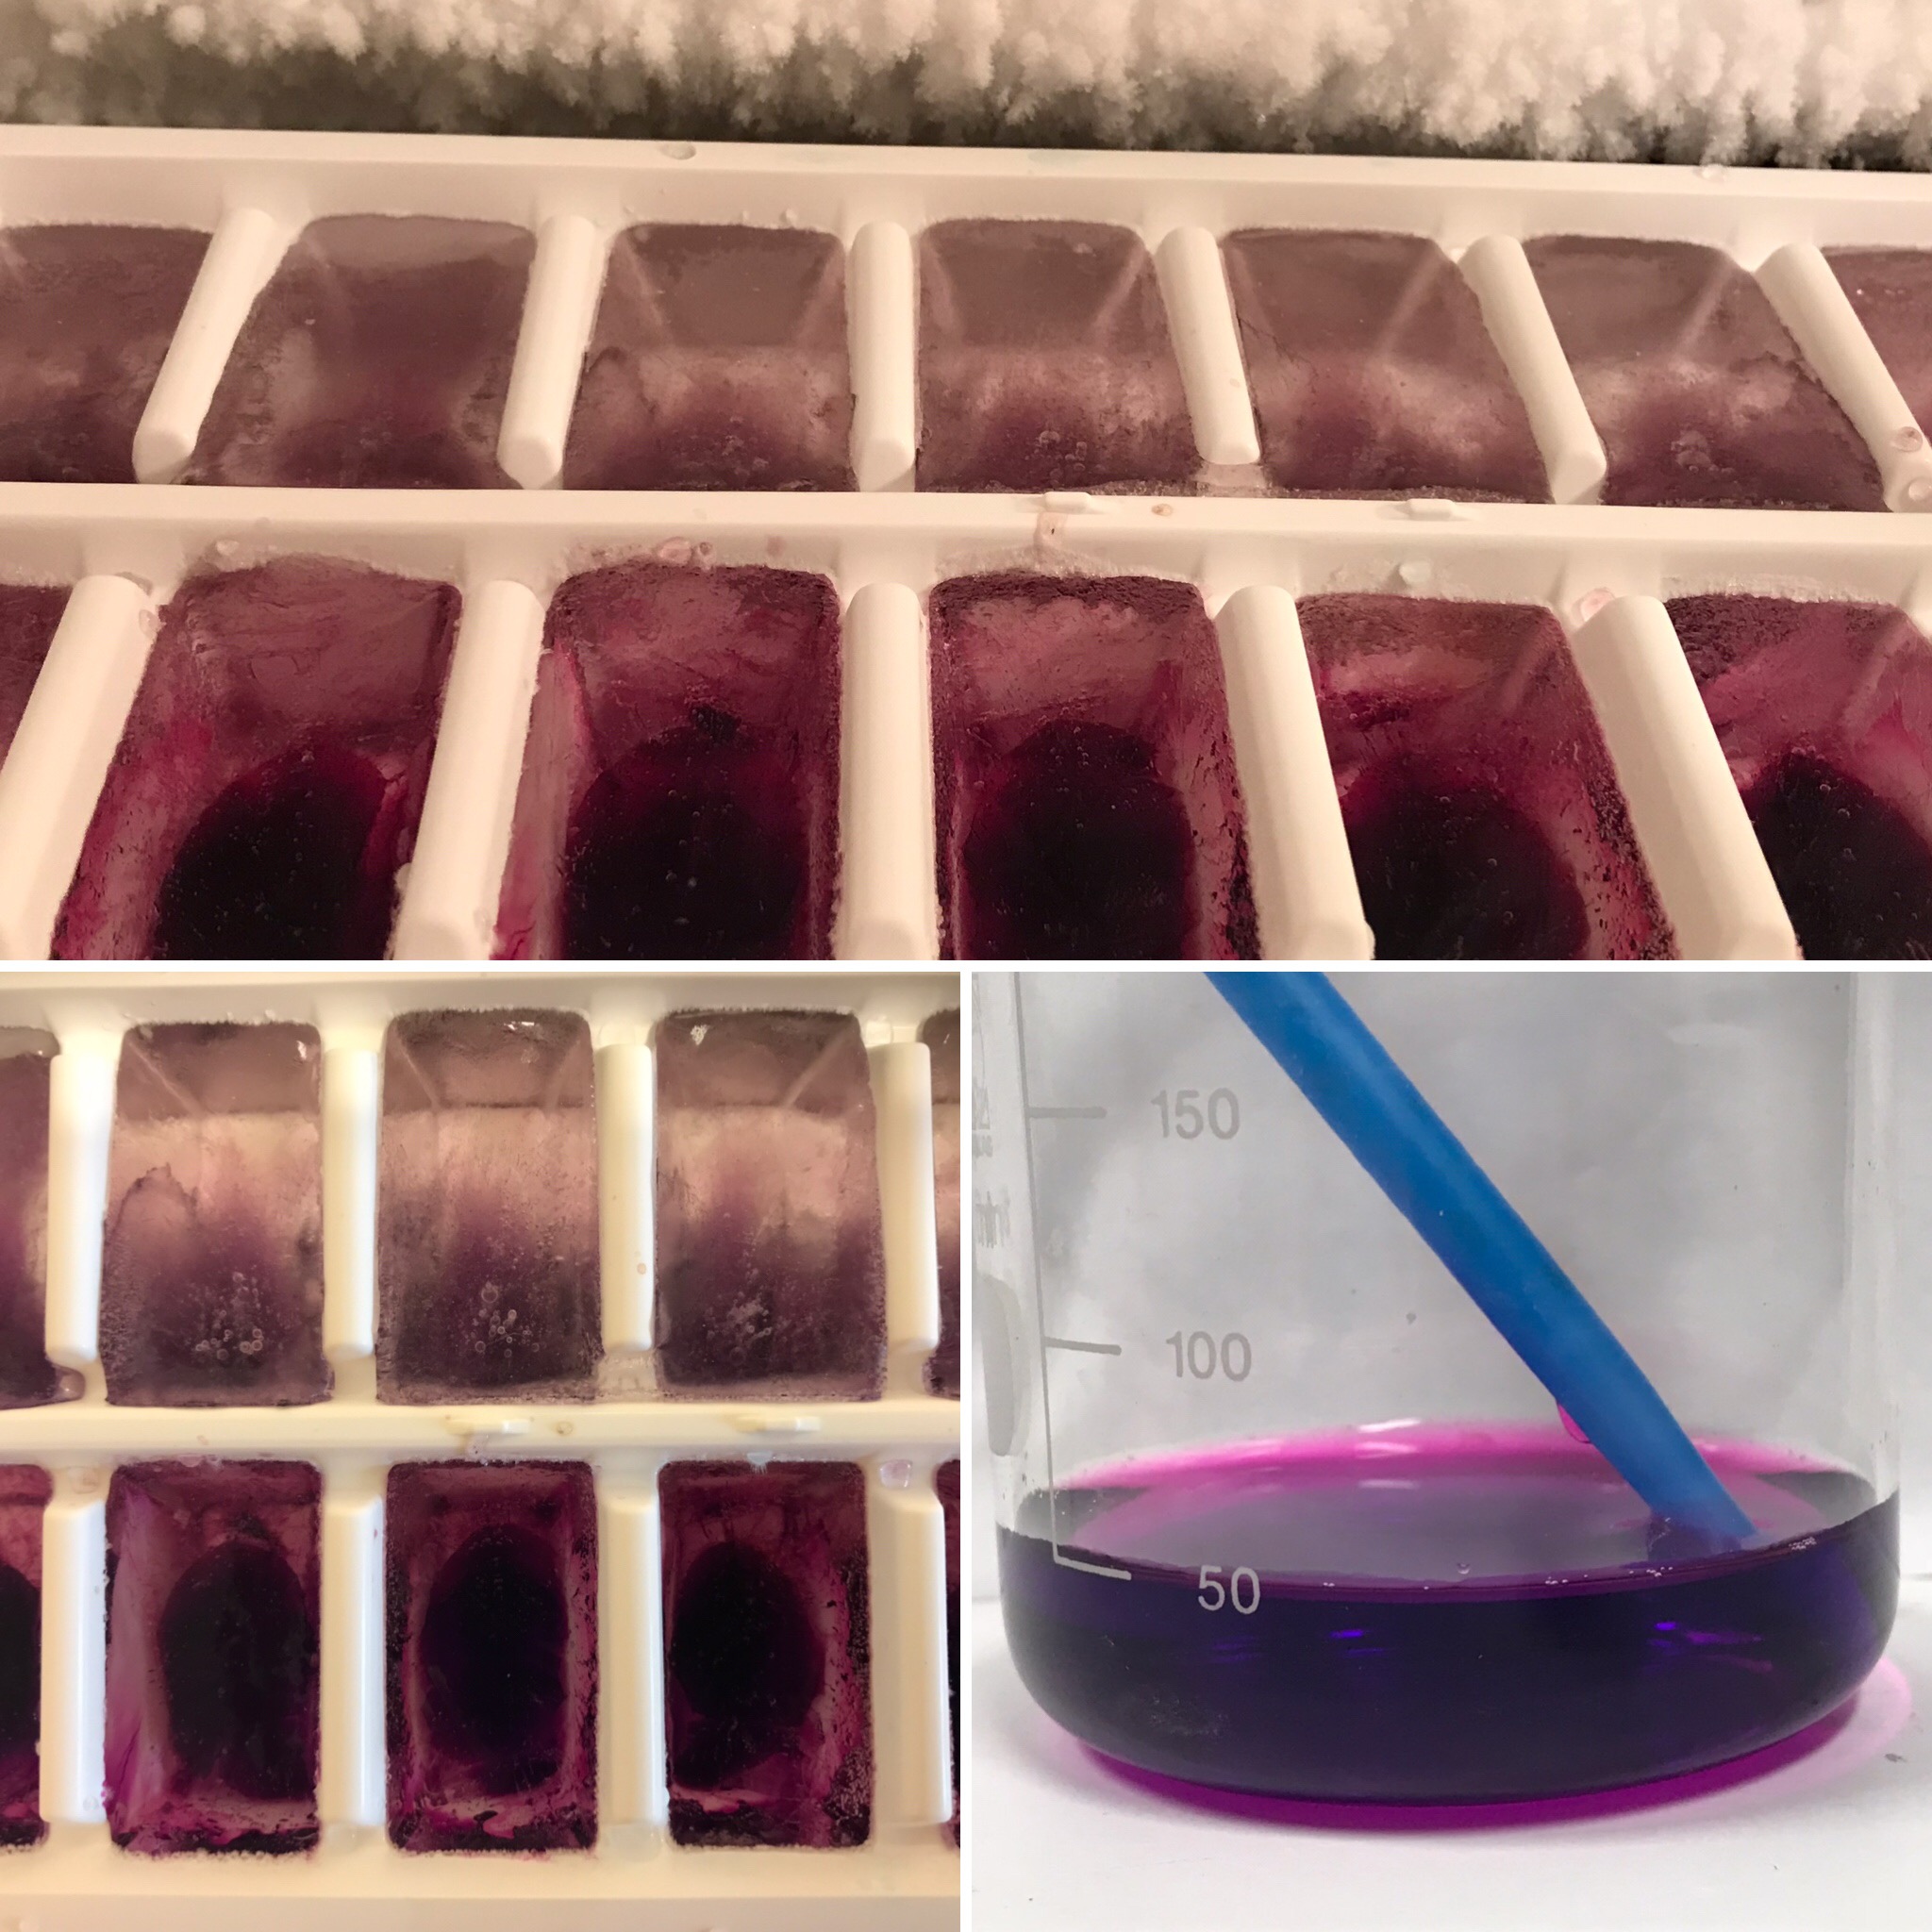
After writing the blog post on sea ice formation, brine release and what ice cubes can tell you about your freezer earlier today, I prepared some more ice cubes (because you can never have too many ice cubes for kitchen oceanography!), and then happened to look into the freezer a couple of hours later. And this is what I found:

Isn’t that beautiful?

Top pic shows the ice cubes “in situ”, clearly showing the cold back wall of the freezer where they were sitting.

Bottom left pic shows a top view of those ice cubes and it is very obvious that they have been starting to freeze from the back wall of the freezer forward: The upper row of ice cubes in the pic has formed clear ice in the direction towards that wall and has pushed the dye forward, whereas the bottom row in the pic is still not completely frozen and ice cubes seem to be freezing from all sides towards the middle and not as distinctly from back to front.

Bottom right pic: The rest of the water I prepared for the ice cubes that I left sitting on the counter for future use — still looks well mixed, no sinking of the dye to be observed!

And with these exciting updates I’ll leave you for now, so start playing with your own ice cubes! :-)