Tag Archives: tank experiment

Tank experiment: Lee waves in a fancy density (and dye) stratification

Did you seriously think we’d stop tank experiments with only 2-layer systems? Nooo!

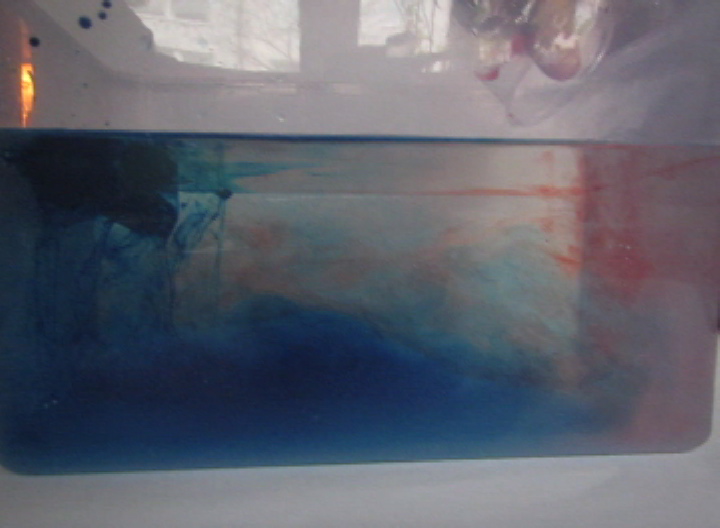
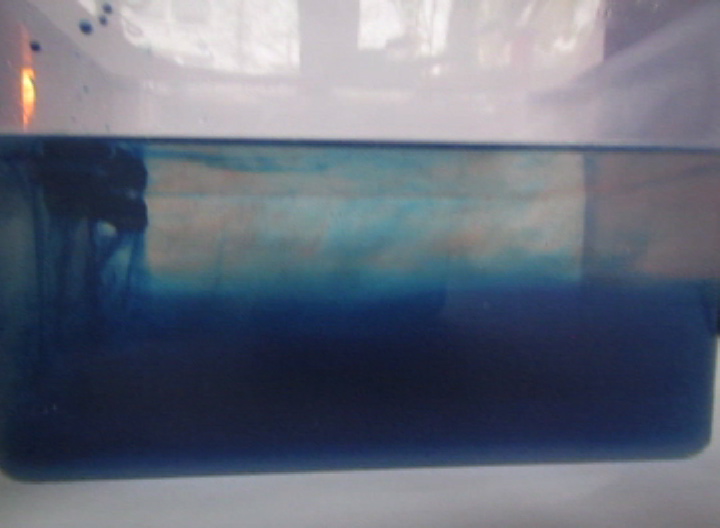
Today, the plan was to set up a continuous stratification, which I have been planning to do for many years. After fiddling with the setup all morning (do you have any idea how many fittings on all kinds of hoses are needed to get that to work well?), reality set in and we ended up doing a quasi-continuous stratification, i.e. 12 density layers dyed in 6 different colors*.

And this is what it looks like when you tow a mountain through that stratification (and try to ignore the excited audience being reflected in the tank): Still very nice lee waves and surprisingly little turbulence!

*We set up the tank to contain the same amount of salt as our 2-layer system yesterday, so instead of one big density jump from about 1000g/l to 1026g/l, this now happened in 5 smaller, more or less regular, jumps. And here is how we did it in the end: Two large reservoirs (unfortunately of different diameters), one containing freshwater, the other one filled up to the same height, containing as much salt as we had in our experiment yesterday. Now the height of the reservoirs was divided in 12 equal dzs, and for each dz that went out of the “freshwater” tank into the experimental tank, we added salt water of the same dz to the “freshwater” tank, which thus continued to increase in salinity. The water that we mixed that way went through a hose and entered the experimental tank through the bottom of the tank through a hole over which we had put the mountain (to contain mixing to a small volume and also so we didn’t have to watch water shooting out of that hole in our nice stratification). So as the water we added became increasingly dense, it nicely layered itself underneath the other water in the tank. And we just had to add more and more dye for the color gradient. Easy peasy :-)

The one where it would help to understand the theory better (but still: awesome tank experiment!)

The main reason why we went to all the trouble of setting up a quasi-continuous stratification to pull our mountain through instead of sticking to the 2 layer system we used before was that we were expecting to see a tilt of the axis of the propagating phase. We did some calculations of the Brunt-Väisälä frequency, that needs to be larger than the product of the length of the obstacle and the speed the obstacle is towed with (and it was, by almost two orders of magnitude!), but happy with that result, we didn’t bother to think through all the theory.

And what happened was what always happens when you just take an equation and stick the numbers in and then go with that: Unfortunately, you realize you should have thought it through more carefully.

Luckily, Thomas chose exactly that time to come pick me up for a coffee (which never happened because he got sucked into all the tank experiment excitement going on), and he suggested that having one mountain might not be enough and that we should go for three sines in a row.

Getting a new mountain underneath an existing stratification is not easy, so we decided to go for the inverse problem and just tow something on the surface rather than at the bottom. And just to be safe we went with almost four wavelengths… And look at what happens!

We are actually not quite sure if the tilting we observed was due to a slightly wobbly pulling of the — let’s use the technical term and go for “thingy”? — or because of us getting the experiment right this time, but in any case it does look really cool, doesn’t it? And I’ll think about the theory some more before doing this with students… ;-)

Dead water — the fancy experiment including Nansen himself

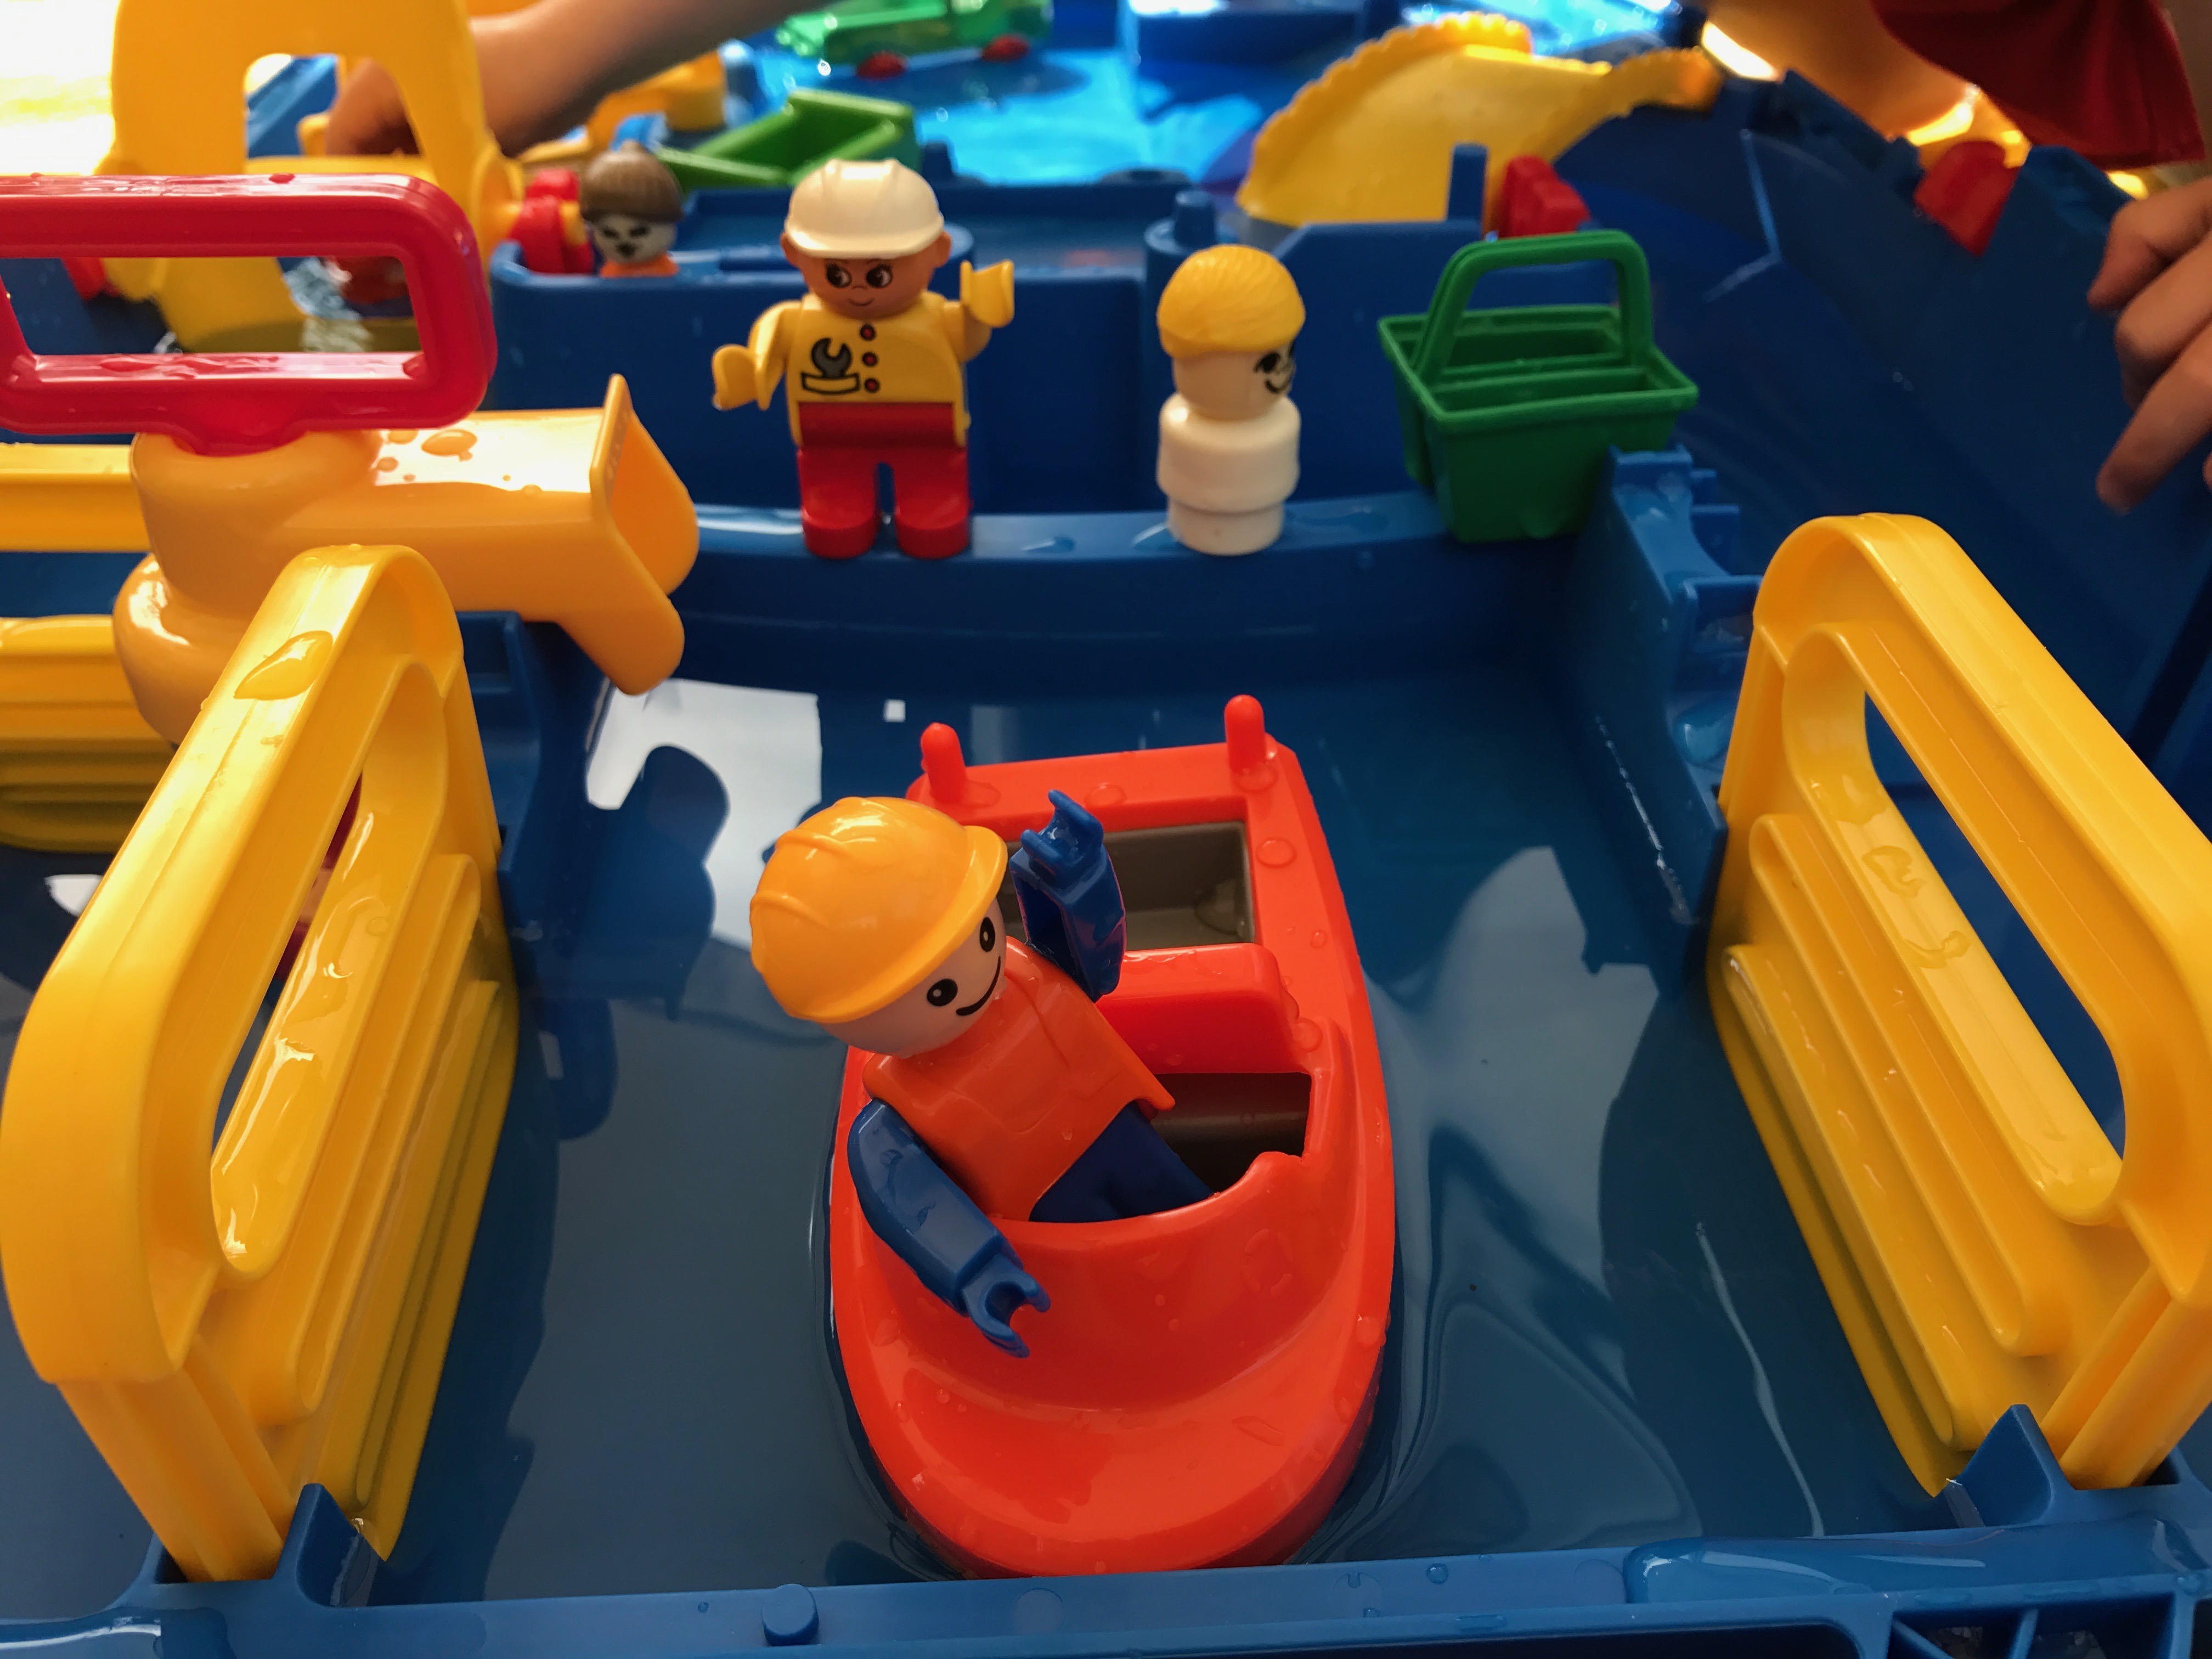
Now that we do have a really awesome 12-layer 6-color stratification, we obviously had to do the dead water experiment again. This time we chose to include a not-too-happy-looking Nansen on the ship, too!

I love this even more than the one we did yesterday!

“Dead water” or: ship-generated internal waves

And here is another experiment that can be done with the same stratification as the lee waves: Towing a ship to explore the phenomenon of “dead water”!

Dead water is well known for anyone sailing on strong stratifications, i.e. in regions where there is a shallow fresh or brackish layer on top of a much saltier layer, e.g. the Baltic Sea of some fjords. It has been described as early as 1893 by Fridtjof Nansen, who wrote, sailing in the Arctic: “When caught in dead water Fram appeared to be held back, as if by some mysterious force, and she did not always answer the helm. In calm weather, with a light cargo, Fram was capable of 6 to 7 knots. When in dead water she was unable to make 1.5 knots. We made loops in our course, turned sometimes right around, tried all sorts of antics to get clear of it, but to very little purpose.” (cited in Walker,  J.M.; “Farthest North, Dead Water and the Ekman Spiral,” Weather, 46:158, 1991)

Finding the explanation for this phenomenon took a little while, but in 1904, Vilhelm Bjerknes explained that “in the case of a layer of fresh water resting on the top of salt water, a ship will not only produce the ordinary visible waves at the boundary between the water and the air, but will also generate invisible waves in the salt-water fresh-water boundary below” — a lot of the ship’s work is now going towards generating the internal waves at the interface rather than for propulsion.

It’s hard to imagine how a ship will generate waves somewhere in the water below, so we are demonstrating this in the tank:

Isn’t it fascinating to think about how far oceanography has come in only a little over a hundred years? And despite all the extremely powerful instrumentation and modelling that we have available now, how cool are even such simple demonstrations in a tank? These are the moments where I know exactly why I went to study oceanography in the first place, and why it’s still the most fascinating subject I can think of…

Lee waves in the tank

Did you guess what we needed the stratification for? Yes — we are moving mountains again! :-)

What we want to look at: How a current reacts to an obstacle in its way, especially a current in a stratification. But since it is really difficult to set up a current in a tank, let alone a stratified one, we are doing the next best thing: Moving the obstacle relative to the water rather than the other way round.

And this is what it looks like:

Et voilà: Beautiful lee waves!

And look at the paper bits floating on the surface and how they visualize convergences and divergences in the upper layer!

The three layers in the pink all have (more or less) similar densities, and are only dyed slightly differently because we had to make several batches of dyed salt water to be able to fill the tank. But look how well they show that the wave is really happening at the interface, and that the other layers are phase locked. What would happen if the stratification inside the pink layer was stronger? Just wait and see…. ;-)

Kelvin-Helmholtz instabilities

I’m back at my happy place — the teaching lab at GFI in Bergen! :-)

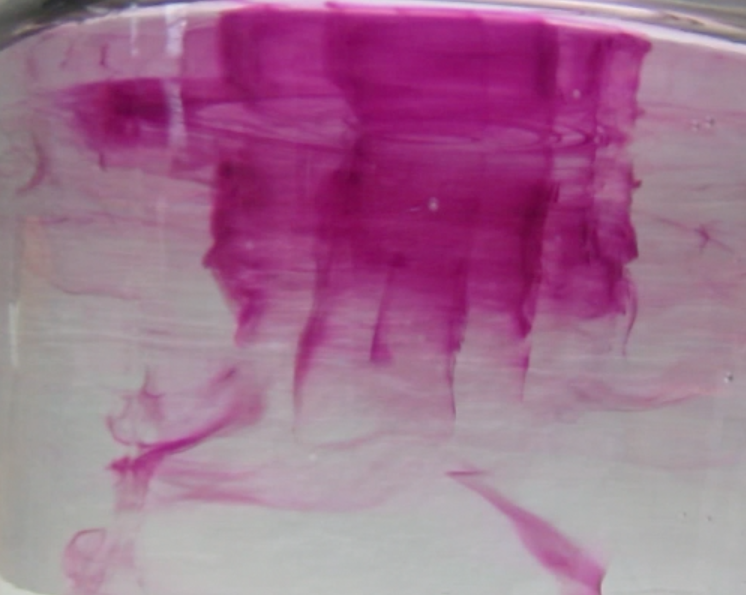
Here a quick look at what we’ve been doing today: Filling the large wave tank! With clear fresh water and then salty pink water that forms a layer below. As the pink water flows underneath the clear water, there is shear between the two layers, waves form and then they break. Beautiful Kelvin-Helmholtz shear instabilities!

Why have we filled the large tank? Just you wait and see… ;-)

Experiment: Oceanic overturning circulation (the easiest version)

“The easiest” in the title of this page is to show the contrast to a “slightly more complicated” version here.

Background

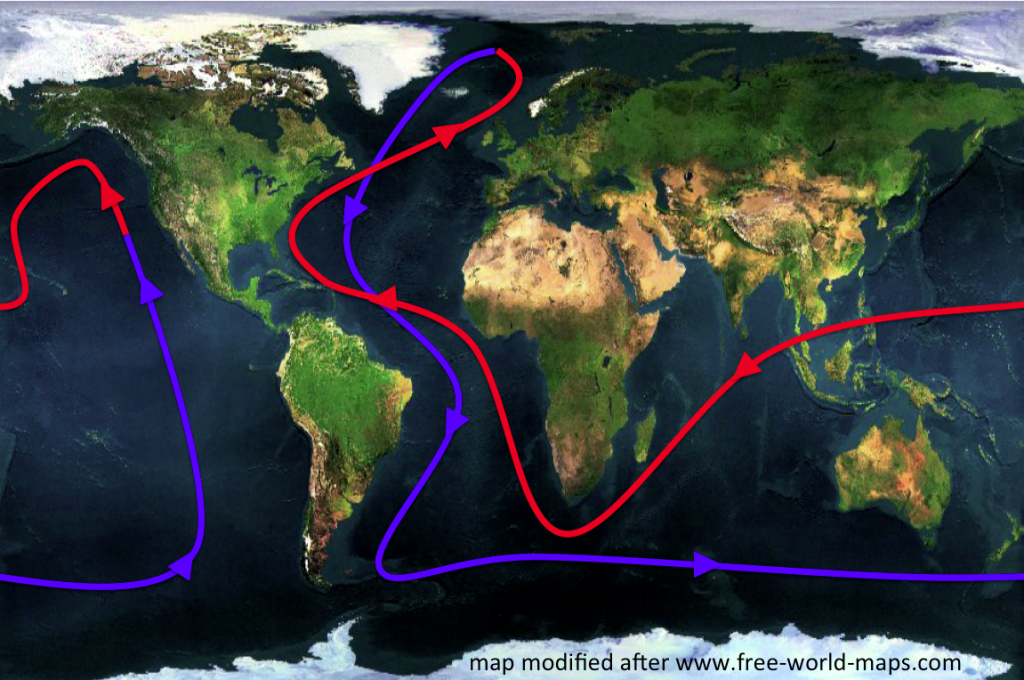
One of the first concepts people hear about in the context of ocean and climate is the “great conveyor belt”. The great conveyor belt is a very simplified concept of the global ocean circulation, which is depicted as a single current that spans the world oceans (see Figure 1 below). In this simplified view of the global circulation, water flows as a warm, global surface current towards the North Atlantic, where it cools, sinks and finally returns southward and through all the world oceans near the bottom of the ocean. Water is transported back to the surface through mixing processes and starts over its journey again as a warm surface current. While in reality some part of the conveyor belt is wind-driven and many processes come to play together, a large part of the circulation can be explained by the water sinking due to cooling at high latitudes.

Conveyor_belt

Figure 1: The great conveyor belt. My sketch on top of a map from http://www.free-world-maps.com (used with permission)

The experiment

Since the global conveyor belt is such a basic concept that we come across in many different contexts, it is very useful to have a good demonstration of what is happening in the world ocean. Plus demonstrations and experiments are always fun!

I here present a very simple experiment that can be used for many different purposes. In science outreach, for example on a fair or in a talk, to catch people’s attention and raise an interest in oceanography. In schools to do the same, or to connect the fascination of the ocean to school physics and talk about density, convection, heat. At university to do all of the above, as well as to practice writing lab reports, talk about the scientific method or the validity of simplifications in theoretical or physical models.

Materials needed

All we need to run this experiment is

  • a clear plastic container
  • lukewarm water
  • red and blue food dye
  • an ice cube tray and
  • access to a freezer.

Ideally we’d also have a thermos or some other kind of insulation to keep the ice cubes frozen until we start running the experiment. To prepare the experiment, all we need to do a half a day ahead is mix some blue food dye into the water that we put in the ice cube tray, and freeze the ice cubes.

Running the experiment

To run the experiment, we start out by filling our “tank” with lukewarm water. Let it settle for a bit. Now we decide for one end of your tank to be the “equator” end. There, we add some red food dye (see Figure 1).

overturning-ice-1

Figure 2: Tank with luke warm water. Red food dye added to the “warm” end of the tank.

Then we add the blue ice cubes to the “poleward” end of our tank (see Figure 3).

overturning-ice-2

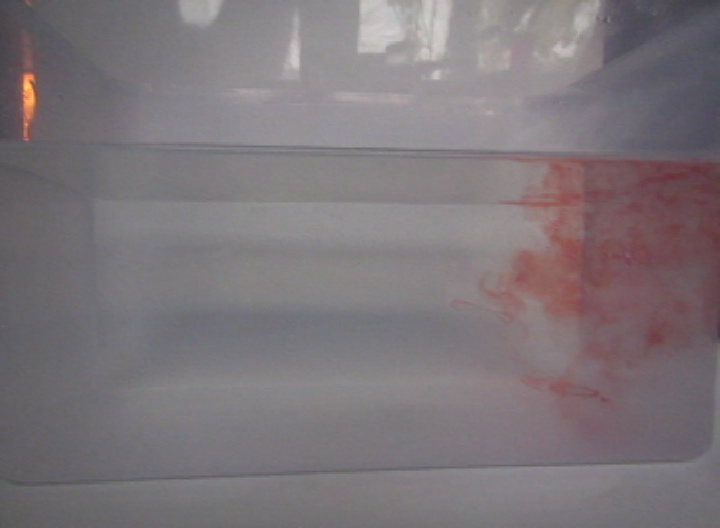
Figure 3: Blue ice cubes melting at the poleward end of the tank. The cold melt water sinks to the bottom of the tank and then spreads “equatorward”.

The cold melt water from the ice cubes is denser than the lukewarm water in the tank and therefore sinks to the bottom of the tank where it spreads “equatorward”, pushing below the warmer water. This can be seen where the red water is pushed upwards and “poleward”.

Discussion

Of course, the processes at play here are not exactly the same as in the real ocean.

For one, deep water formation is NOT due to ice cubes melting in lukewarm water. In fact, melting of sea ice will in most cases not lead to any kind of sinking of water, since the melt water is fresh and the surrounding ocean water is salty and hence denser than the melt water. Cooling in the ocean happens through many processes at the surface of the ocean, like radiation into space and evaporation.

Heating is also represented in an extremely simplified way in this experiment. Heating in the ocean occurs mainly (with the negligible exception of thermal springs in the ocean) by radiative heating from the sun, and at the surface only. We “heat” throughout the whole depth of the ocean by filling the whole tank with lukewarm water.

Also, the mixing processes that, in the real ocean, bring deepwater back to the surface are not represented here at all. Our tank will eventually fill with a layer of cold water at the bottom (See Figure 4), and the circulation will stop once all the ice has melted.

overturning-ice-3

Figure 4: Blue ice cubes melting at the poleward end of the tank. The cold melt water sinks to the bottom of the tank and then spreads “equatorward”. Slowly, the tank fills with cold water.

Why use the experiment?

Even with all the simplifications described above, this experiment is a great first step in becoming intrigued by the ocean, and towards understanding ocean circulation. Seeing the melt water sink from the ice cubes is fascinating no matter how little interest one might have in the physics that cause it. Sliding a finger up and down the side of the tank lets you experience – feel! – how the temperature changes from warm near the surface to very cold near the bottom. Actually physically feeling this is a lot more impressive than just watching the experiment or even just being shown temperature sections of the ocean. And the experiment invites you to play: What if you added little pieces of paper on the water surface, would you see them move with the flow towards the cold end of the tank? Or if you dropped a dye crystal in the middle of the tank, would the dye ribbon that forms be deformed by the currents in the tank? And what if you added twice as many ice cubes, would the currents be twice as fast?

This is pretty much the easiest experiment you can imagine. If you are afraid of what food dye might do in the hands of your participants, you don’t even need to let them handle it themselves, even when they are working in small groups with individual tanks: just go around dripping the dye in and then add the dyed ice cubes yourself. While someone might still tip over a tank and spill the water, this has yet to happen to me. Especially since, before running the experiment, you will have pointed out that they need to make sure not to bang against the tables as to not disturb the experiment. And now apart from making sure that the ice cubes are frozen when you want to run this experiment, there is nothing that can go wrong. So why not try this experiment next time you want to talk about global ocean circulation?

Watch a video of the experiment here:

What would I do differently next time?

Next time, I would pay attention to which end of my tank will represent the equatorward and poleward side of the ocean. Not that it matters much, but in most graphics of sections through the North Atlantic, the northern end will be on the right side and the southern end on the left. If the experiment is set up the other way round (as on all pictures and movies above) you will need to remember to point it out (or even mark it on the tank with a sharpie or such).

Still scared of the hassle of running experiments?

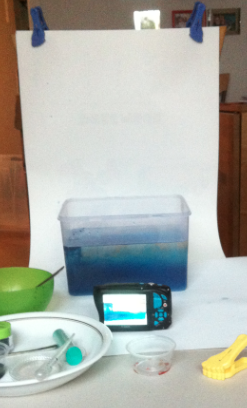
And for all of you who hesitate doing awesome experiments because it looks like you need so much equipment: No you don’t. Here is a “making of” shot from how I did this experiment on my coffee table while sitting on my couch. The background is the back of an old calendar sheet, clipped to the back of a chair. And that’s it.

Screen shot 2015-11-02 at 3.41.24 PM

The setup for my experiment.

P.S.: This text originally appeared on my website as a page. Due to upcoming restructuring of this website, I am reposting it as a blog post. This is the original version last modified on November 4th, 2015.

I might write things differently if I was writing them now, but I still like to keep my blog as archive of my thoughts.

Experiment: Eddy in a jar

Rotating experiments in your kitchen.

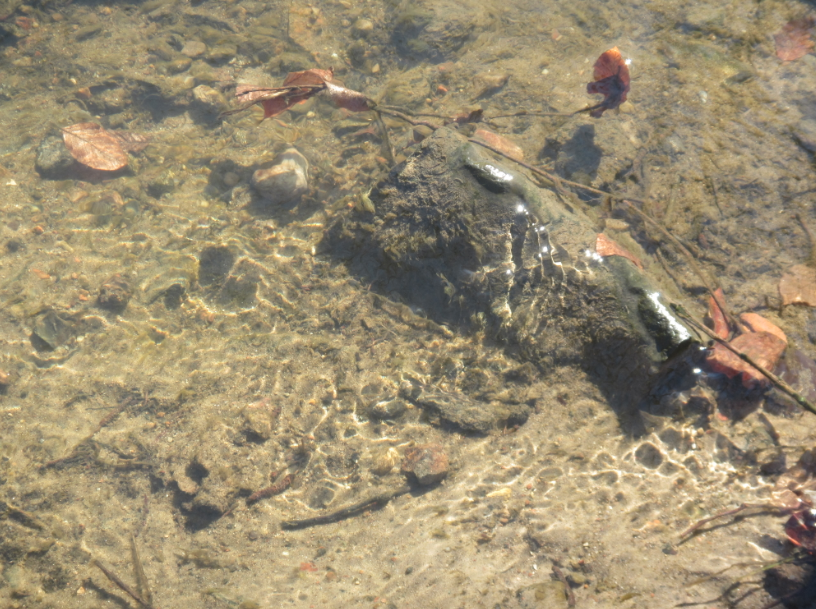
Eddies, those large, rotating structures in the ocean, are pretty hard to imagine. Of course, you can see them on many different scales, so you can observe them for example in creeks, as shown below:

IMG_1266

Eddies in the Pinnau river, and their dark “shadows”.

If you can’t really spot them in the image above, check out this post for clues and a movie.

So how can you create eddies to observe their structure?

MVI_0698

Dye spiral caused by an eddy in a jar

I took a large cylindrical jar, filled it with water, stirred, let it settle down a little bit and then injected dye at the surface, radially outward from the center. Because the rotating body of water is slowed down by friction with the jar, the center spins faster than the outer water, and the dye streak gets deformed into a spiral. The sheet stays visible for a very long time, even as it gets wound up tighter and tighter. And you can see the whole eddy wobble a bit (or pulsate might be the more technical term) because I introduced turbulence when I stopped stirring.

Watch the movie below if you want to see more. Or even better: Go play yourself!

P.S.: This text originally appeared on my website as a page. Due to upcoming restructuring of this website, I am reposting it as a blog post. This is the original version last modified on November 27th, 2015.

I might write things differently if I was writing them now, but I still like to keep my blog as archive of my thoughts.

Experiment: Ice cubes melting in fresh water and salt water

Explore how melting of ice cubes floating in water is influenced by the salinity of the water. Important oceanographic concepts like density and density driven currents are visualized and can be discussed on the basis of this experiment.

Context

Audience

This hands-on experiment is suited for many different audiences and can be used to achieve a wealth of different learning goals. Audience ranges from first-graders over undergraduates in physical oceanography to outreach activities with the general public. Depending on the audience, this activity can be embedded in very different contexts: For children, either in their physics teaching to motivate learning about concepts like density, or in the context of learning about the climate system and ocean circulation. For college/university students the activity can either be used in physics teaching to get a different view on density; in oceanography/Earth science to talk about ocean circulation and processes that are important there; to motivate the scientific process; or to practice writing lab reports (you can be sure that students will at some point be tasting the water to make sure they didn’t accidentally swap the salt water and fresh water cup – a great teachable moment for a) Never putting anything in your mouth in a laboratory setting, and b) Always documenting exactly what you are doing because stuff that you think you will definitely remember obviously isn’t remembered that clearly after all). For the general public, this is typically a stand-alone activity.

Skills and concepts that students must have mastered

It helps if the concept of density is known, but the experiment can also be used to introduce or deepen the understanding of the concept.

How the activity is situated in the course

I use this activity in different ways: a) as a simple in-class experiment that we use to discuss the scientific method, as well as what needs to be noted in lab journals and what makes a good lab report, or density-driven circulation; b) to engage non-majors or the general public in thinking about ocean circulation, what drives ocean currents, … in one-off presentations.


Goals

Content/concepts goals for this activity

Students learn about concepts that are important not only in physical oceanography, but in any physical or Earth science: density in general; density of water in particular, depending on the water’s temperature and salinity; how differences in density can drive currents both in the model and in the world ocean; how different processes acting at the same time can lead to unexpected results; how to model large scale processes in a simple experiment. After finishing the activity, they can formulate testable hypotheses, are able to reason based on density how a flow field will develop and they can compare the situations in the cups to the “real” ocean.

Higher order thinking skills goals for this activity

Students learn about and practice the use of the scientific method: formulation of hypotheses, testing, evaluating and reformulating.

Other skills goals for this activity

Students practice writing lab reports, making observations, working in groups.


Description and Teaching Materials

Materials

(per group of 2-4 students):

  • 1 clear plastic cup filled with room-temperature salt water (35psu or higher, i.e. 7 or more tea spoons of table salt per liter water), marked as salt water (optional)
  • 1 clear plastic cup filled with room-temperature fresh water, marked as fresh water (optional)
  • 2 ice cubes
  • liquid food dye either in drop bottle, with a pipette or with a straw as plunging syphon

Description

Before the experiment is started, students are asked to make a prediction which ice cube will melt faster, the one in salt water or the one in fresh water. Students discuss within their groups and commit to one hypothesis.
Students then place the ice cubes into the cups and start a stop watch/note the time. Students observe one of the ice cube melting faster than the other one. When it becomes obvious that one is indeed melting faster, a drop of food dye can be added on each of the ice cubes to color the melt water. Students take the time until each of the ice cubes has melted completely.

Discussion

The ice cube in the cup containing the fresh water will melt faster, because the (fresh) melt water is colder than the room-temperature fresh water in the cup. Hence its density is higher and it sinks to the bottom of the cup, being replaced by warmer waters at the ice cube. In contrast, the cold and fresh melt water in the salt water cup is less dense than the salt water, hence it forms a layer on top of the salt water and doesn’t induce a circulation like the one in the fresh water cup. The circulation is clearly visible as soon as the food dye is added: While in the freshwater case the whole water column changes color, only a thin meltwater layer on top of the salt water is colored (for clarification, see images in the presentation below)


Teaching Notes and Tips

Students usually assume that the ice cube in salt water will melt faster than the one in fresh water, “because salt is used to de-ice streets in winter”. Have students explicitly state their hypothesis (“the one in salt water will melt faster!”), so when they measure the time it takes the ice cubes to melt, they realize that their experiment does not support their hypothesis and start discussing why that is the case. (Elicit the misconception, so it can be confronted and resolved!)

My experience with this experiment is that all groups behave very consistently:

  • At least 80% of your audience will be very sure that the ice cube in salt water will melt faster than the one in fresh water. The other 20% will give the correct hypothesis, but only because they expect a trick question, and they will most likely not be able to come up with an explanation.
  • You can be 100% sure that at least in one group, someone will say “oh wait, which was the salt water again?” which hands you on a plate the opportunity to say “see — this is a great experiment to use when talking about why we need to write good documentations already while we are doing the experiment!”
  • You can also be 100% sure that in that group, someone will taste the water to make sure they know which cup contains the salt water. Which lets you say your “see — perfect experiment to talk about lab safety stuff! Never ever put things in your mouth in a lab!”
  • You can also be sure, that people come up with new experiments they want to try.
    • At EMSEA14, people asked what would happen if the ice cubes were held at the bottom of the beaker.
    • At a workshop on inquiry-based learning, people asked what the dye would do if there was no ice in the cups, just salt water and fresh water. Perfect opportunity to say “try! Then you’ll know! And btw — isn’t this experiment perfect to inspire the spirit of research (or however you would say that in English – “Forschergeist” is what I mean!). This is what you see in the pictures in this blogpost.

It is always a good idea to have plenty of spare ice cubes and salt/fresh water at room temperature ready so people can run the experiment again if they decide to either focus on something they didn’t observe well enough the first time round, or try a modified experiment like the ones described above.

A reviewer of this activity asked how easily students overcome the idea that water in the cup has to have just one temperature. In my experience this is not an issue at all – students keep “pointing” and thereby touching the cups, and in the thin-walled plastic cups I typically use the temperature gradient between “cold” melt water and “warm” salt water is easily felt. The (careful!) touching of the cups can also be explicitly encouraged.

Different ways to use this experiment

This experiment can be used in many different ways depending on the audience you are working with.

  • Demonstration: If you want to show this experiment rather than having students conduct it themselves, using colored ice cubes is the way to go (see experiment here). The dye focuses the observer’s attention on the melt water and makes it much easier to observe the experiment from a distance, on a screen or via a projector. Dying the ice cubes makes understanding much easier, but it also diminishes the feeling of exploration a lot – there is no mystery involved any more. And remember in order for demonstrations to increase the learning outcome, they need to be embedded in a larger didactical setting, including forming of hypotheses before the experiment is run and debriefing afterwards.
  • Structured activity: For an audience with little knowledge about physics, you might want to start with a very structured activity, much like the one described above. Students are handed (non-colored) ice cubes, cups with salt water and fresh water and are asked to make a prediction about which of the ice cubes is going to melt faster. Students test their hypothesis, find the results of the experiment in support with it or not, and we discuss. This is how I usually use this experiment in class (see discussion here).The advantage of using this approach is that students have clear instructions that they can easily follow. Depending on how observant the group is, instructions can be very detailed (“Start the stop watch when you put the ice cubes in the water. Write down the time when the first ice cube has melted completely, and which of the ice cubes it was. Write down the time when the second ice cube has melted completely. …”) or more open (“observe the ice cubes melting”).
  • Problem-solving activity: Depending on your goals with this experiment, you could also consider making it a problem-solving activity: You would hand out the materials and ask the students to design an experiment to figure out which of the cups contains fresh water and which salt water (no tasting, of course!). This is a very nice exercise and students learn a lot from designing the experiment themselves.
  • Open-ended investigation: In this case, students are handed the materials, knowing which cup contains fresh and salt water. But instead of being asked a specific question, they are told to use the materials to learn as much as they can about salt water, fresh water, temperature and density.As with the problem-solving exercise, this is a very time-intensive undertaking that does not seem feasible in the framework we are operating in. Also it is hard to predict what kind of experiments the students will come up with, and if they will learn what you want them to learn. On the other hand, students typically learn much more because they are free to explore and not bound by a specific instruction from you, so maybe give it a try?
  • Problem-based learning: This experiment is also very well suited in a Problem-Based Learning setting, both to work on the experiment itself or, as we did, to have instructors experience how problem-based learning works so they can use it in their own teaching later. Find a suggested case and a description of our experiences with it here.
  • Inquiry-based learning: Similarly as with Problem-Based Learning, this experiment can be used to let future instructors experience the method of inquiry-based learning from a student perspective. For my audience, people teaching in STEM, this is a nice case since it is close enough to their topics so they can easily make the transfer from this case to their own teaching, yet obscure enough that they really are learners in the situation.

Pro tip: If you are not quite sure how well your students will be able to cope with this experiment, prepare ice cubes dyed with food coloring and use them in a demonstration if students need more help seeing what is going on, or even let students work with colored ice cubes right from the start. If ice cubes and hence melt water are dyed right away, it becomes a lot easier to observe and deduct what is happening. Feel free to bring the photos or time lapse movie below as a backup, too!
dyed_ice_cubes_01

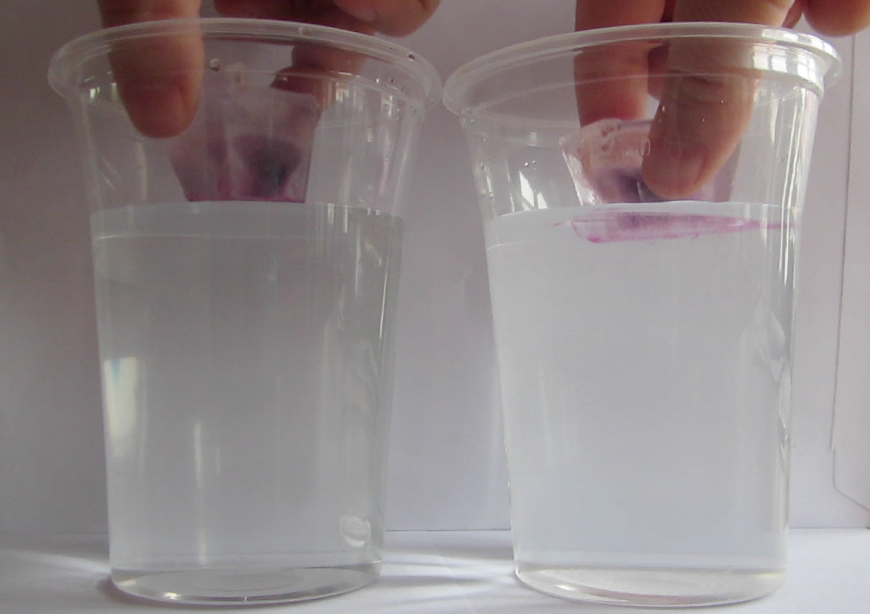
Dyed ice cubes about to be put into fresh water (left) and salt water (right)
dyed_ice_cubes_02

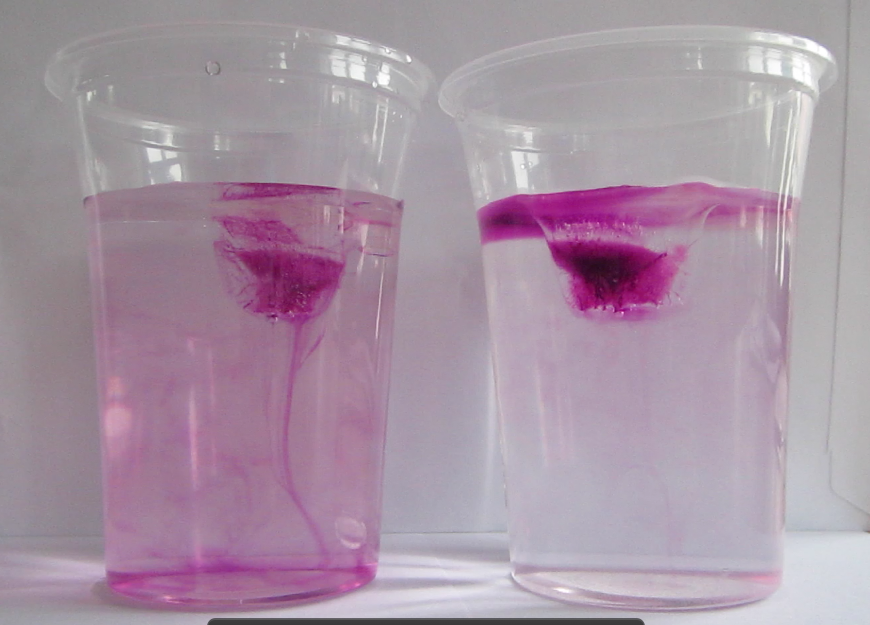
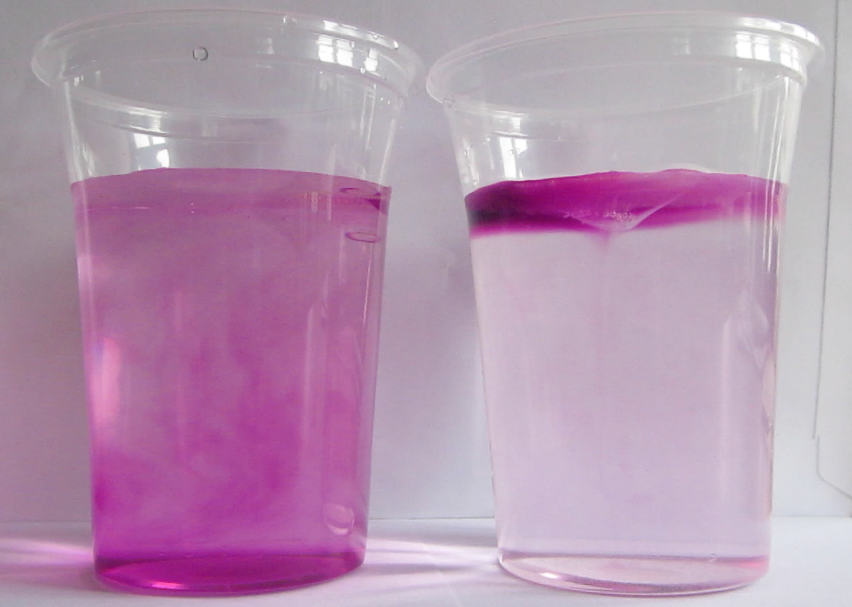
When the ice cubes start melting, it becomes very clear that they do so in different manners. In the left cup, the cold meltwater from the ice cube is denser than the lukewarm water in the cup. Hence it sinks to the bottom of the beaker and the water surrounding the ice cube is replaced by warmer water. On the right side, the lukewarm salt water is denser than the cold melt water, hence the cold meltwater floats on top, surrounding the ice cube which therefore melts more slowly than the one in the other cup.
dyed_ice_cubes_03

The ice cube in the fresh water cup (left) is almost completely gone and the water column is fairly mixed with melt water having sunk to the bottom of the beaker. The ice cube in the salt water cup (right) is still a lot bigger and a clear stratification is visible with the dyed meltwater on top of the salt water.

And here a time-lapse movie of the experiment.

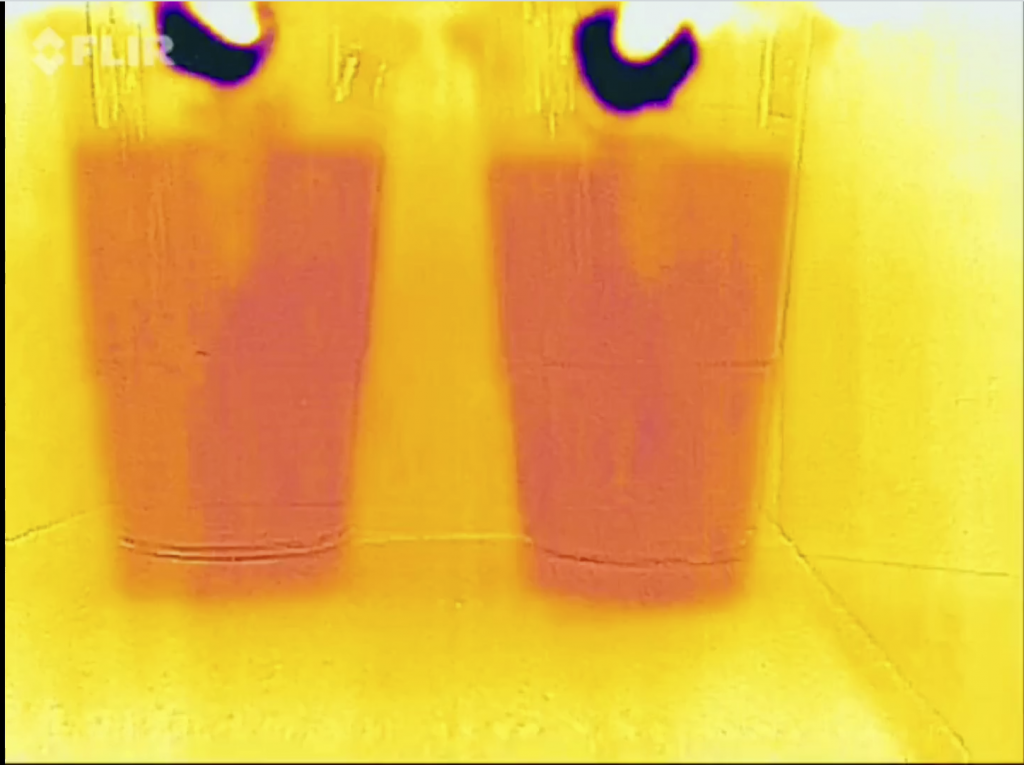
Another way to look at the experiment: With a thermal imaging camera!
screen-shot-2017-06-11-at-17-12-29

Cold (dark purple) ice cubes held by warm (white-ish) fingers over room-temperature (orange) cups with water
screen-shot-2017-06-11-at-17-12-55

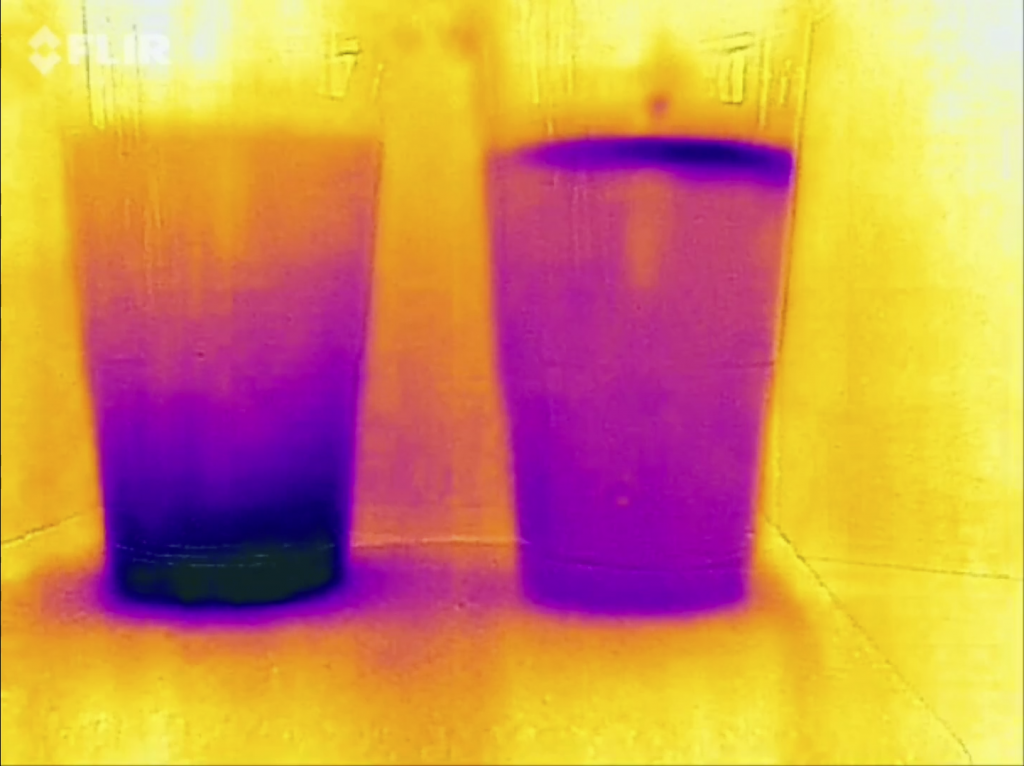
After a while, both cups show very different temperature distributions. The left one is still room temperature(-ish) on top and very cold at the bottom. The other one is very cold on top and warmer below.
screen-shot-2017-06-11-at-17-13-20

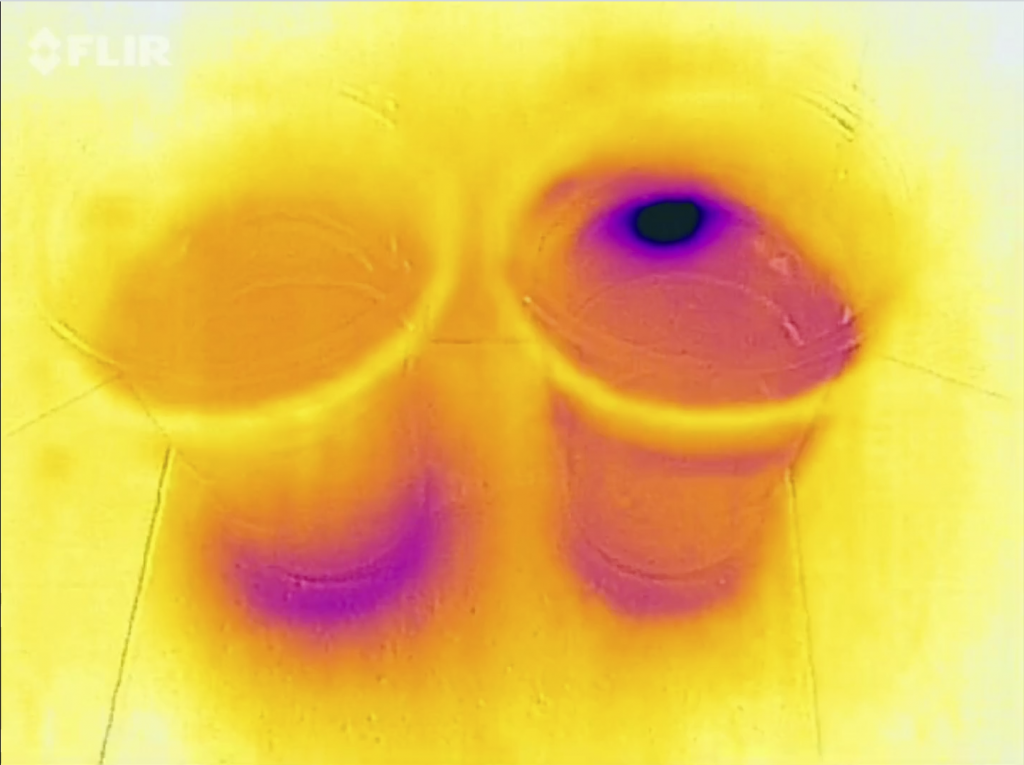
When you look in from the top, you see that in the left cup the ice has completely melted (and the melt water sunk to the bottom), whereas in the right cup there is still ice floating on top.

Assessment

Depending on the audience I use this experiment with, the learning goals are very different. Therefore, no one assessment strategy can be used for all different applications. Below, I am giving examples of what are possible ways to assess specific learning goals:

– Students apply the scientific process correctly: Look at how hypotheses are stated (“salt melts ice” is not a testable hypothesis, “similar-sized ice cubes will melt faster in salt water than in fresh water of the same temperature” is).

– Students are able to determine what kind of density-driven circulation will develop: Suggest modifications to the experiment (e.g. ice cubes are made from salt water, or ice cubes are held at the bottom of the cups while melting) and ask students to predict what the developing circulation will look like.

– Students can make the transfer from the flow field in the cup to the general ocean circulation: Let students compare the situation in the cup with different oceanic regions (the high Arctic, the Nordic Seas, …) and argue for which of those regions displays a similar circulation or what the differences are (in terms of salinity, temperature, and their influence on density).

In general, while students run the experiment, I walk around and listen to discussions or ask questions if students aren’t already discussing. Talking to students it becomes clear very quickly whether they understand the concept or not. Asking them to draw “what is happening in the cup” is a very useful indicator of how much they understand what is going on. If they draw something close to what is shown on slide 28 of the attached slide show, they have grasped the main points.


Equipment

Don’t worry, it is totally feasible to bring all the equipment you need with you to run the experiment anywhere you want. This is what we brought to EMSEA14 to run the workshop three times with 40 participants each:
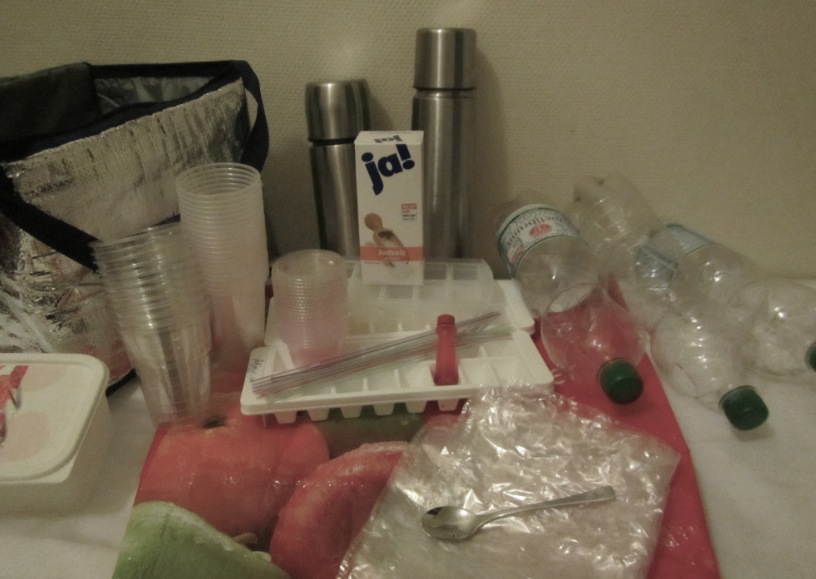
EMSEA14_list

What we brought to EMSEA14 to run workshops on the ice cubes melting in fresh and salt water experiment

In one big grocery bag:

  • 4 ice cube trays
  • 4 ice cube bags (backup)
  • 2 thermos flasks (to store ice cubes)
  • 1 insulating carrier bag (left)
  • 4 empty 1.5l water bottles to mix & store salt water in
  • 1 tea spoon for measuring salt
  • 500g table salt
  • 21 clear plastic cups for experiments
  • 10 clear plastic cups to hand out ice cubes in
  • 11 straws (as pipettes)
  • 1 flask of food dye
  • 11 little cups with lids to hand out food dye in
  • nerves of steel (not shown :-))

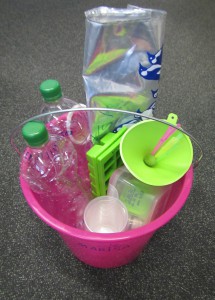
And if you are my friend, you might also get the “ice cube special” — a pink bucket with all you will ever need to run the experiment! Below is what the ice cube experiment kit looks like that I made for Marisa, with labels and everything…
IMG_4202

An “ice cube experiment” kit that I made for a friend. Want one, too?

References and Resources

This activity has been discussed before, for example here:

I have also written about it a lot on my blog, see posts tagged “melting ice cubes experiment“.

P.S.: This text originally appeared on my website as a page. Due to upcoming restructuring of this website, I am reposting it as a blog post. This is the original version last modified on November 4th, 2015.

I might write things differently if I was writing them now, but I still like to keep my blog as archive of my thoughts.
Why we actually need a large tank — similarity requirements of a hydrodynamic model

When talking about oceanographic tank experiments that are designed to show features of the real ocean, many people hope for tiny model oceans in a tank, analogous to the landscapes in model train sets. Except even tinier (and cuter), of course, because the ocean is still pretty big and needs to fit in the tank.

What people hardly ever consider, though, is that purely geometrical downscaling cannot work. Consider, for example, surface tension. Is that an important effect when looking at tides in the North Sea? Probably not. If your North Sea was scaled down to a 1 liter beaker, though, would you be able to see the concave surface? You bet. On the other hand, do you expect to see Meddies when running outflow experiments like this one? And even if you saw double diffusion happening in that experiment, would the scales be on scale to those of the real ocean? Obviously not. So clearly, there is a limit of scalability somewhere, and it is possible to determine where that limit is – with which parameters reality and a model behave similarly.

Similarity is achieved when the model conditions fulfill the three different types of similarity:

Geometrical similarity
Objects are called geometrically similar, if one object can be constructed from the other by uniformly scaling it (either shrinking or enlarging). In case of tank experiments, geometrical similarity has to be met for all parts of the experiment, i.e. the scaling factor from real structures/ships/basins/… to model structures/ships/basins/… has to be the same for all elements involved in a specific experiment. This also holds for other parameters like, for example, the elastic deformation of the model.

Kinematic similarity
Velocities are called similar if x, y and z velocity components in the model have the same ratio to each other as in the real application. This means that streamlines in the model and in the real case must be similar.

Dynamic similarity
If both geometrical similarity and kinematic similarity are given, dynamic similarity is achieved. This means that the ratio between different forces in the model is the same as the ratio between different scales in the real application. Forces that are of importance here are for example gravitational forces, surface forces, elastic forces, viscous forces and inertia forces.

Dimensionless numbers can be used to describe systems and check if the three similarities described above are met. In the case of the experiments we talk about here, the Froude number and the Reynolds number are the most important dimensionless numbers. We will talk about each of those individually in future posts, but in a nutshell:

The Froude number is the ratio between inertia and gravity. If model and real world application have the same Froude number, it is ensured that gravitational forces are correctly scaled.

The Reynolds number is the ratio between inertia and viscous forces. If model and real world application have the same Reynolds number, it is ensured that viscous forces are correctly scaled.

To obtain equality of Froude number and Reynolds number for a model with the scale 1:10, the kinematic viscosity of the fluid used to simulate water in the model has to be 3.5×10⁻⁸m2/s, several orders of magnitude less than that of water, which is on the order of 1×10⁻⁶m2/s.

There are a couple of other dimensionless numbers that can be relevant in other contexts than the kind of tank experiments we are doing here, like for example the Mach number (Ratio between inertia and elastic fluid forces; in our case not very important because the elasticity of water is very small) or the Weber number (the ration between inertia and surface tension forces). In hydrodynamic modeling in shipbuilding, the inclusion of cavitation is also important: The production and immediate destruction of small bubbles when water is subjected to rapid pressure changes, like for example at the propeller of a ship.

It is often impossible to achieve similarity in the strict sense in a model experiment. The further away from similarity the model is relative to the real worlds, the more difficult model results are to interpret with respect to what can be expected in the real world, and the more caution is needed when similar behavior is assumed despite the conditions for it not being met.

This is however not a problem: Tank experiments are still a great way of gaining insights into the physics of the ocean. One just has to design an experiment specifically for the one process one wants to observe, and keep in mind the limitations of each experimental setup as to not draw conclusions about other processes that might not be adequately represented.

So much for today — we will talk about some of the dimensionless numbers mentioned in this post over the next weeks, but I have tried to come up with good examples and keep the theory to a minimum! :-)