Tag Archives: density

Effects of temperature and salinity on density and stratification

Removing a barrier between waters of different densities and watching what happens. (deutscher Text unten)

Today, one of the groups performed a classical experiment (shown for example here) – but the awesome thing is that they came up with the planning pretty much by themselves in order to determine the effects of temperature and salinity on density. They compared water of the same temperature, but one fresh and one salty; warm salty vs cold fresh water; and cold salty vs warm fresh water. They predicted the outcome correctly, and we are showing two movies below: One normal movie and one in slow motion. Enjoy!

Heute hat eine Gruppe ein klassisches Experiment reproduziert. Allerdings haben sie es quasi selbstständig entwickelt.

Um den Effekt von Temperatur und Salzgehalt auf die Dichte zu bestimmen, werden zwei Wassermassen in einen Tank gefüllt, durch ein Wehr getrennt. Das Wehr wird herausgezogen und die dichtere Wassermasse schichtet sich unter die weniger dichte. Die Gruppe hat drei Fälle verglichen: Wasser gleicher Temperatur mit und ohne Salz; warmes salziges Wasser mit kaltem süßen; und warmes süßes Wasser mit kaltem salzigen. Der Film unten zeigt eine Zeitlupe der Bewegung.

:-)


Why we absolutely need toy boats at the JuniorAkademie

Luckily I’m not the only one believing that we absolutely need remotely controlled boats! – Zum Glück bin ich nicht die Einzige, die findet, dass wir ferngesteuerte Boote brauchen!

Mein Boot hat Hochkonjunktur. D. kann es in einem Tank wenden, der nur etwa 1.5 mal so breit ist wie das Boot lang! Das kann man im Film unten bewundern. Der Film zeigt eine der ersten Wendungen, mittlerweile wendet er ohne die Ränder zu berühren. Ich hingegen komme nur um die Kurve wenn ich mit Bande spiele, und auch dann nur mit Mühe…

Und dann ist da ja noch das U-Boot. Was wir heute in Schichtung ausprobiert haben. Interne Wellen anzuregen war nicht so einfach, aber Vermischung ist doch auch was schönes!

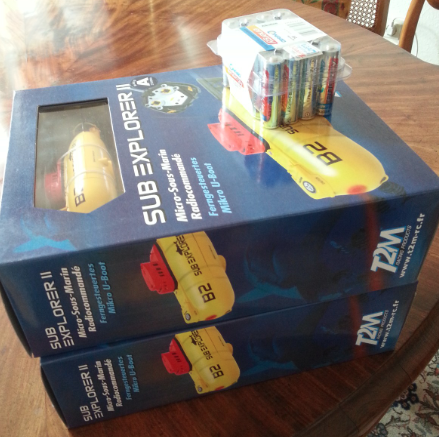
Und dann bekam ich heute morgen von meinen Eltern das Foto unten geschickt mit dem Kommentar “Eins ist für uns”. Offensichtlich haben sie erkannt, dass man wirklich ferngesteuerte U-Boote braucht! Sind meine Eltern super oder sind meine Eltern super?

Tilting of a frontal surface under rotation

Eddy in a rotating tank.

This is an experiment that Pierre and I ran two years ago in Bergen but that – as I just realized – has not been featured on this blog before. Which is a pity, because it is a pretty cool experiment.

Under rotation, vertical fronts with different densities on either side can persist for a long time without leading to the density-driven adjustment shown in the non-rotating Marsigli experiment. This is what we demonstrate with this experiment.

In a not-yet-rotating tank, dyed salt water is filled into a centered cylinder while, at the same time, fresh water is filled in the tank outside of the cylinder.

This setup is then spun up for approximately half an hour. Then, the cylinder can be carefully removed and the column of dense water can adjust to the new conditions.

Screen shot 2012-03-09 at 5.50.07 PM

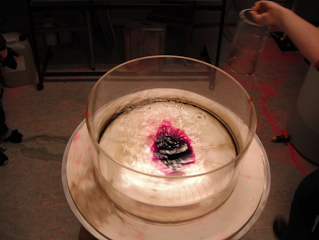
The rotating tank just as the cylinder is being removed

When the cylinder is being removed, disturbances are being introduced. Hence, several columns with sloping fronts develop in the rotating system.

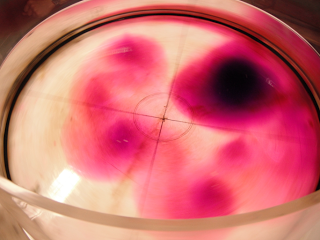
Screen shot 2012-03-09 at 5.50.16 PM

Dense columns developing towards an equilibrium state in the rotating system.

This is what the rotating tank looks like from the side several minutes after the cylinder has been removed.

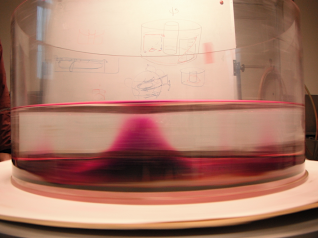
Screen shot 2012-03-09 at 5.50.26 PM

Side view of the sloping front around the dense column

Here are a couple of movies of this experiment. First a top view (note how you can see the deformation of the surface when you focus on the reflection of the ceiling lights on the water’s surface!):

Then a side view:

And finally (just because it’s fun) this is what it looks like when you switch off the rotation of the tank when you are done with the experiment:

Marsigli’s experiment

Density-driven flow.

The experiment presented in this post was first proposed by Marsigli in 1681. It illustrates how, despite the absence of a difference in the surface height of two fluids, currents can be driven by the density difference between the fluids. A really nice article by Soffientino and Pilson (2005) on the importance of the Bosporus Strait in oceanography describes the conception of the experiment and includes original drawings.

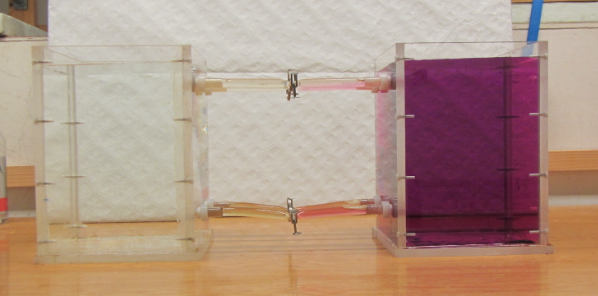
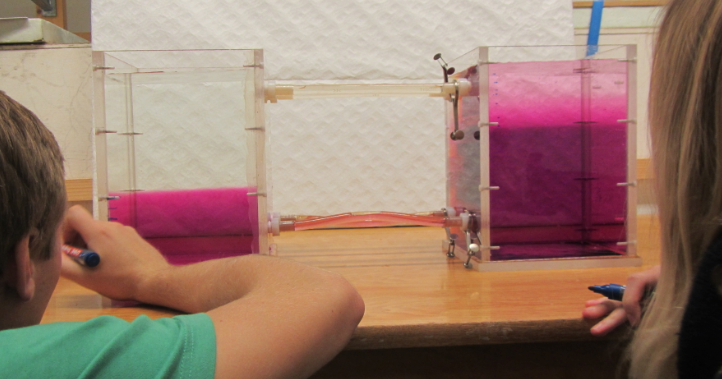
The way we conduct the experiment, we connect two similar tanks with pipes at the top and bottom, but initially close off the pipes to prevent exchange between tanks. One tank is filled with fresh water, the other one with salt water which is dyed pink. At a time zero we open the pipes and watch what happens.
Marsigli1

Two tanks, one with clear freshwater and one with pink salt water, before the connection between them has been opened.

As was to be expected, a circulation develops in which the dense salt water flows through the lower pipe into the fresh water tank, compensated by freshwater flowing the opposite way in the upper pipe.
Marsigli3

The two tanks equilibrating.

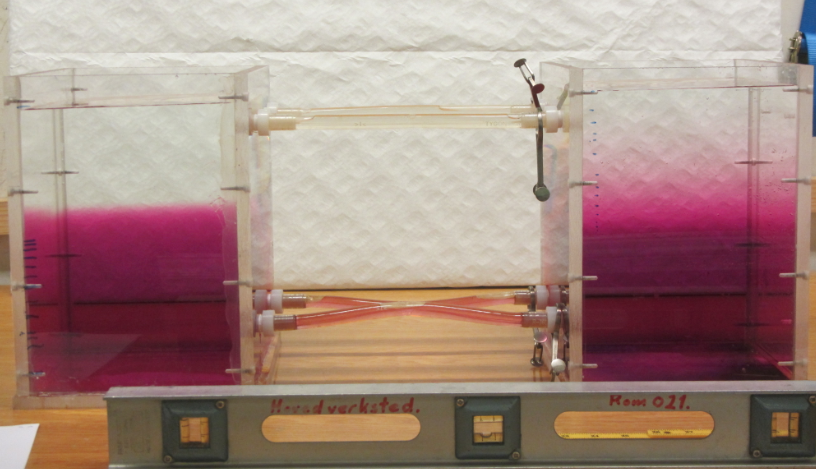
We measure the height of the interface between the pink and the clear water in both tanks over time, and watch as it eventually stops changing and equilibrates.
Marsigli4

The two tanks in equilibrium.

Usually this experiment is all about density driven flows, as are the exercises and questions we ask connected to it. But humor me in preparation of a future post: Comparing the height of the two pink volumes and the two clear volumes we find that they do not add up to the original volumes of the pink and clear tanks – the pink volume has increased and the clear volume decreased.
How did that happen?

Guest post: The mystery of the cold room

Guest post by Kristin Richter!
Today I’m excited to bring to you a guest post from Innsbruck, Austria, written by my friend Kristin Richter. Kristin ran the oceanography lab in Bergen before I took over, and she is a total enabler when it comes to deciding between playing with water, ice and food dye, or doing “real” work. Plus she always has awesome ideas of what else one could try for fun experiences. We just submitted an abstract for a conference together, so keep your fingers crossed for us – you might be able to come see us give a workshop on experiments in oceanography teaching pretty soon! But now, over to Kristin.
A little while ago, I made an interesting experience while presenting some science to students and the general public on the “Day of Alpine Science”  in Innsbruck using hands-on experiments. Actually, my task was to talk about glaciers but being a physical oceanographer I felt like I was on thin ice. Well, glaciers, I thought, hmmm … ice, melting ice, going into the sea, … sea, … sea ice! And I remembered how Mirjam once showed a nice experiment to me and some friends about melting ice in fresh and salt water. And suddenly I was all excited about the idea.
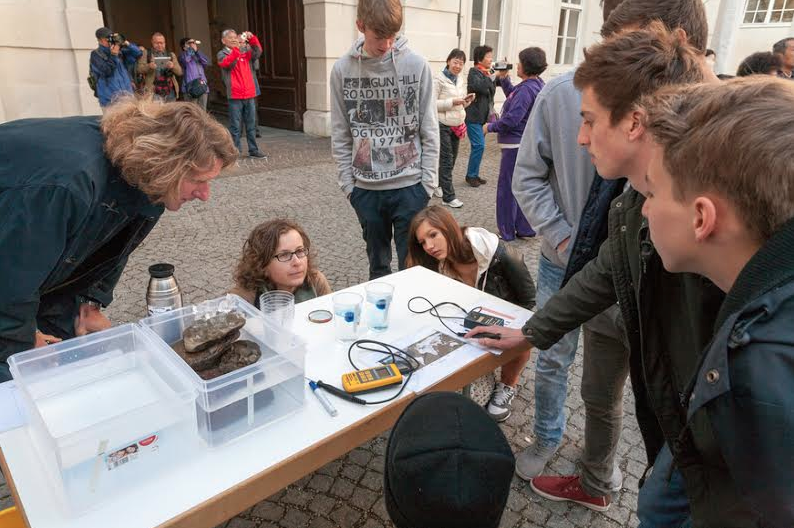
To at least mention the glaciers, I planned to fill two big food boxes with water, have ice float (and melt) in one of the tanks and put ice on top of a big stone (Greenland) in another tank filled with water to show the different impact of melting land ice and sea ice on sea level. Since melting the ice would take a while (especially on a chilly morning outside in early April) I would have enough time to present the “actual” experiment – coloured ice cubes melting in two cups of water – one with freshwater, and the other one with salt water.
Screen Shot 2014-04-24 at 12.17.01

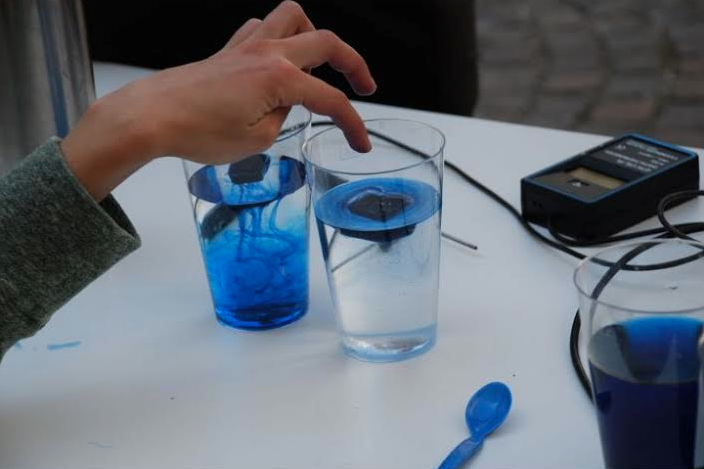
Melting ice. A comparison of sea ice and glaciers melting’s impact on sea level, ice cubes melting in fresh and salt water on the right. Photo by “Forschungsschwerpunkt Alpiner Raum”, University of Innsbruck.

As we expected many groups with many students, I needed a lot of ice. I told the organizers so (“I need a lot of ice, you know, frozen water”) and they said no problem, they will turn on their cooling chamber. The day before, I went there and put tons of water into little cups and ice cube bags into the chamber to freeze over night.The next morning – some hundreds of students had already  arrived and were welcomed in the courtyard – I went to get some ice for the first group. I opened the cooling chamber,… and froze instantly. Not so very much because of the cold temperature but because I was met by lots of ice cube bags and little cups with… water. Like in LIQUID WATER! Cold liquid water, yeah, but still LIQUID! Arrrghhhh, my class was about to begin in a few minutes and I had NO ICE. “Ah, yes”, volunteered the friendly caretaker, “come to think of it, it is just a cooling chamber!”I started panicking, until a colleague pointed out the Sacher Cafe (this is Austria after all) and their ice machine across the road. I never really appreciated ice machines, but that one along with the friendly staff saved the day. Luckily, I brought some colored ice cubes from at home – so I was all set to start.

Screen Shot 2014-04-24 at 12.16.50

Ice melting in fresh water (left) and salt water (right). Photo by “Forschungsschwerpunkt Alpiner Raum”, University of Innsbruck.

And the station was a big success, the students were all interested, asked many questions and were excited about the colored melt water sinking and not sinking. :-)  I even managed to “steal” some students from the neighboring station of my dear meteorology colleagues. That was something I was particularly proud of as they could offer a weather station, lots of fun instruments to play with and a projector to show all of their fancy data on a big screen. (Actually, I also abandoned my station for a while to check out their weather balloon.)

Anyway, I had a lot of fun that day and could definitely relate to Mirjams enthusiasm for this kind of teaching. I can’t wait for the next opportunity to share some of those simple yet cool experiments with interested students. I will bring my own ice though!


Modeling the Denmark Strait Overflow

Ha, this is a bad pun. We are modeling the Denmark Strait Overflow – but in a non-numerical, small-scale-and-playdough kind of way.

More than a year ago, Kjetil and I ran that experiment with a group of high-school students and when writing a post about a much more sophisticated version of this experiment I realized I never documented this one in the first place. So here we go!

IMG_3604_small

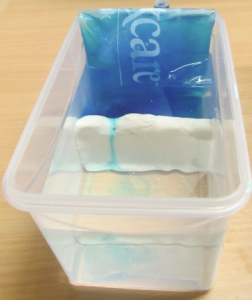
The set-up: Tupper ware with a modeling clay ridge (“let’s call it Greenland-Scotland-Ridge”) across, filled with water to a level above the ridge, cooled with a sport’s-injury cooling pack in “the North”.

Dye is added to the “northern end” of the tank (i.e. the end where the water is being cooled by a sport’s injury cooling pack). As the water cools, it becomes denser and fills up the reservoir on the northern end until it spills over the clay ridge.

IMG_3592_small

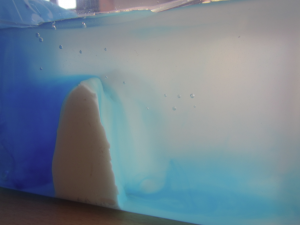
The overflow. See the blue, dense reservoir on the left and the dense water spilling over the ridge.

This is a very simple demonstration of how overflows actually work.

IMG_3607_small

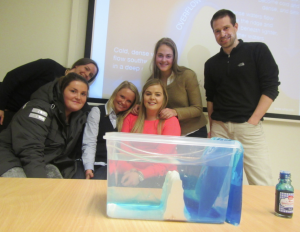
Kjetil, his Master student Eli and some of the high-school students. Can you see the sketch of the Denmark Strait Overflow on the slide in the background? (Plus, for everybody who is interested: This is the food coloring I have been using right there in the front right!)

Cartesian divers – theoretical considerations

 A bit more reflection on cartesian divers.

When I wrote the two previous posts, I had known cartesian divers for a very long time in many contexts, for example as something that is routinely used in primary school teaching. While I was aware that developing a correct physical description of such a diver is challenging, I assumed that everybody had an intuitive understanding of how a diver would react when pressure was applied on the bottle. To me, this is an experiment that I would use to demonstrate the different compressibilities of air and water, assuming that everybody can imagine what happens if the density of a floating body changes.
Turns out my assumption of what people intuitively understand was way off. In the paper Helping students develop an understanding of Archimedes’ principle. I. Research on student understanding”, Loverude, Kautz and Heron talk about difficulties university science majors have with hydrostatics. Of seven volunteers who were interviewed, who had all completed their instruction in hydrostatics and all reported course grades at or above the mean, all but two predicted that the diver would rise as pressure was applied to the bottle. And none of the students could account for the observation that the diver sank!
Now I’m wondering at which point the students’ difficulties arise. Is it that they don’t know about different compressibilities or is it at a much more basic level? From the study mentioned above it seems that students don’t appreciate the tiny density range (where calling it a range might already be over-stating it) in which a body can float in (non-stratified) water without swimming at the surface or sinking to the ground. In a way this makes sense – most of the time that we look at water in a way comparable to how we look at a cartesian diver (i.e. through side walls so we are looking at a depth section of a non-stratified fluid), we are actually looking at aquaria where fish float in very similar ways to the cartesian divers. But we never stop to think about how floating and adjusting depth in a fluid is actually quite an achievement. Which we see when the fish die and first float at the surface and then sink to the bottom…
In any case. If it is the case that students don’t appreciate how rare it is for something to float in a fluid, then showing a cartesian diver might even be working against us by reinforcing a perception that is harmful to the students’ future understanding of hydrostatics. Or we can use the divers in a different way – have students build them themselves, so that they need to fiddle with them to adjust their initial density until it is just right, before they start working in the way shown in the previous posts. I think this is a thought I want to develop further… So stay tuned!

Cartesian diver – organic version

Using orange peel as cartesian divers.

Guess what my mom told me when we were playing with cartesian divers the other day? That orange peel works really well as a cartesian diver! Who would have thought?

And just because we like playing we tried both orange peel and tangerine peel. Watch!

Funnily enough, they behave very differently. While the thick orange peel works really well, the much less thick tangerine peel very quickly looses all the air bubbles and hence the buoyancy and the ability to adjust buoyancy. So if in doubt (and not interested in extending the experiment to a lesson in contrast and compare) – oranges are the way to go!

Cartesian diver

Compressibility of water and air.

Today I want to talk about the different compressibilities of water and air. Actually, no, I just want to show you an experiment. One way to visualize that air is a whole lot more compressible than water is to look at cartesian divers. You probably know the fancy ones as shown on the far left of the picture below that you typically find at Christmas Markets or high-end (i.e. nerdy) toy stores.

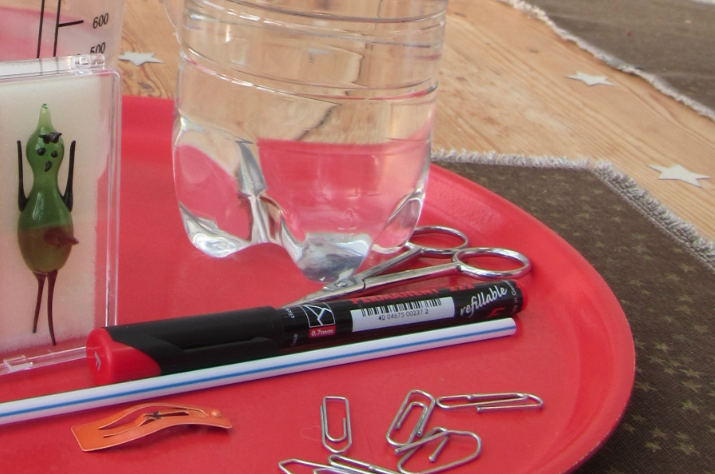
But, as you probably guessed already, this post is about making those divers from scratch. You probably know that you could just use those old-fashioned eye-drop pipettes, or normal plastic pipettes. But how boring is that? (Plus how much material do you need when doing this experiment with a big class!) All you need is shown in the image below: Straws, scissors and paper clips.

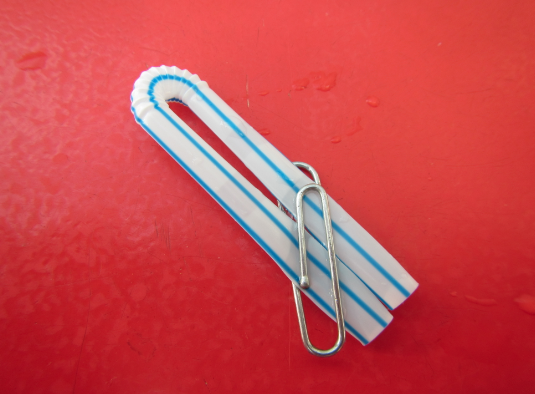
Some of the more complicated instructions tell you to cut a piece of straw and put modeling clay on top to seal it, but I’m lazy. A much simpler version is shown here: Bend a straw, cut the long end, close the two ends together with a paper clip (also helps as added weight to adjust the buoyancy of the diver) and there you are!

How does that homemade diver dance? Watch the movie below:

So how do the classical cartesian diver compare to homemade one?

So we see that while both of them dive up and down, they don’t behave exactly the same. And if we were using this experiment in class, we would now talk about how this is due to the different volumes of air in the two divers, and the different densities of the structures themselves. But what I find much more important right now: My diver doesn’t turn as nicely as the conventional one! So what is one to do?

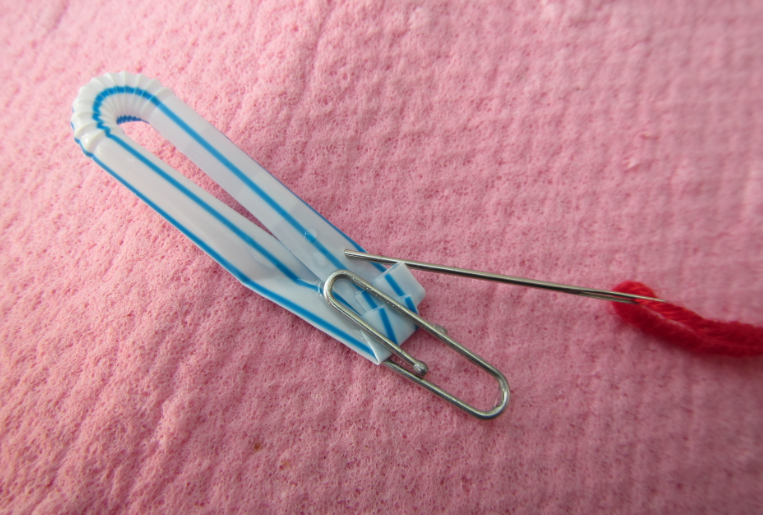
Exactly. Poke a hole in it. Let’s find out if that did the trick?

Almost as nice as the glass diver, no? So now start playing and send me movies of your divers! :-)

Oceanographic concepts and language (part 1)

About teaching in a language that is a foreign language for both your students and yourself.

Most of my teaching so far has happened in English to mainly non-native English speakers with the occasional native speaker thrown in. One thing that I realized recently was that concepts that are definitely not common knowledge at home in Germany and that are described by technical terms in German, are absolute household terms in other language.

Let’s for example think about density.

In German, or Norwegian for that matter, “Dichte” or “tetthet” is not a concept that is used in everyday language very much, and that therefore needs to be explained in introductions to oceanography, and that typically is rather difficult to understand for the students. I usually introduce density both by talking about mass per volume, and then by showing experiments to visualize what differences in density can look like, for example by showing that soda cans with the exact same volume can still sink or swim depending on what’s inside.

In English however, people have an intuitive understanding of what density is – a measure of compactness. A densely populated area is an area where many people live close together. If a lecture is very dense, there is a lot of content for the amount of time you attend. A low-density floppy disk will not be able to contain as much information as a high-density one. So having this background, not a lot of transfer is needed to be able to talk about the density of water.

I am usually pretty aware that I am teaching in a language that is foreign to both the students and to me, and I try to compensate for that by explaining what I perceive as technical terms. But recently I had a native English speaker in one of my classes, and that person got really upset because I spent so much time on what that person thought was trivial. So I guess language awareness needs to go both ways – not only being aware of what kind of vocabulary students of certain nationalities probably won’t be familiar with, but also being aware of the vocabulary that I learned as technical terms and that are not perceived as technical terms by students of other nationalities.

Dear readers, have you come across this? What other terms can you think of that we should be aware of?