Tag Archives: kitchen oceanography

Temperature-driven overturning experiment – the easy way

In my last post, I showed you the legendary overturning experiment. And guess what occurred to me? That there is an even easier way to show the same thing. No gel pads! (BUT! And that is a BIG BUT! Melting of ice cubes in lukewarm water is NOT the process that drives the “real” overturning! For a slightly longer version of this post check this out).

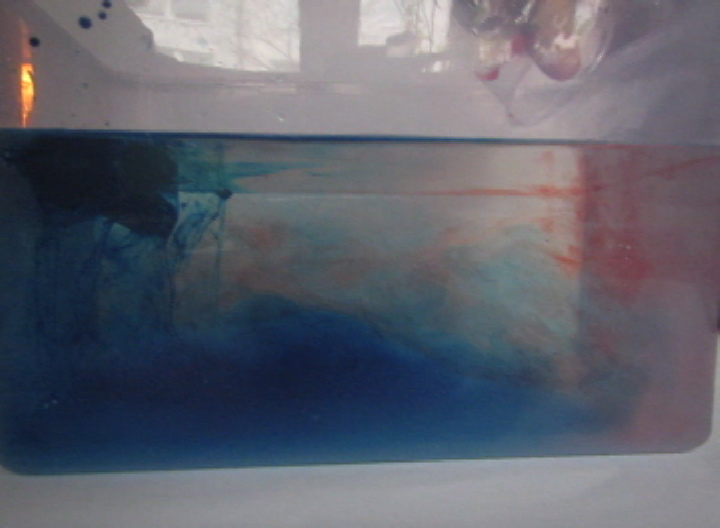
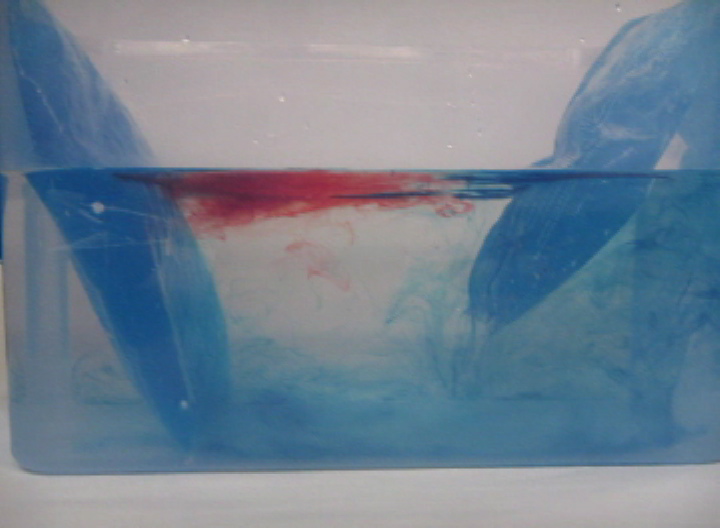
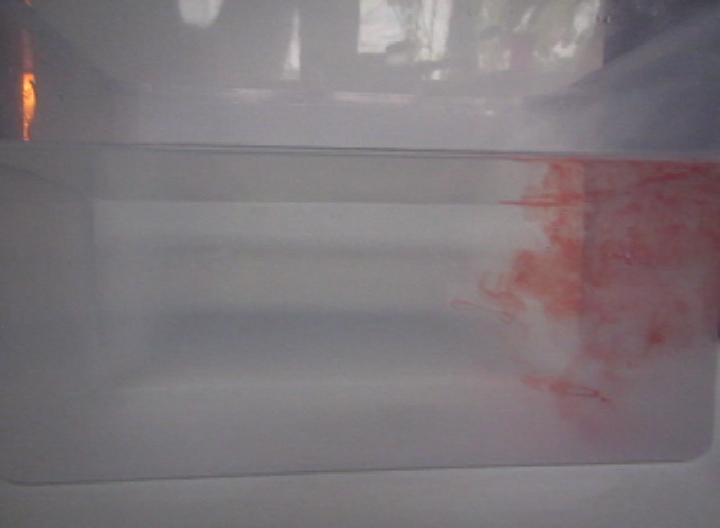
So. Tank full of luke warm water. Red dye on one end. Spoiler alert: This is going to be the “warm” end.

overturning-ice-1Now. Ice cubes on the “cold” end. For convenience, they have been dyed blue so that the cold melt water is easily identifiable as cold.

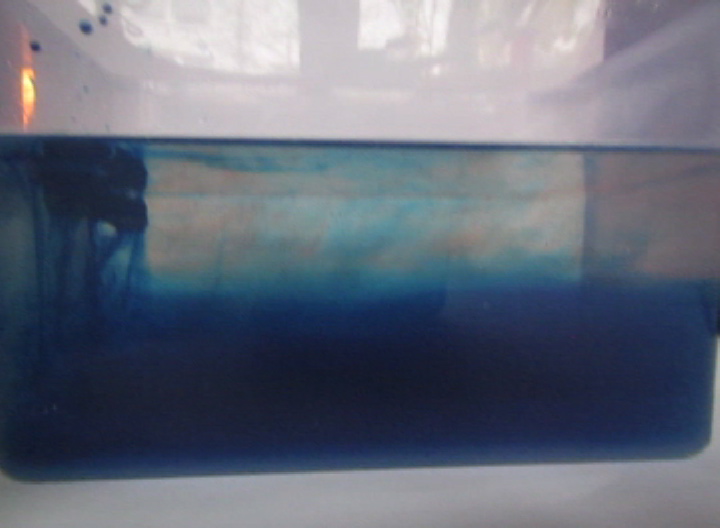
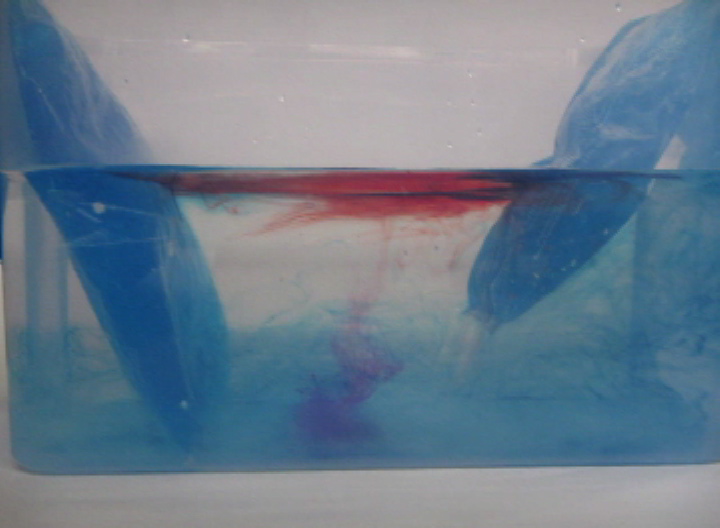
overturning-ice-2A very easy way to get a nice stratification! And as you see in the video below, awesome internal waves on the interface, too.

overturning-ice-3

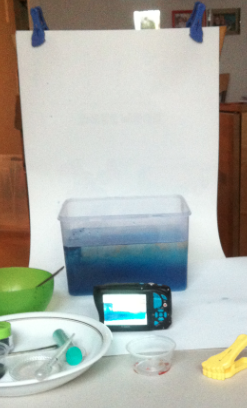
And because I know you like a “behind the scenes”:

I took this picture sitting on my sofa. The experiment is set up on the tea table. The white background is a “Janosch” calendar from 15 years ago, clipped to the back of a chair. And that is how it is done! :-)

Screen shot 2015-11-02 at 3.41.24 PM

Overturning experiment. By Mirjam S. Glessmer

A very simple overturning experiment for outreach and teaching

For one of my side-projects I needed higher-resolution photos of the overturning experiment, so I had to redo it. Figured I’d share them with you, too.

You know the experiment: gel pads for sports injuries, one hot (here on the left), one cold (here on the right). Blue dye on the cold pad to mark the cold water, red dye on the warm pad as a tracer for warm water.

overturning

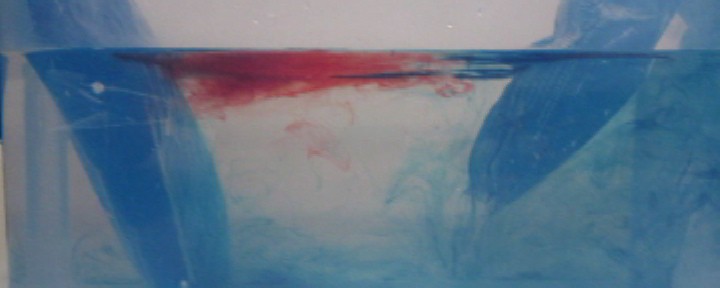
Thermally-driven overturning circulation: Warm water flowing near the surface from the warm pad on the left towards the right, cold flow from the cool pad at the bottom right to left.

A circulation develops. If you drop dye crystals in the tank, the ribbon that formed gets deformed by the currents for yet another visualization of the flow field.

overturning2

Thermally-driven overturning circulation. In the middle of the tank you see a ribbon of dye, caused by falling dye crystals, being transformed by the currents in the tank.

Lighting is a problem this time of year. I chose natural light over artificial, and it came out ok, I think.

And here is the video:

On buoyancy

This is an experiment that Martin brought to Ratzeburg and that he let me use on my blog: Using a beam balance to talk about buoyancy.

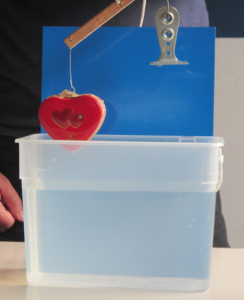
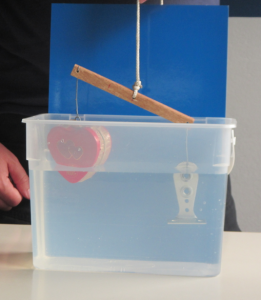
So at first we have two objects hanging on the beam balance, a heavy one with a large volume, and a lighter one with a smaller volume.

IMG_2527

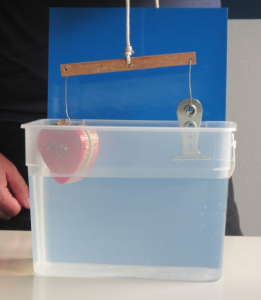
As we lower the beam balance towards the water, the large object starts floating! Whereas the other one does not.IMG_2526

And in fact, the small object sinks and the larger one keeps floating.IMG_2525

What a great experiment to talk about density and buoyancy!

Strawberry ice cream crystals

My new favorite thing is to put strawberries through a blender and then freeze small portions of that to eat as ice cream later. It is super yummy plus you never know what you’ll see when you open the lid!

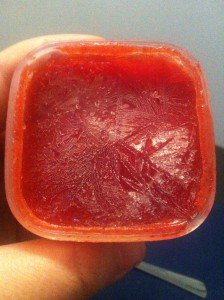
Sometimes, you get long crystals like these:

2015-07-30 20.13.27

Ice crystals on strawberry ice cream

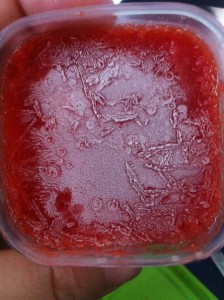
And then other times, you get something completely different. Look at those circular shapes! Perhaps that’s where the UFO landed? You can’t really see it in the picture, but those disks come quite a bit higher than the rest of the ice.

2015-07-28 16.13.08

Ice crystals on strawberry ice cream

In the bottom left corner, you see a smudge – that is where I pried off one of the disks to see what might have caused it. Turns out there is a cavity underneath. So somehow bubbles in the strawberry mash freeze out into those disks?

I am guessing that the ice cream in the second picture came from a batch that I beat harder than the one in the first picture, hence more bubbles. Or maybe the one in the first picture sat outside the freezer longer, so the bubbles had all reached the surface and popped before it went into the freezer? What do you guys think? Seems like I should really be carefully writing protocols next time I’m making ice cream! :-)

Stream lines and paper towels

We’ve been talking about stream lines a lot recently (see for example the flow around a paddle or flow around other stuff). I’ve always heard stories about a neat way of visualizing stream lines that I wanted to show on my blog. So I set out to try it, but it just never worked exactly the way I had imagined it should. Anyway, here you go:

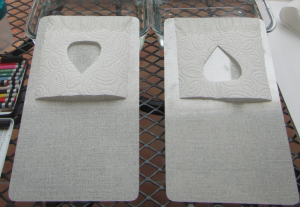
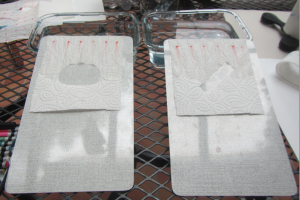
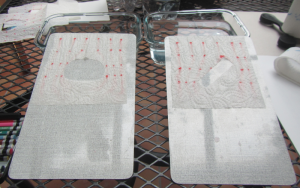
We take paper towels and cut an “obstacle” in it. In this case, it’s a drop-shape. The paper towel is set up such that one end is dunked in water, and that once the water has been sucked up a little, it neatly flows down a slope through the towel. In the picture below you see that the water just came over the edge of the cutting boards.

IMG_2102So once a flow has established (and only then, because I wanted to go for steady state stream lines, not some stuff that happens while things are still adjusting), I started dotting dye in to trace the flow:

IMG_2103As you can see, each dot leaves a streak. In this case, though, the streaks are not nearly clear enough for me, so I decided to “recharge” a little further downstream (making sure I put the dye exactly on one of the stream lines, obviously).

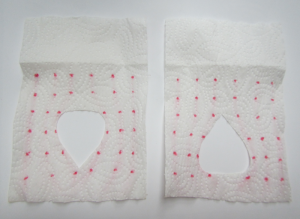
IMG_2104And voila! The flow really goes around the object similarly to what we would have imagined. And this is what the finished drop-shaped obstacle looks like:

IMG_2106

stream lines on paper towel

As you see, next time it’s important to make sure there is more paper towel left downstream of the obstacle. We already get interference from the bottom edge of the paper towel where the flow is interrupted.

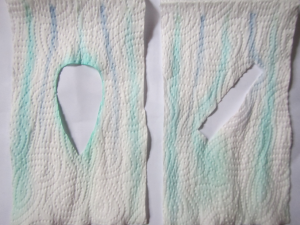
It’s also important to figure out what kinds of pens work: The picture below is from a test I did at my parents’ which worked a lot better than the pens I tried above.

IMG_2107

stream lines on paper towel

And finally I am not sure how the embossed pattern in the paper towel influences the flow. So maybe I should try and find something with either a smaller pattern or something more regular. Plenty to do still!

So, all in all: Interesting visualization which I am definitely going to try again at some point, but there are still a couple of kinks I need to find fixes for!

More mystery tubes

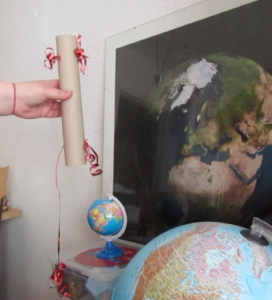
My mystery tube blog post seems to have inspired a lot of people. How awesome! This is what my parents sent me:

And my friend Kristin Richter took the whole thing to the next level: She brought the mystery tube in to work and tested it on colleagues! And when we were discussing the mystery tube in the context of a possible workshop we wanted to run, she came up with a great context.

— spoiler alert – don’t continue reading if you haven’t figured out how the mystery tube works! —

So the thing is: In all instructions the two threads inside the tube are connected with a ring through which they are both fed. When I built my own mystery tube, I was too lazy and to cheap to put a ring inside a mystery tube where it a) wasn’t visible and b) not even necessary. My solution was instead to just cross the two threads and the result is exactly the same. So Kristin pointed out that this is actually a really cool feature of the mystery tubes when we use them to model a model. A model might reproduce the behavior of a system perfectly (like my cheap mystery tube reproduces all the functionalities of a “real” mystery tube with a ring inside), yet we do not know if it does reproduce reality for the right reasons. New scenarios might develop – for example if we shook the mystery tubes, one might make a noise and the other one might not – but still. What if one ring was made out of a material that did not make a sound when hitting the walls of the tube? We’ll never know whether there is a “ring” in the real world or not.

Screen shot 2015-06-18 at 9.48.24 AM

Mystery tube

Did the mystery tubes get even more awesome now or what? :-)

Developing a hypothesis: Mystery tubes

Finally I know why I’ve been collecting empty toilet paper and kitchen paper rolls for ages: To build mystery tubes!

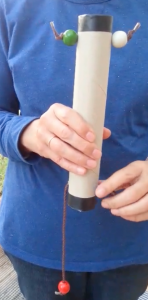
Mystery_tube

Mystery tube

I only built a prototype, but it works just fine.

So here is what you do with it:

And now it’s your turn. How does the mystery tube work?

I can’t wait to use mystery tubes to introduce students to the scientific method. Obviously I would make sure to tape off the open ends of the roll so nobody can have a peek inside! The students can play with the tube and then start developing hypotheses on how the mystery tube works. Ideally, I would bring all kinds of materials for them to build their own tubes to test their hypotheses.

For this exercises to be as close to real-life science as possible, I think it is important to never reveal the solution and not have them check it out, either. Building a model and not knowing whether it is an exact replica of the real world or if it only worked fine for all cases we tried it on, but would break down on a different case, is part of the game after all!

P.S.: I got the idea here.

P.P.S.: Kristin, what do you think?


Watching the solar eclipse using “household items”

Different methods to project the sun to watch it safely.

During our recent PBL workshop, we came up with a number of different ways to watch a solar eclipse by projecting the sun’s image on a screen, using “household items” (which was the task we had set). Many different methods are shown here:
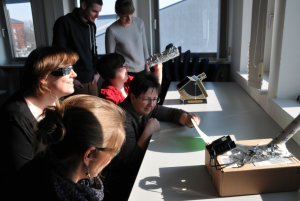
DSC_3766

Watching the solar eclipse on March 20th, 2015. Photo by Alina Gruhn (thanks! :-))

Below are descriptions of the different projectors, starting with the easiest and becoming more and more difficult as you read along.

The pin-hole cardboard projector

The easiest way to watch a solar eclipse anyone can imagine is the green card you see in the picture above: It’s just a piece of cardboard with a hole in the middle. The result might not be the most exciting of all, but in the picture below you see the small projection at the bottom right corner with a small bit bitten out of it. Not too bad for a no-tech version of a projector!
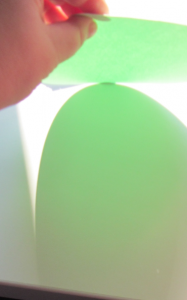
IMG_0954

“Solar projector”. Cardboard with a pin hole in the middle. See the projected image of the sun in the bottom right corner of the picture?

Next time one might want to use darker cardboard. But since this was just a proof of concept, I was happy enough with it.

The chips tube projector

Participant F brought a cardboard chips tube which she cut in half, added sandwich paper in the middle, made a tiny hole in the bottom of the can and voila: projector.
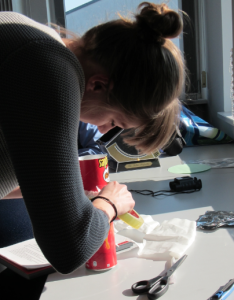
IMG_0947

Creating the chips tube projector

While she was disappointed by the size of the image, I thought it was pretty cool:
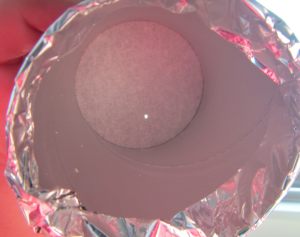
IMG_0968

Projection of the solar eclipse in the chips can projector. See how the left part of the sun is missing?

The binocular projector

One projector that was amazingly easy to set up (provided you have binoculars handy) and that gave pretty impressive results is shown here:
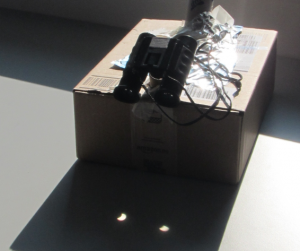
IMG_0969

Projection of the solar eclipse using binoculars.

So easy, yet so effective!

Anna’s special projector

This is a project that had great potential, only we gave up on adjusting everything properly because all the other projectors were set up already and it was too exciting to watch the solar eclipse.
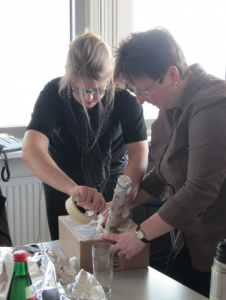
IMG_0948

Anna and Siska building a projector

I think here the sun was projected on a screen inside the box, which you could look at through a tube. And the other tube is covered on top except for a tiny hole.

The solar projector

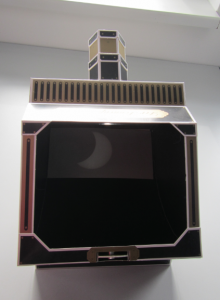
I know it is cheating a bit, but I decided to have the solar projector I talked about last week count as a “household item”. And it is, because I had it at home before we wrote the solar eclipse PBL case!

The projections with the real projector were super impressive:
IMG_0973

Projection of the solar eclipse in a real projector

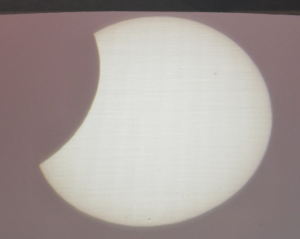
In fact, we could even watch solar spots on the sun. I will definitely bring out this projector again long before the next solar eclipse!
IMG_0963

Projection of the solar eclipse. Can you spot the sun spots?

And one extra:

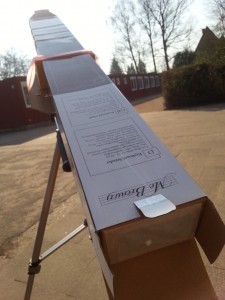
The box-projector

This one we didn’t try out ourselves (even though I had brought all the materials, but as I said above, we got so caught up observing that we didn’t pursue all the different options), so the pictures are from my mom’s school where my mom and my dad (and 20 something kids, I suspect*) had to play, too. See the tripod for scale – this projector is a lot bigger than anything we built at my work!
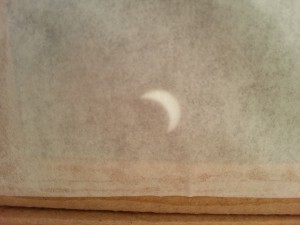
WP_20150320_002And their projections look pretty impressive, too:
WP_20150320_019

Projection of the solar eclipse

By the time the sun was covered that much, the sky was completely overcast at my work. But it looks like the kids got to see a pretty impressive solar eclipse!

*because, funnily enough, lots of classes weren’t allowed to watch the solar eclipse but had to sit inside with the curtains closed. Because on this one day the sun was clearly so much more dangerous than on any other given day, especially when watching only a projection of it (and there are tons of methods to do that as you might have noticed from the post above…). Always amazing  how stupid some people are…
Vortex streets on a plate

You might think that three hours of canoe polo on a Saturday morning would be enough water for the day, but no.  As when I did the experiment for the “eddies in a jar” post a while back, sometimes I just need to do some cool oceanography. So last Saturday, this is what I did:
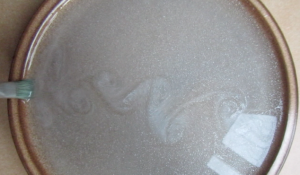
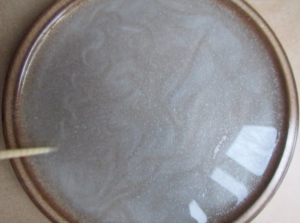
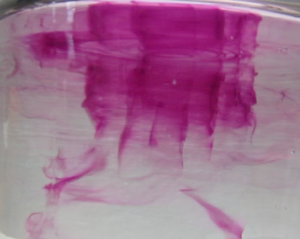
Screen shot 2015-02-21 at 4.38.32 PMI took a plate, mixed some sugar, silvery water color, and water, pulled some stuff through the water and that was pretty much it. As a first order approximation, pulling an object through a stagnant water body is the same as the water body moving past a stationary object. And since it is usually pretty difficult to visualize flow around stationary objects (at least if you don’t want to pollute that little creek nor waste a lot of water). So this is really exciting.

Screen shot 2015-02-21 at 5.01.02 PM

Depending on the size of the object you pull through the water, and its speed, all kinds of different eddies develop. So fascinating! Watch the movie below to get an impression. (It’s really only an impression – it’s 2 minutes out of the 40 or so that I filmed ;-))

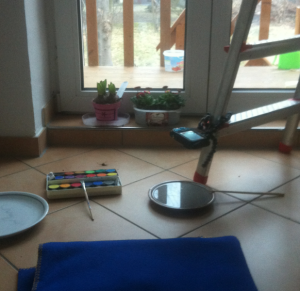
And for those of you who are always like “oh, I would love to, but I couldn’t possibly do this at home!”: This is what it looked like in my kitchen when I filmed the video above:Screen shot 2015-02-21 at 4.27.15 PM

The plate I am filming is the one underneath the camera (I love my gorilla grippy). My water colors from back when I was in primary school, a paint brush, a chop stick, the plate I tried first that turned out to not have enough contrast with the silver paint, a blanket because the tiles are cold to sit on. Oh, and the flowers that I have been meaning to put into nice pots for a couple of days now. So – no big mystery here! Go try! And let me know how it went.

Eddies in a jar

Rotating experiments in your kitchen.

Do you know those Saturday mornings when you wake up and just know that you have to do oceanography experiments? I had one of those last weekend. Unfortunately, I didn’t have a rotating table at hand, but luckily most of my experiments work better than the exploding water balloon time-lapse I showed you on Monday, so this is what I did:

MVI_0698

Dye spiral

I took a large cylindrical jar, filled it with water, stirred, let it settle down a little bit and then injected dye at the surface, radially outward from the center. Because the rotating body of water is slowed down by friction with the jar, the center spins faster than the outer water, and the dye streak gets deformed into a spiral. The sheet stays visible for a very long time, even as it gets wound up tighter and tighter. And you can see the whole eddy wobble a bit (or pulsate might be the more technical term) because I introduced turbulence when I stopped stirring. So pretty, the whole experiment. And so satisfying if you need a really quick fix of oceanography on a Saturday morning!

Watch the movie below if you want to see more. Or even better: Go play yourself! It’s easier than making one of those microwave mug cakes and sooo goooooood :-)