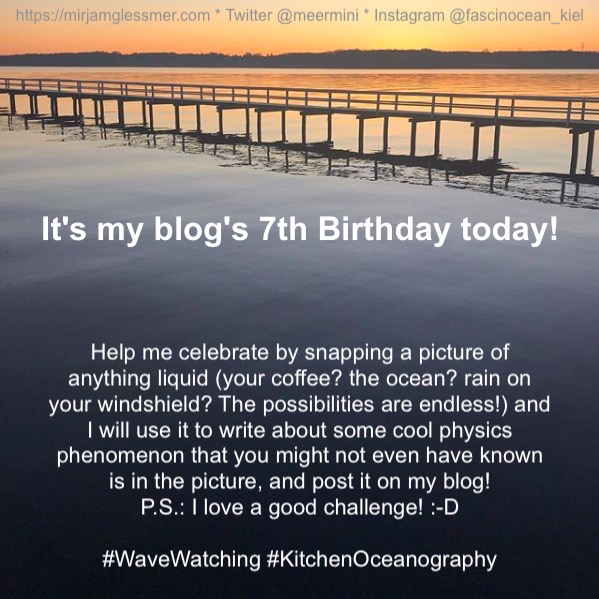
It doesn’t feel like it, but today marks the 7-year-anniversary of my first blog post on my “Adventures in Oceanography and Teaching”! To celebrate, I sent out this call to action (and please feel free to respond, no matter when you are reading this):
Below, I am sharing the pictures that people sent me plus my thoughts on them, newest on top. Pictures that reached me after August 28th 2020 will be posted in follow-up posts! (Keep them coming, I love it!)
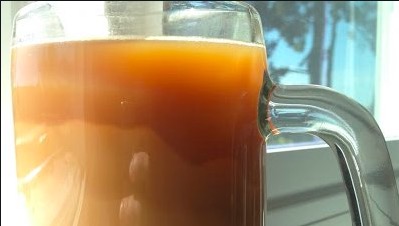
Oooh, I love the internal waves on the interface between the milky part of the coffee and the not-yet-milky part! Looking at them moving very slowly always feels like being caught in slow motion, when of course the phase speed has to be very slow because of reduced gravity
21:55 — Phil (San Francisco)
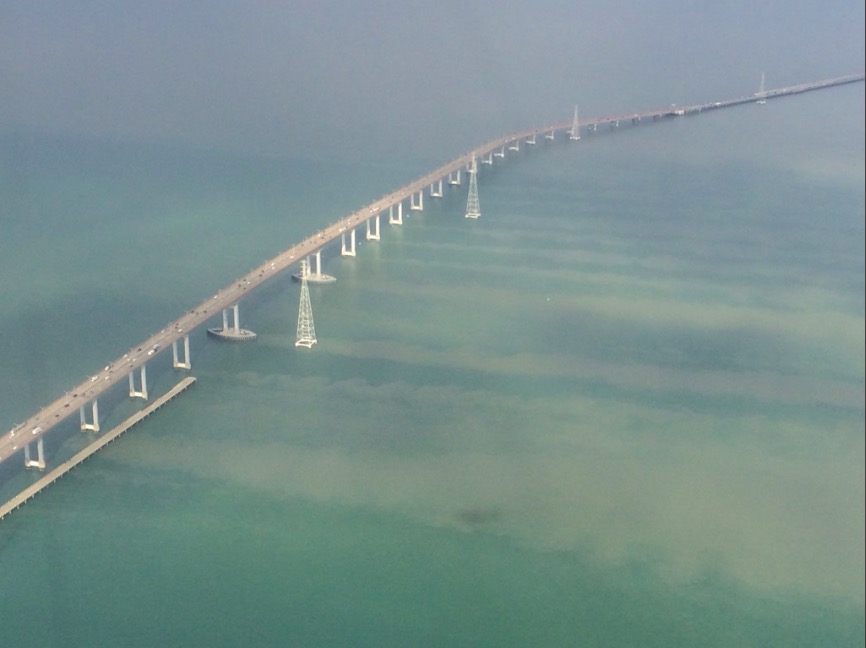
Ooooh, this is awesome! Phil writes “photo of an awesome phenomenon that I took just before landing at SFO. San Mateo Bridge, San Francisco Bay on an evidently quickly rising tide!” and I am love the vortex streets! Count 4 pylons up from the bottom — that’s such a nice and clear von Kármán vortex street, absolutely beautiful! And then the bottom one does seem to show som shear instability. Now. In some spots vortex streets develop, while in others they don’t. But why?
21:06 — Clark (Bay of Fundy)
Clark wrote an entire thread explaining this awesome observation in the Bay of Fundy. You should totally check out the whole thread & explanations on Twitter, but I had to share this video so you can see what an exciting situation it is!
20:51 — Elin (Bergen)
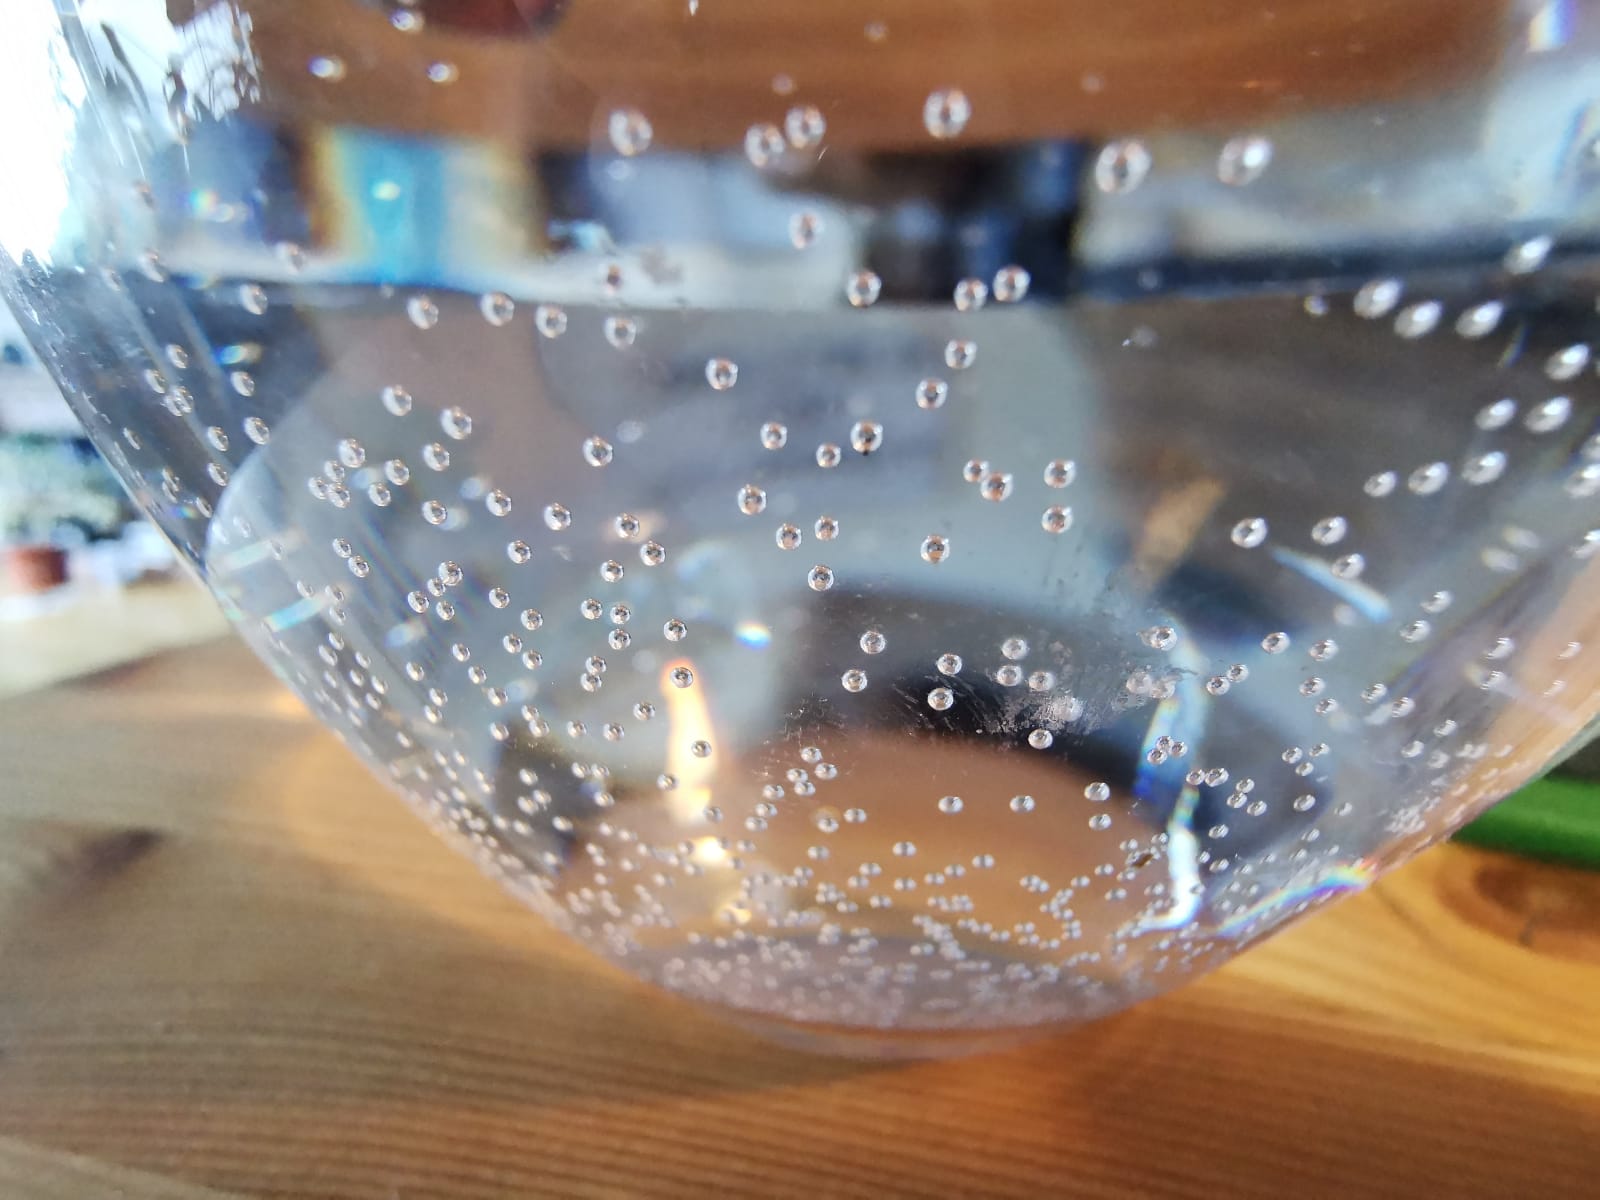
Oh, nice one! Lots of tiny air bubbles in a vase or jug filled with water. Now. Is the line crossing through the water level? It kinda looks like it at first glance, because it seems to show a meniscus. On the other hand, there are bubbles sitting above that line, and they don’t look qualitatively different from the ones “under water”, so that seems unlikely. But then light seems to be refracted substantially differently above and below that line, so maybe we are looking at the water surface at some weird angle? Intuitively I would say that we are looking in from underneath the water level, but see the water line on the opposite side of the vessel. But that doesn’t seem to make sense with the (most likely level) table top? I will have to think about this some more!
18:14 — Simone (Hamburg)
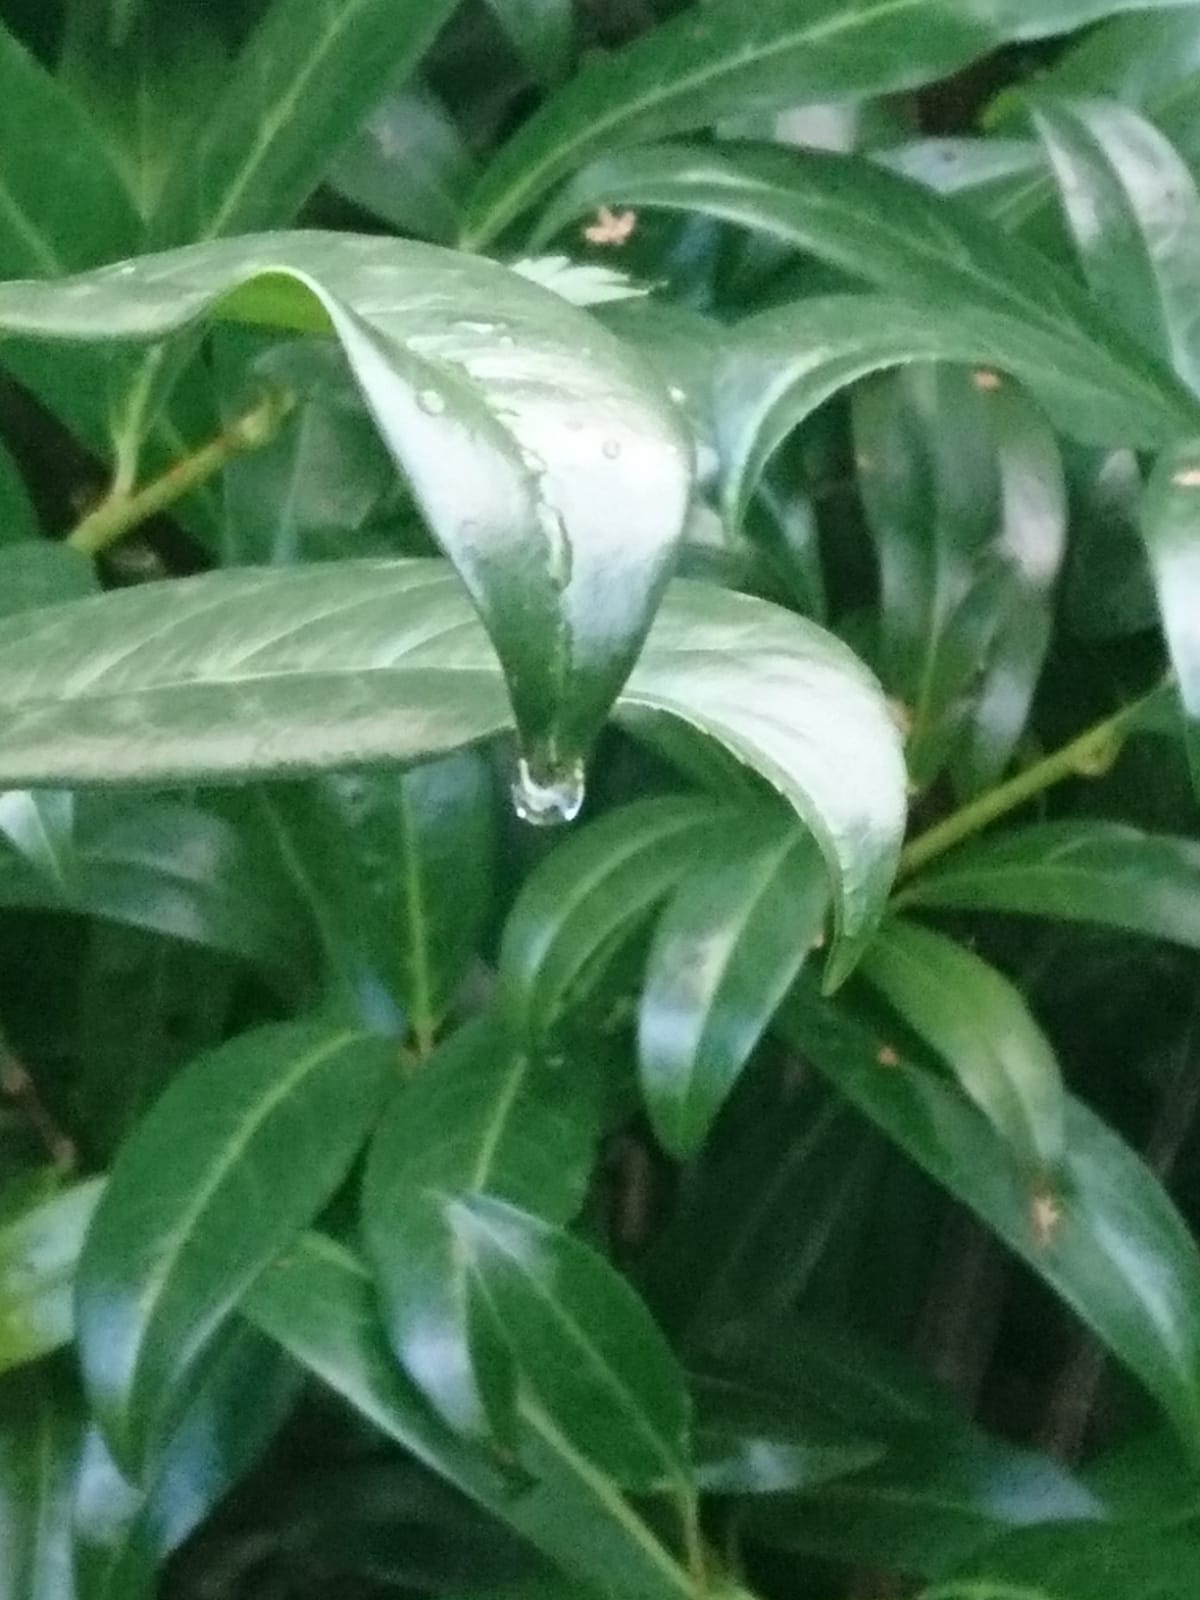
How beautiful — in this drop we see the tip of the leaf it is hanging on pointing uo from the lower end of the drop! Nice example of how drops act as lenses and show us the world upside-down!
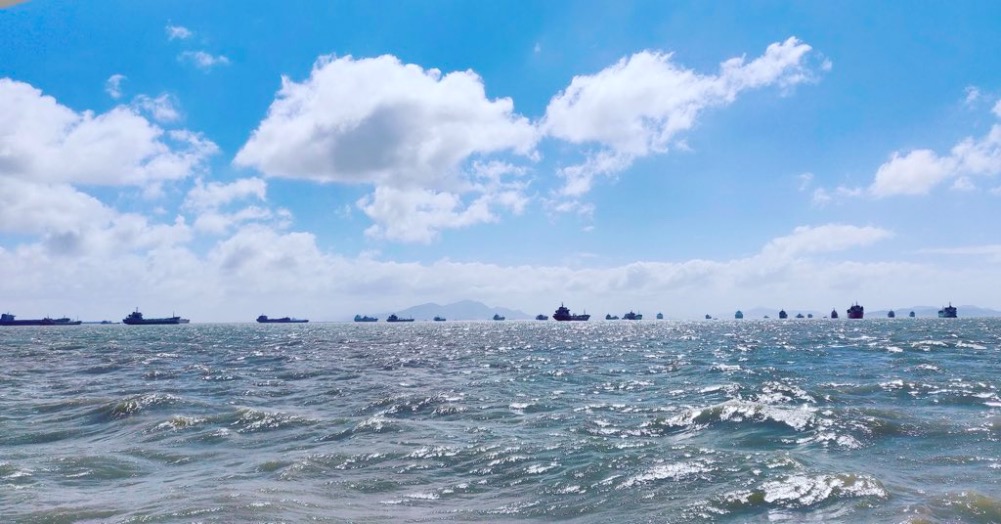
Oh! Nice long waves coming in from far offshore. From the shape of the wave profiles I would guess that this was taken close to shore in shallow-ish water. This seems to be confirmed by the waves changing direction from further away coming towards us, which would indicate that the depth is changing over that distance
Unfortunately I could only screenshot that gif, check it out in the original tweet! What I find fascinating here is how there are two waves breaking offshore running towards us, but then there are several wave crests even closer to us that are still distinct and pointy (so the waves clearly didn’t loose all their energy breaking), but not breaking. I think there must be a shallow area where those two breaking waves are, making them break, and then deeper water again so that they are only temporarily tripping up and breaking, but then propagating further towards the shore without too much of an interruption
15:18 — Nena (Bodensee)
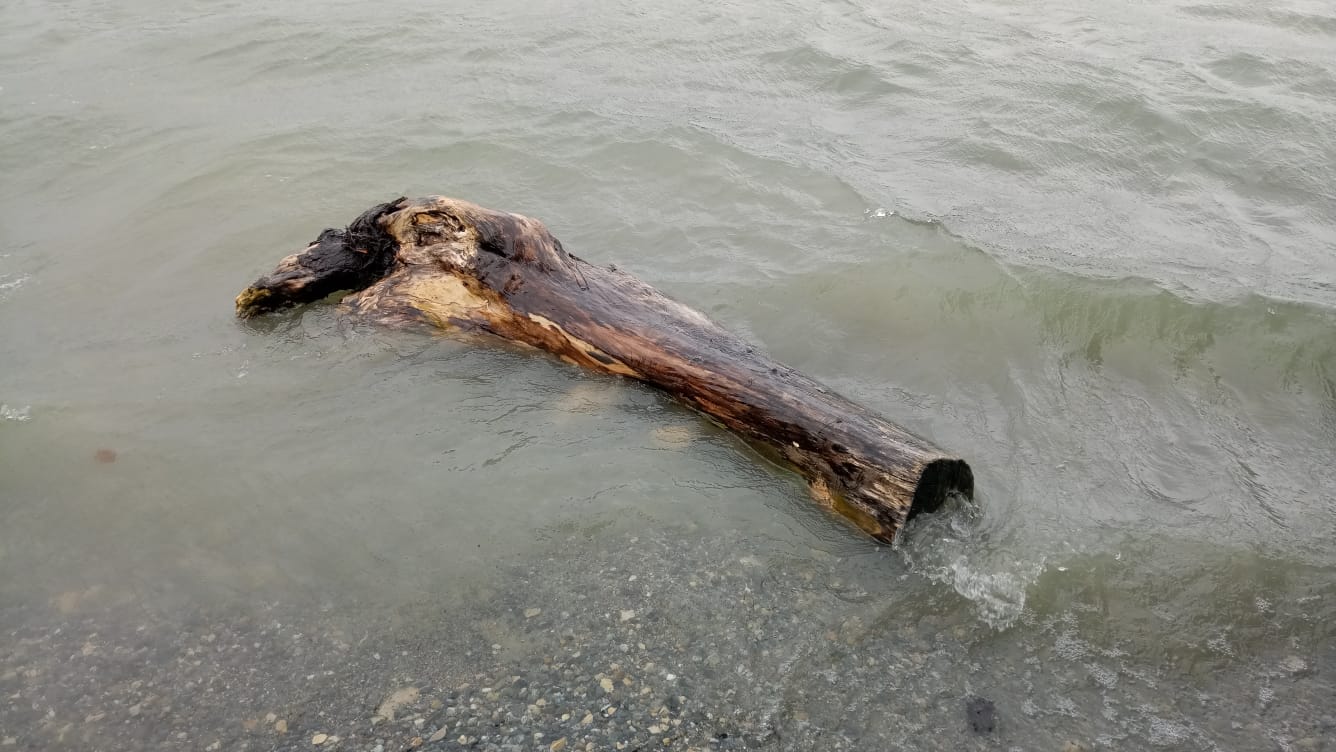
Oh, waves and a piece of driftwood! I wonder if it’s floating, it looks like it’s grounded. Otherwise I’d expect it to move with the waves, creating a dipole pattern when the ends take turns coming further out and then sinking deeper into the water.
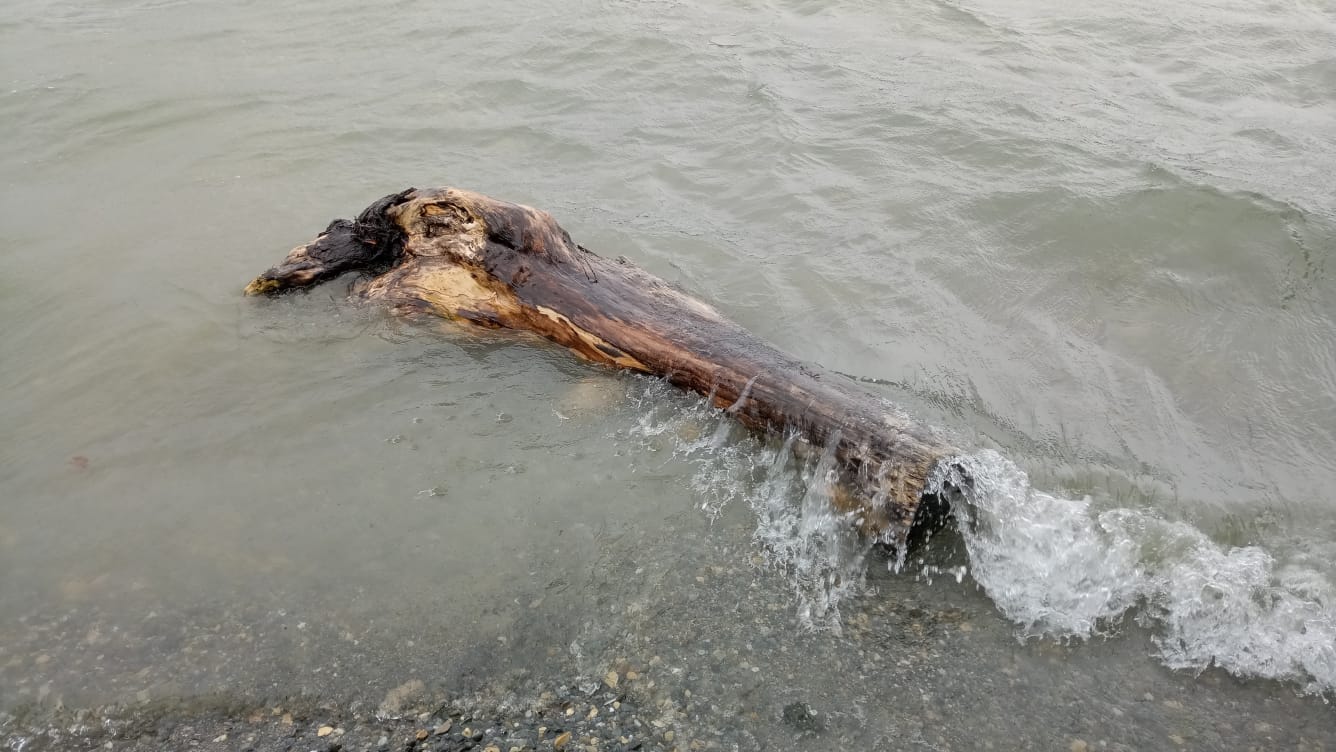
And now a larger wave, breaking as it reaches the shore and also washing over the driftwood. I love how the water that came washing over the driftwood “in one piece” then disintegrates into drops when it falls down the other side!
15:13 — Jeffrey (Boulder)
Wow, this video is super tricky! Please check it out — volume up!
At first, I thought that the periodicity was set by eddies shedding periodically after water had washed over the obstacle. But after about the 50th time I looked at the video, the obstacle (is it driftwood?) seemed to start moving. If it is actually moving, the periodicity makes sense: The wood is trapped in place (you see that on the far side of the river) but it can move a little. It’s bopping on the water, floating at whatever height the waterlevel is at, but at the same time acting as a dam and trapping water on its upstream side, thus influencing the waterlevel. So this is basically a recharge-discharge oscillator. Maybe. Or maybe not. Any ideas, anyone? This is really tricky!
12:38pm — Gabriela (Lüneburg)
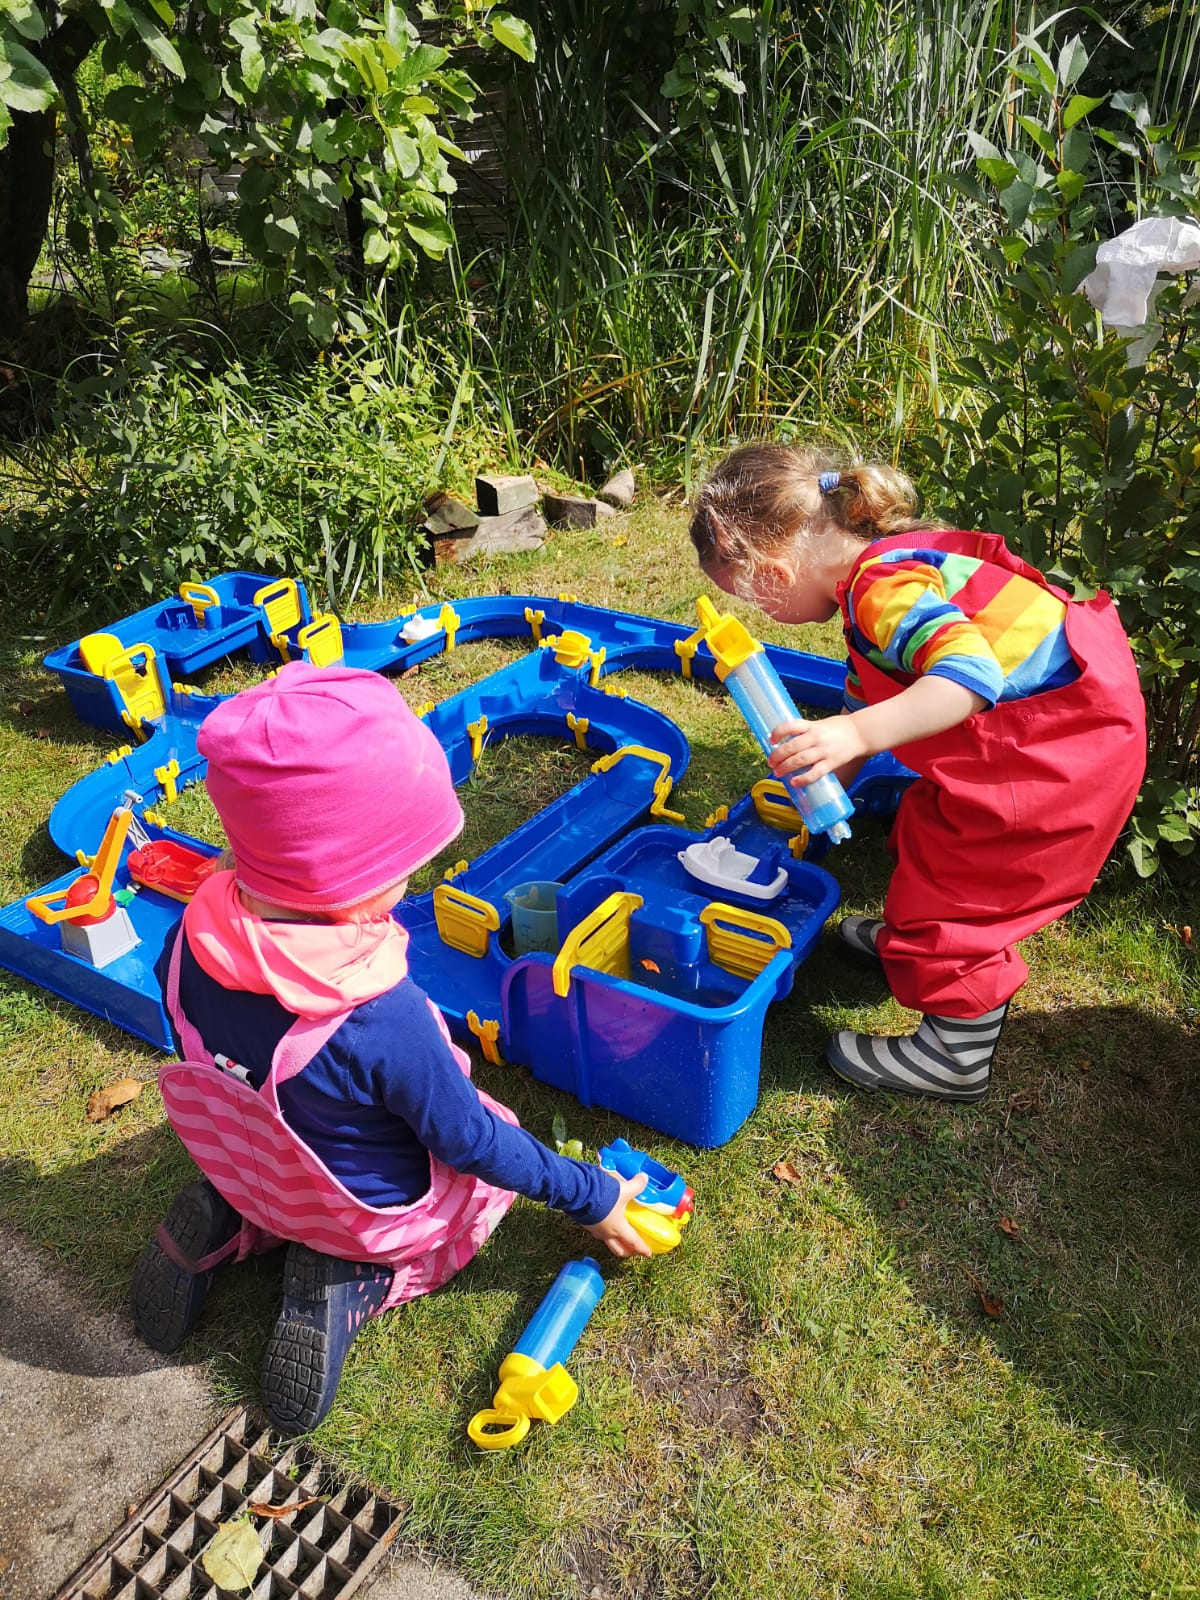
I would be so jealous of those kids playing with the locks and weirs and water channels if they weren’t my adorable nieces. Now I just can’t wait to go visit & play with this really cool toy!
11:49am — Gabriela (Lüneburg)

Somehow raindrop photography seems to be the topic of the day today? Here we see really well how a drop shows us an upside-down image of the world. See the sky at the bottom and the shed at the top, with the wine branches in the middle?
11:39am — Gabriela (Lüneburg)
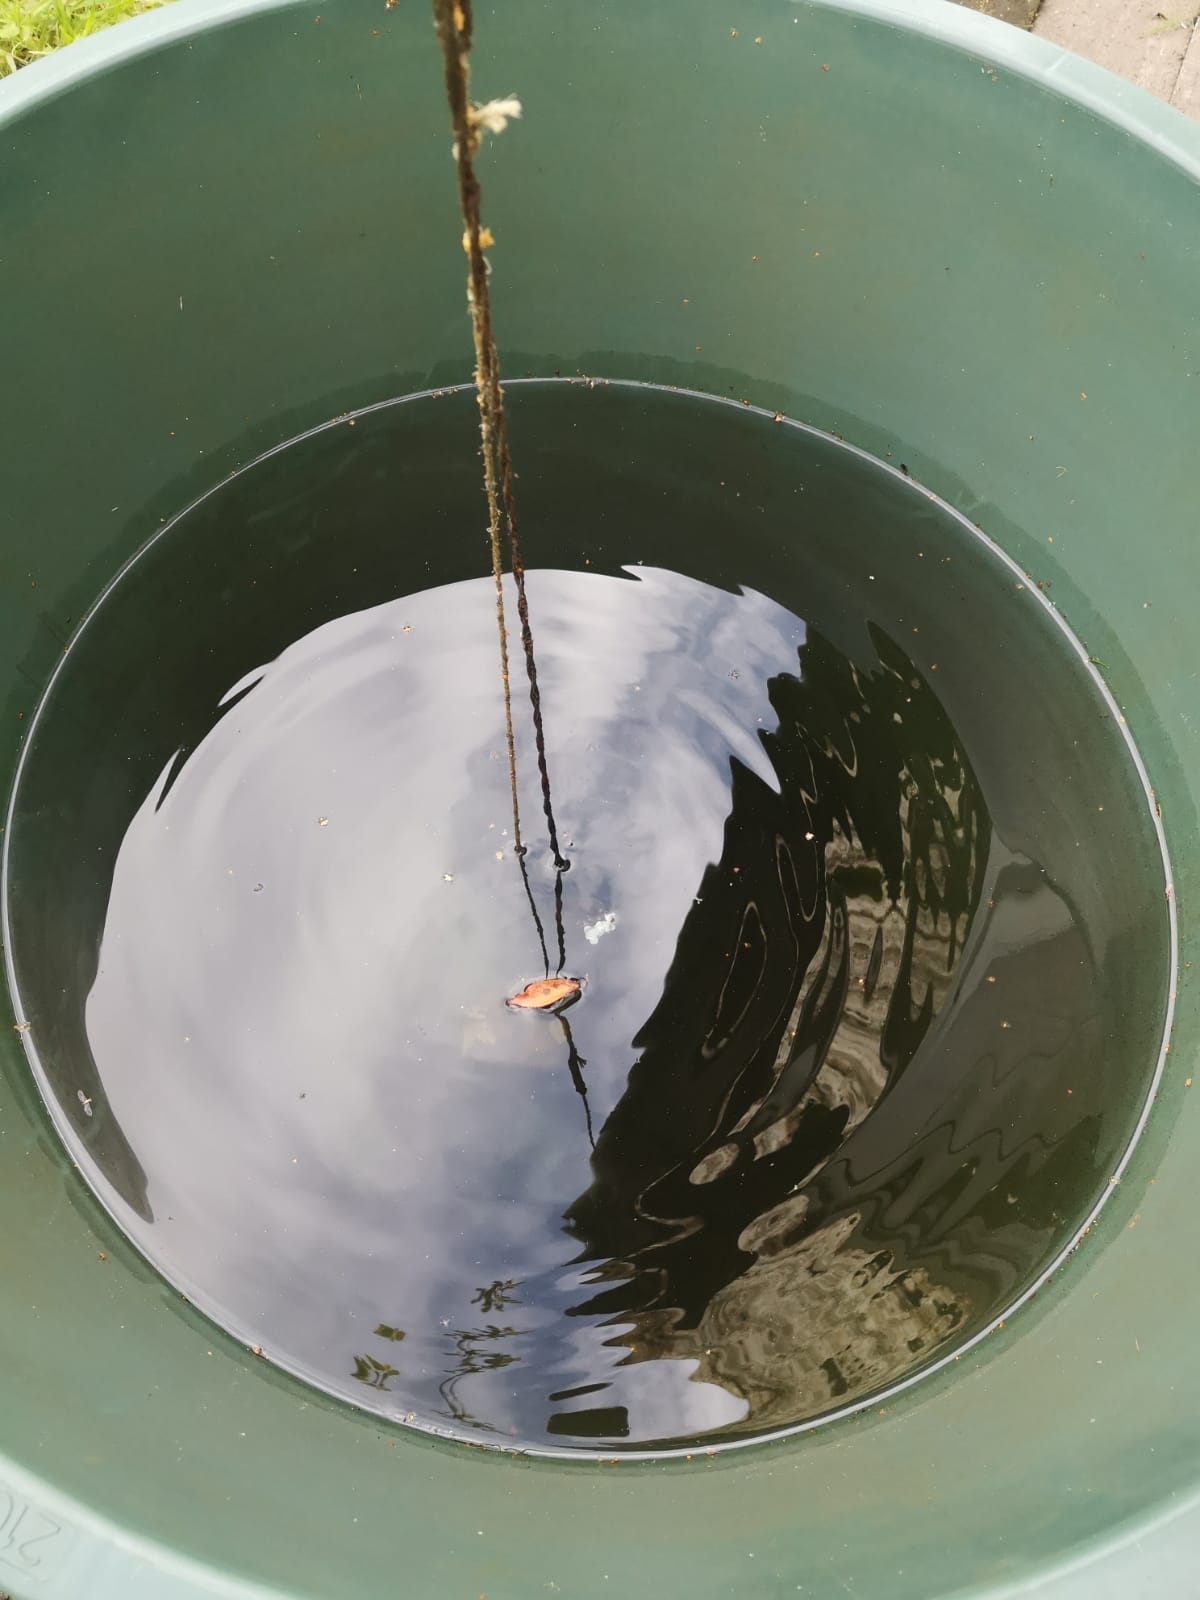
Oh, a rain barrel! I think someone touched the side (possibly kicked it) so we get waves radiating from the outside in. Could also be that someone moved the ropes, but I would expect shorter wavelength waves then
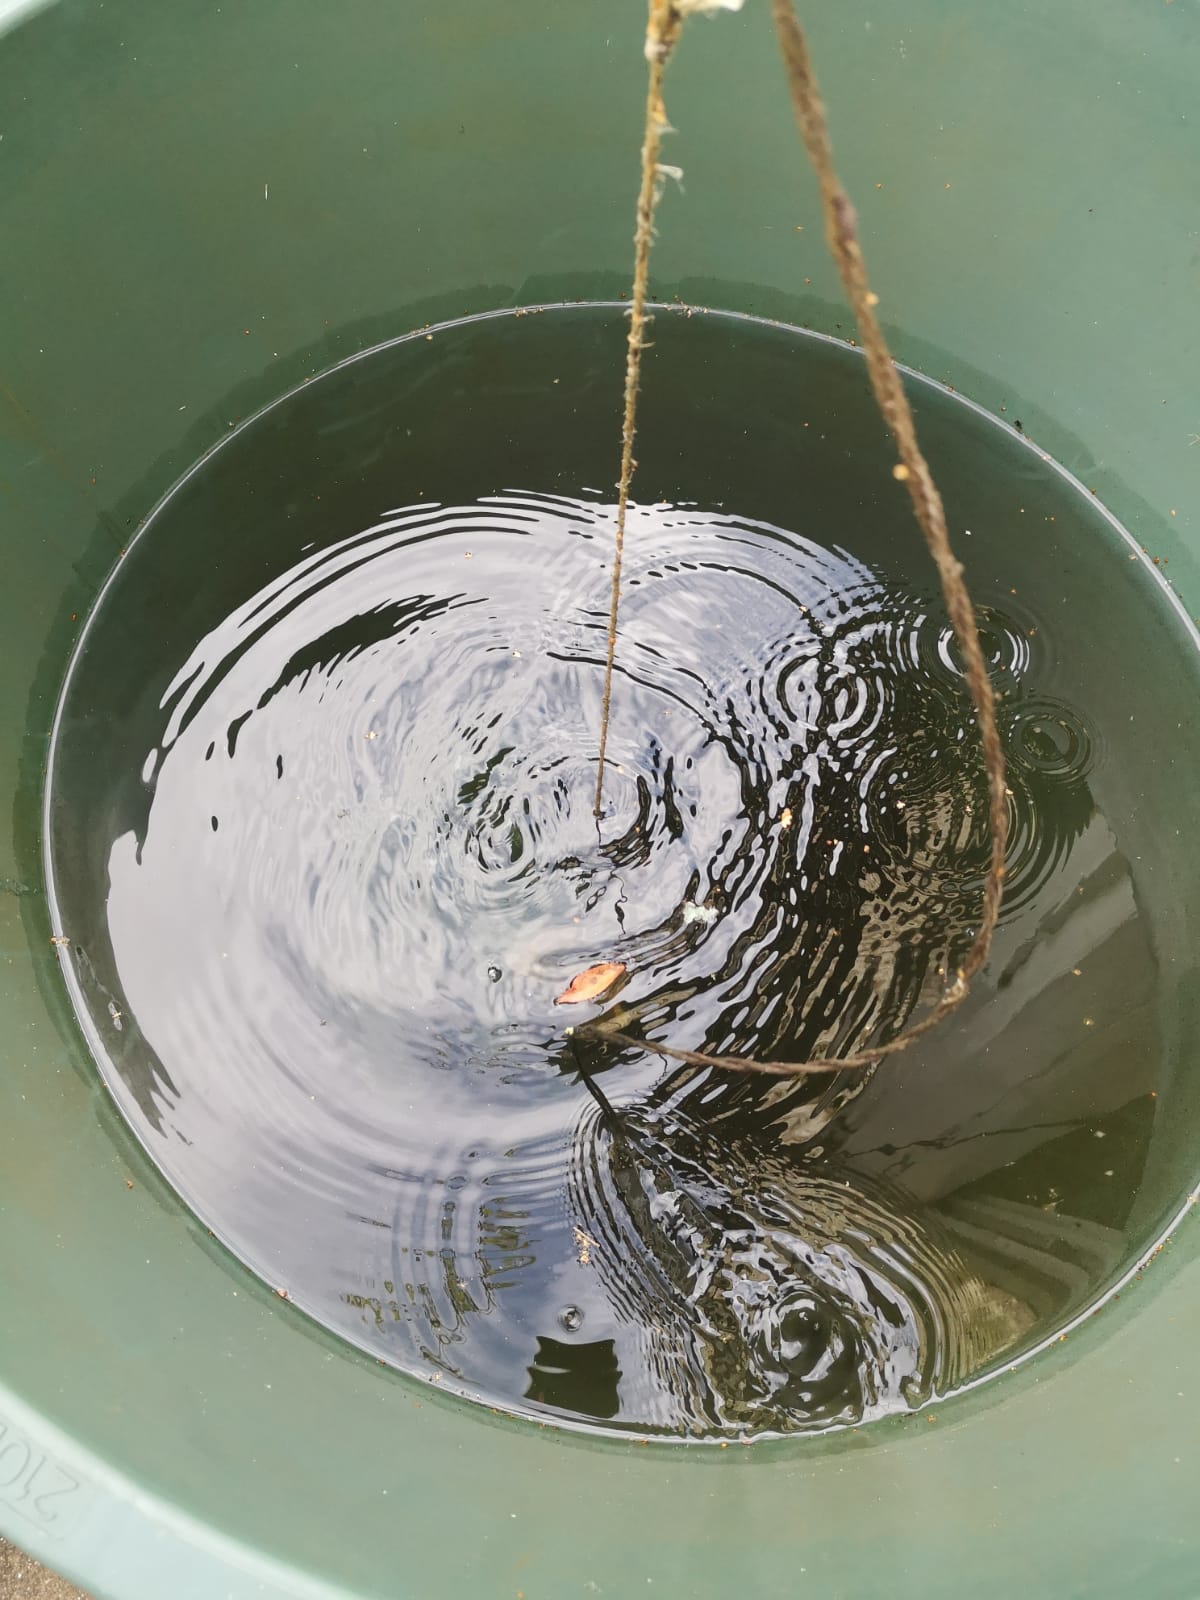
This would be sooo difficult to interpret if I didn’t have inside knowlege: There are rocks hanging at the end of those strings to keep them in the center of the barrel, to guide the rain water in. What happened here is that someone pulled one of the strings to the side and let go of it. We see that the rock that was lifted when the rope was pulled out, is pulling the rope down again. That’s why the rope still has this weird bow shape, and that’s why we get kinda a wake where the rope moved from the outside of the barrel towards the center. All the other smaller ring waves are either drops that fell from the wet rope, or the ones that are centered around the other rope are caused by that rope vibrating because it’s attached to the first rope somewhere up on top
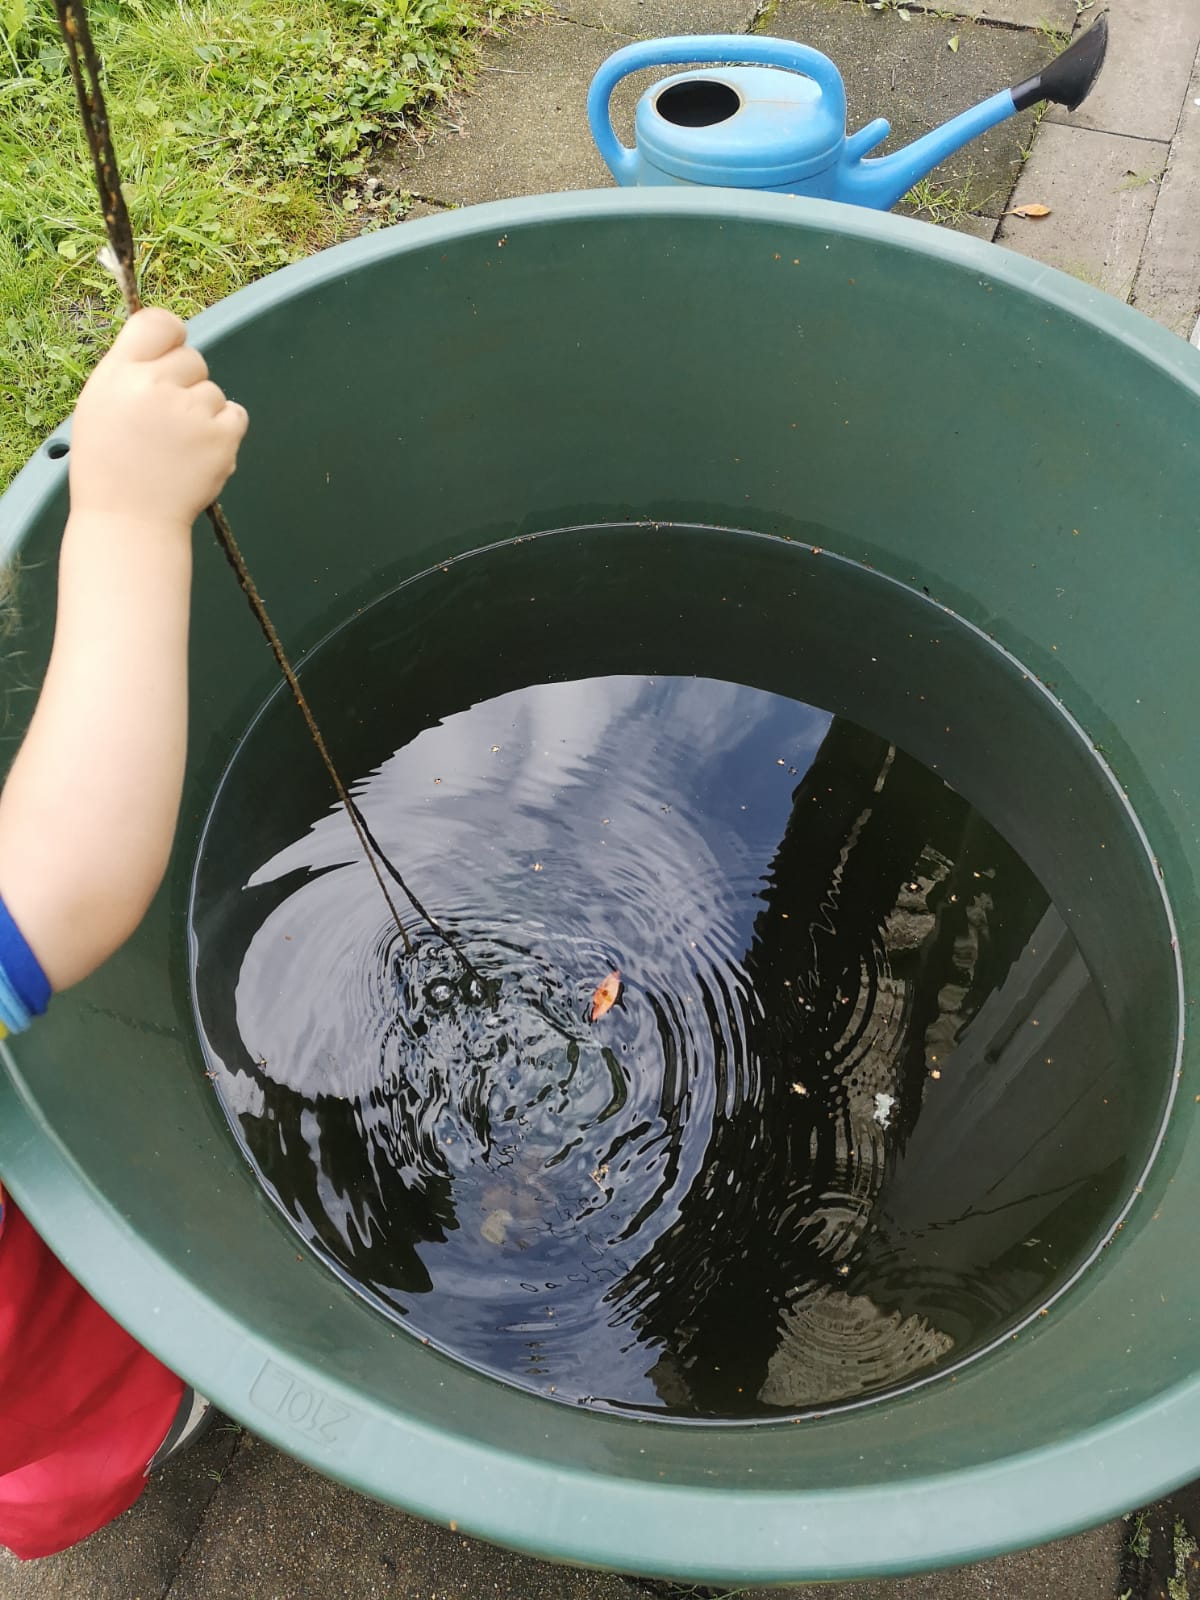
Here, my niece is demonstrating how to make wakes by swinging weighted ropes through water
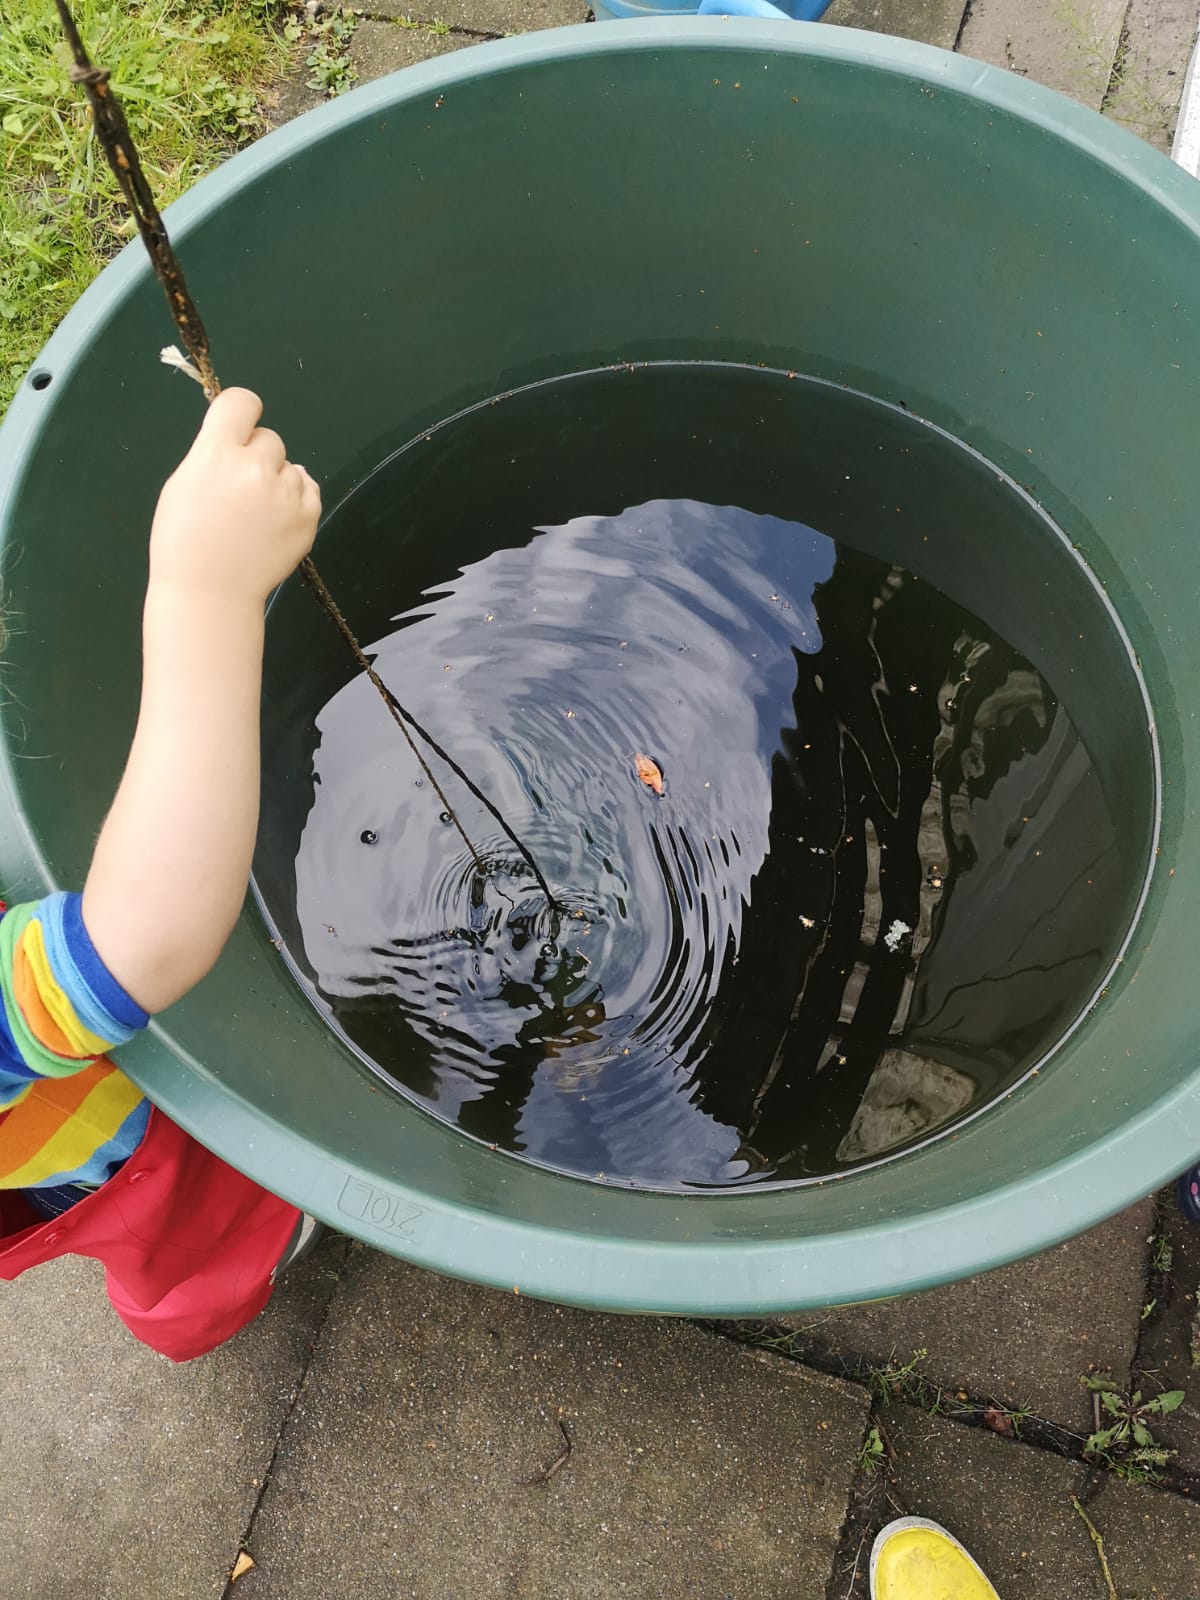
Same as above, but we nicely see the capillary waves that radiate away
11:20am — Katharina (Hamburg)
I guess I said I liked a challenge… Screenshots with comments below! And check out the sound in the movie! Volume up!
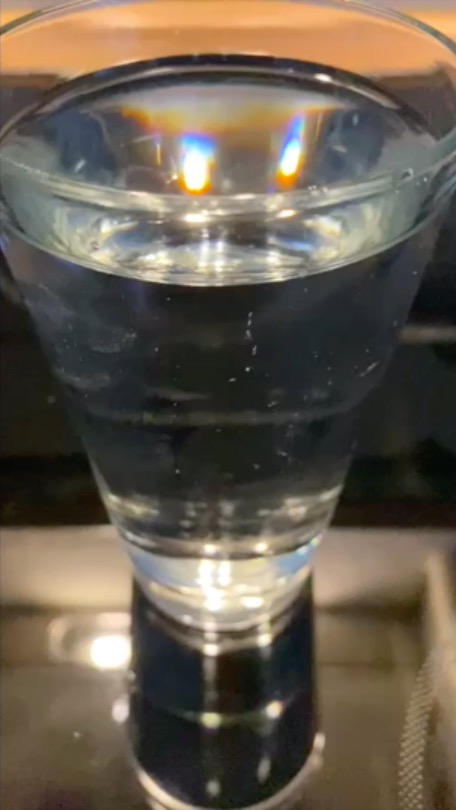
At first I thought this was going to be a movie with pretty rainbows and reflections — water can create awesome prism effects!
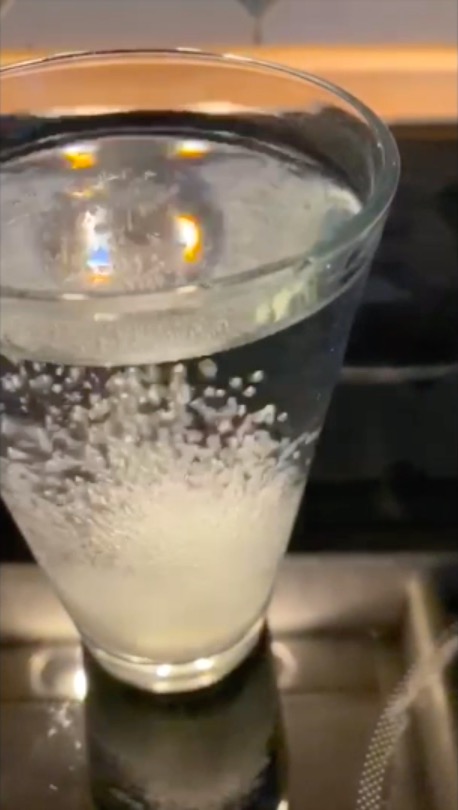
But no! She dropped a fizzy tablet in! Here we see the first gas bubbles bubbling up to the surface. The bubbles get bigger the closer they get to the surface, because the pressure decreases and they can therefore expand
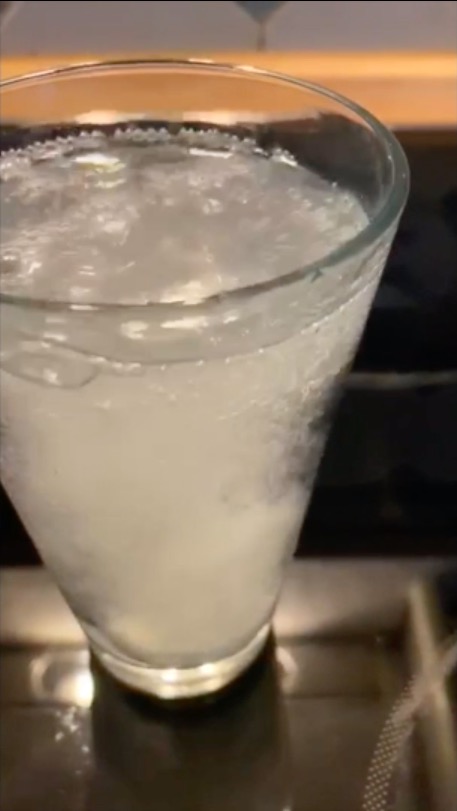
Already a lot of bubbling and fizzing going on! On the right side of the glass we can see that the gas bubbles are released in bursts. We also hear that when listening to the sound in the movie. Also funny to see how the bubbles raise in the middle of the glass and the flow is really turbulent there. Only at the rim can bubbles persist without bursting for a little while
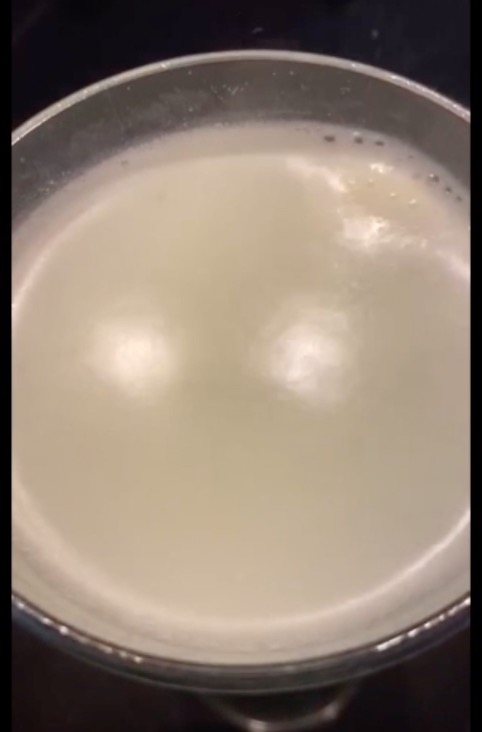
The tablet has almost completely dissolved now, and what little is left has floated up to the surface (upper right). Btw, that fizzing sound is not really made by the water itself, it’s all the tiny bubbles bursting. Since sound are pressure waves and bursting bubbles radiate pressure, as the gas inside of the bubble is at higher pressure than the surrounding air and expands until the bubble bursts and then the pressure equilibrates. That’s what we hear!
10:46am — Astrid (Hamburg)
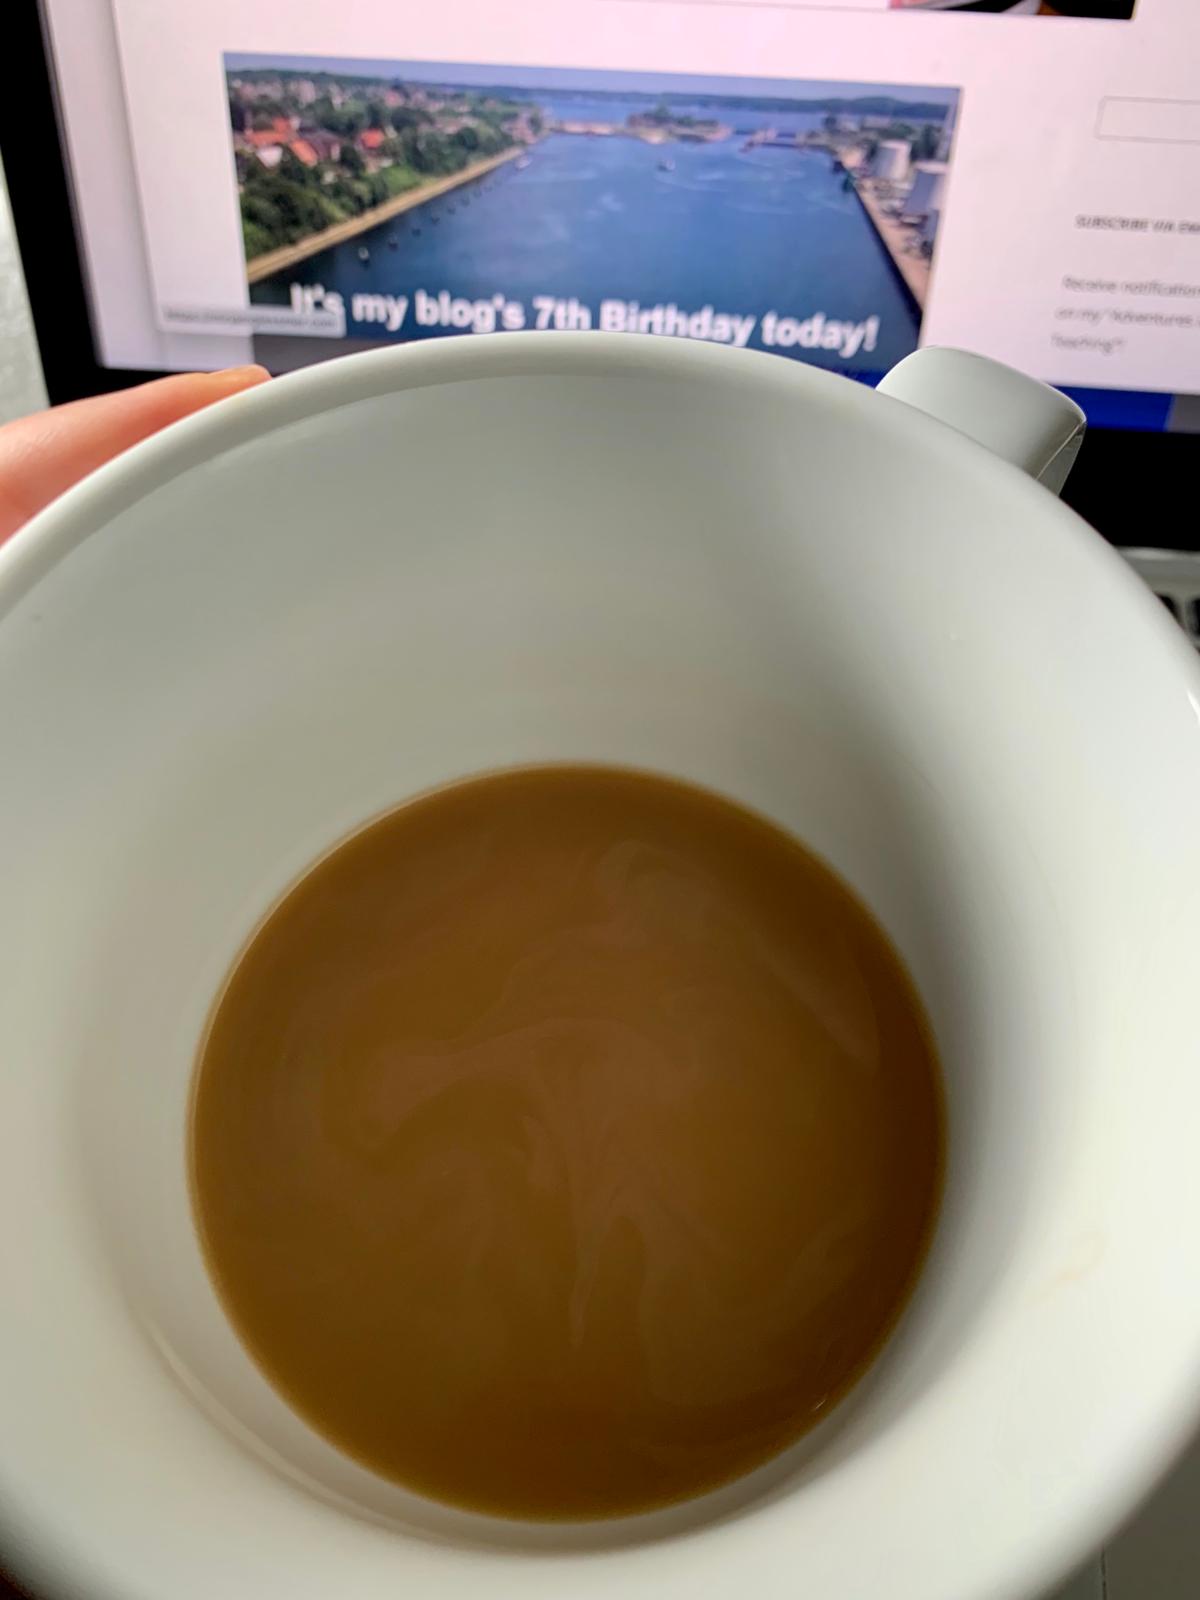
Astrid has a great taste! Both in her choice of reading materials (my blog!) and in her taste of coffee, with the beautiful swirls of milk in it. Here we see that molecular diffusion is slow when it has to physically swap whole molecules around — the swirls of milk are still distinguishable in the coffee (she clearly didn’t stir). But I would be prepared to bet that the milk has the same temperature as the coffee, because molecular diffusion of heat is fast (and also because she likes her coffee hot, the milk most likely went in hot)!
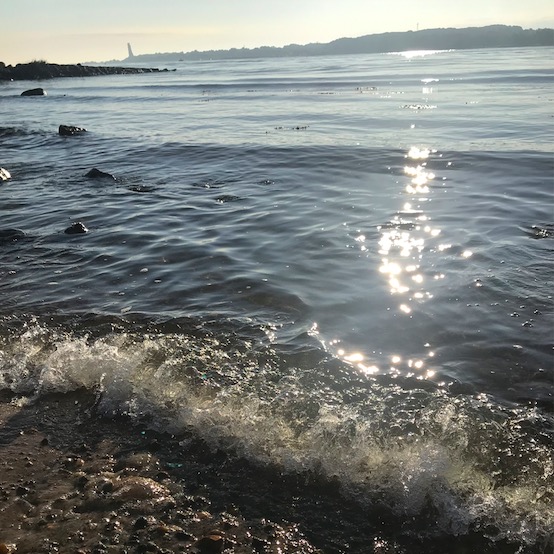
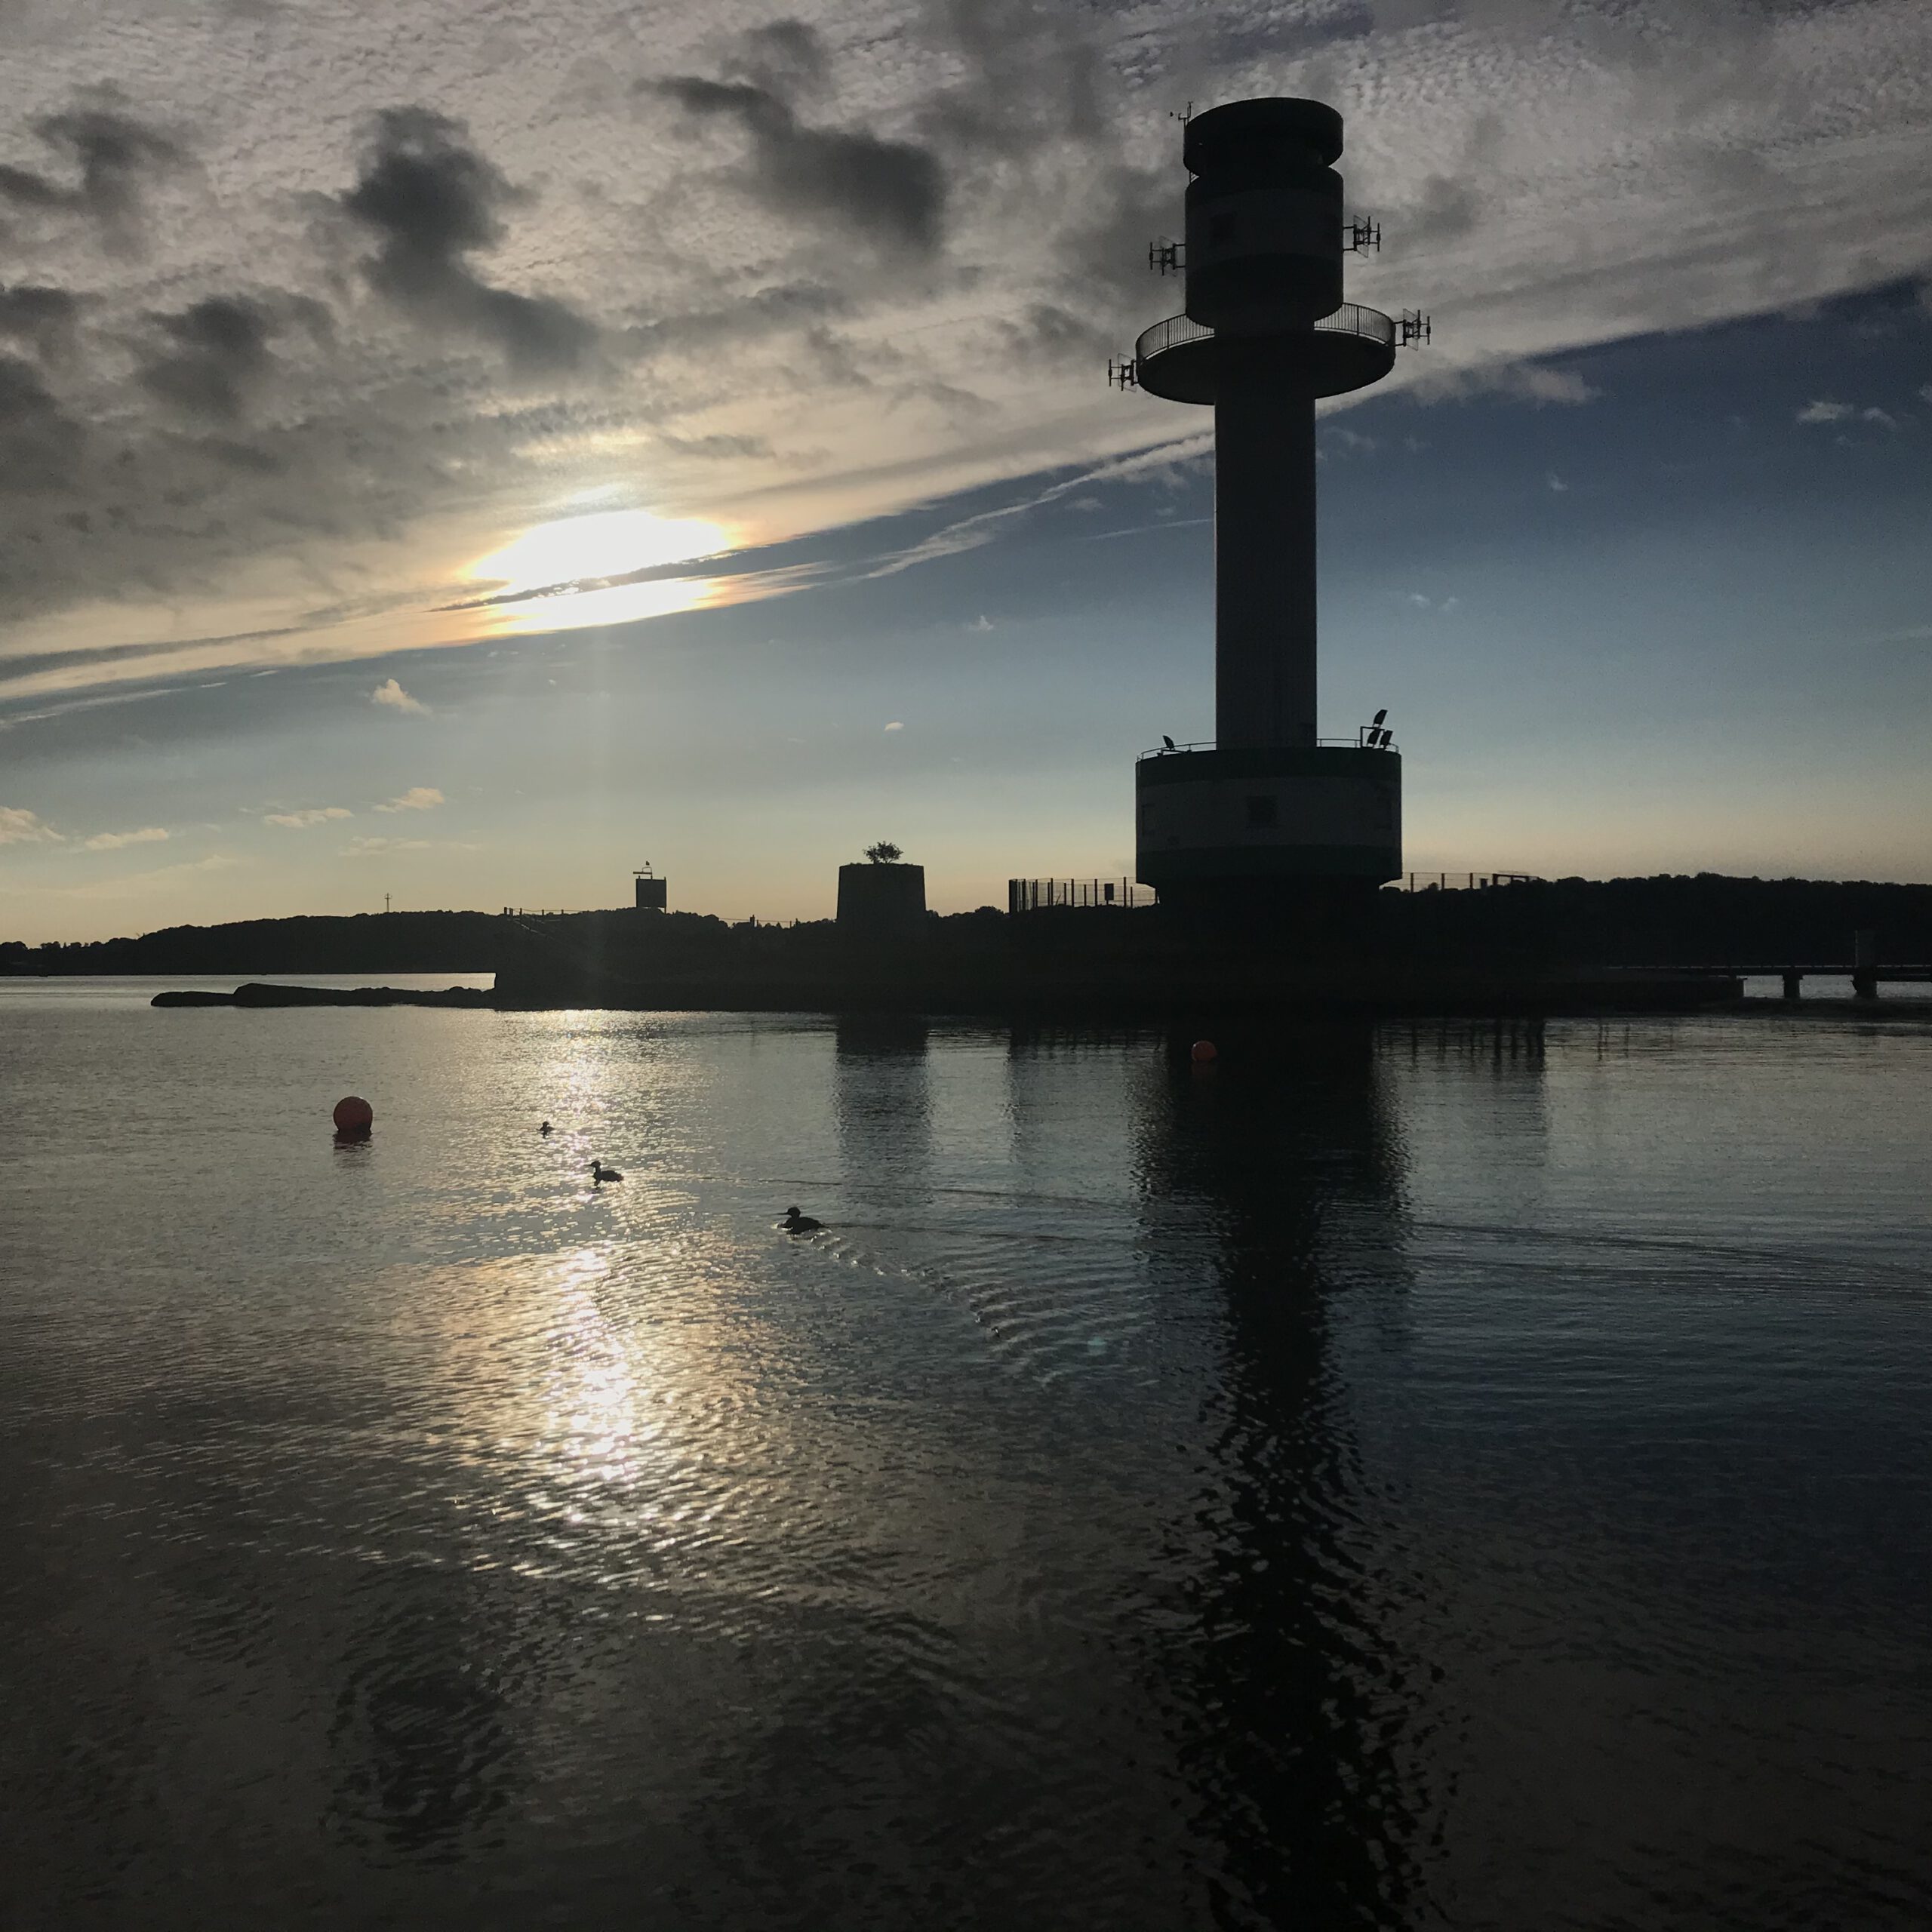
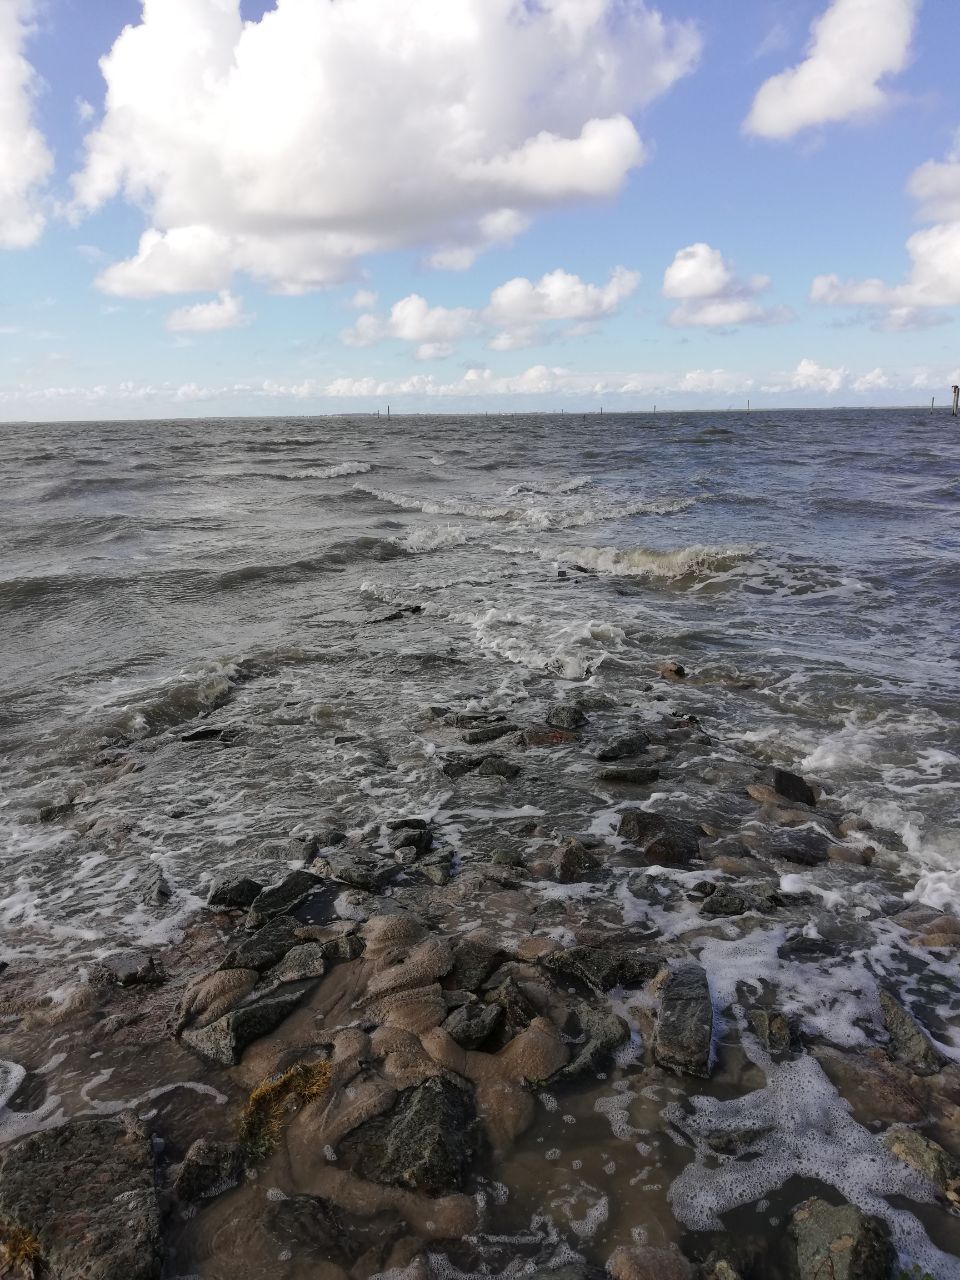
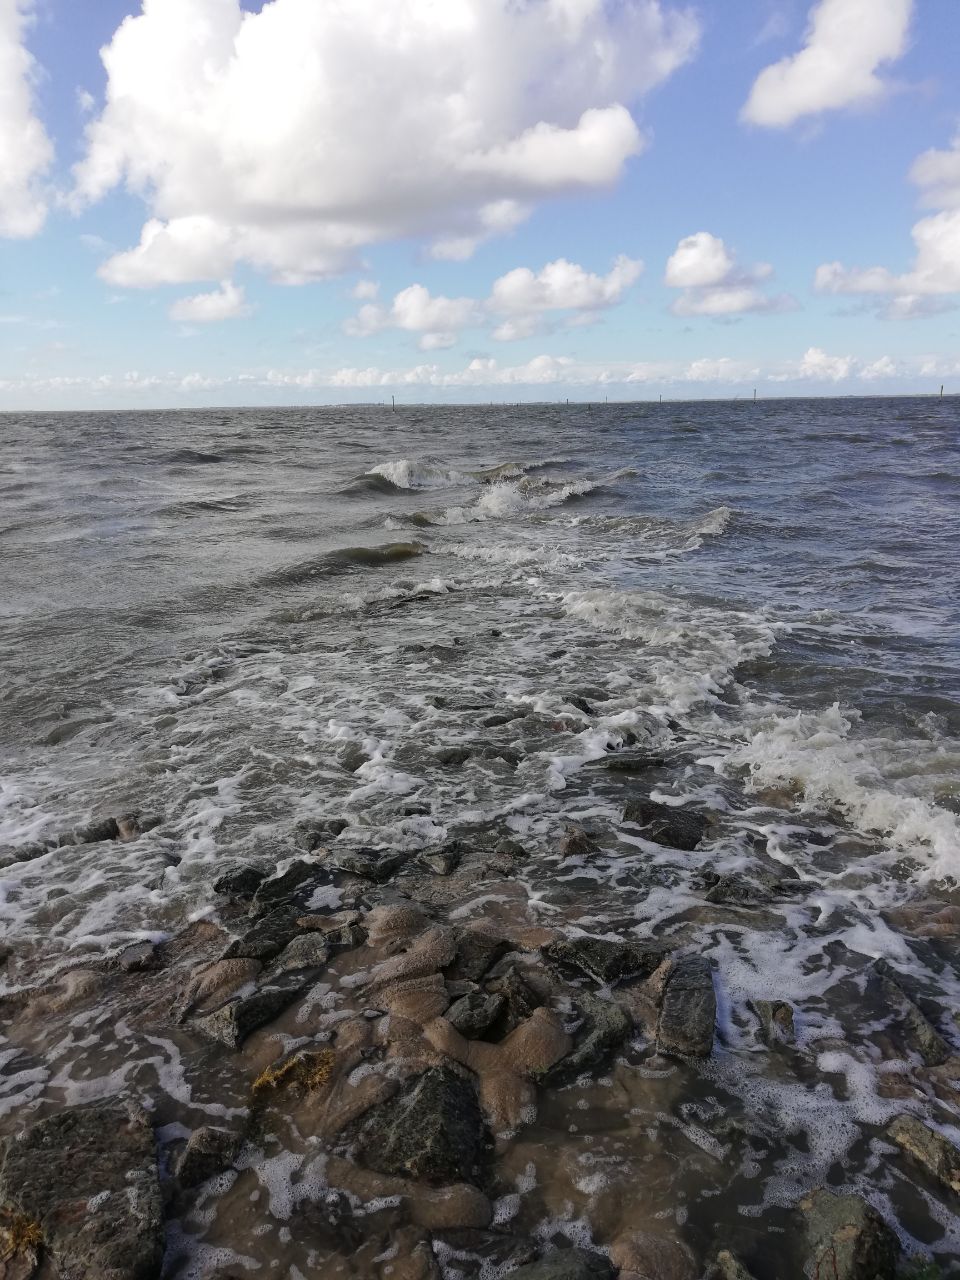
10:38am — Sara (Klein Waabs)
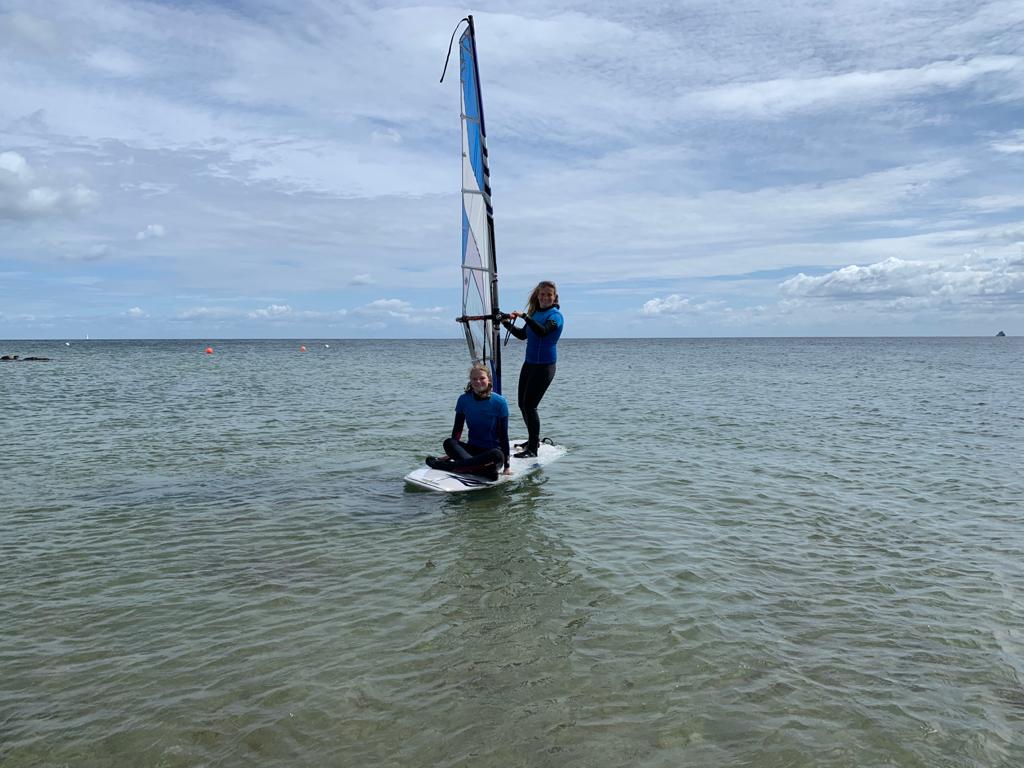
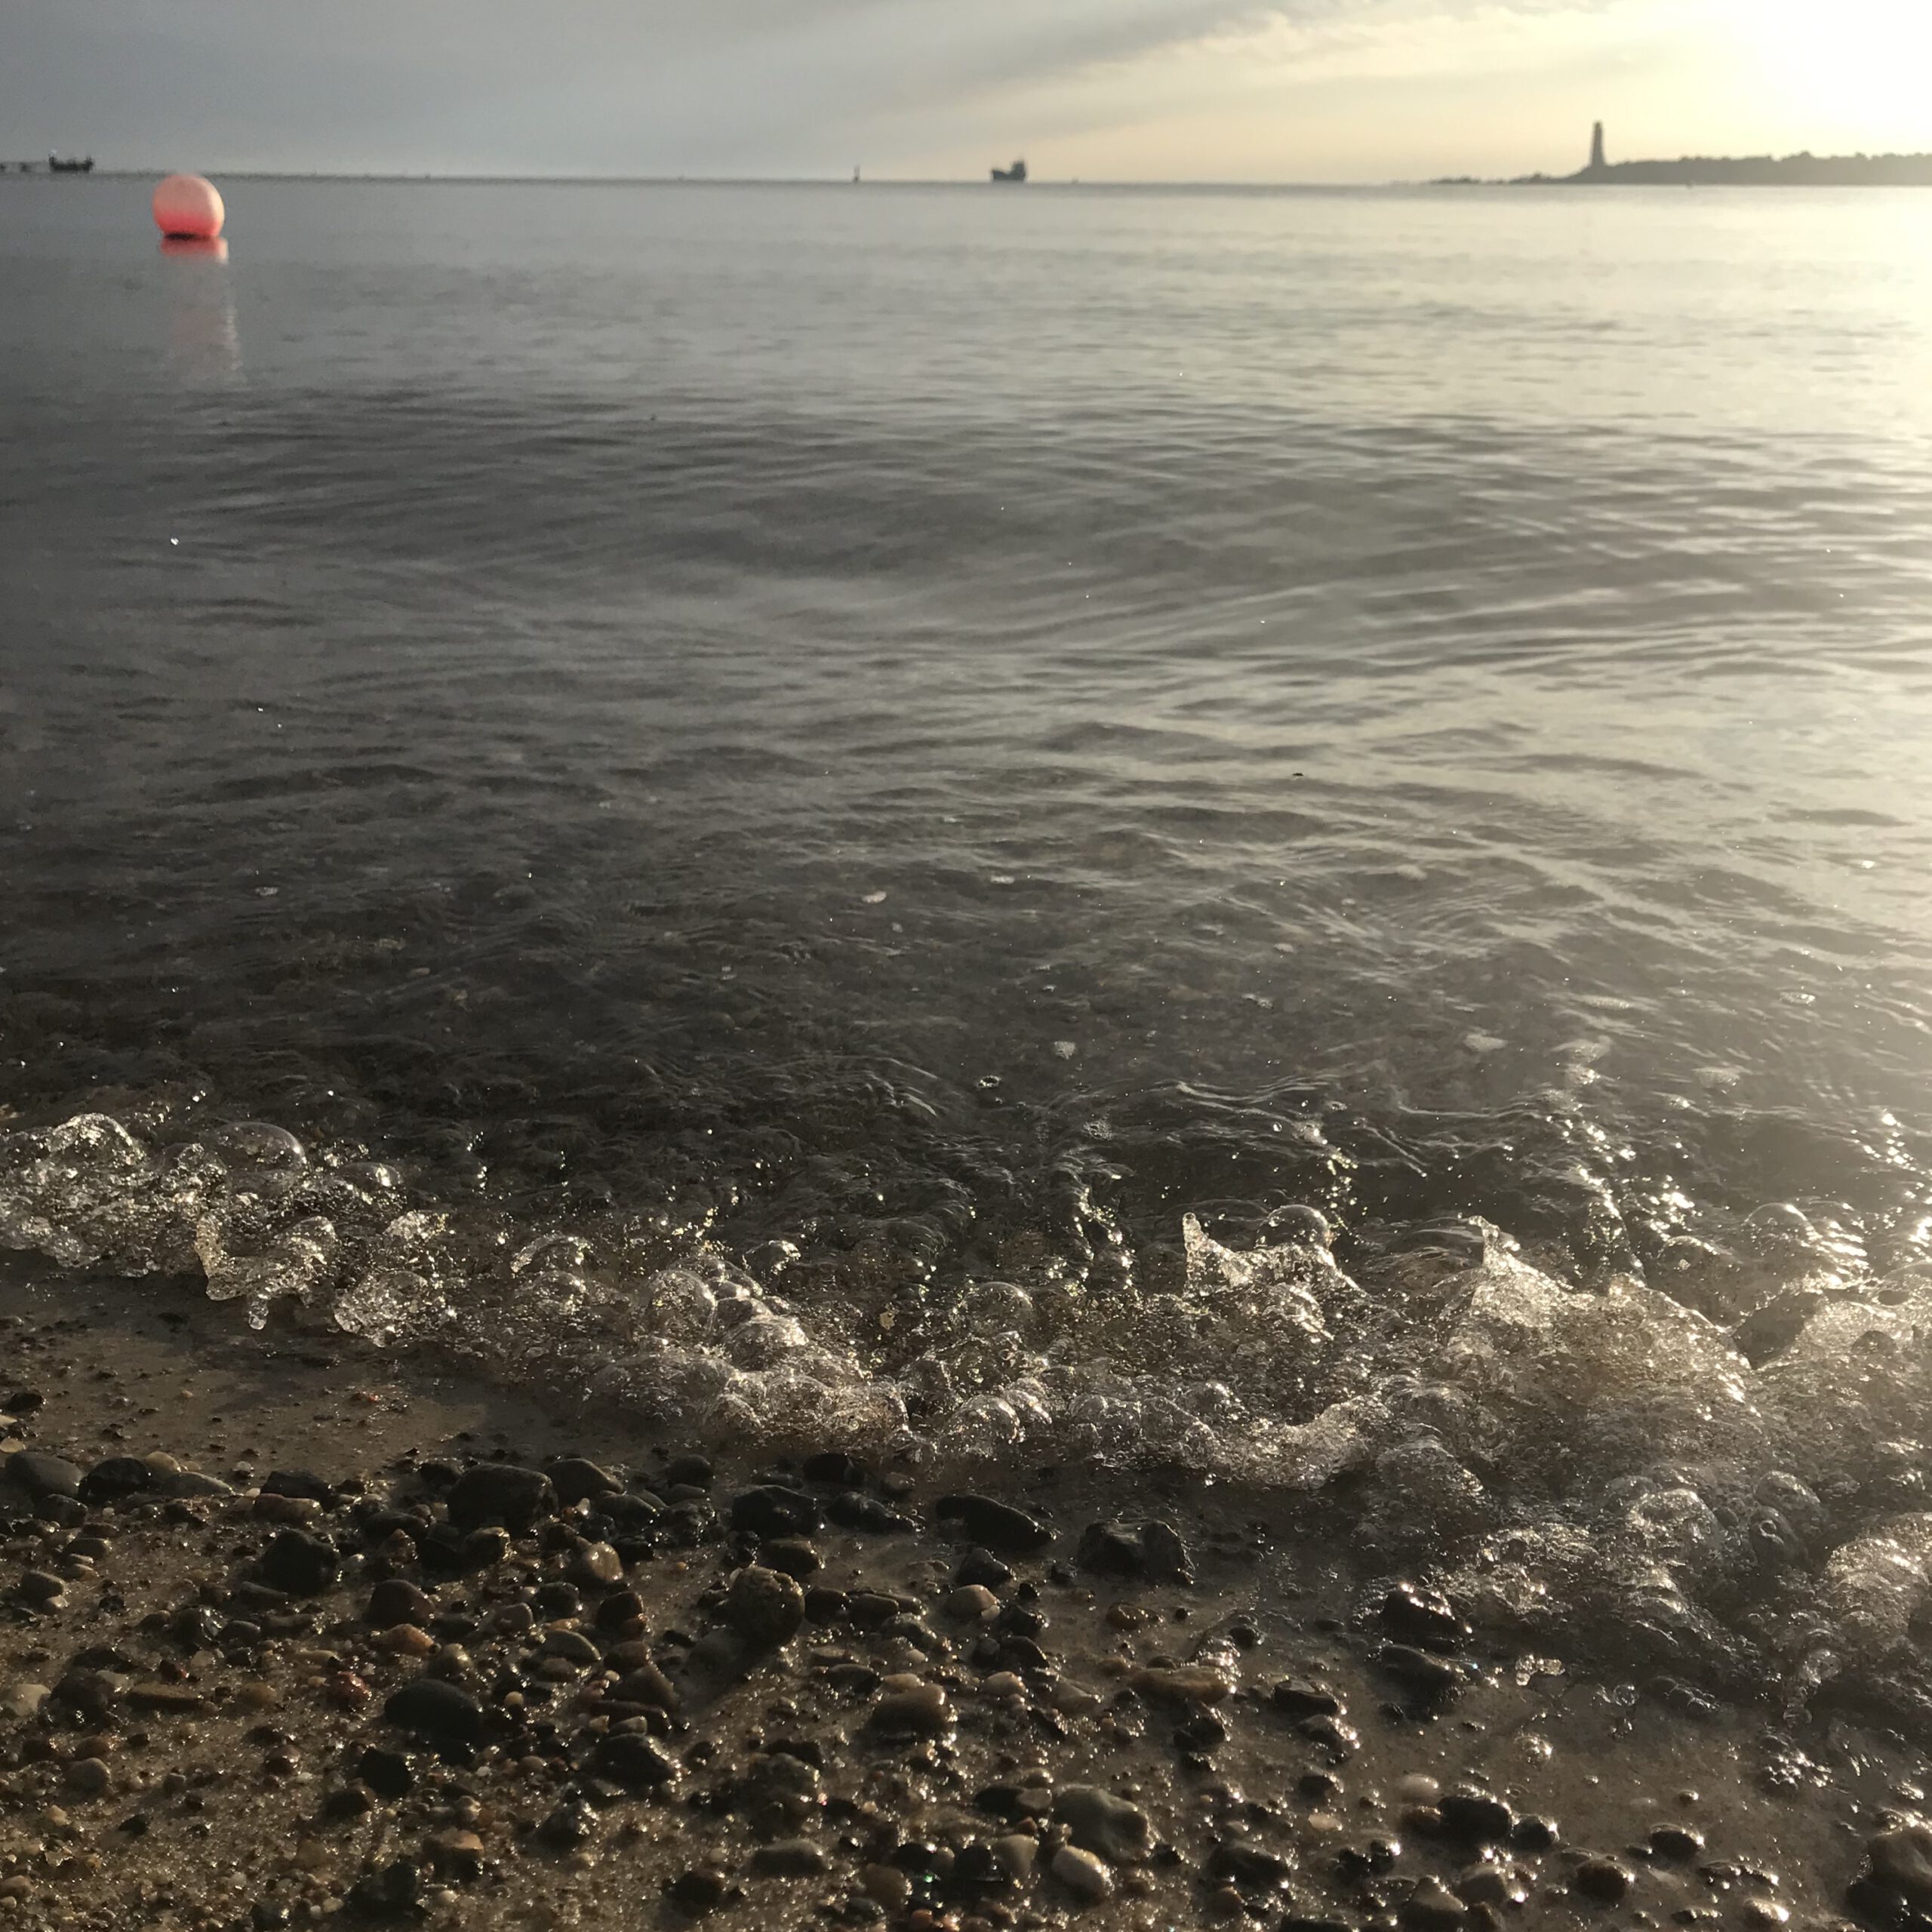
Phew, this is a difficult one! The first structures that jump at me (besides the wind surfers, of course) are the shadow of the sail (from the board to the left) and the reflection of the sail (from the board towards us), which are kind of distracting from the waves. And the waves are kind of messy, there is no clear direction visible. There is some wind causing the waves. Not very much, but enough to make it difficult to distinguish wind waves from others caused e.g. by the surf board.
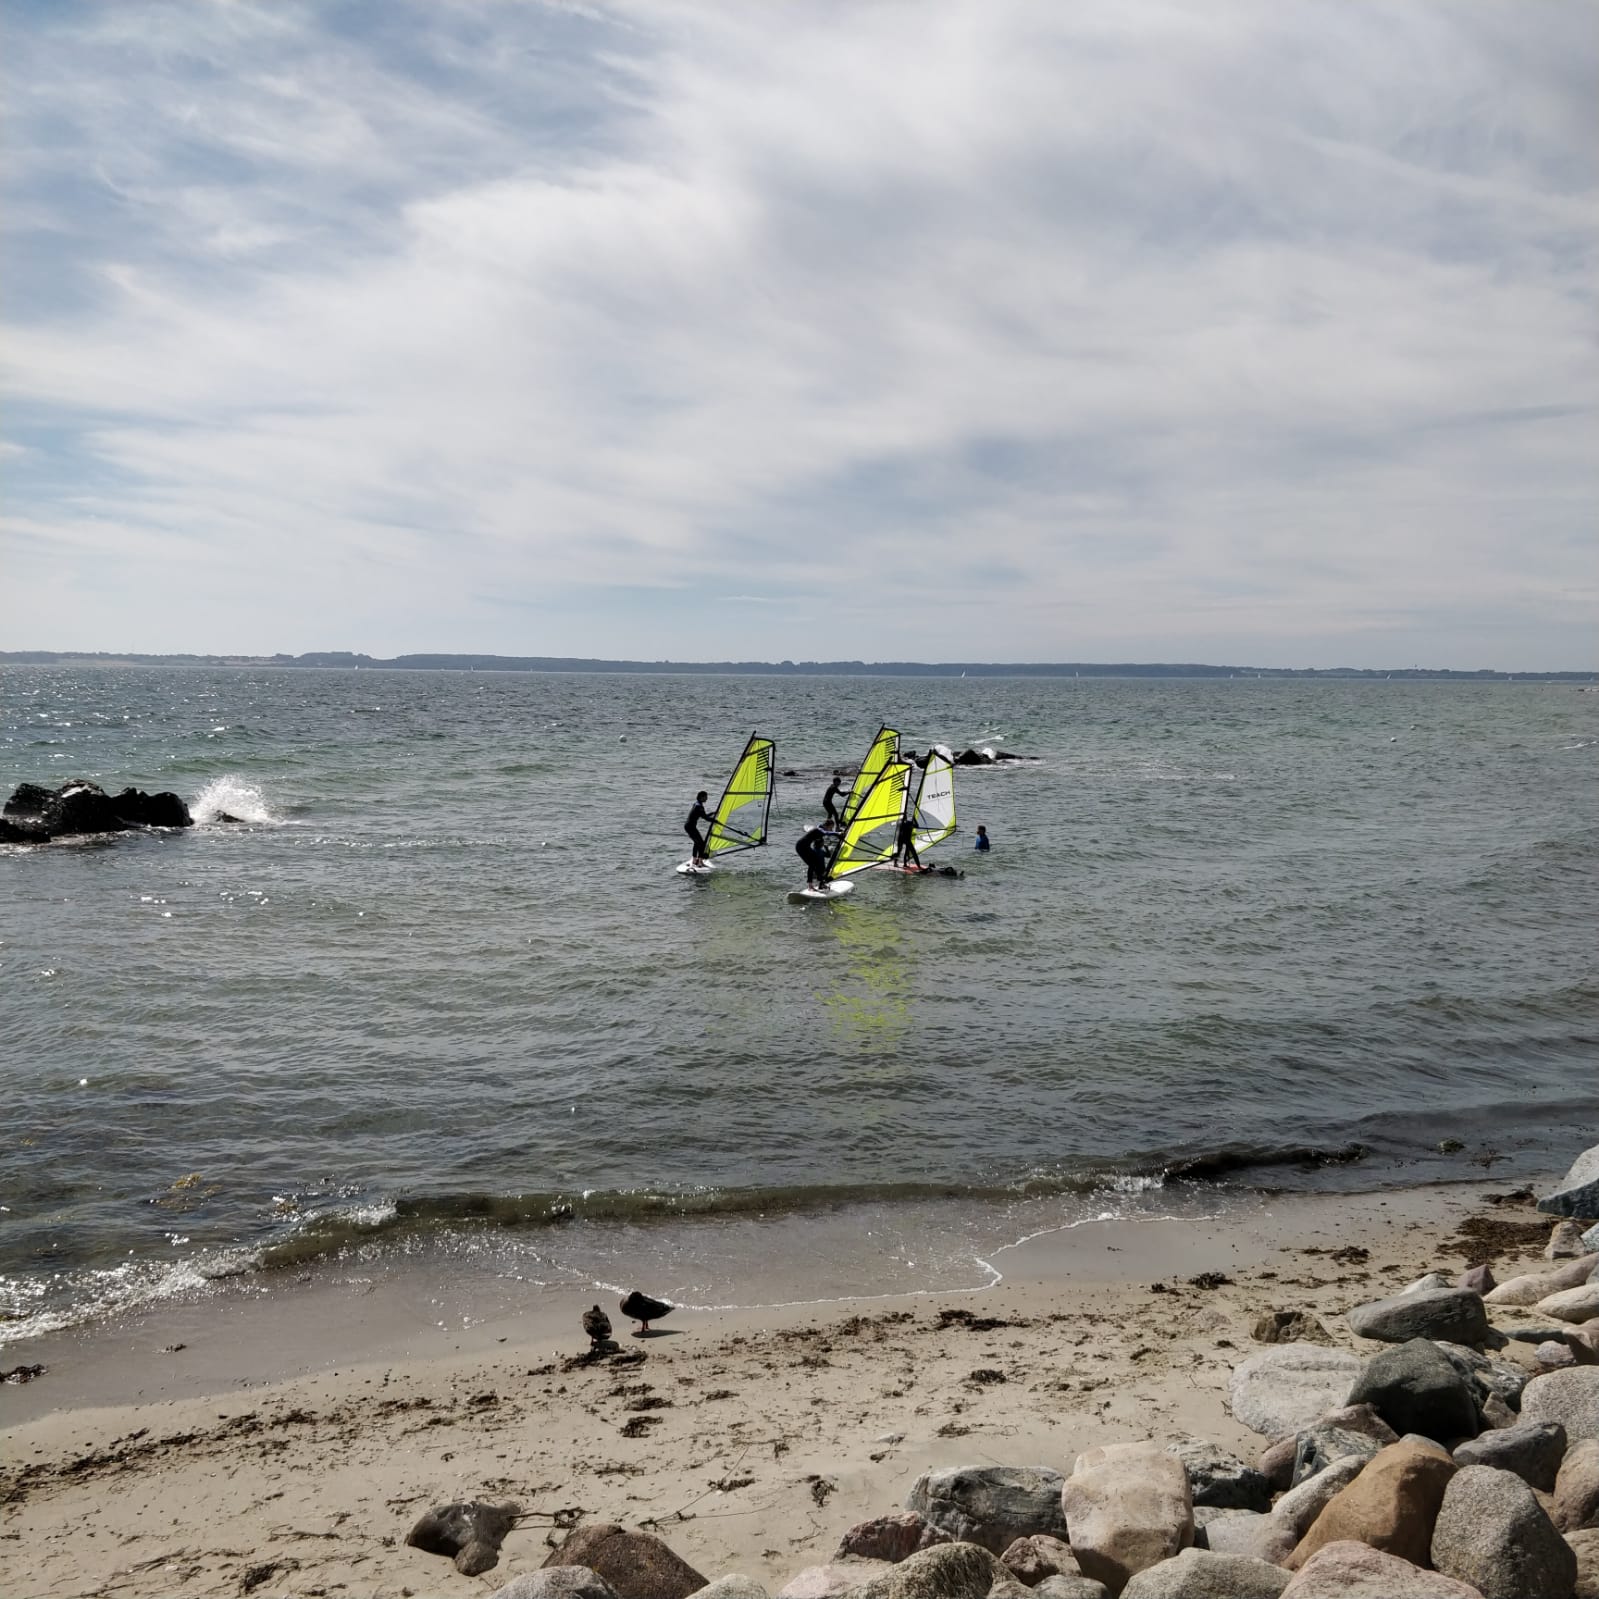
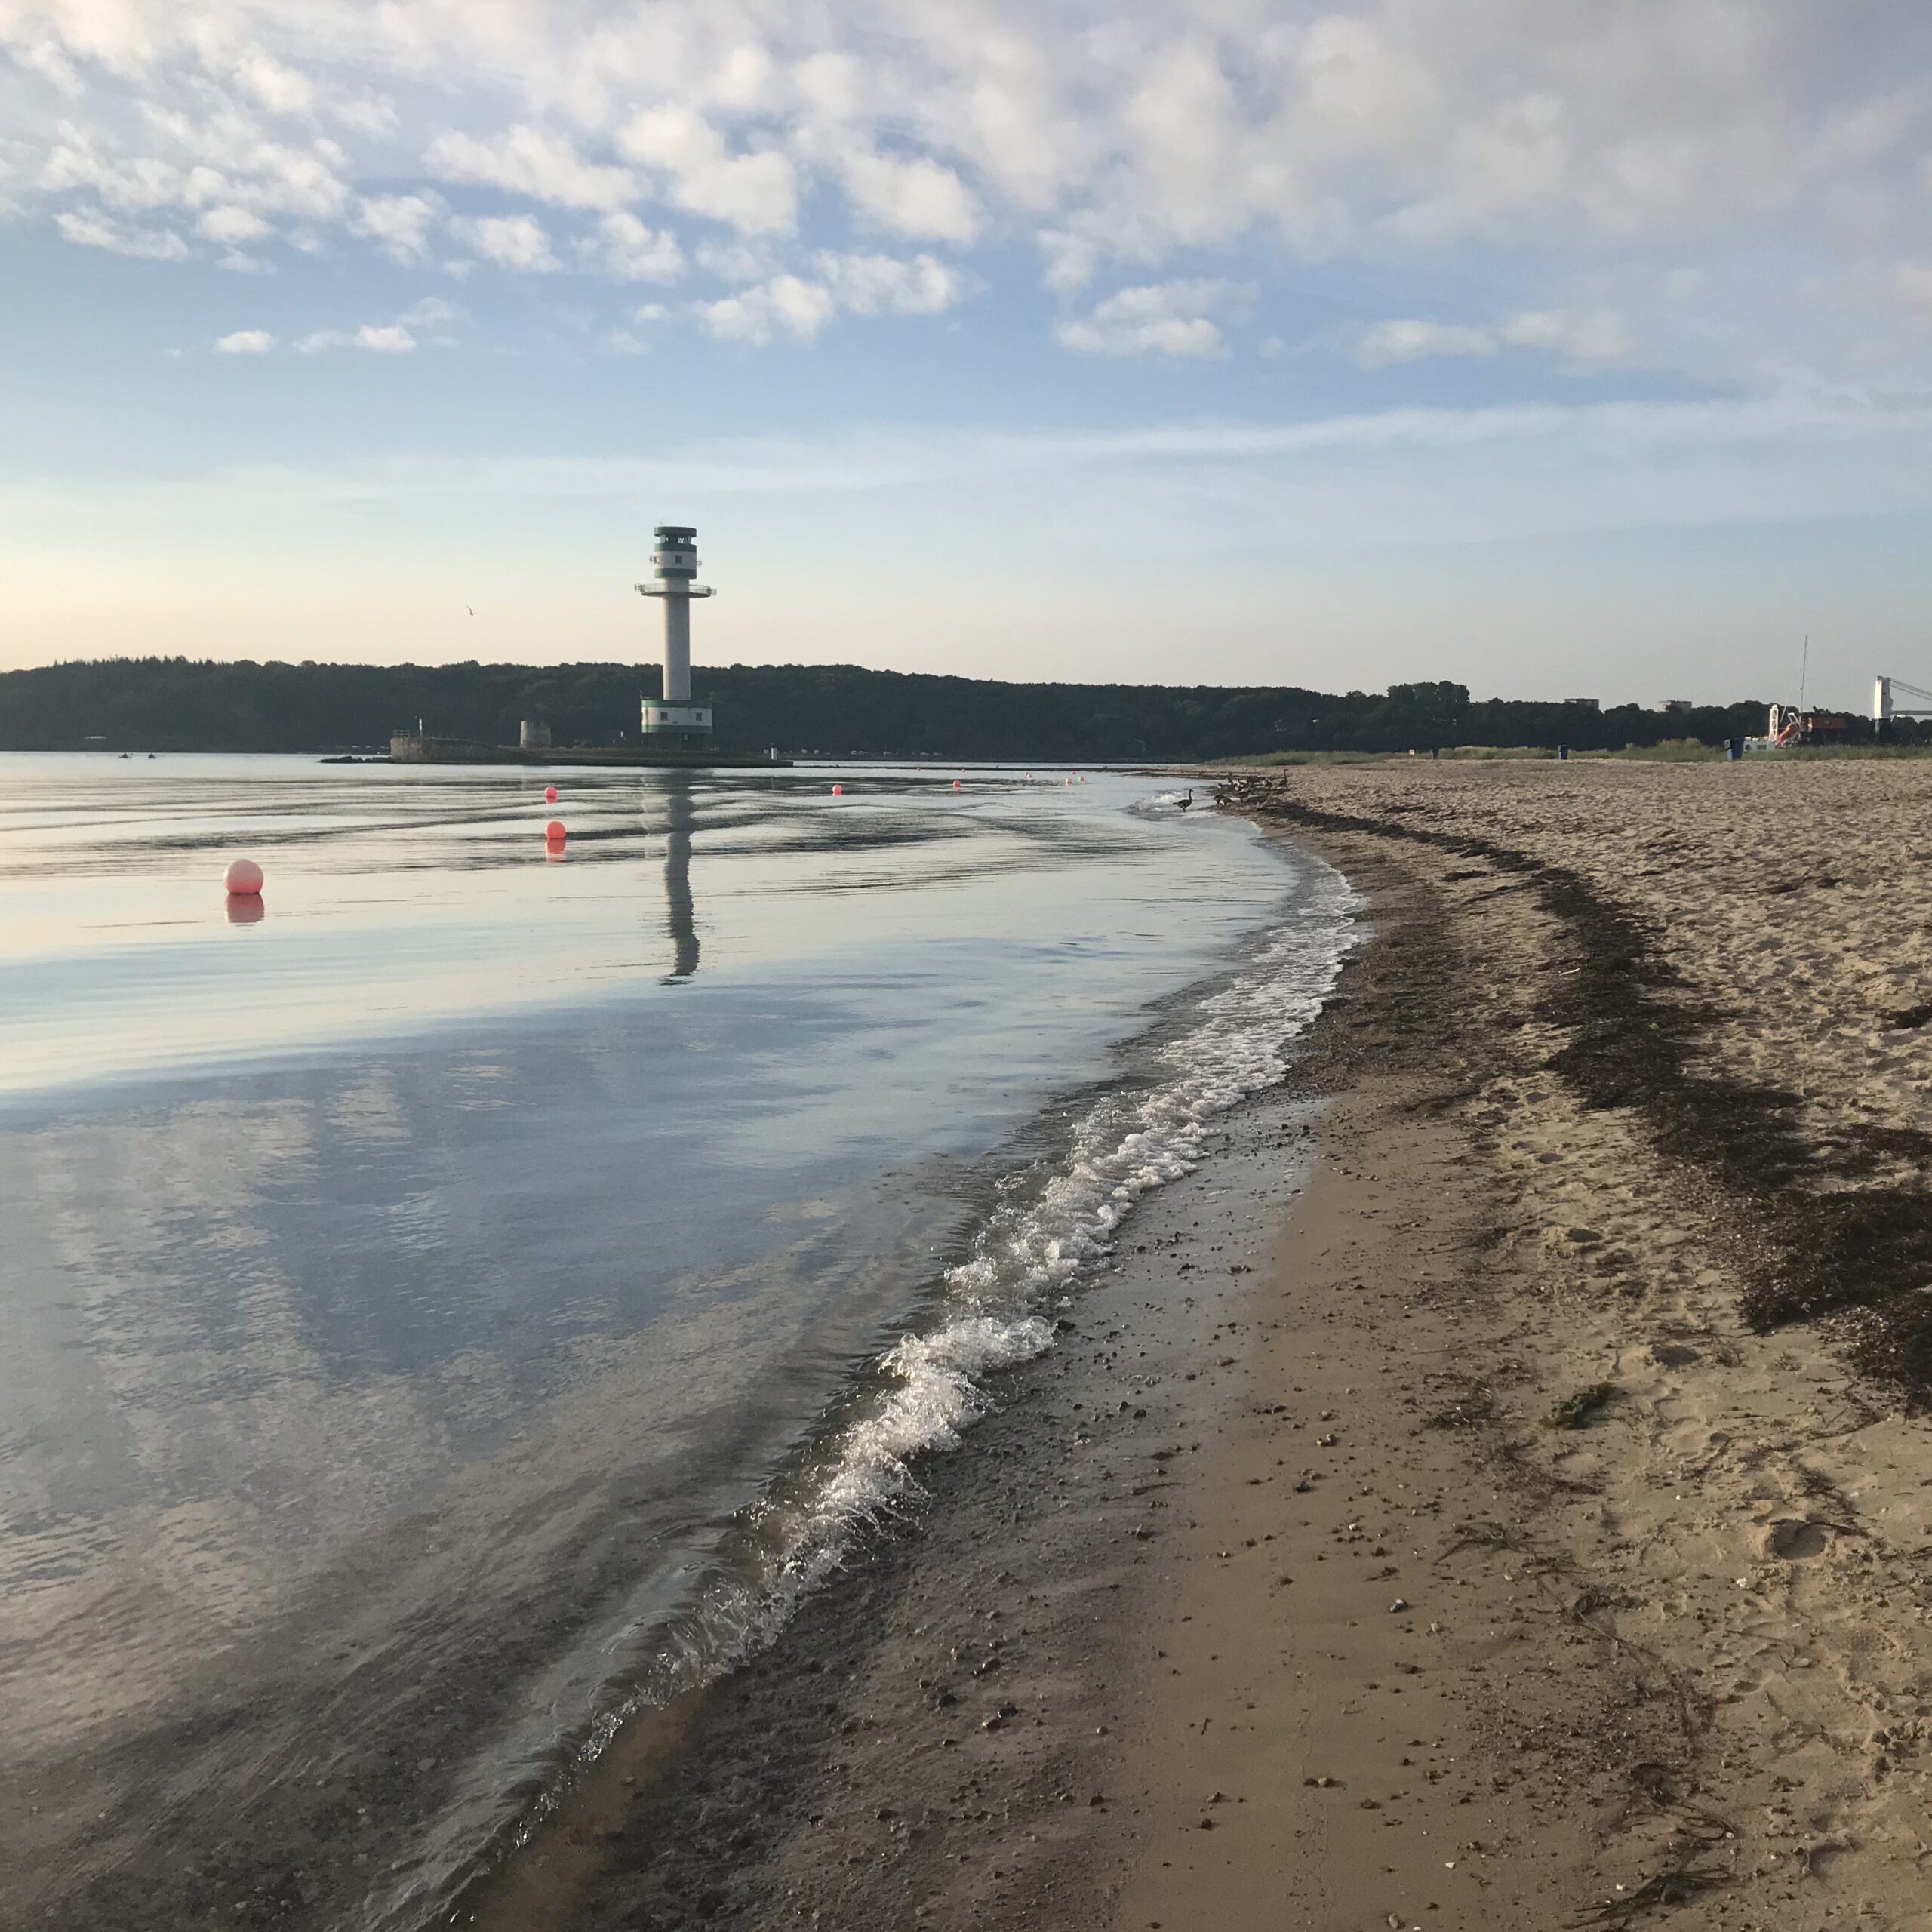
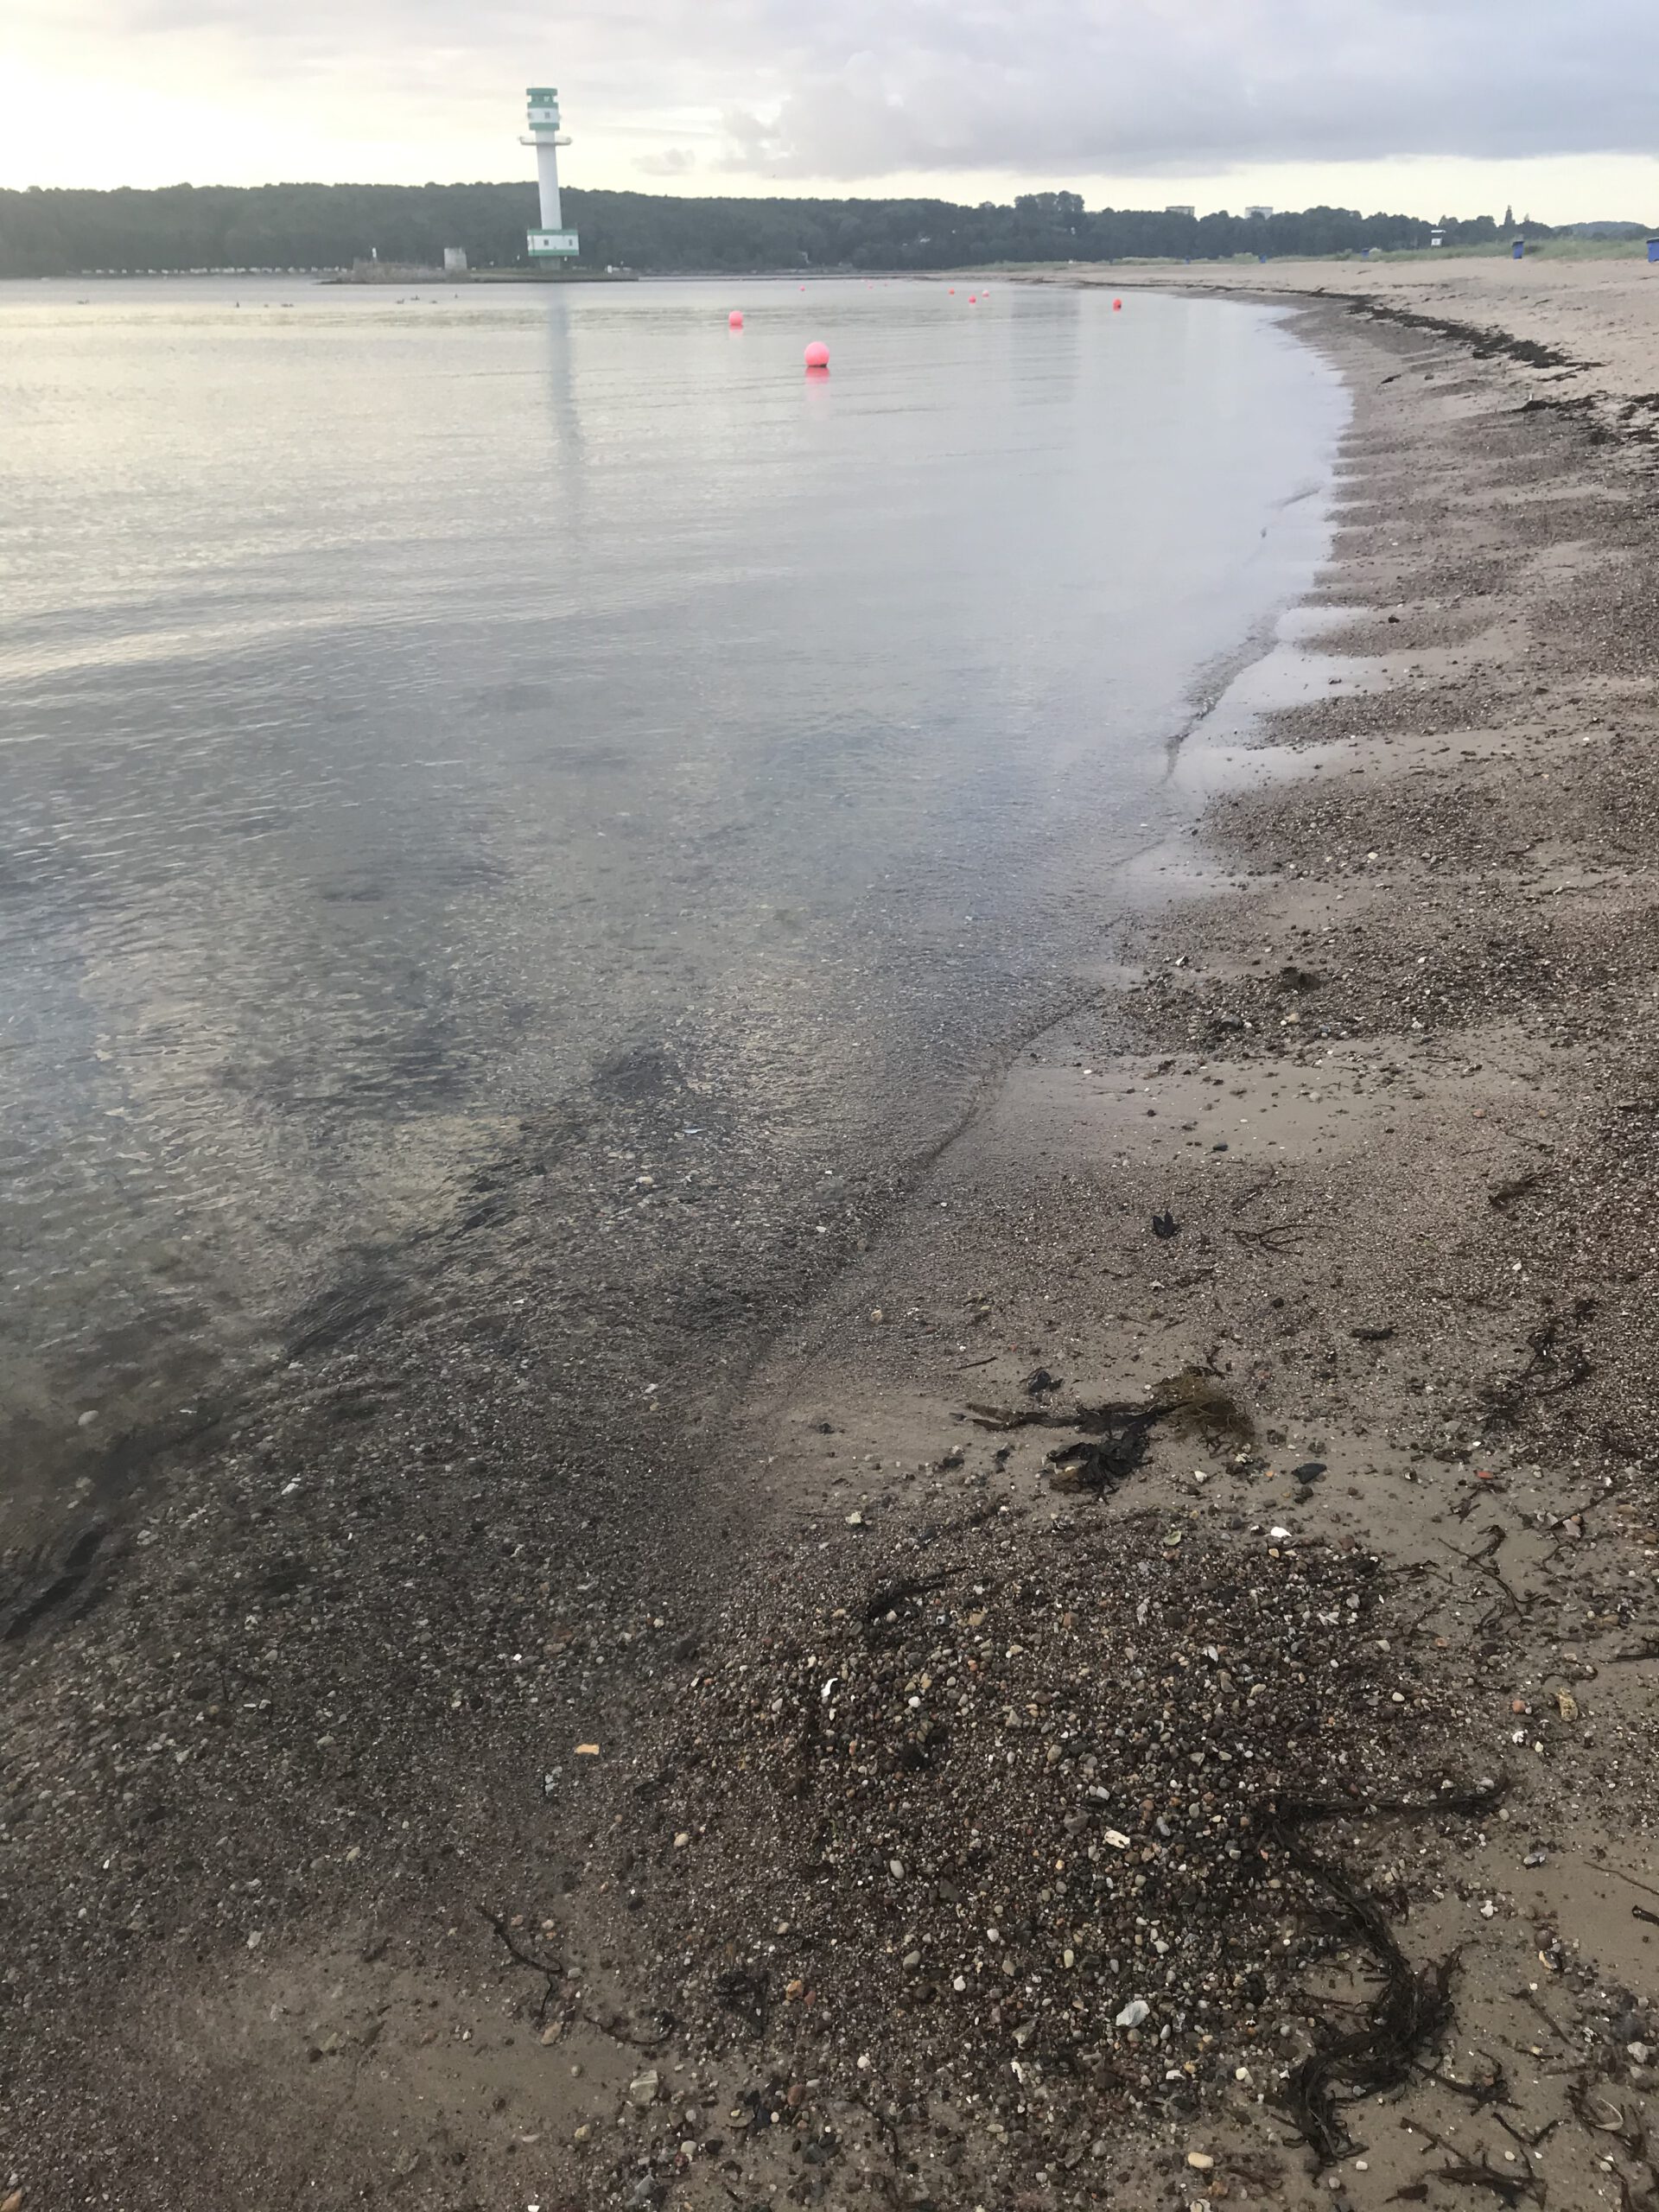
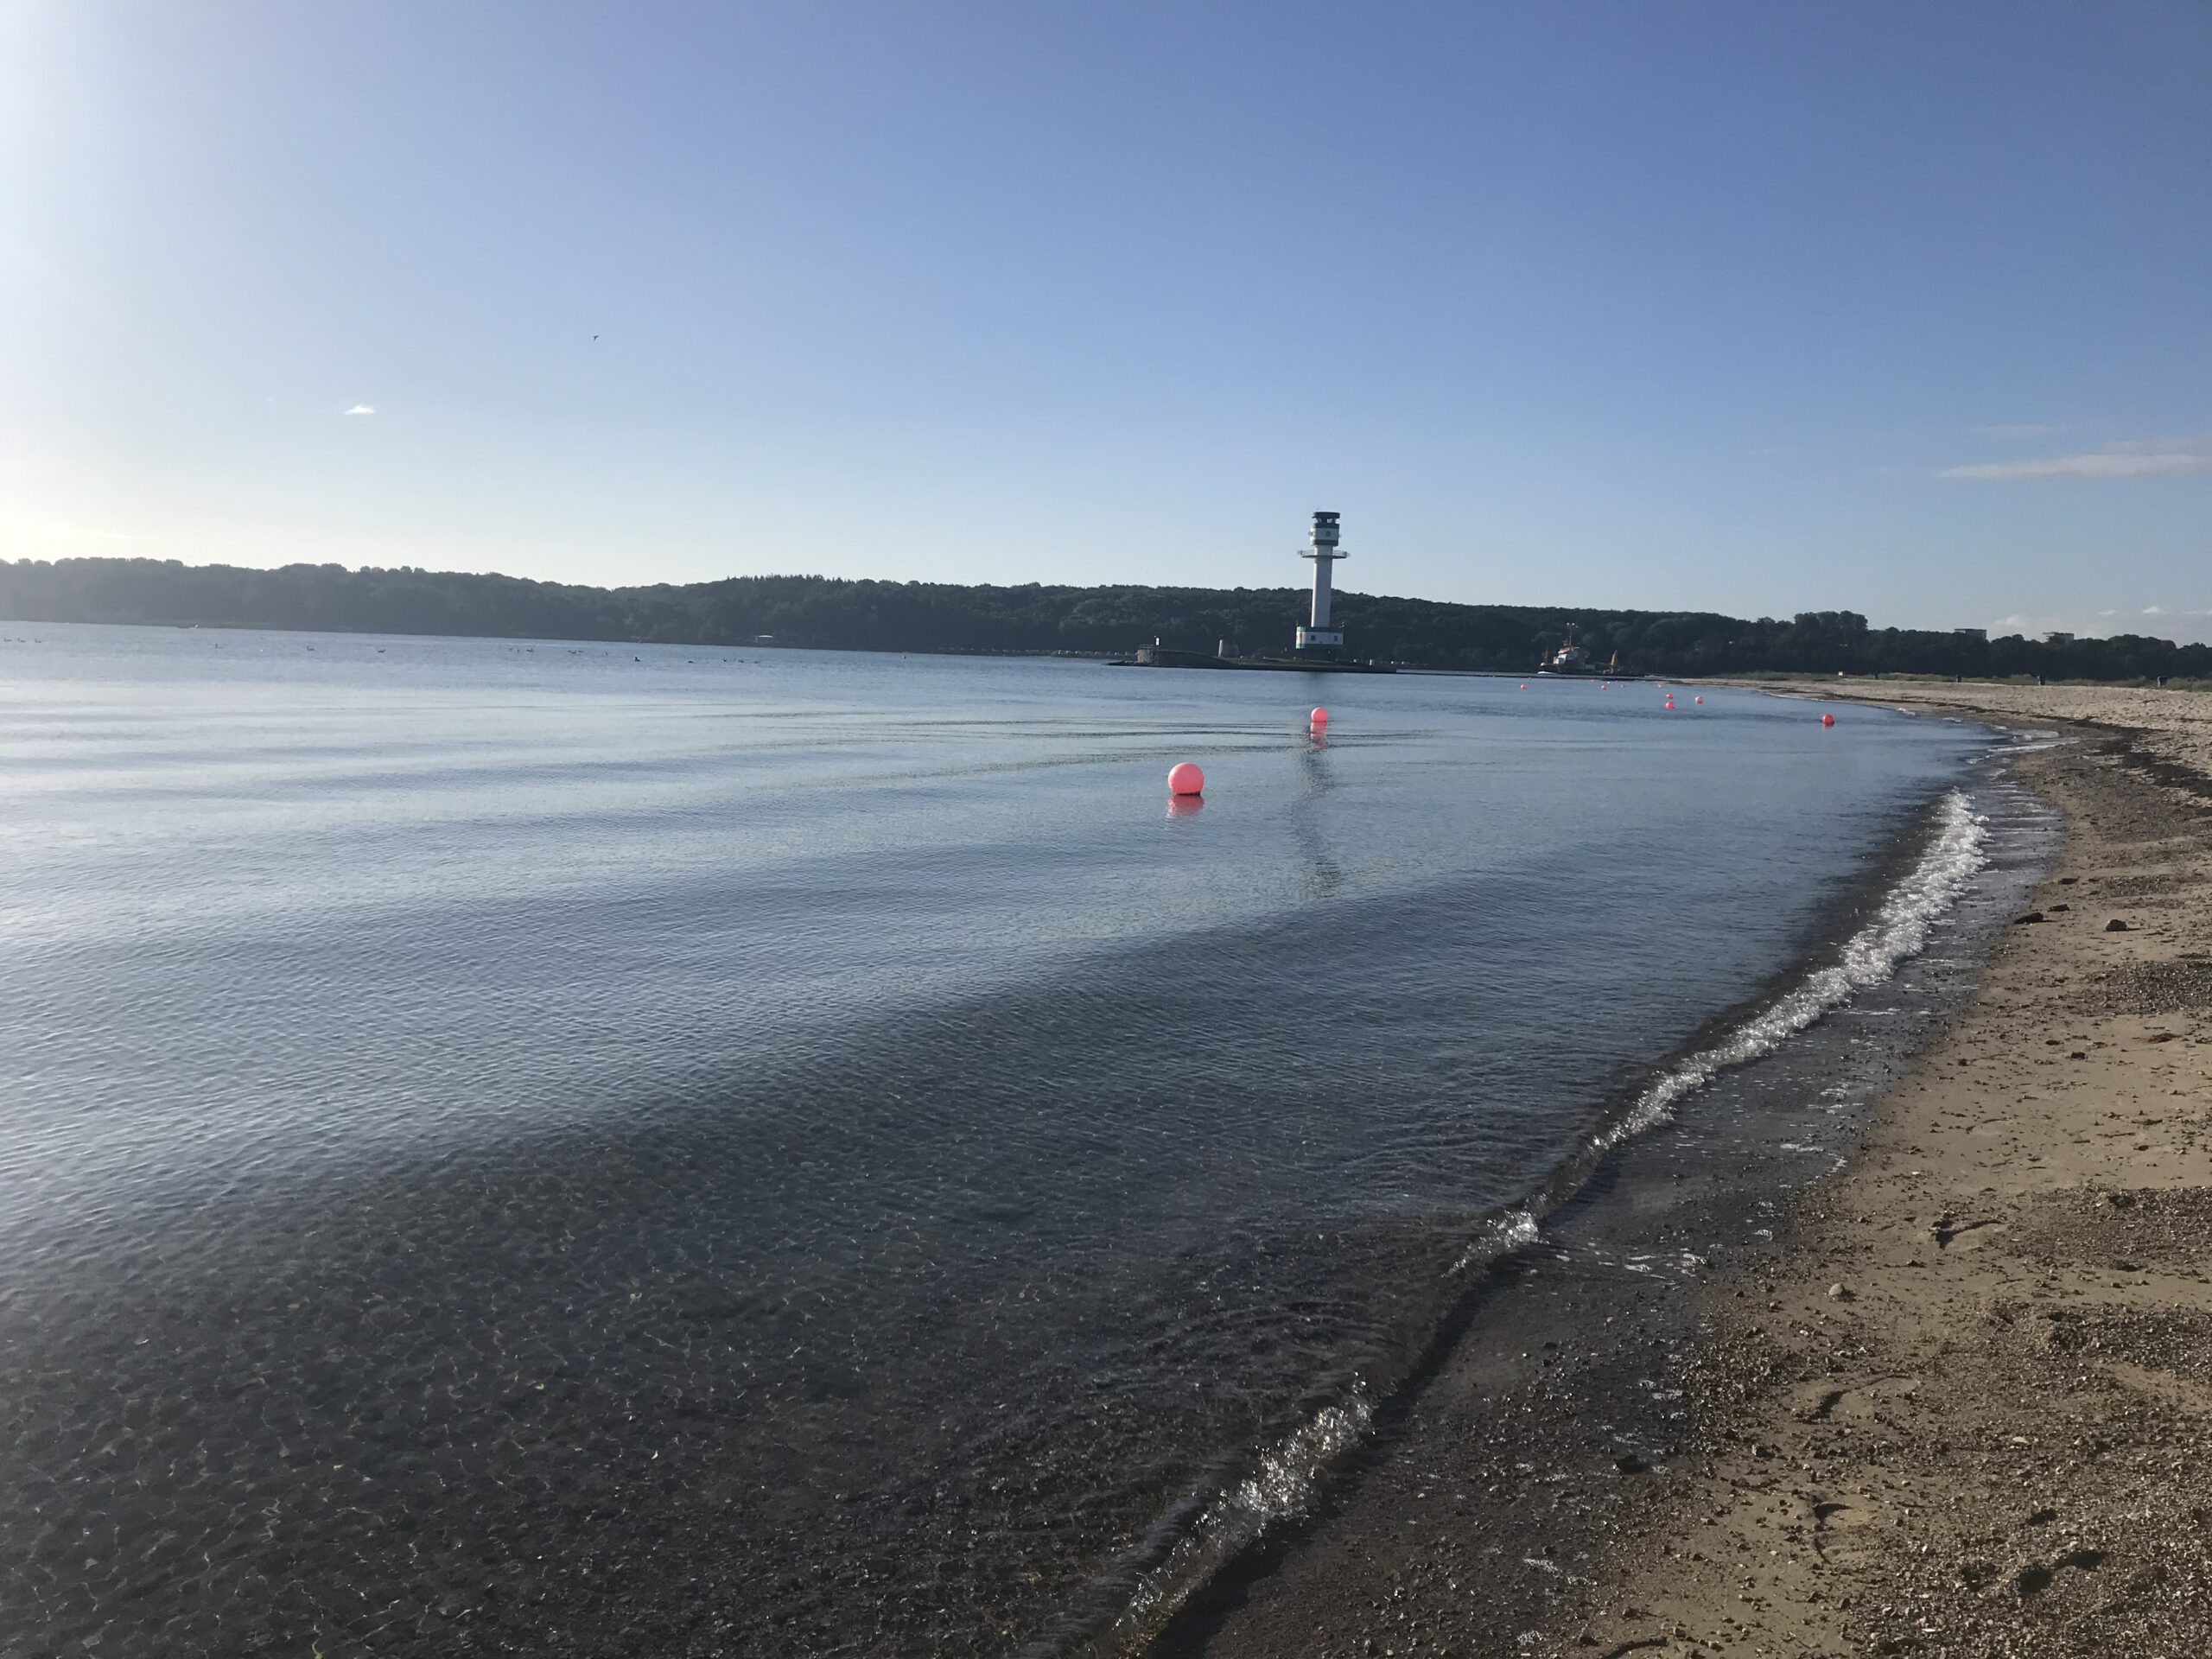
Now we have some wind! We see waves breaking at the stones offshore (and looking at how high the foam is flying, those waves were not too shabby!), but we don’t actually see a lot of those waves because everything from the wave breakers towards us is in the lee and thus sheltered. But we see some long waves that have propagated into this bay that break on the beach
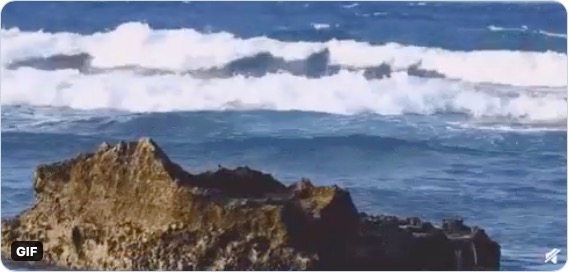
10:37am — Florian (all over the world!)
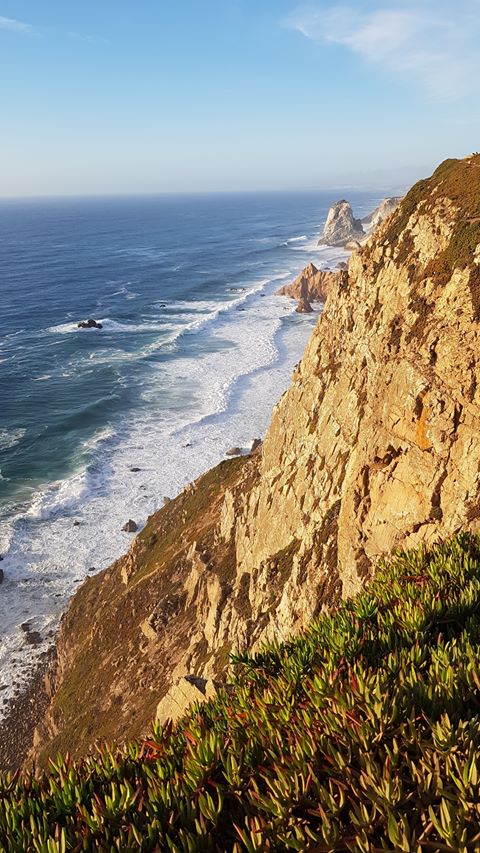
Cabo da Roca in Portugal; westernmost point of the continent. This is beautiful! Waves from far offshore arrive at the beach. As they reach the shallower water, all of their properties except their frequency change: Their wavelength gets shorter, their height larger, their steepness larger. When one part of a crest is in shallower water than the rest, the crest bends towards the shallower areas. The breaking waves create a lot of foam, indicating that there was some biological activity creating a surface film
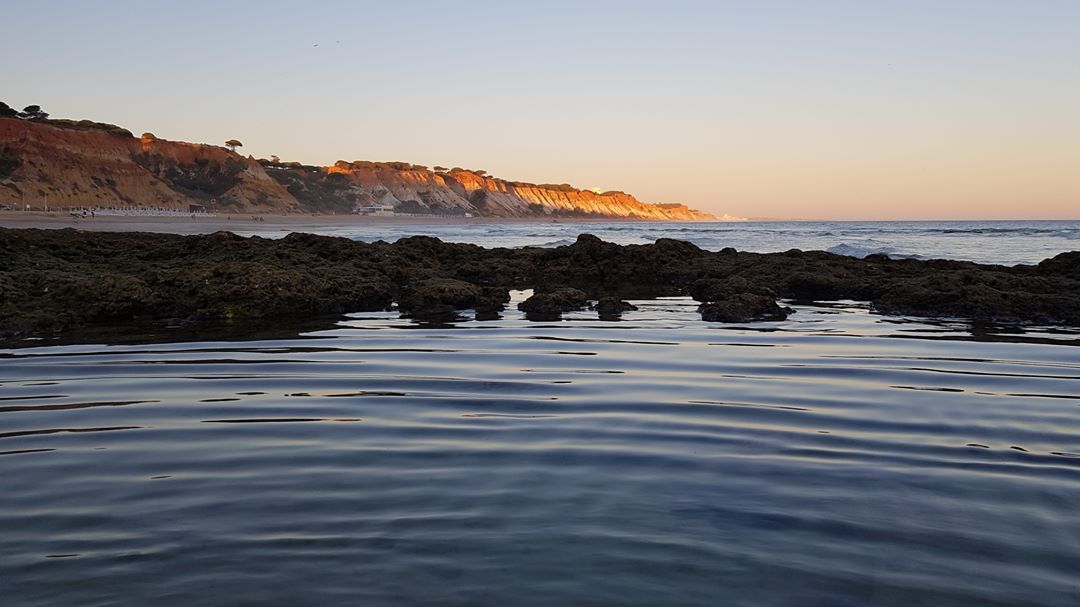
Falesia Beach, Algarve. Oh how beautiful! Breaking waves on the other side of those rocks, and only the longer waves make it into the calm, sheltered space this side of the rocks. Interesting example of a filter that only lets long wavelength come through!
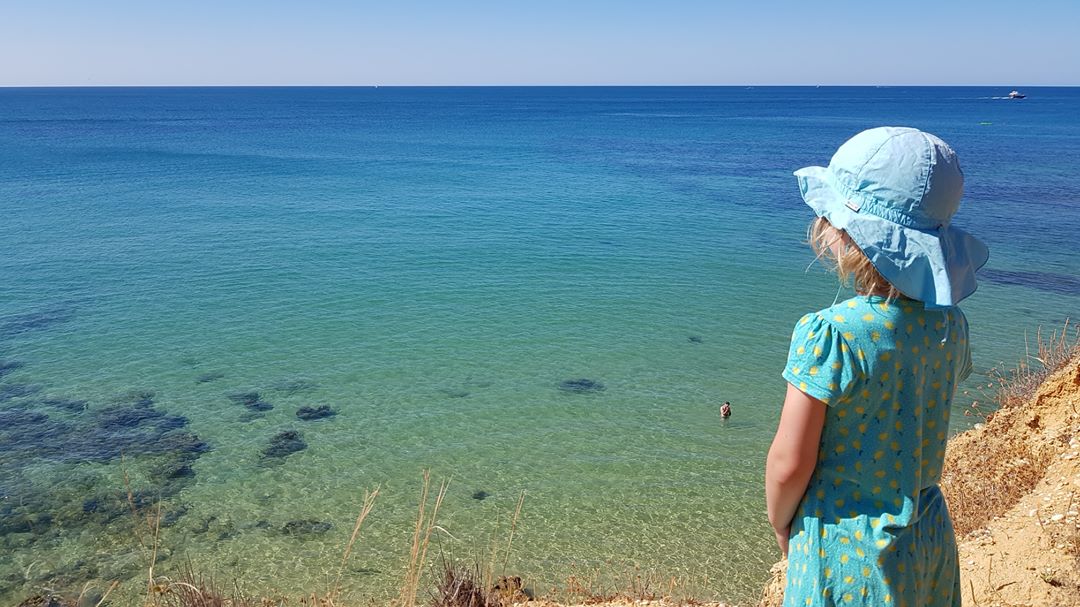
Algarve-Coast. What strikes me here are the beautiful colors! Near the beach, we can look into the water and see the sandy sea floor as well as some larger rocks, that seem to be partly overgrown. The further we look offshore, the bluer the sea gets, because at shallower angles the reflection from the sky increases, until at a critical angle, we only see reflections and can’t look into the water any more.The different shades of blue in those areas show where breezes rough up the water, darker areas are those where there is currently more wind and the surface roughness is higher. Another thing I am noticing are the waves that the person in the water makes — circles around them.
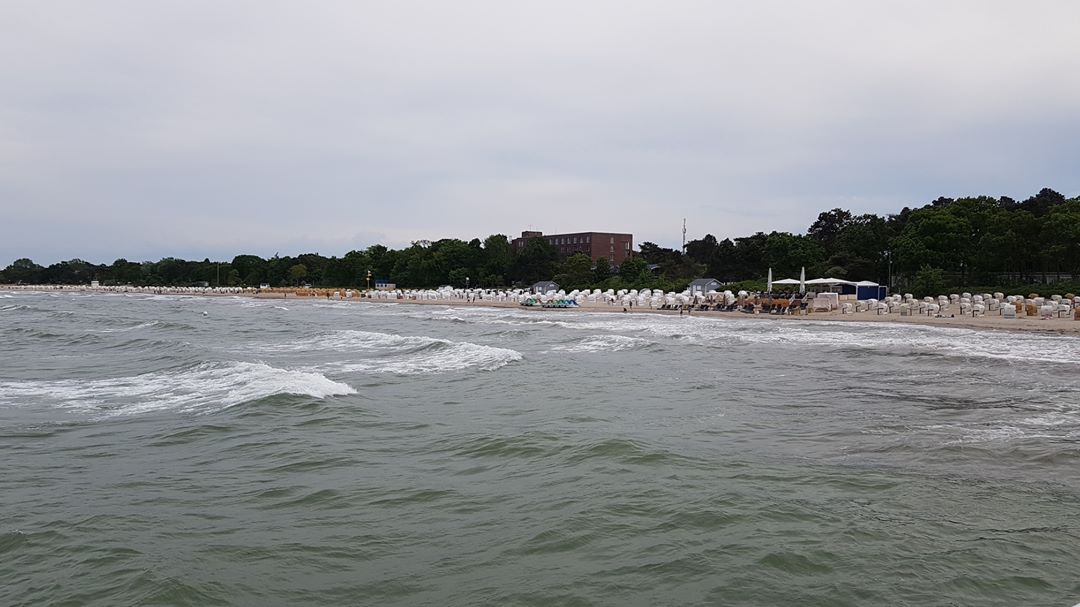
Timmendorfer Strand, Baltic Sea coast. On a windy day! We can see that from the whay the waves are breaking, not only right at the beach and in areas where the water is shallower, but also in smaller, more random bursts. Also waves don’t have the same regular shape as they would have had this wave field traveled to the beach from far away, it seems to be somewhat regional. Also love how far the waves run up the beach (as you see from the large area covered in foam). This must have been a fun day to play at the beach!
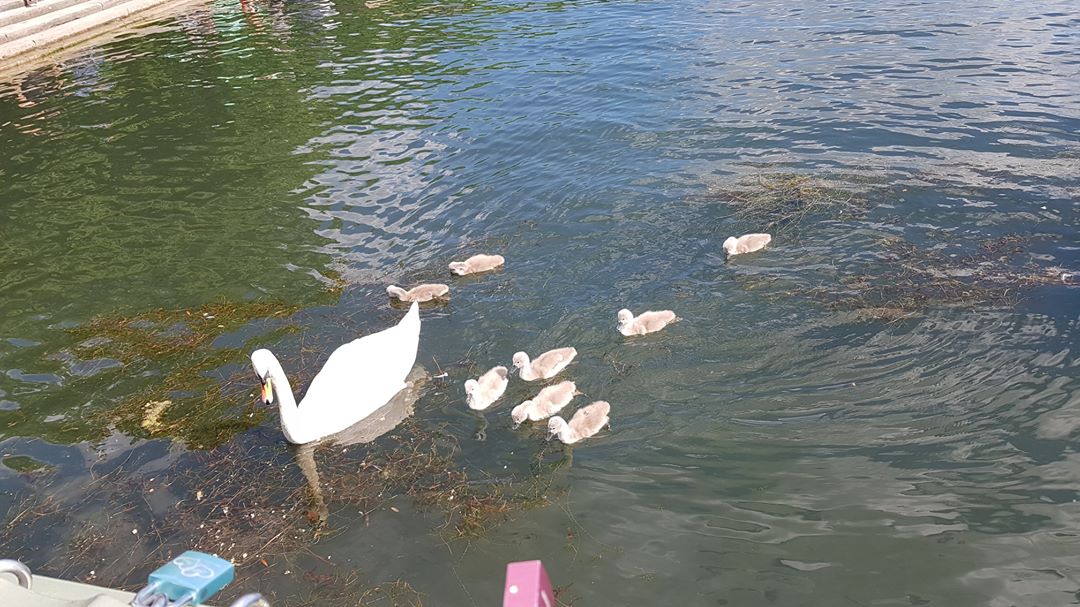
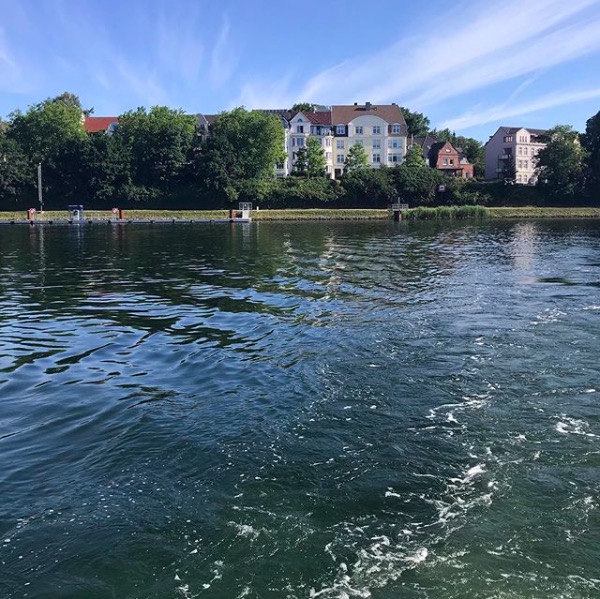
Maschsee Hanover — I love how you see different things in this picture: First, how stuff floating in the water dampens out the waves (see how there are a lot more waves behind the plants floating in the water than on this side). And then the wakes that this cute family of swans is making as they are swimming towards us!
9:09am — Gabriela (Lüneburg)
Honestly, what jumps at me most is my ADORABLE niece who’s saying Kaffefoto (“coffee pic”). But then there is also the puzzle of why the coffe coming out of the machine looks so much lighter than when it’s in the mug (underneath the foam)? Well, the foam is the clue here! When there are a lot of airbubbles in the coffee still, they reflect light differently (i.e. from all different directions, making it look white, rather than directional, showing either the color of the coffee or a reflection) than when the coffee has settled down and the air bubbles have gone away.
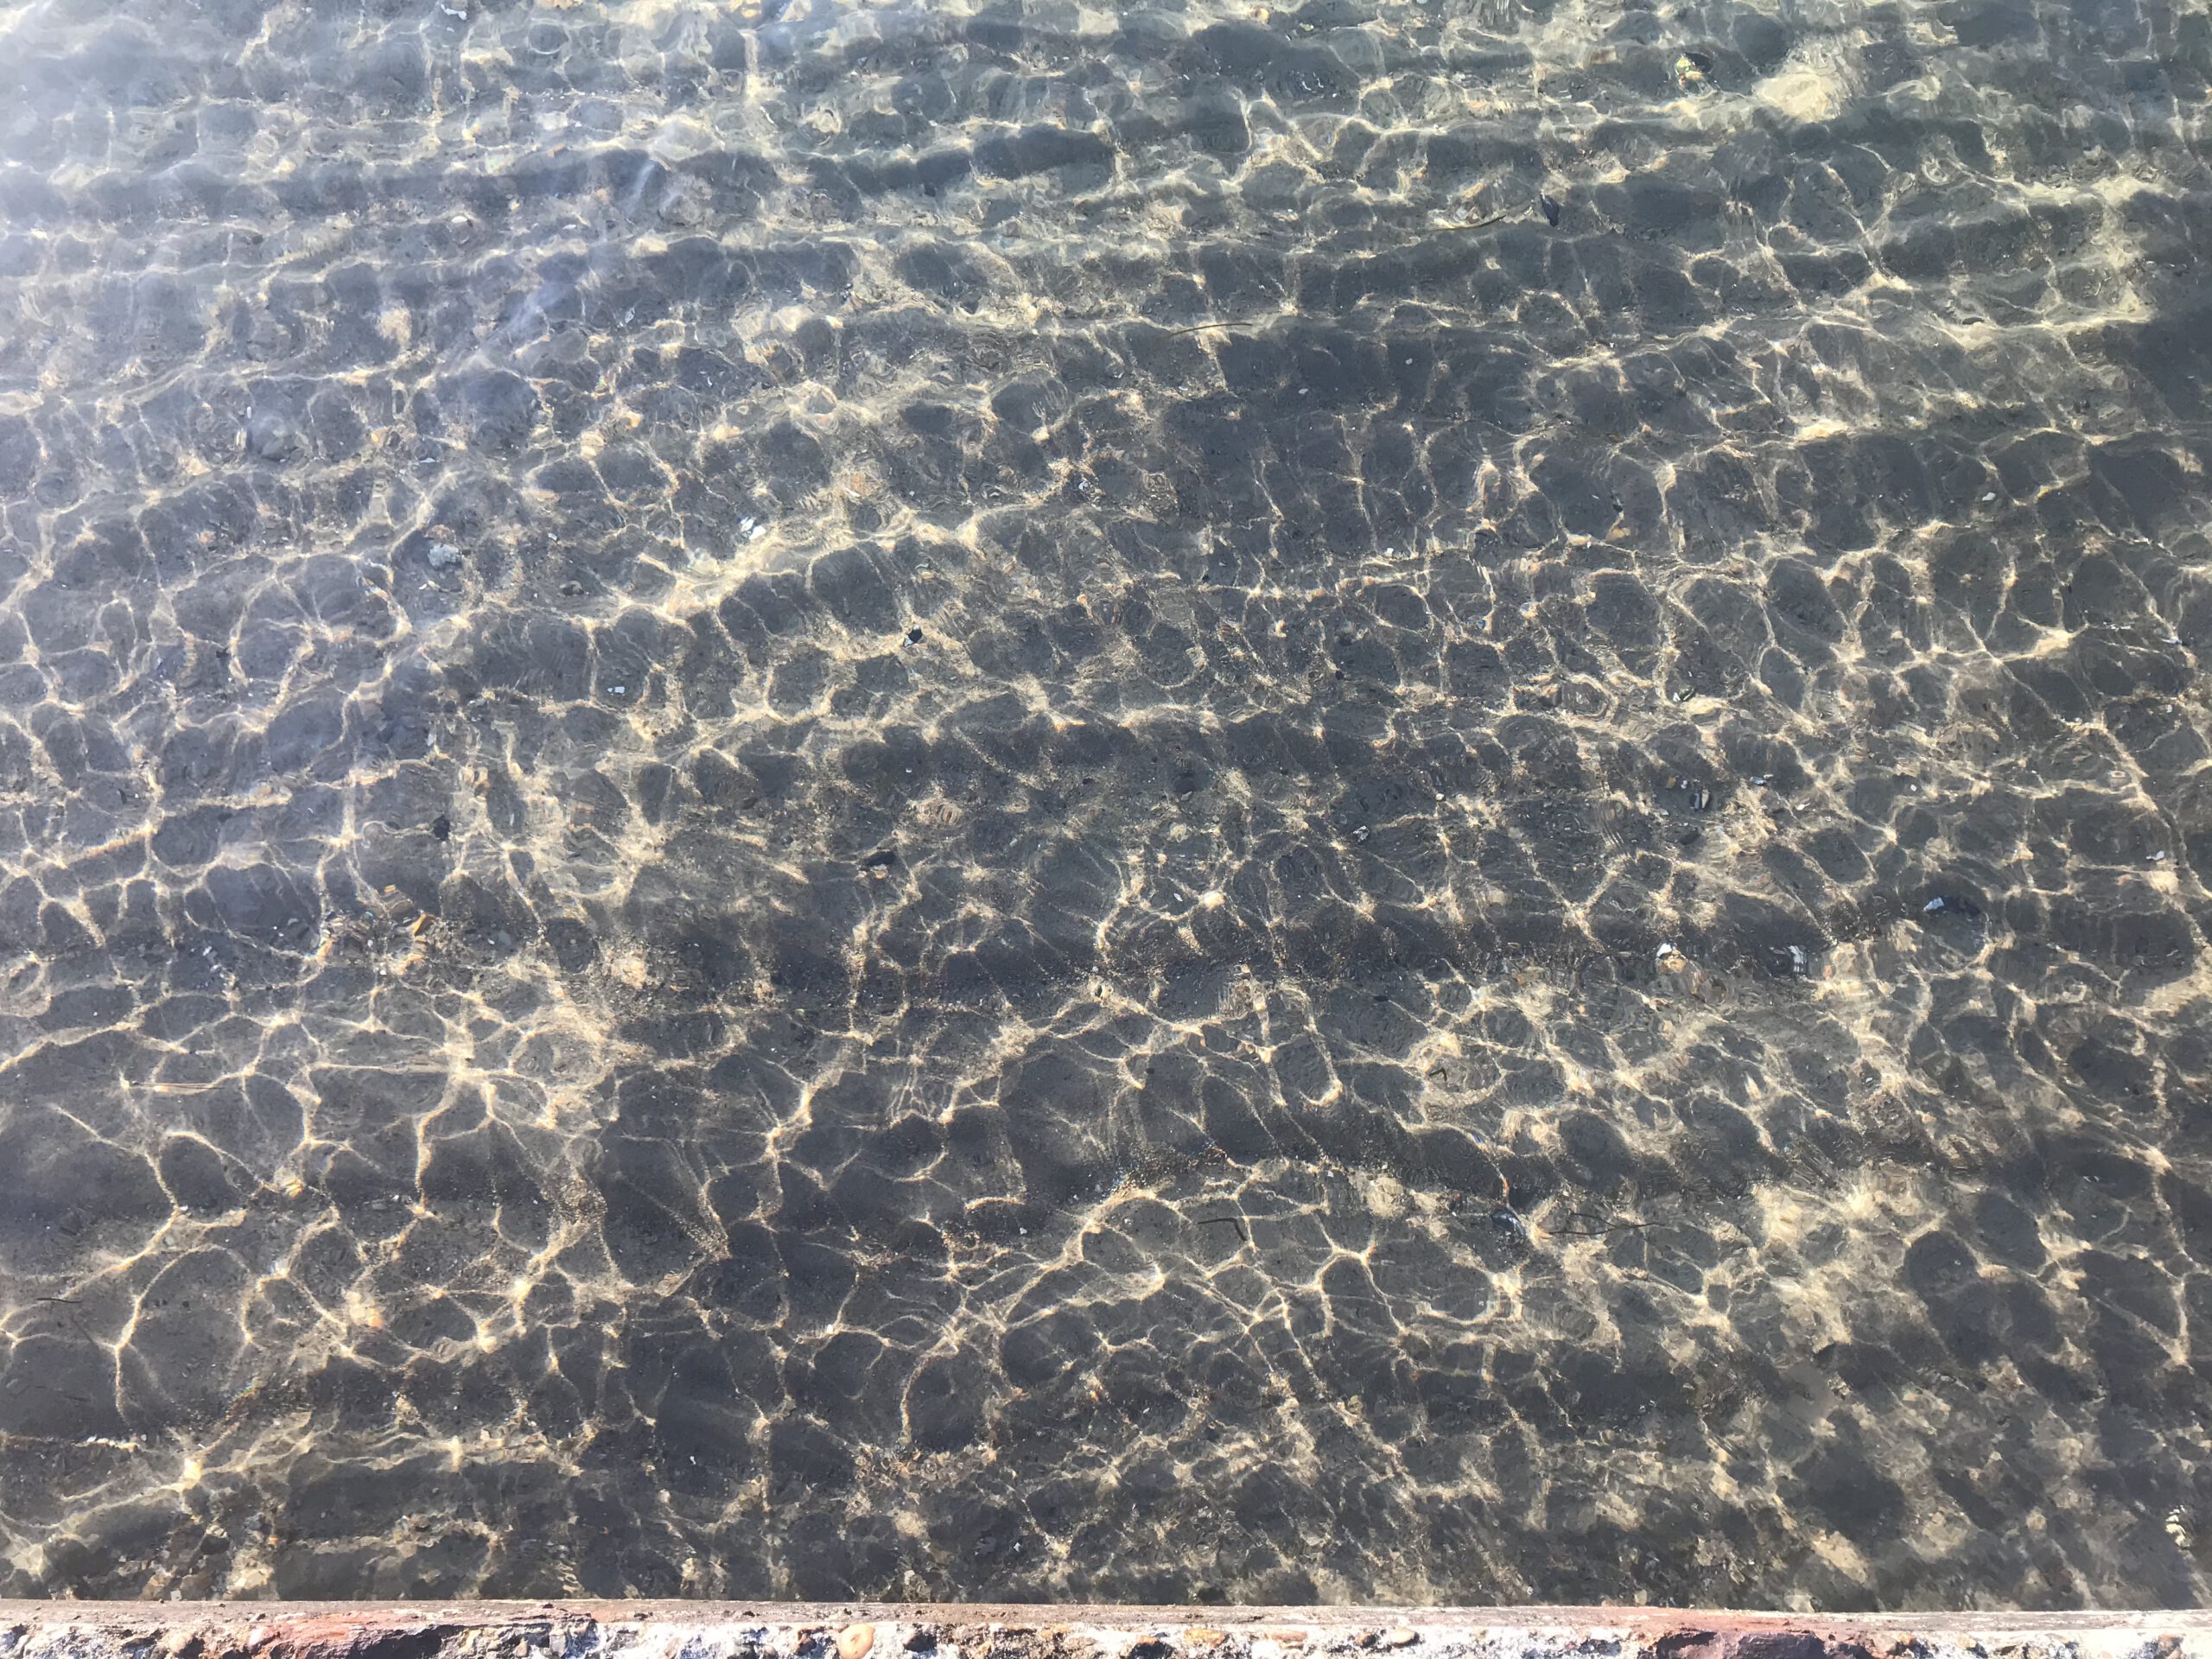
9:01am — Kristin (hiking somewhere near Bergen)
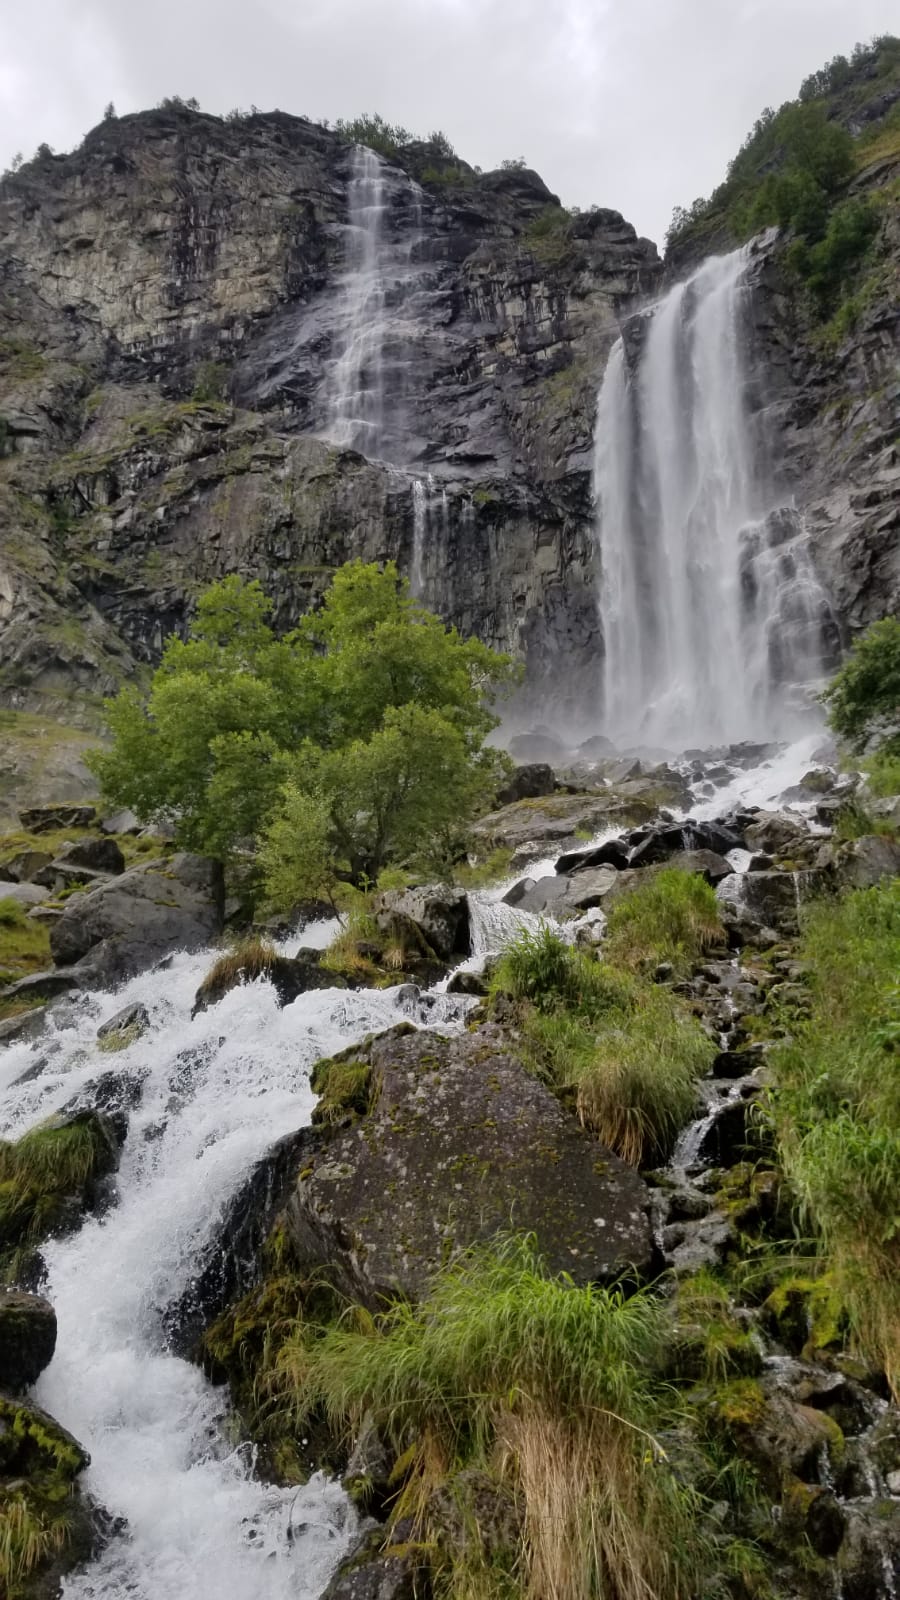
Did you ever wonder why waterfalls (or really turbulent rivers) always look white, while a lake or the ocean can look all kinds of different colors depending on what is dissolved in the water and what they are reflecting on the surface? The answer is that in waterfalls (or the really turbulent, “white water” rivers), there are tons of tiny air bubbles trapped in the water. All the surfaces of those air bubbles and also the turbulent flow itself make the water surface very irregular. Since the surface is so irregular, it reflects light from all different directions, rather than just one. As we receive all that different-colored light, our eye interprets it as white. Fun exception: Sometimes we see rainbows in water falls. Then the sun as light source is so dominant that we see the sunlight reflected in the falling water drops and a rainbow appears!
9:01am — Siddharth (Sadashivnagar)
Oh I love this! I think that what Sid doesn’t show us on the very right is a narrow connection to a second body of water, on which waves are generated by wind. (Alternatively, there might be something there at the very right just outside the frame that is making waves, such as a bird or a fountain, but I don’t think that’s the case. Birds usually don’t move this regularly for long enough to generate this wave field even before you started filming and then throughout the whole movie. Fountains usually generate concentric waves (unless there are several fountains, in which case this would be a trick question ;-))) So let’s assume that wind-generated waves from a second body of water pass through a narrow inlet onto this pond. As they pass the narrowest part, they start spreading to all directions, forming concentric waves that grow over time. Well, almost concentric, because the narrowest part isn’t a perfect point source. Therefore we don’t see diffraction at a slit, but rather at a wider opening.
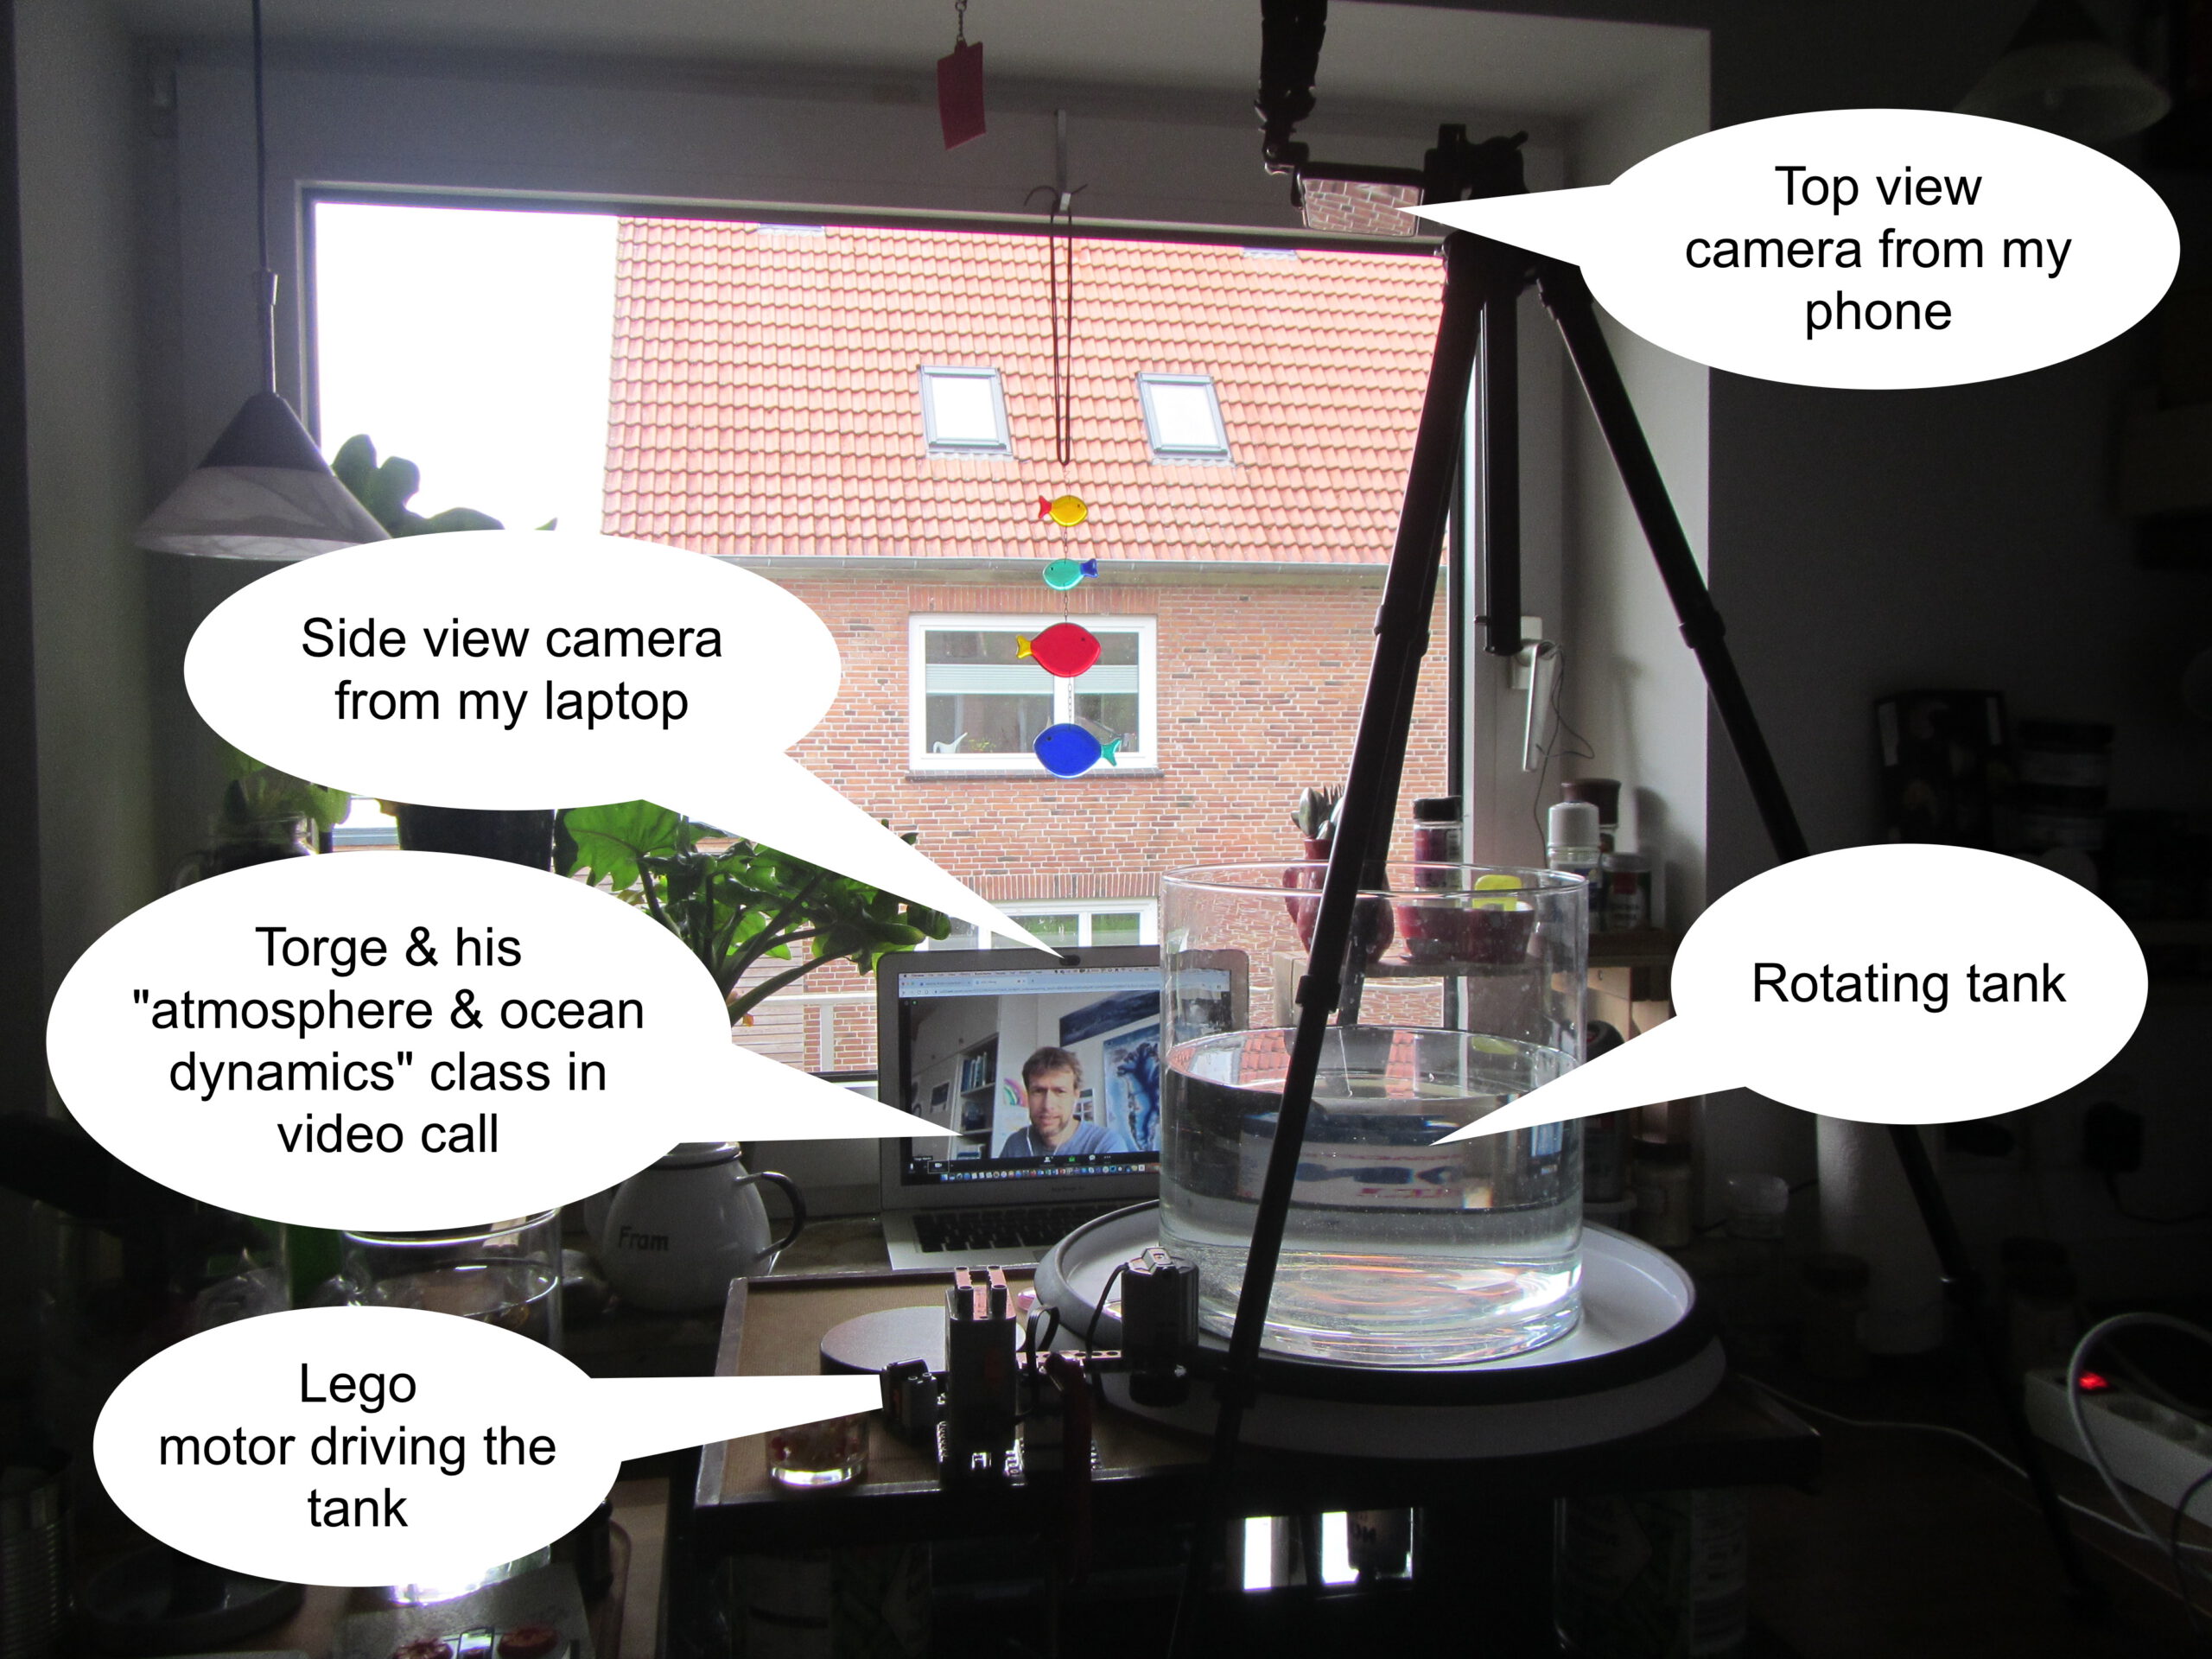
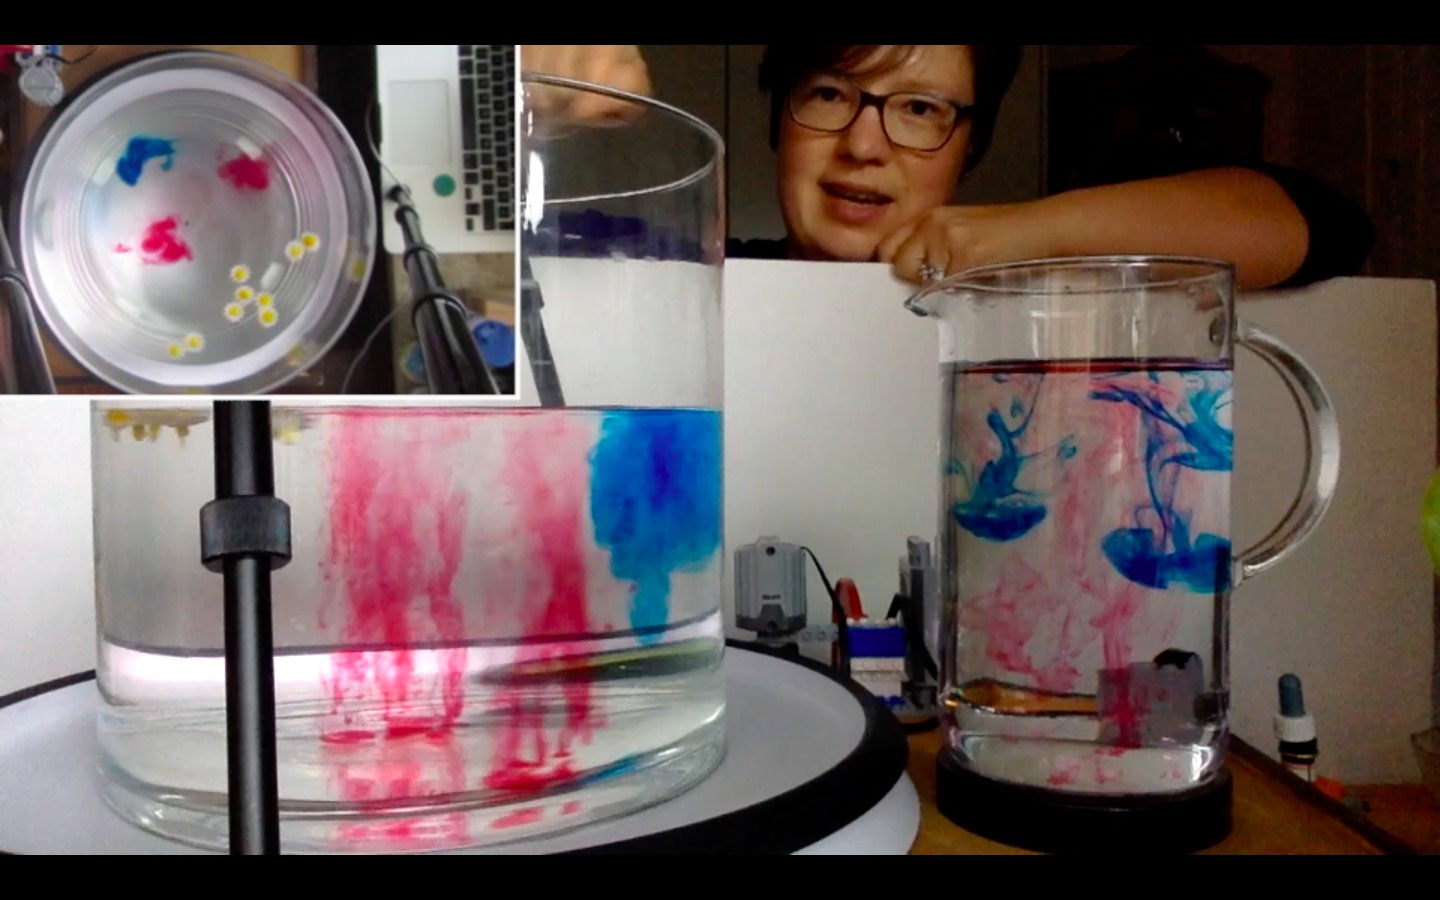
8:58am — Torge (Kiel)
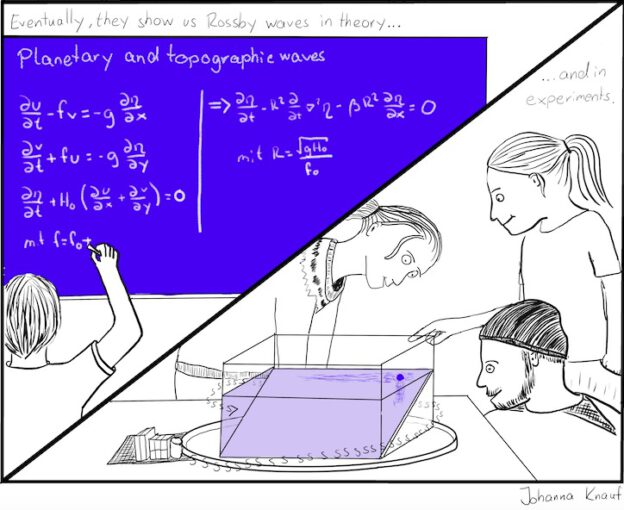
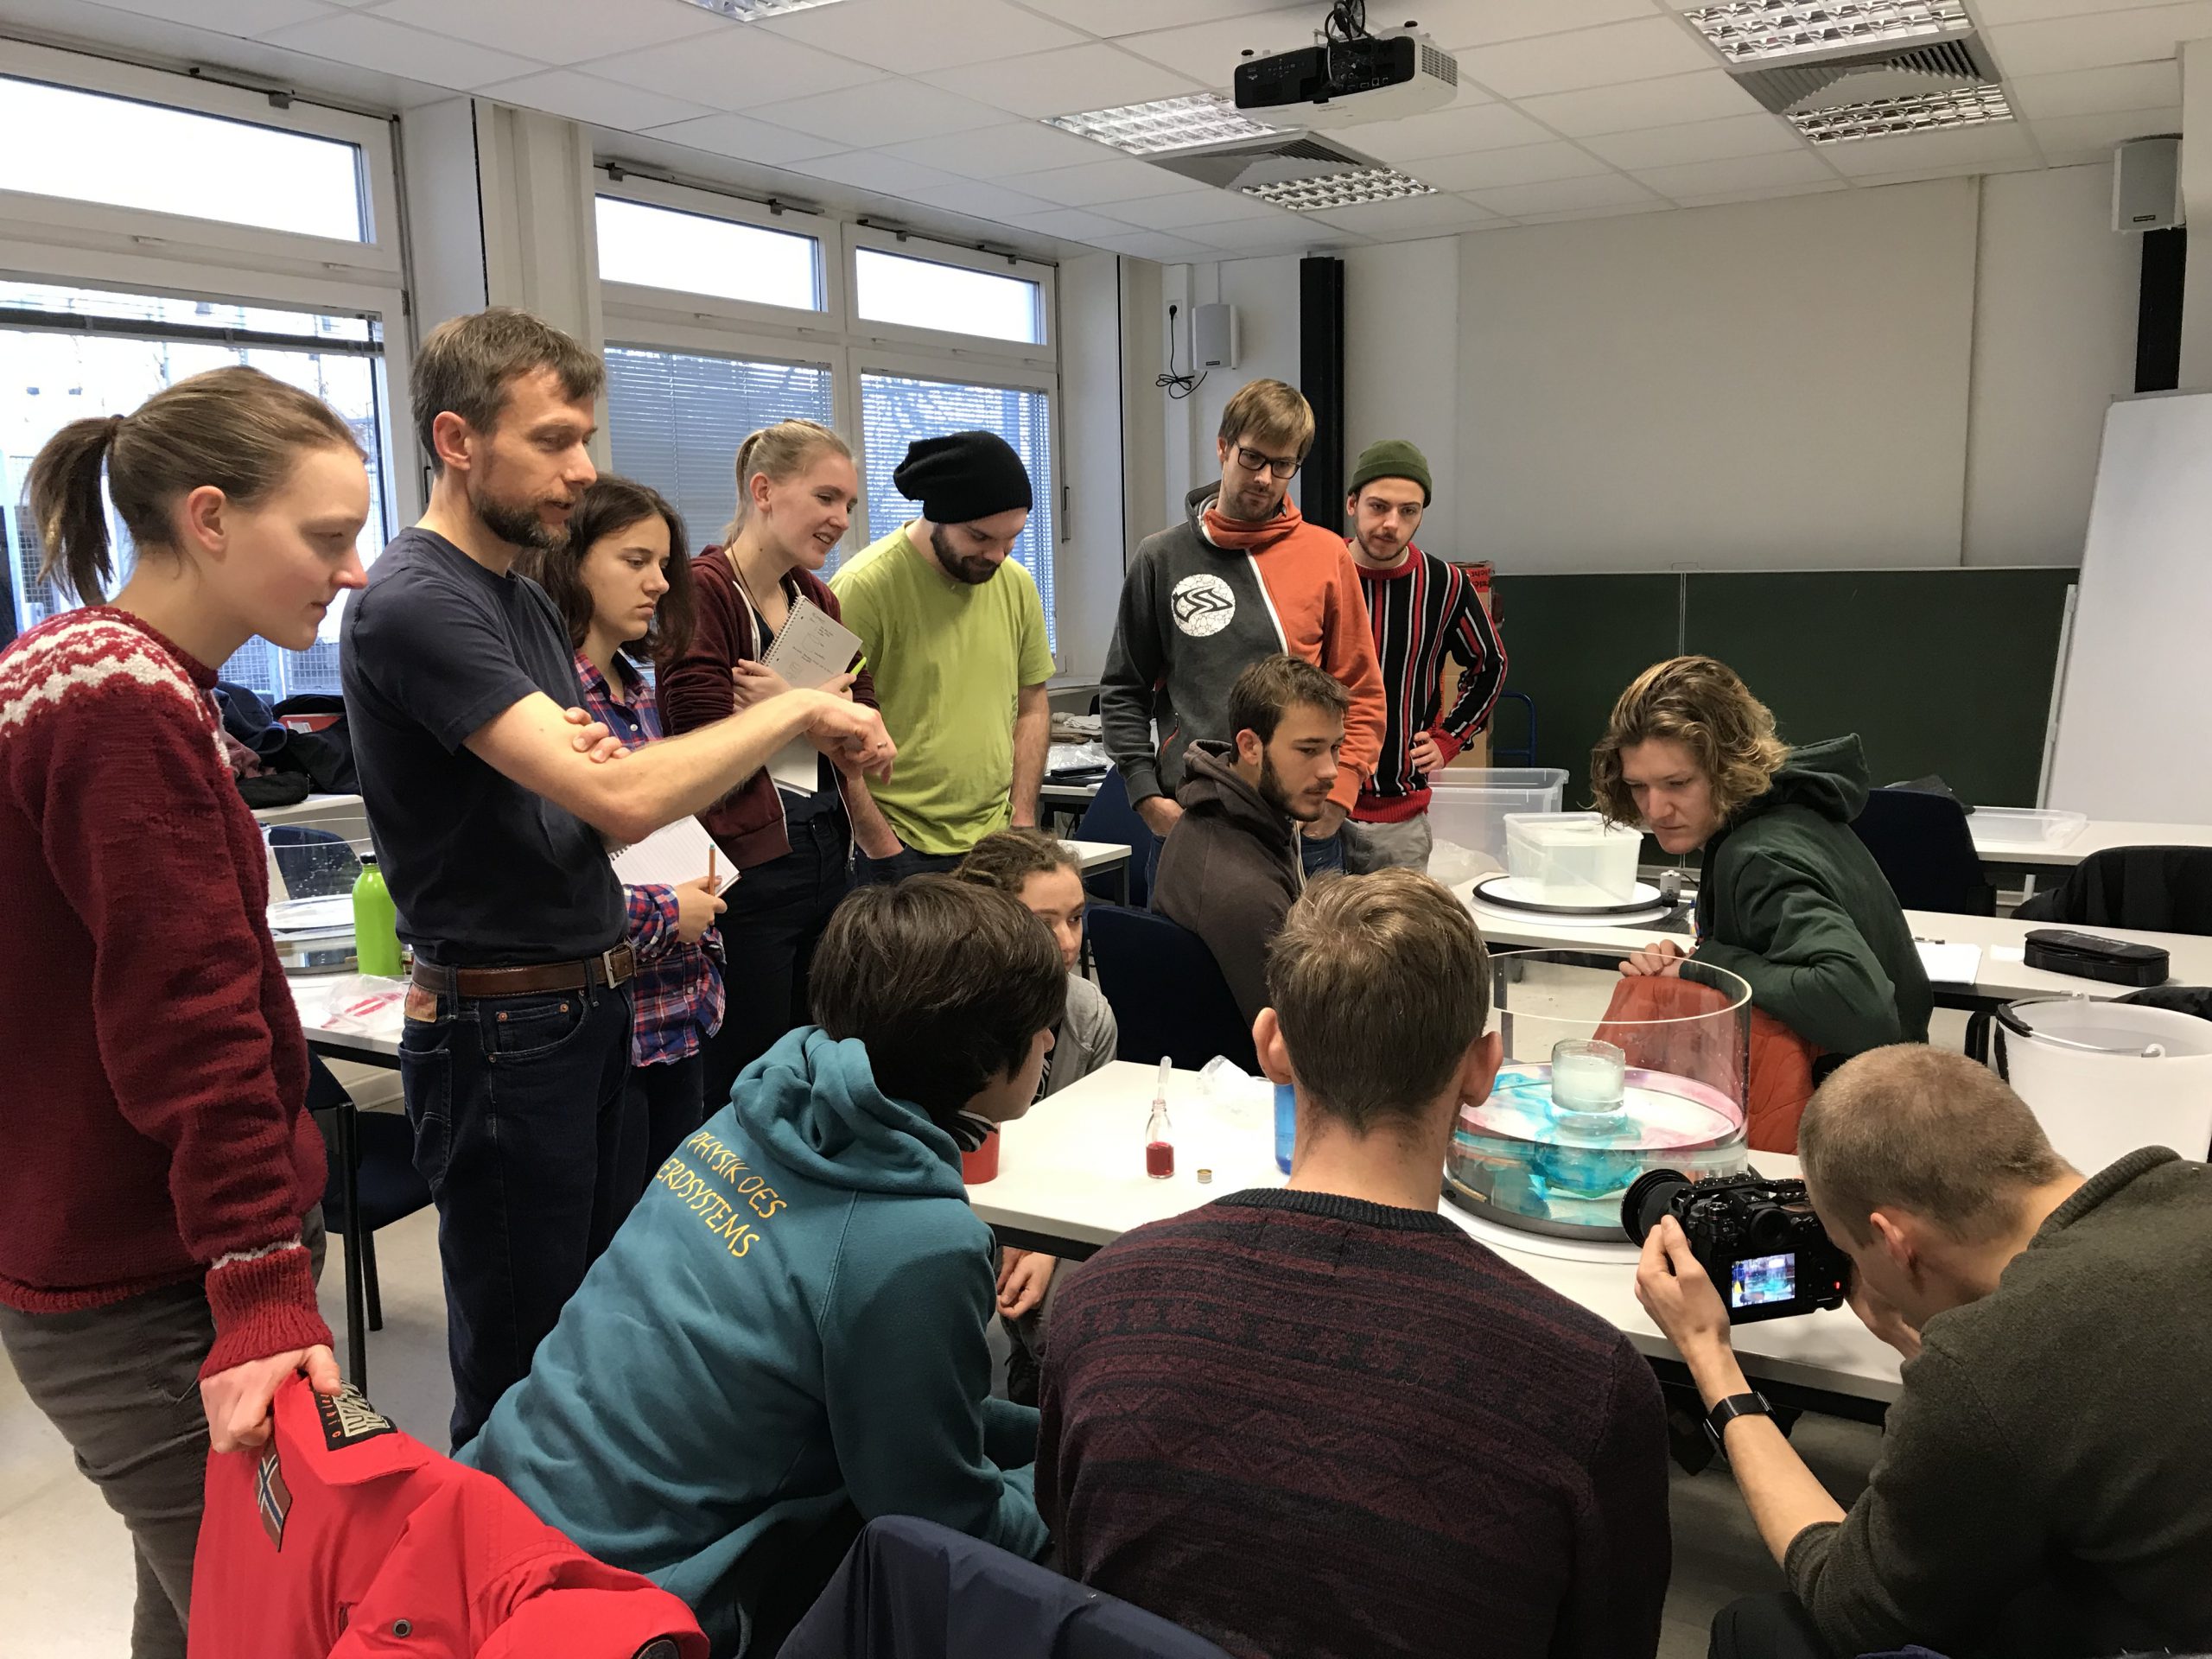
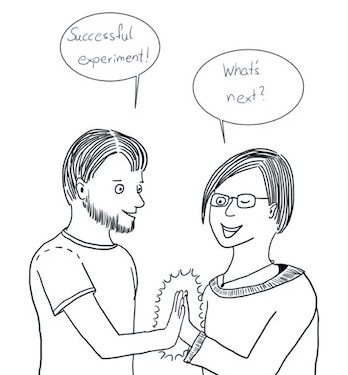
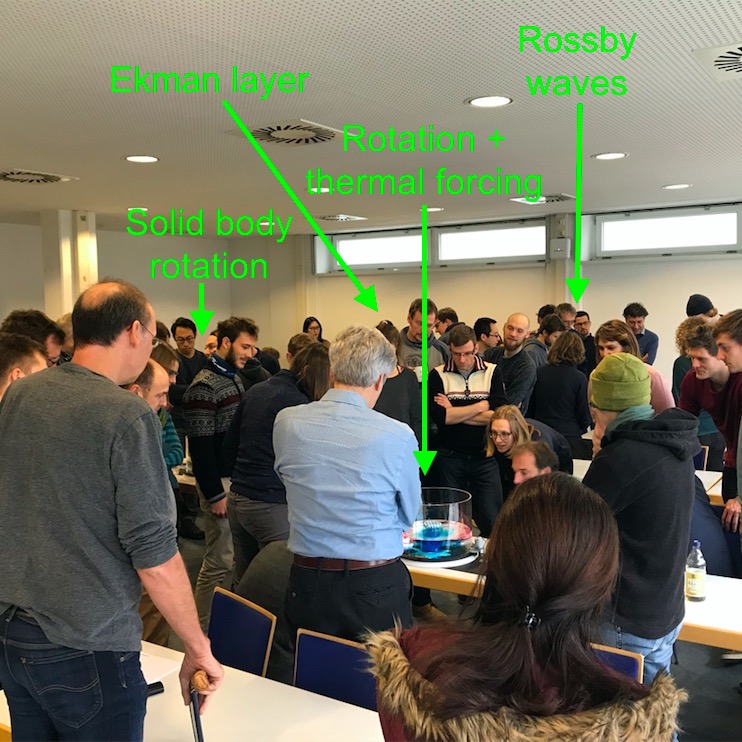
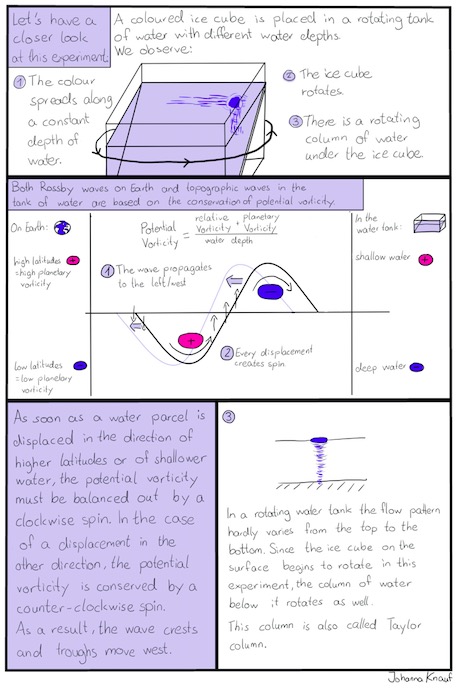
Not a picture, but even better: He managed to fix the problem we had been having with the co-rotating video of our rotating tank. Super excited! If I wasn’t so busy today (slightly underestimated how many pics my dear friends would send me!) I would go try it out right away!
8:51am — Sam (Manchester)
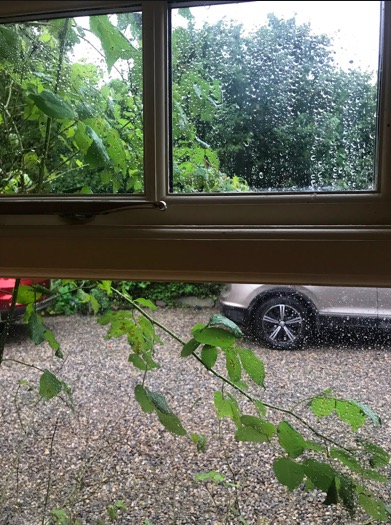
Raindrops on the window! I love how, especially with the ones in the upper part of the window, you can see the world upside down: the bright sky at the bottom of the drops, the darker trees at the top. In the drops further down the window you see the sky at the bottom, then the darker bushes and trees, and then the brighter gravel & car! So cool!
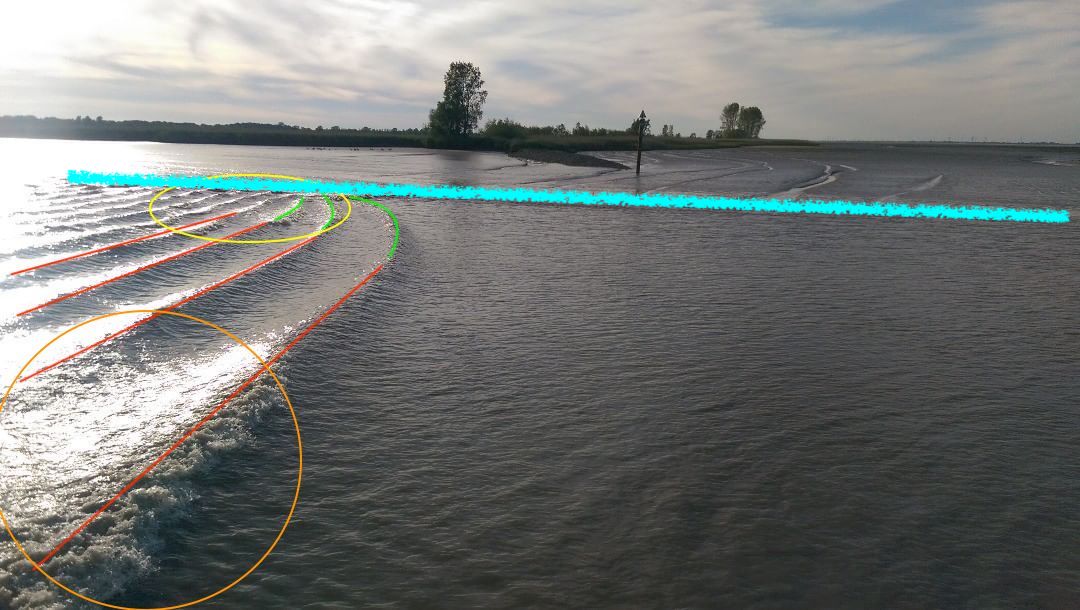
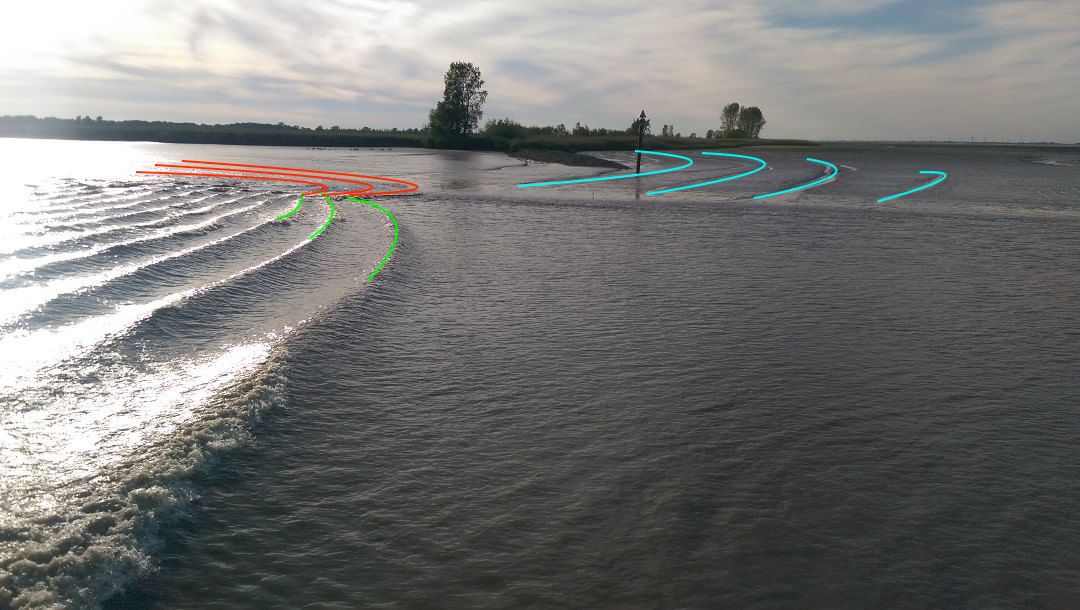
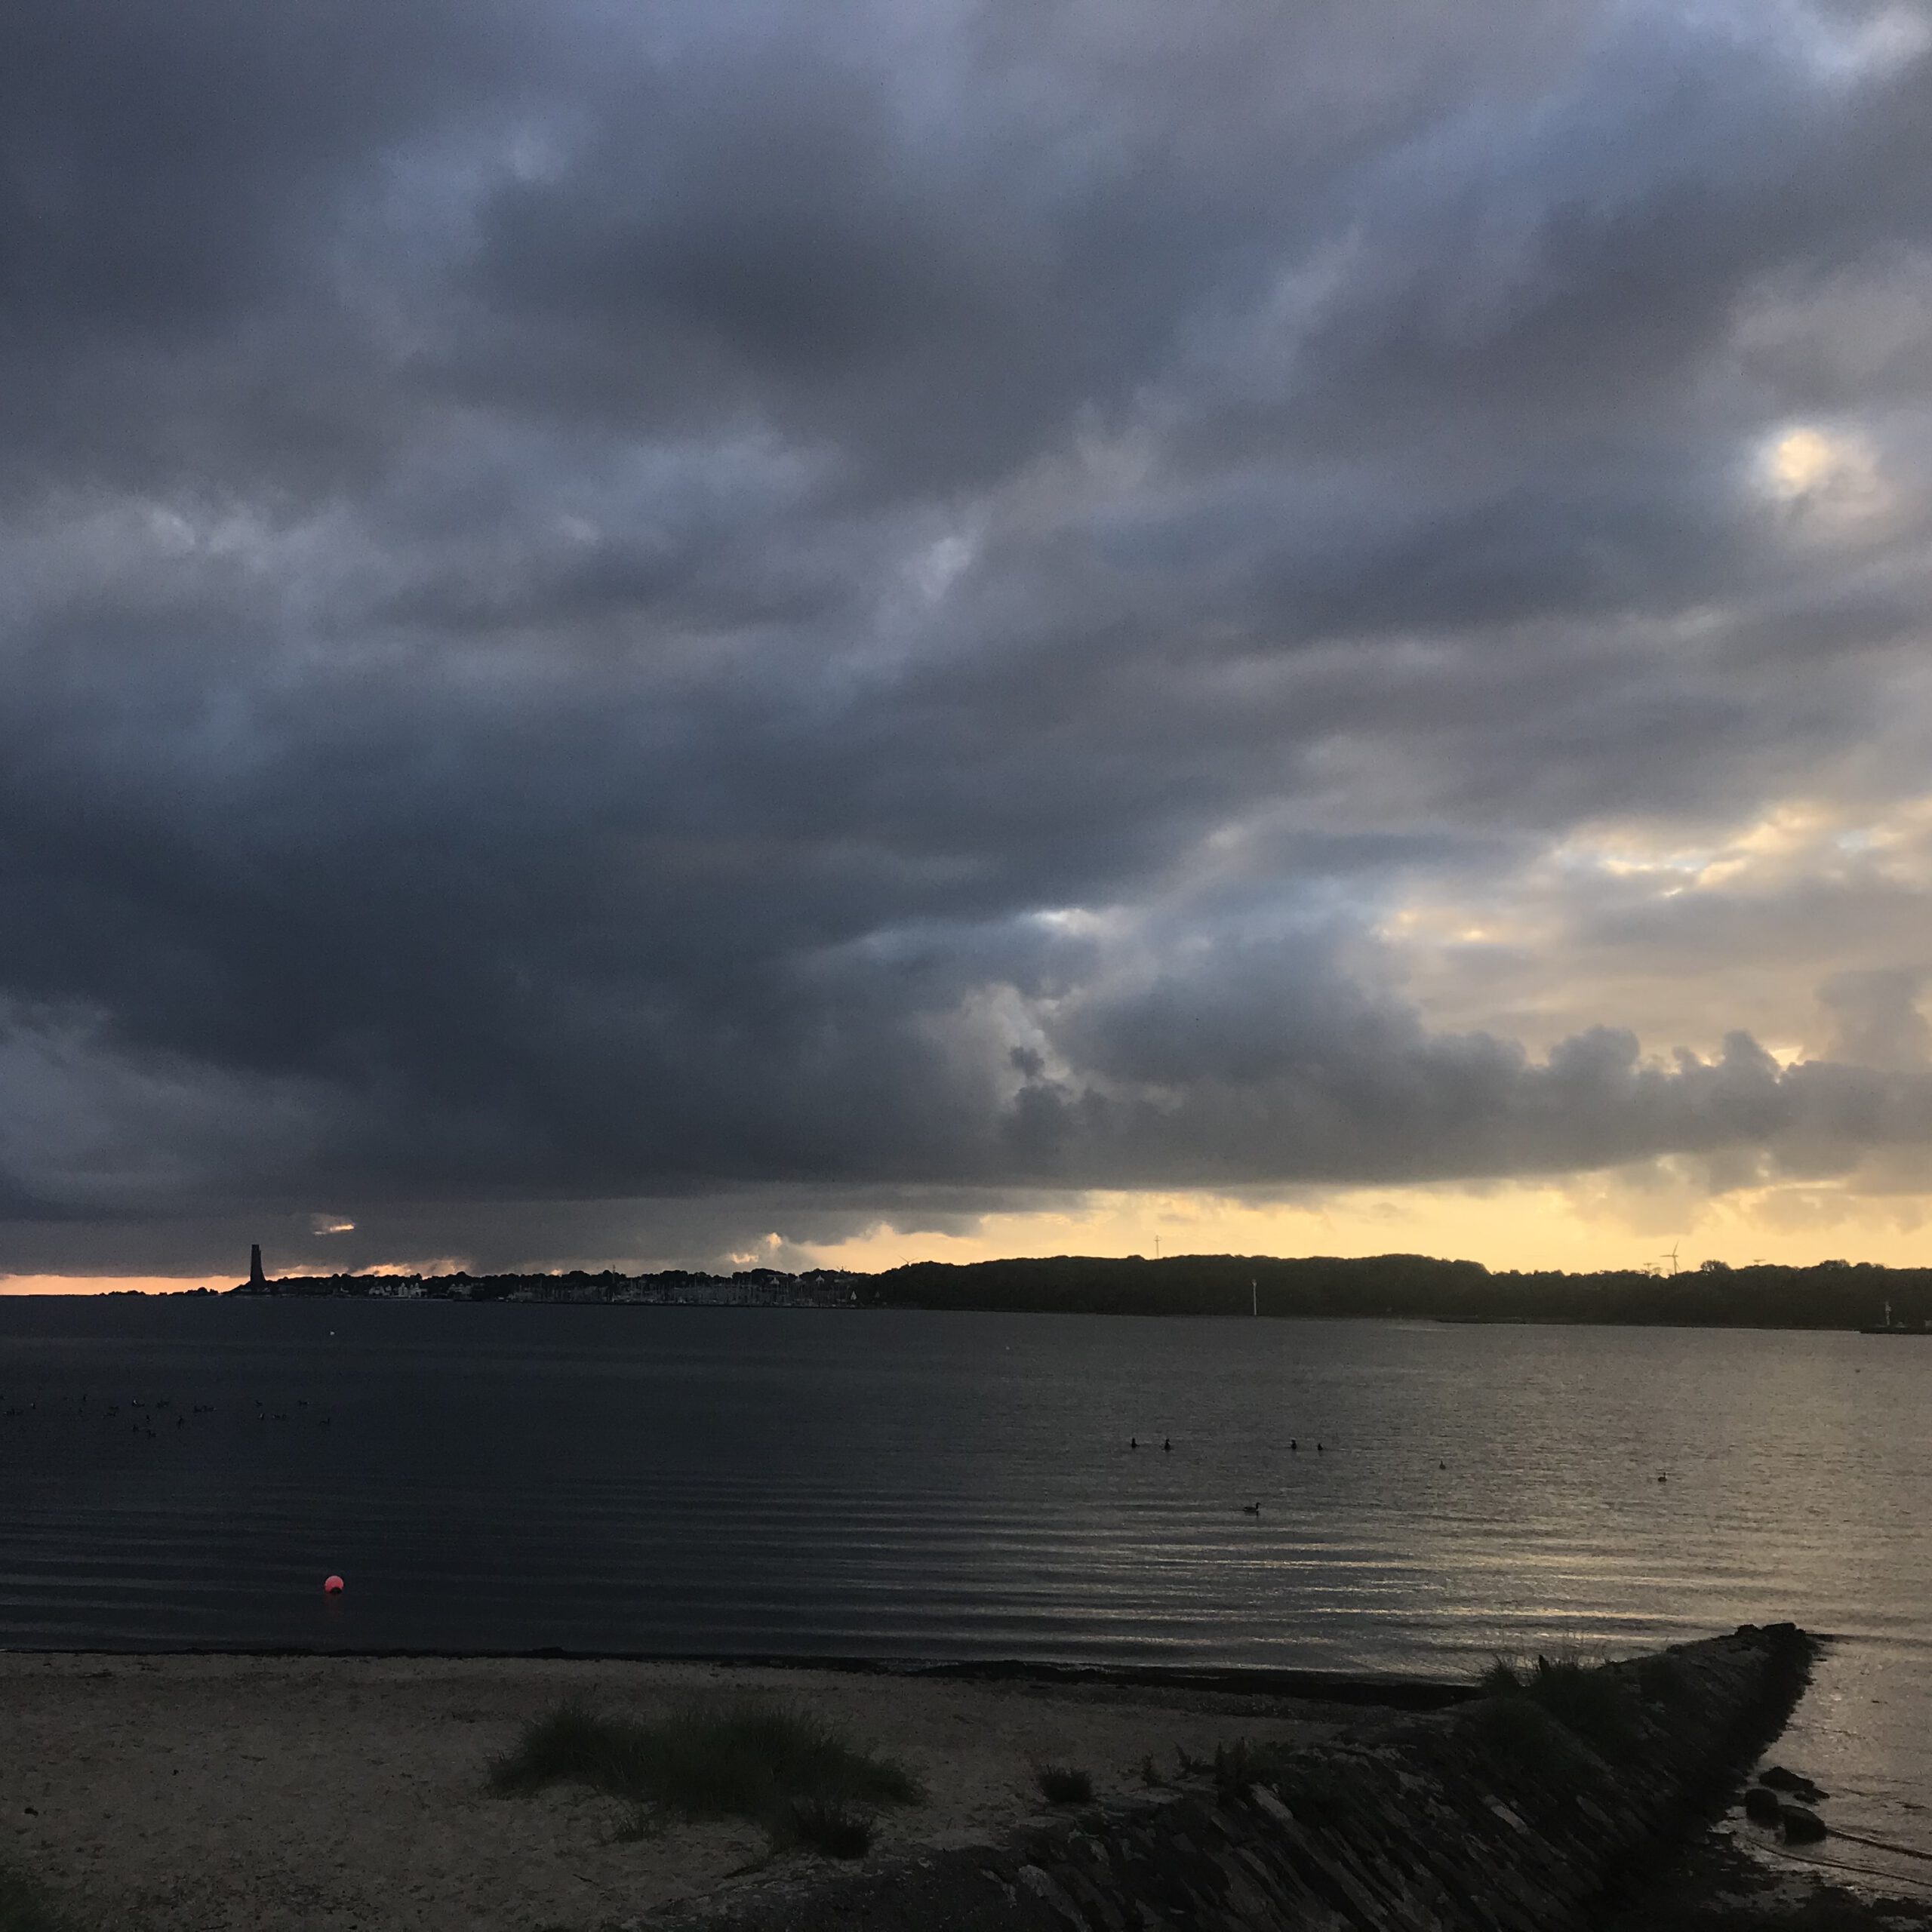
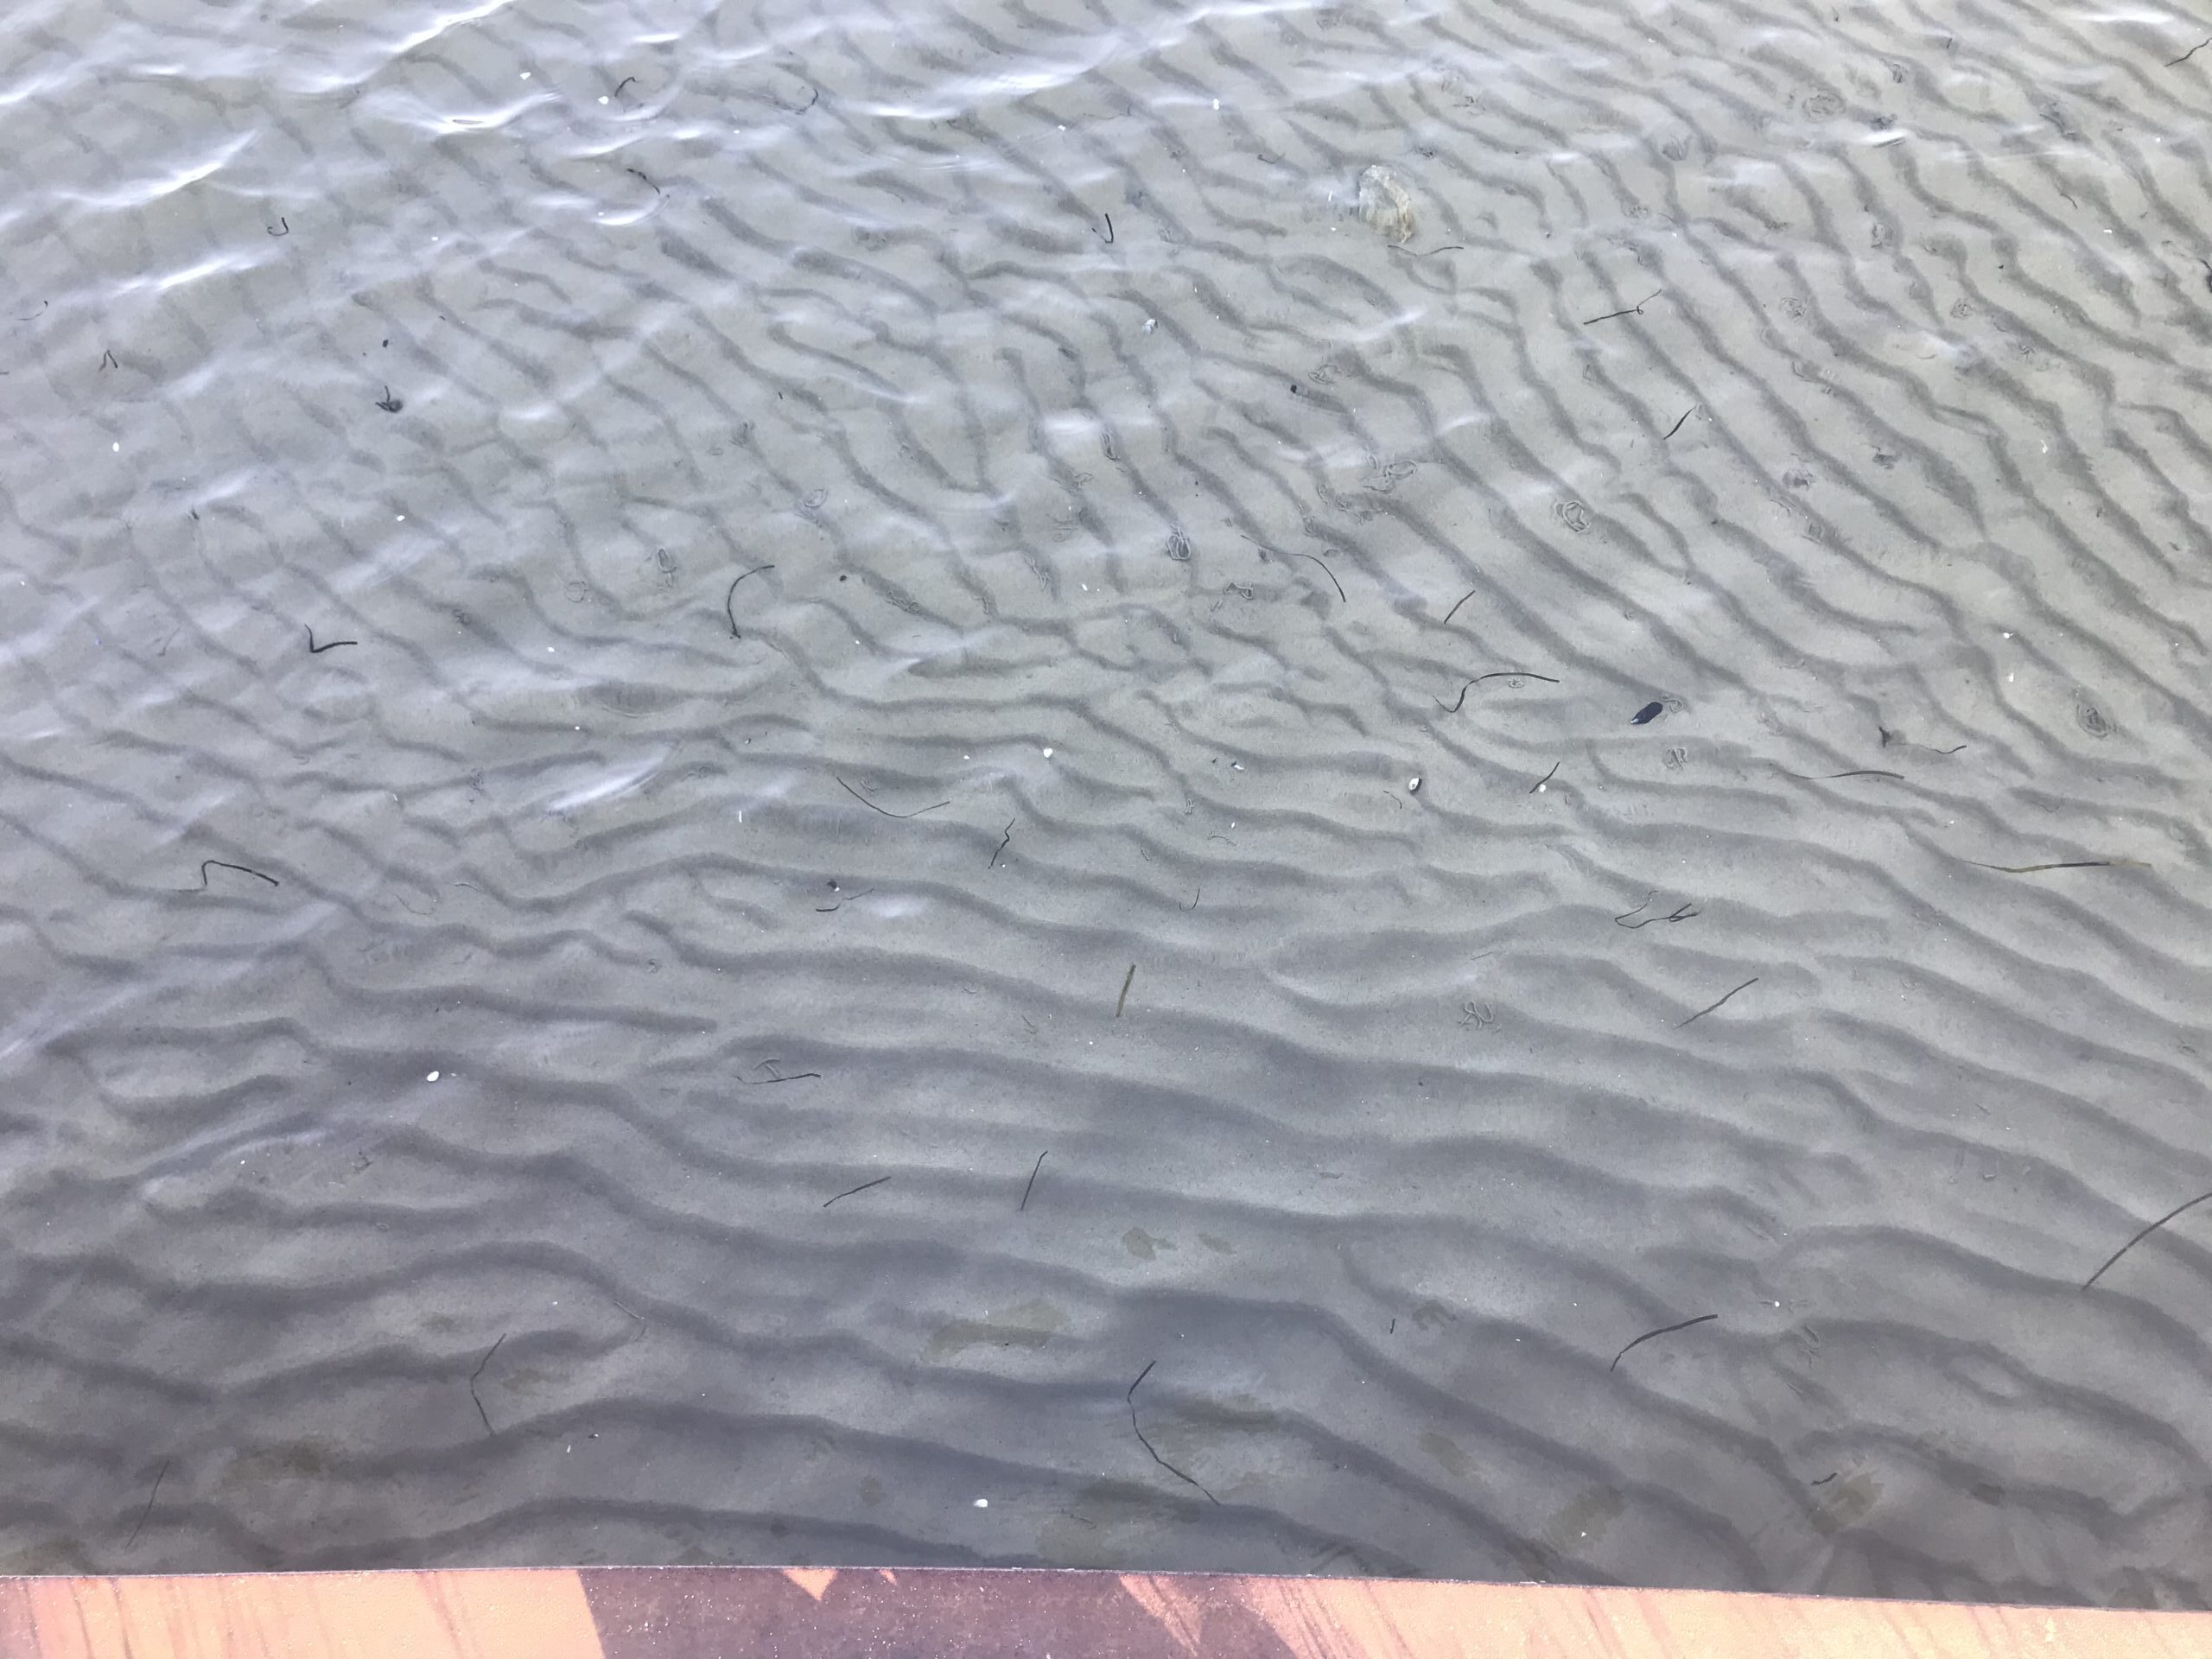
8:28am — Ronja (Nordsee)
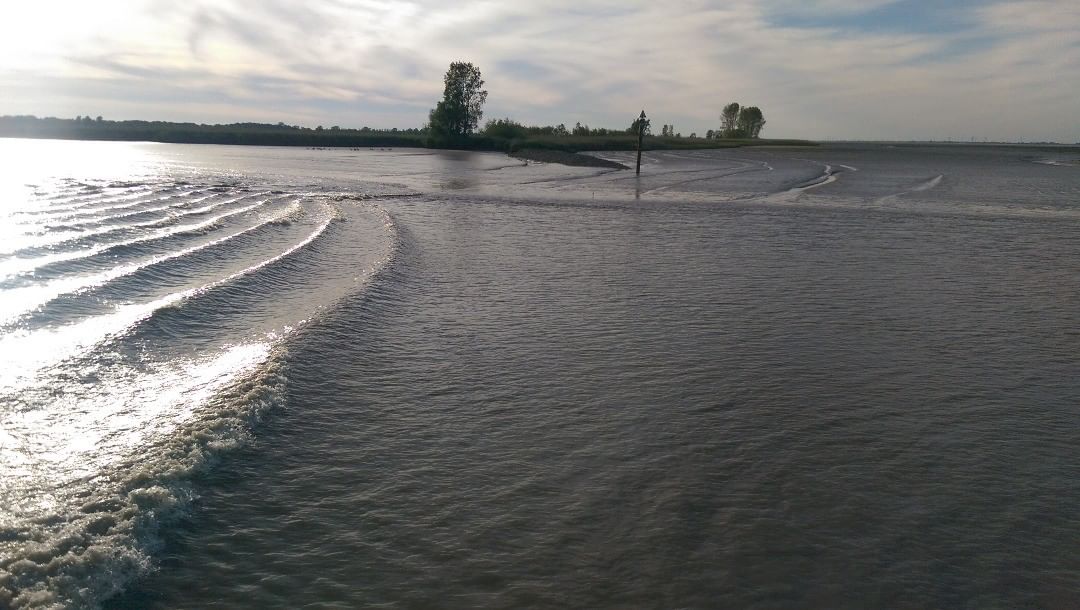
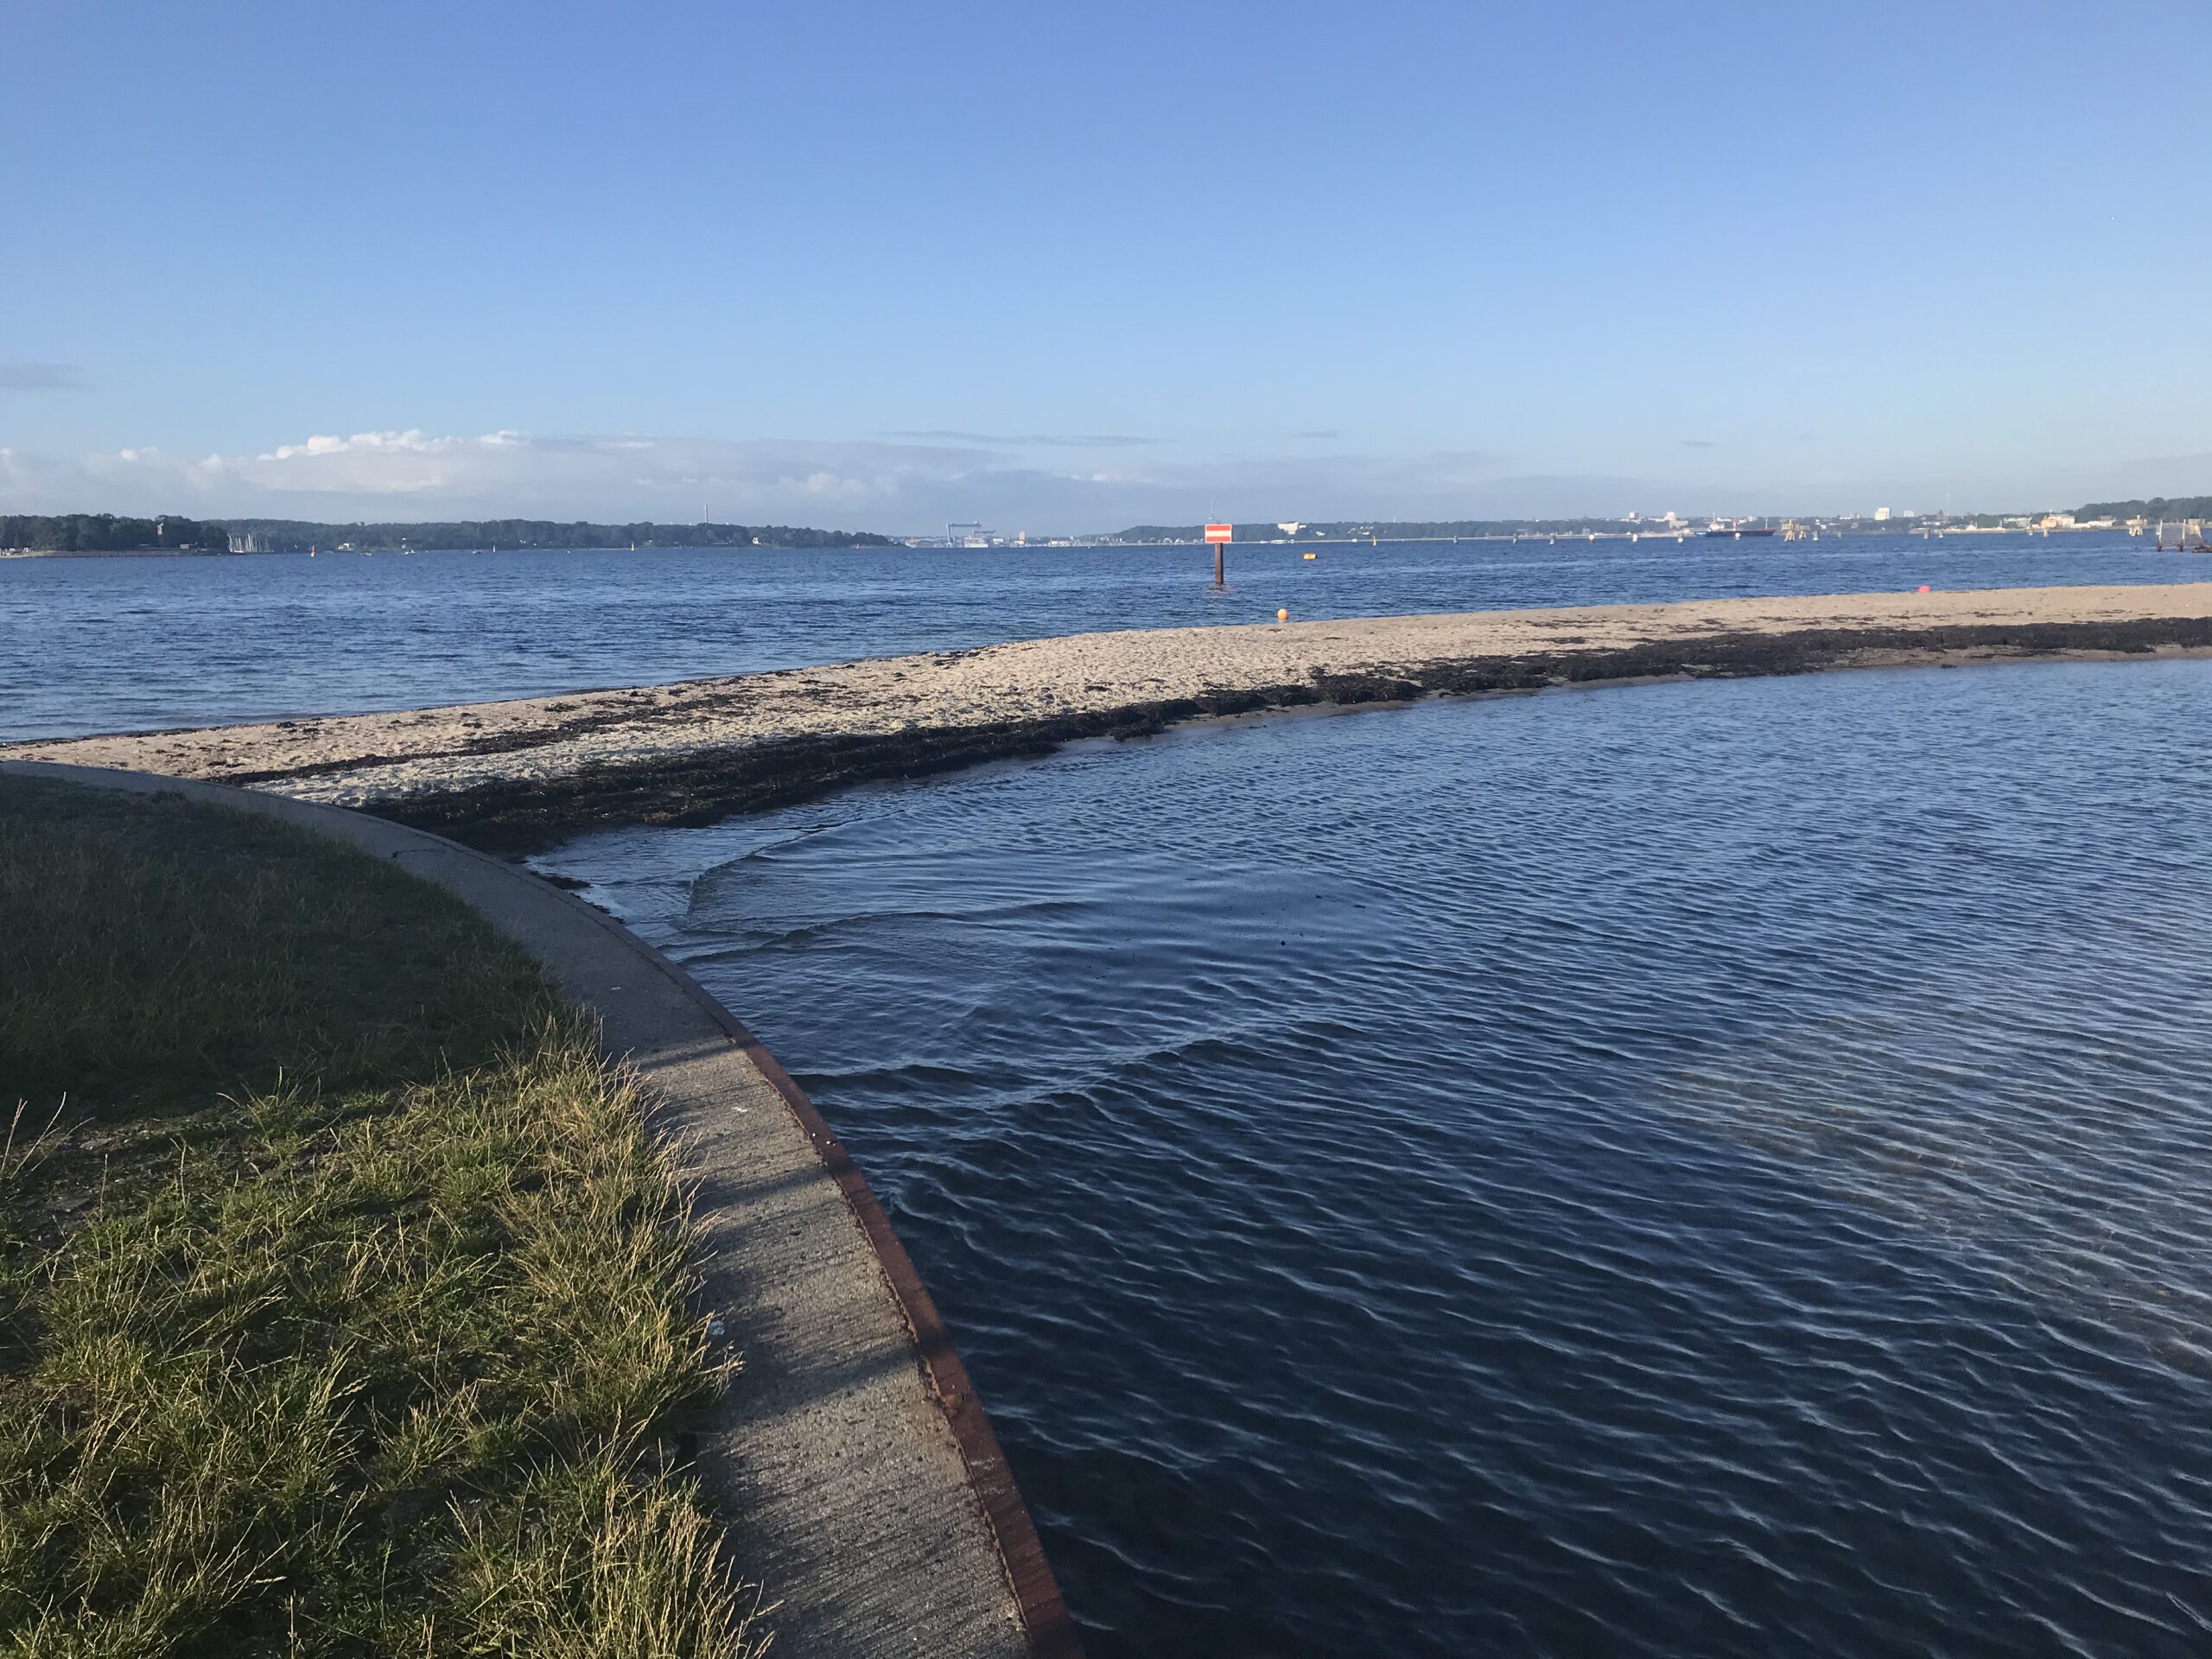
On this beautiful picture you clearly see wave crests meeting up at an angle, even though further offshore they all seem to be coming in parallel to the beach. Why? Because there is this groyne going out perpendicular to the shore. You see some of the stones at the bottom of the picture, but from the wave field we see that it reaches further offshore and is just submerged there. Where it is submerged, the water depth suddenly decreases. Waves running close to and on top of it therefore change their speed, and with changing speed, the wave crests bend towards the obstacle (as they are being slowed down more on the obstacle side than on the deeper side). Since this happens on both sides of the groyne, we get this cool checkerboard pattern!
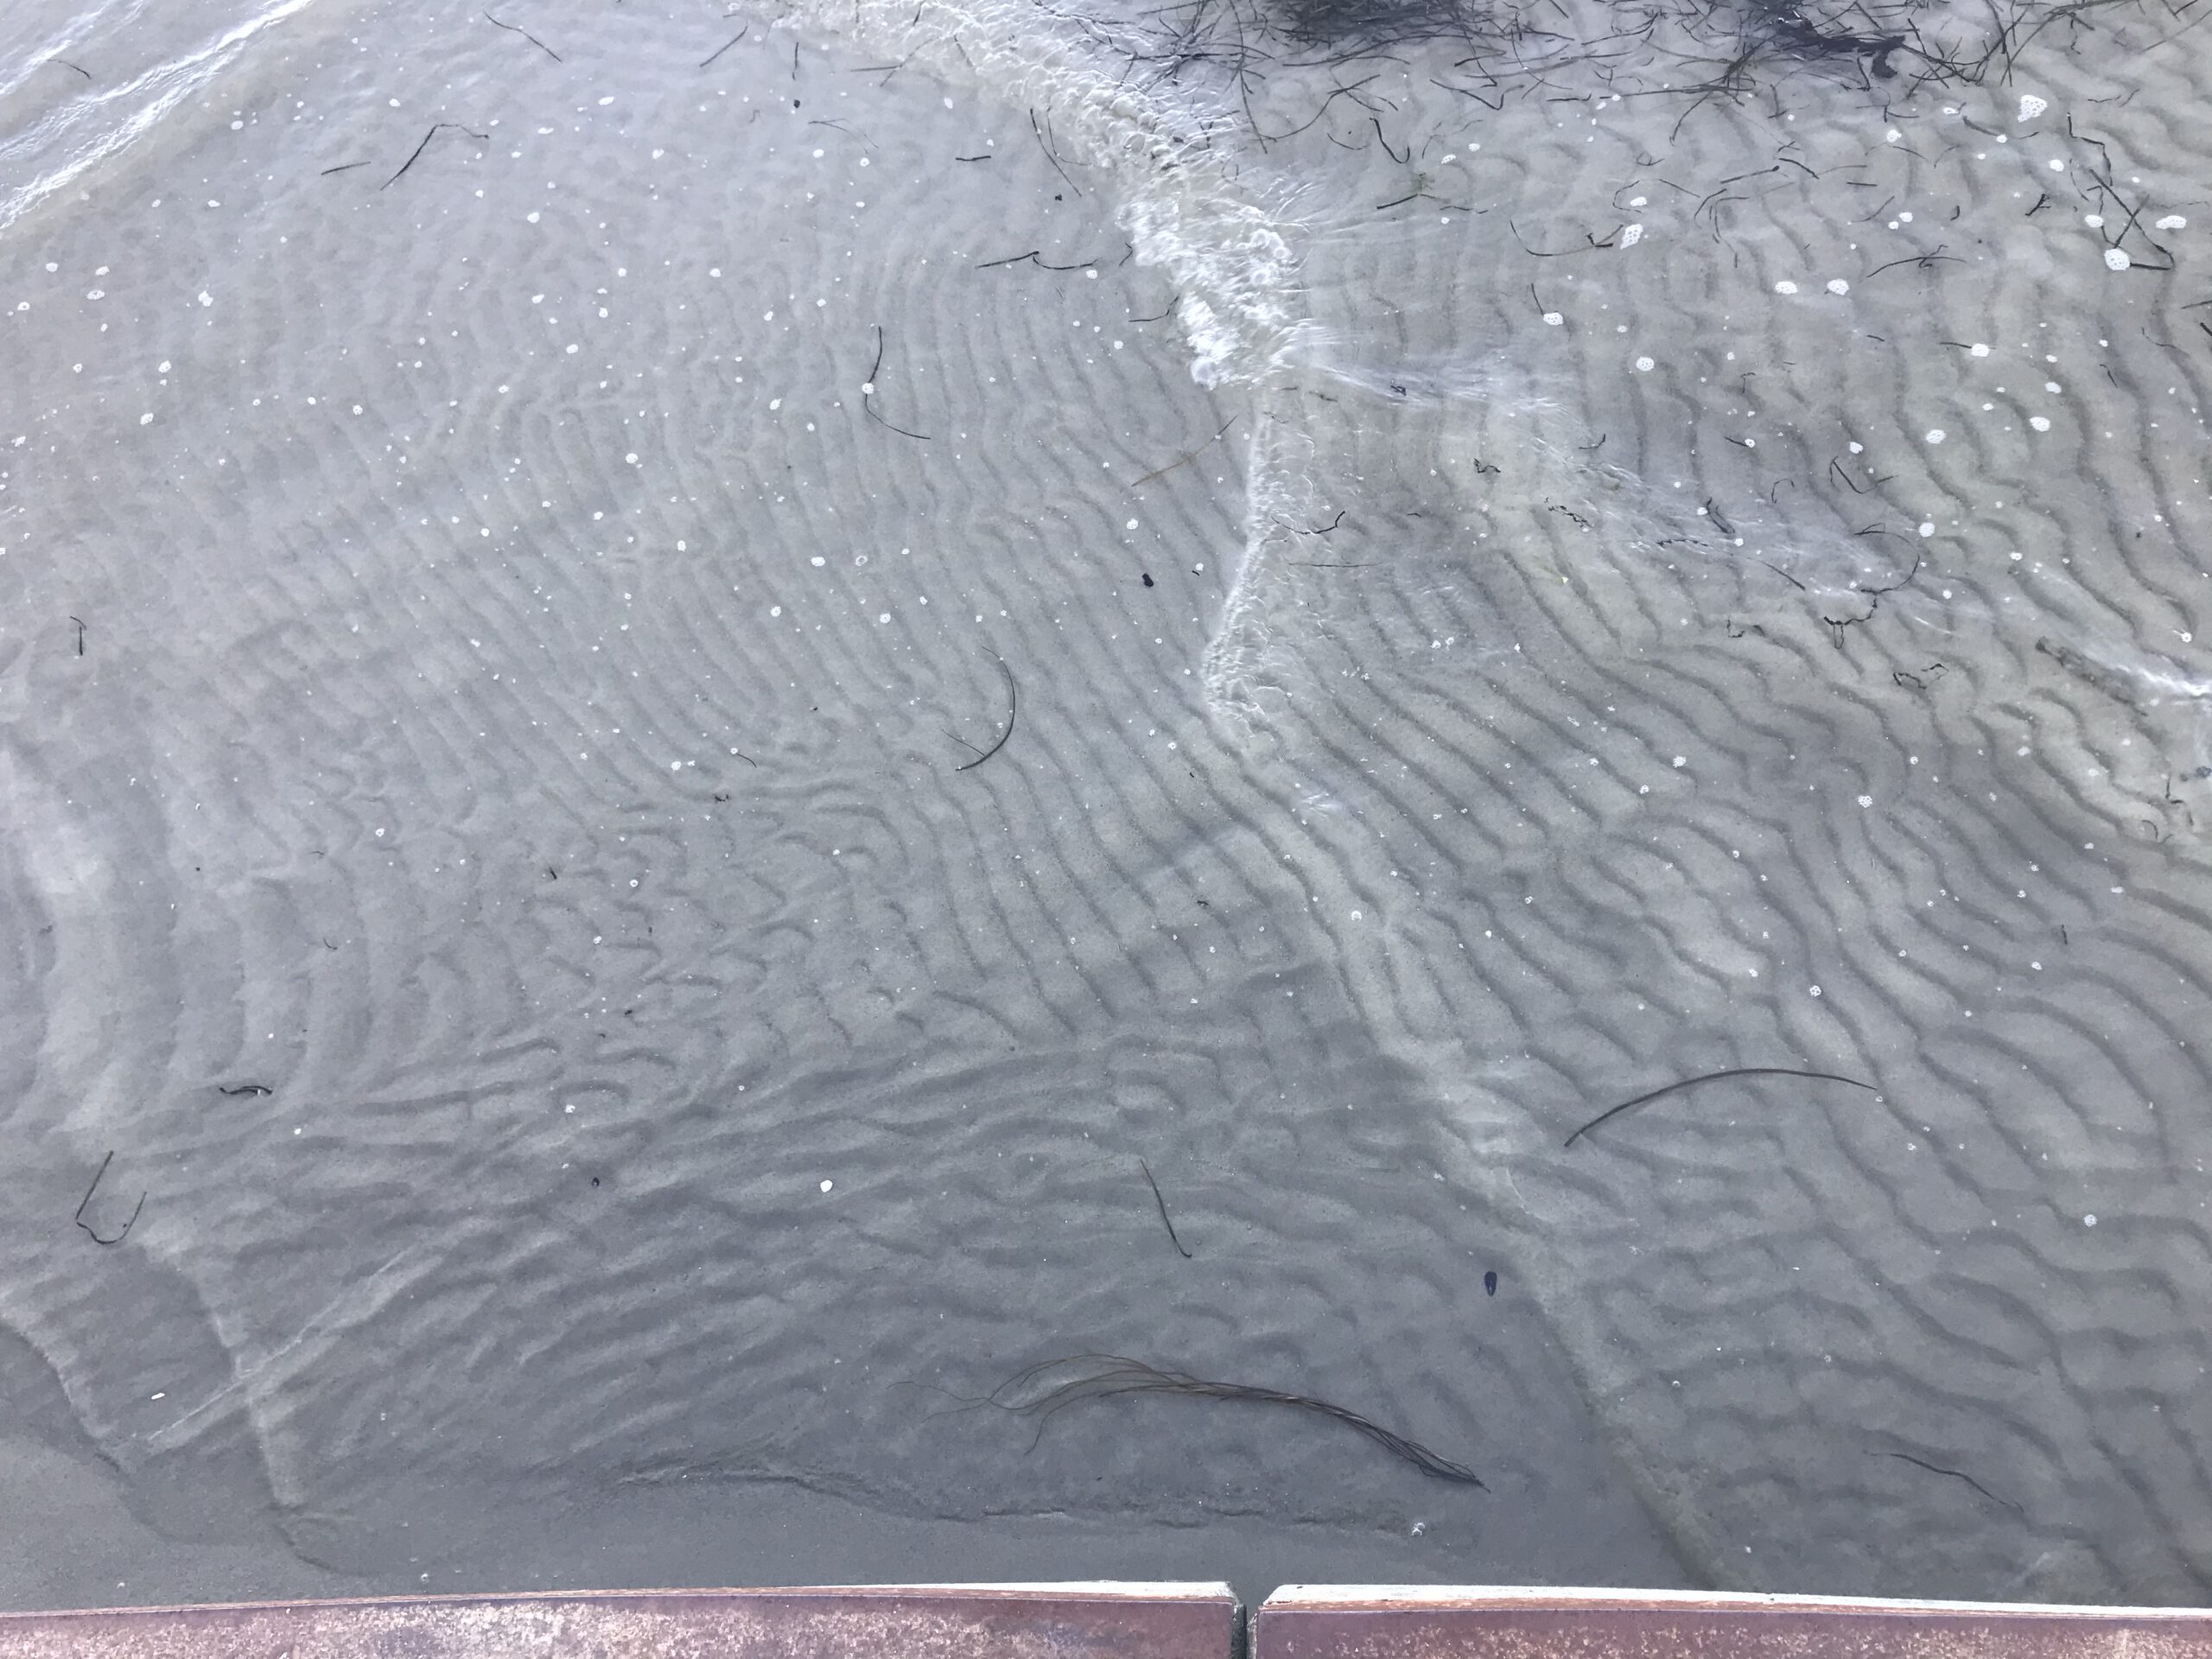
Same explanation as above, but another beautiful picture! :-)
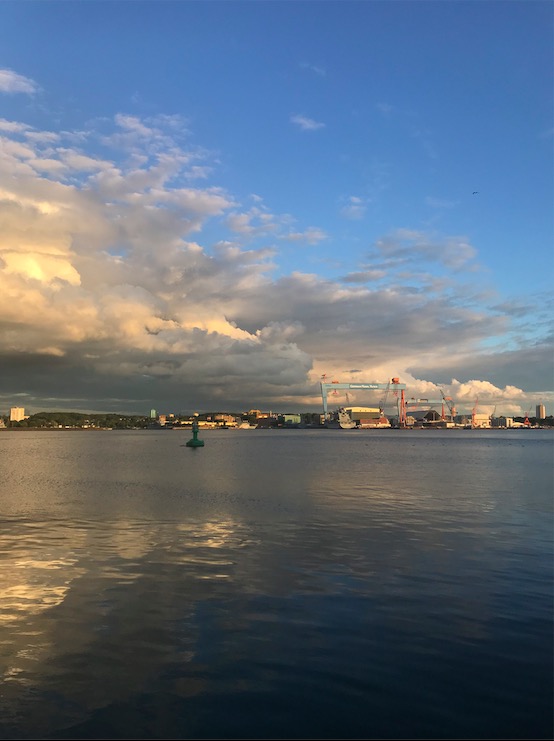
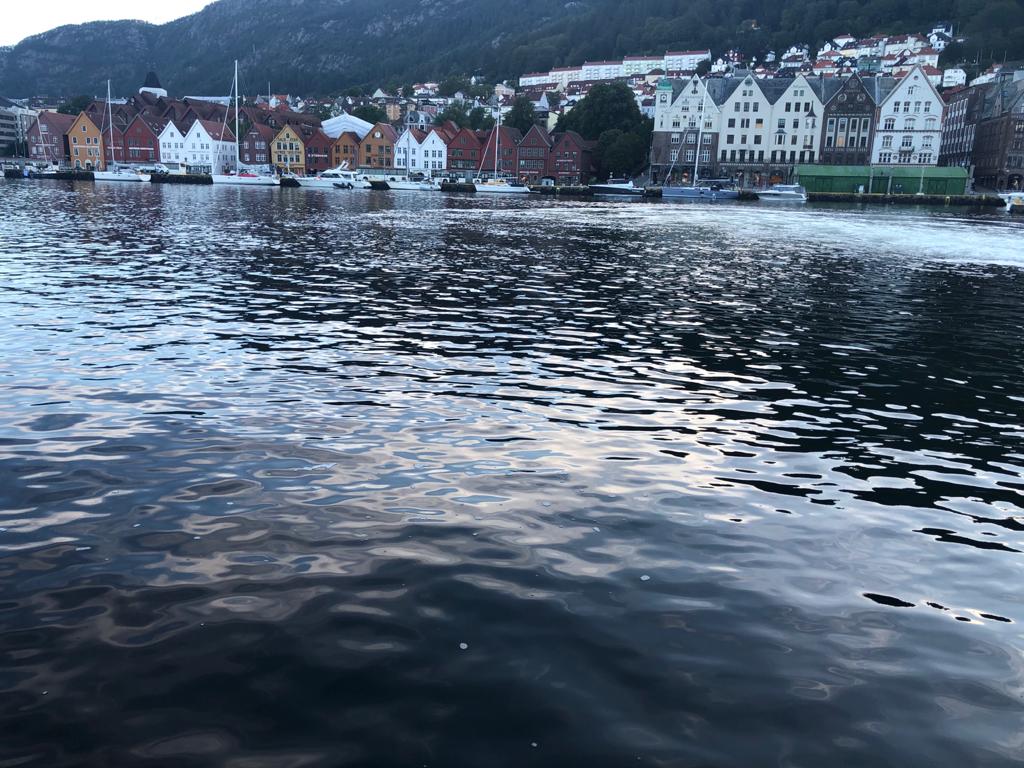
8:13am — Elsa (Bergen)
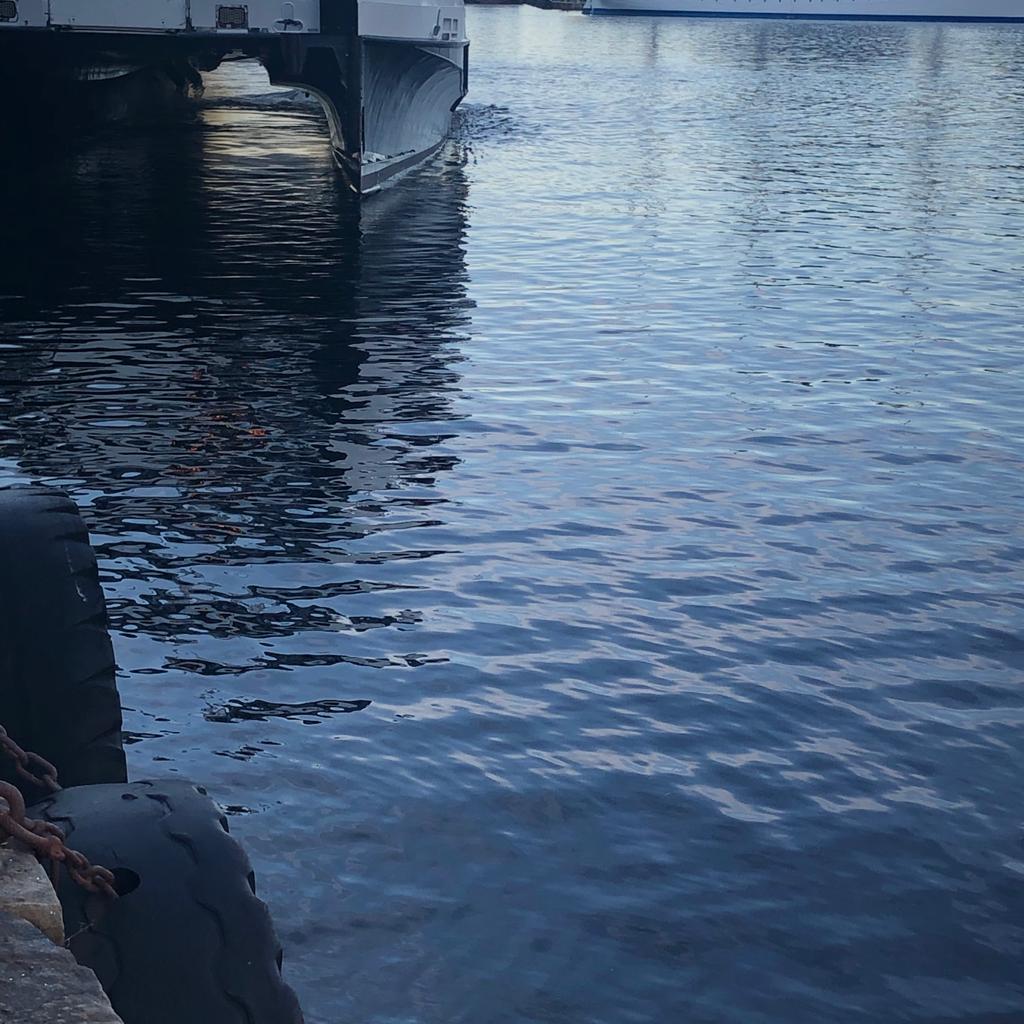
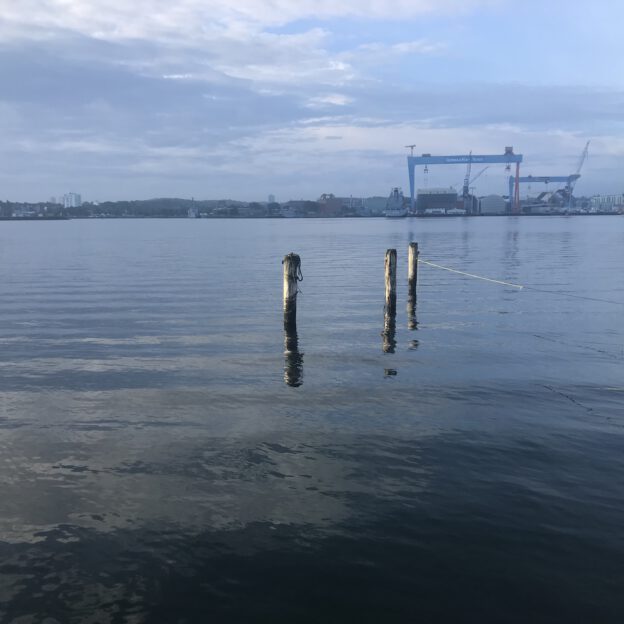
Ha! Knowing where this picture was likely taken, the fist thing I notice is the reflection of the masts of the sailing ship Statsraat Lehmkuhl! And how pretty the light is looking in between the hulls of the catamaran. And how there are waves radiating away from where other waves bumped against the bottom of those tyres
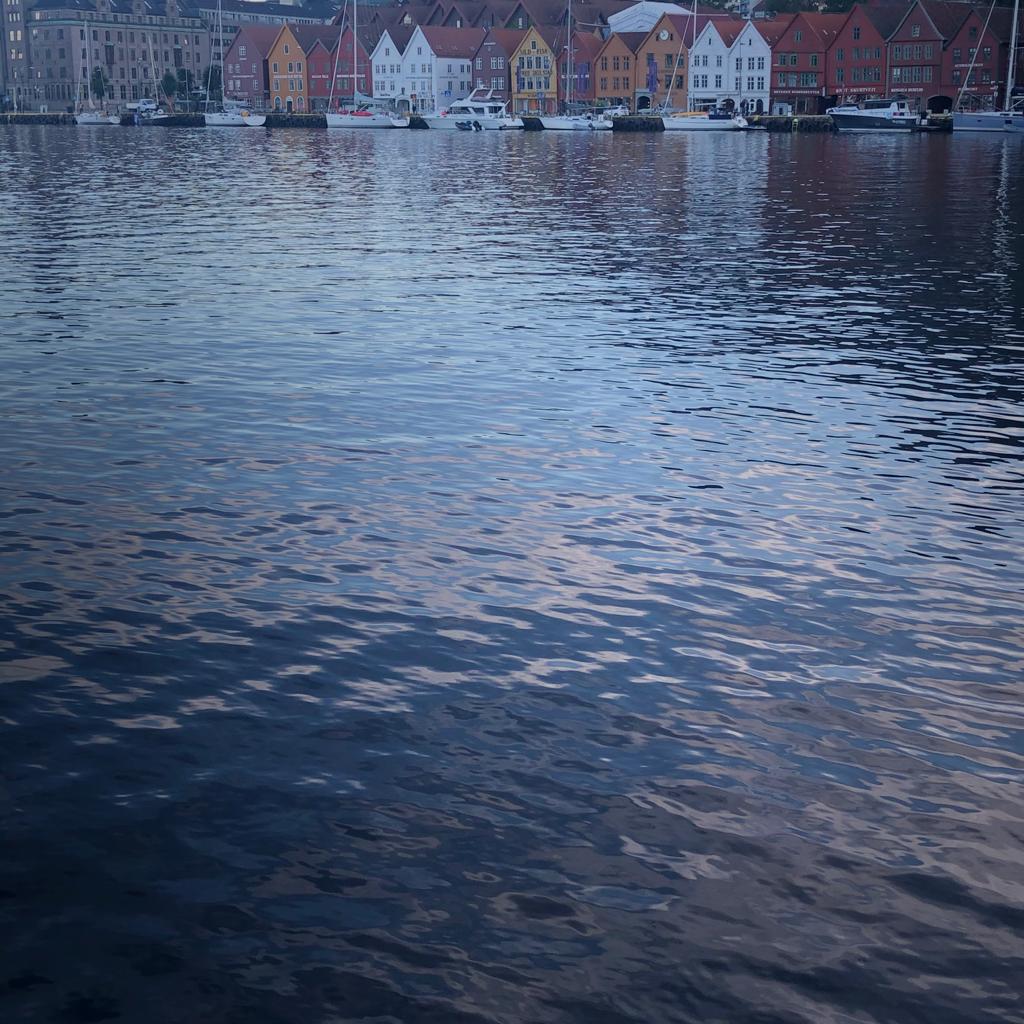
Bergen is so beautiful! I love how we see the reflection of the colorful houses of Bryggen, then the dark mountain of Fløyen behind it, and then a blue sky with pink clouds! And how the structures of waves are clearest where there are strong contrasts in brightness of the reflected light, for example at the pink/blue boundaries!
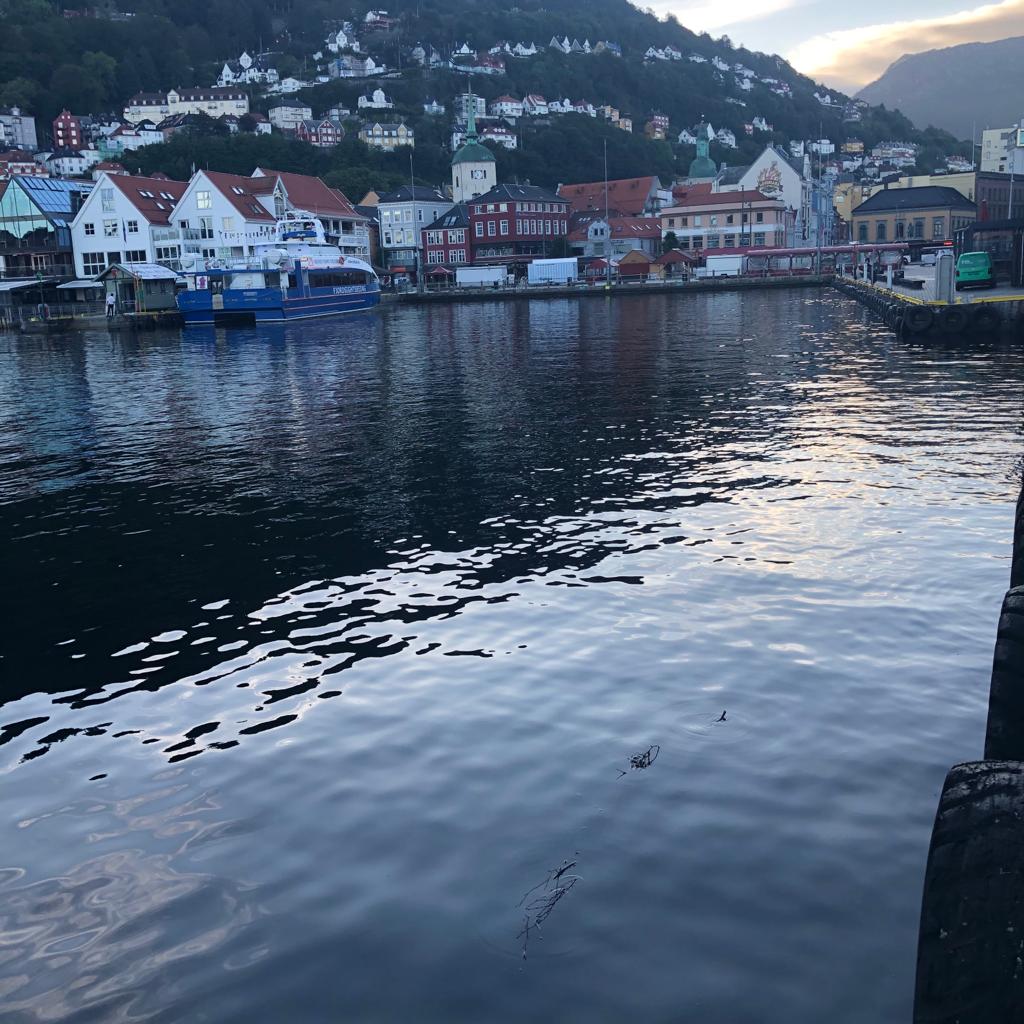
More beautiful Bergen. The dark mountain’s reflection does not have a sharp edge, because the water surface isn’t flat. So depending on the angle of the surface, some spots still show mountain while others already show the sky
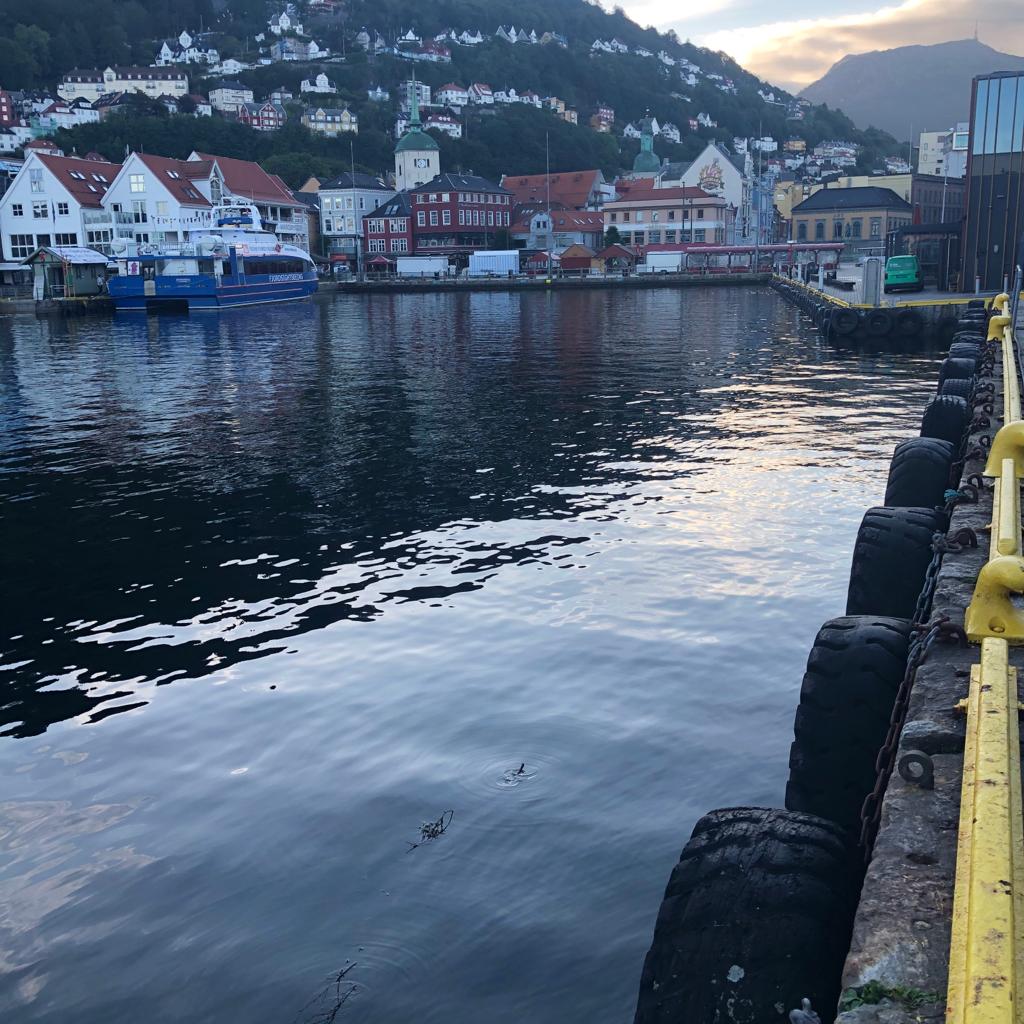
Same as above, PLUS isn’t it cute how the floaty bits in the foreground have their own little wave rings around them???
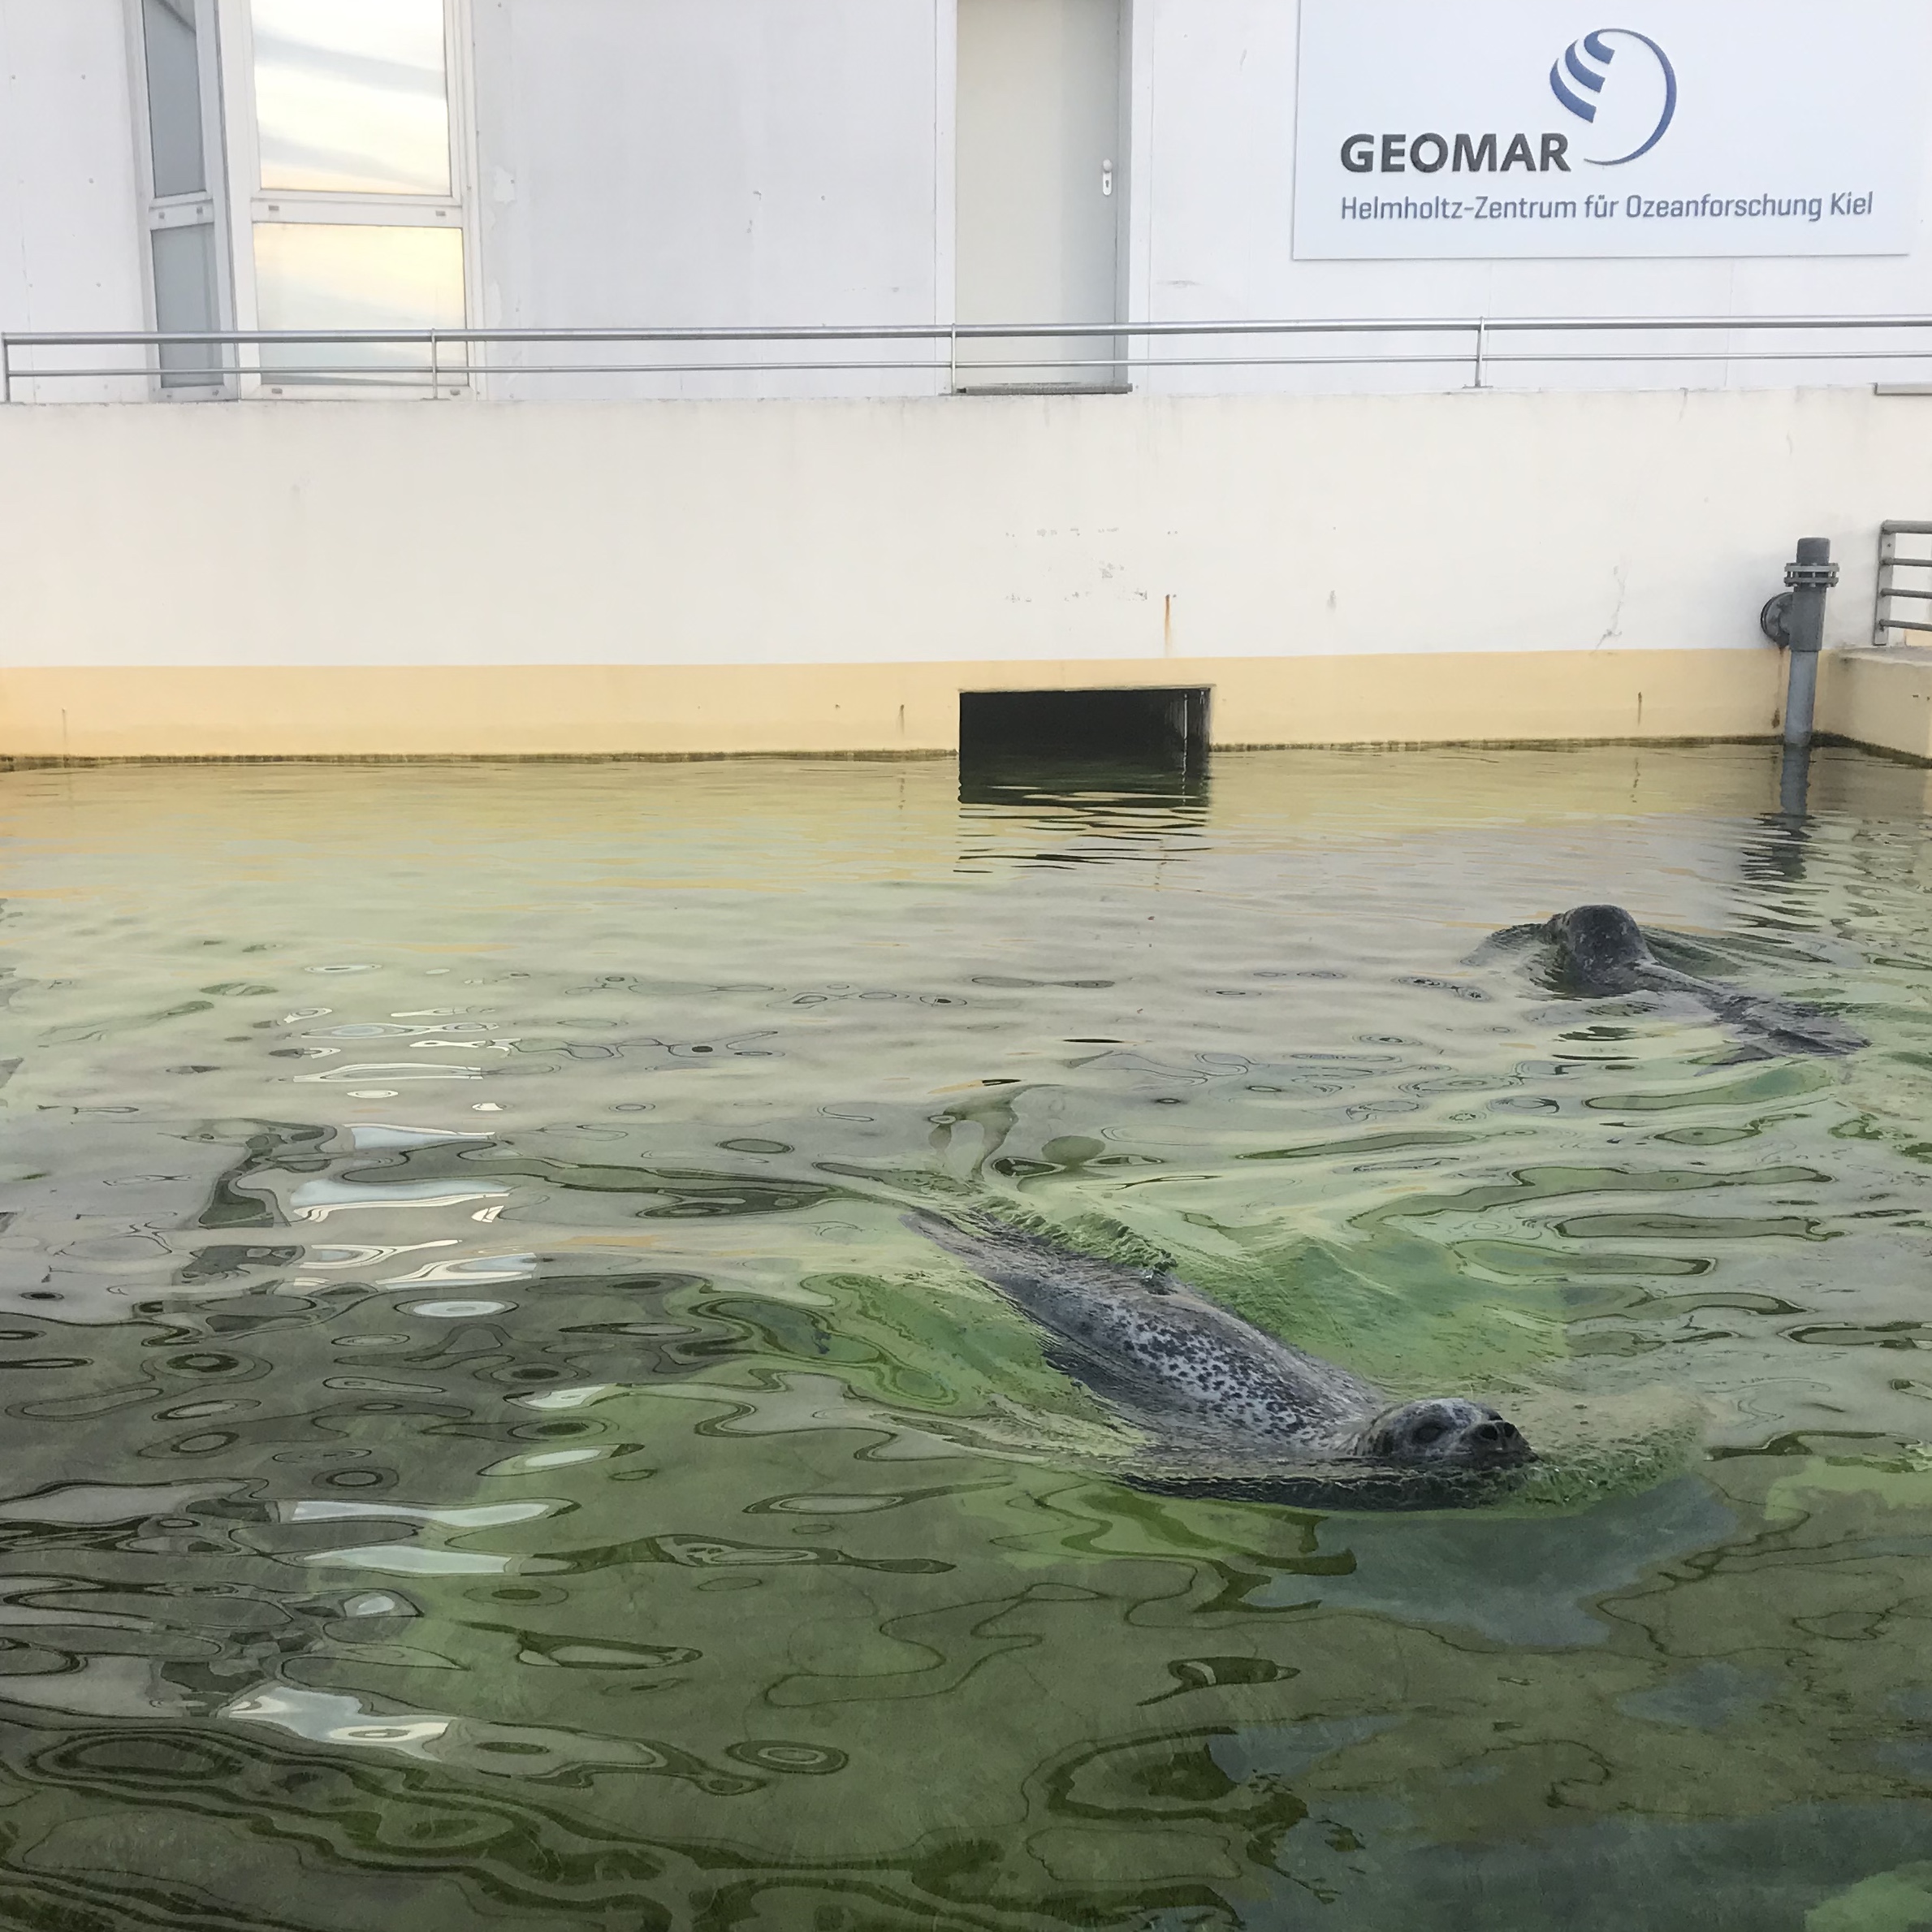
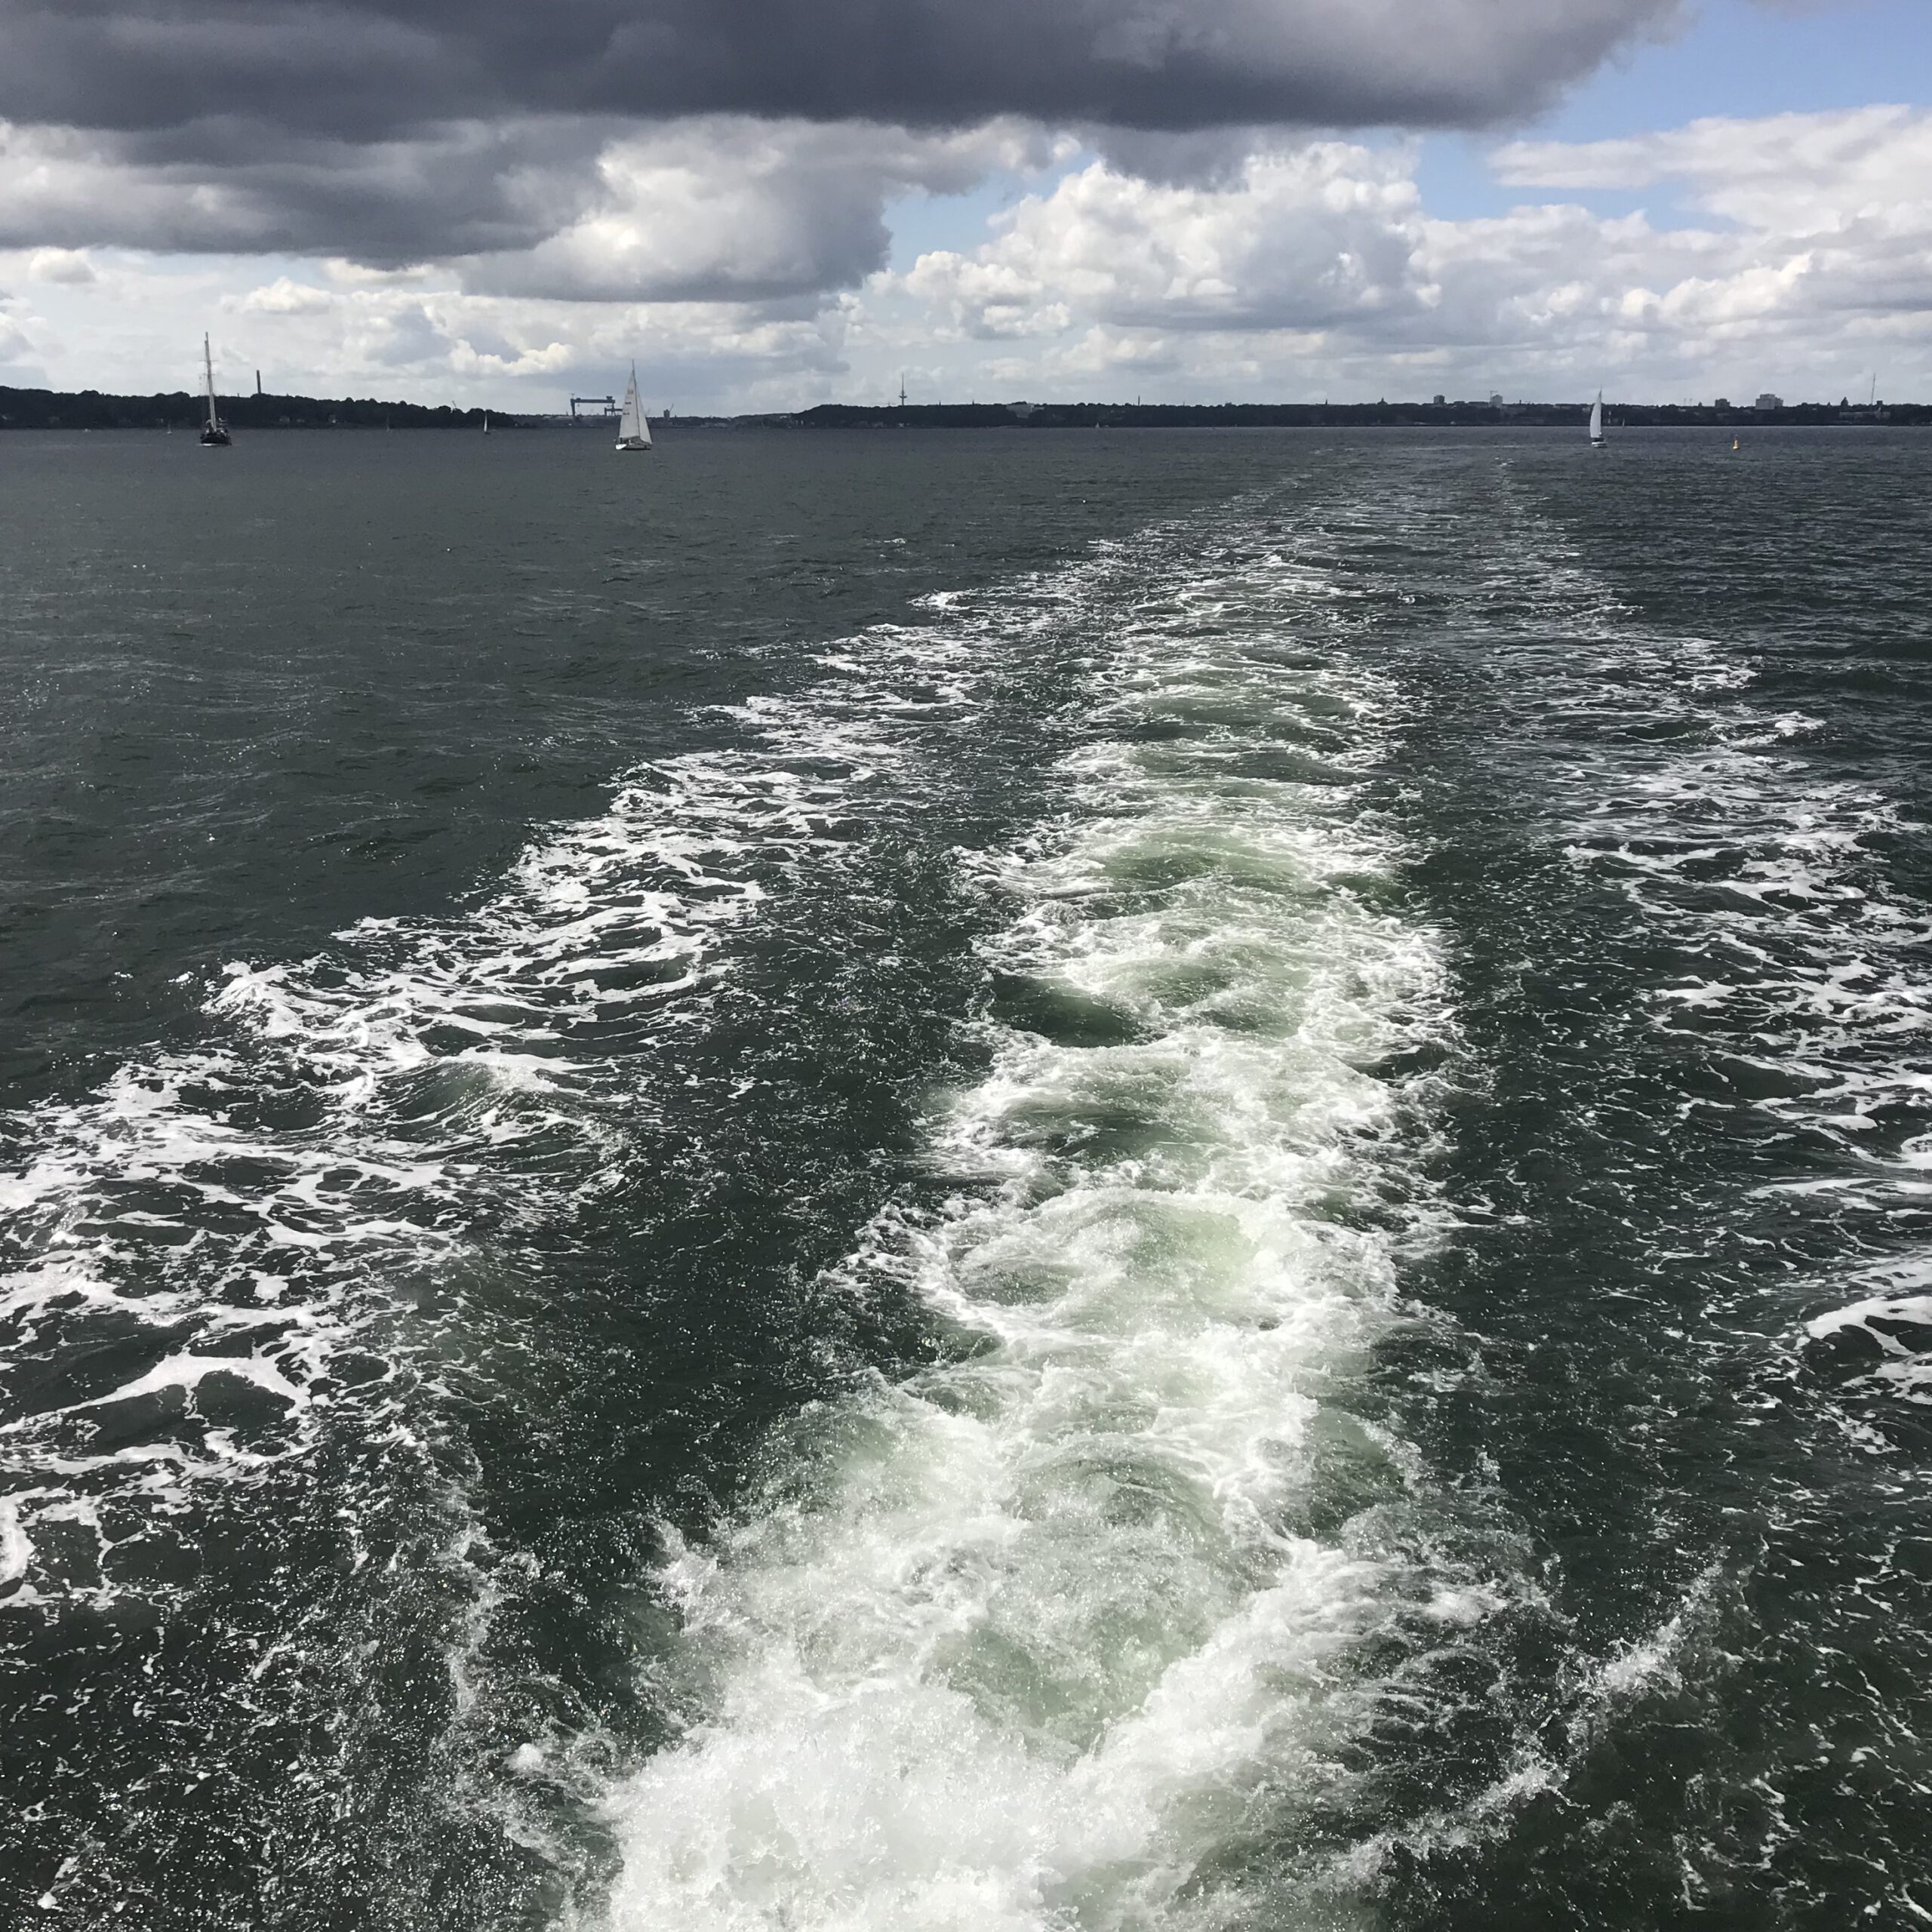
What jumps at me here is the turbulent (white) water, most likely caused by a speedboat
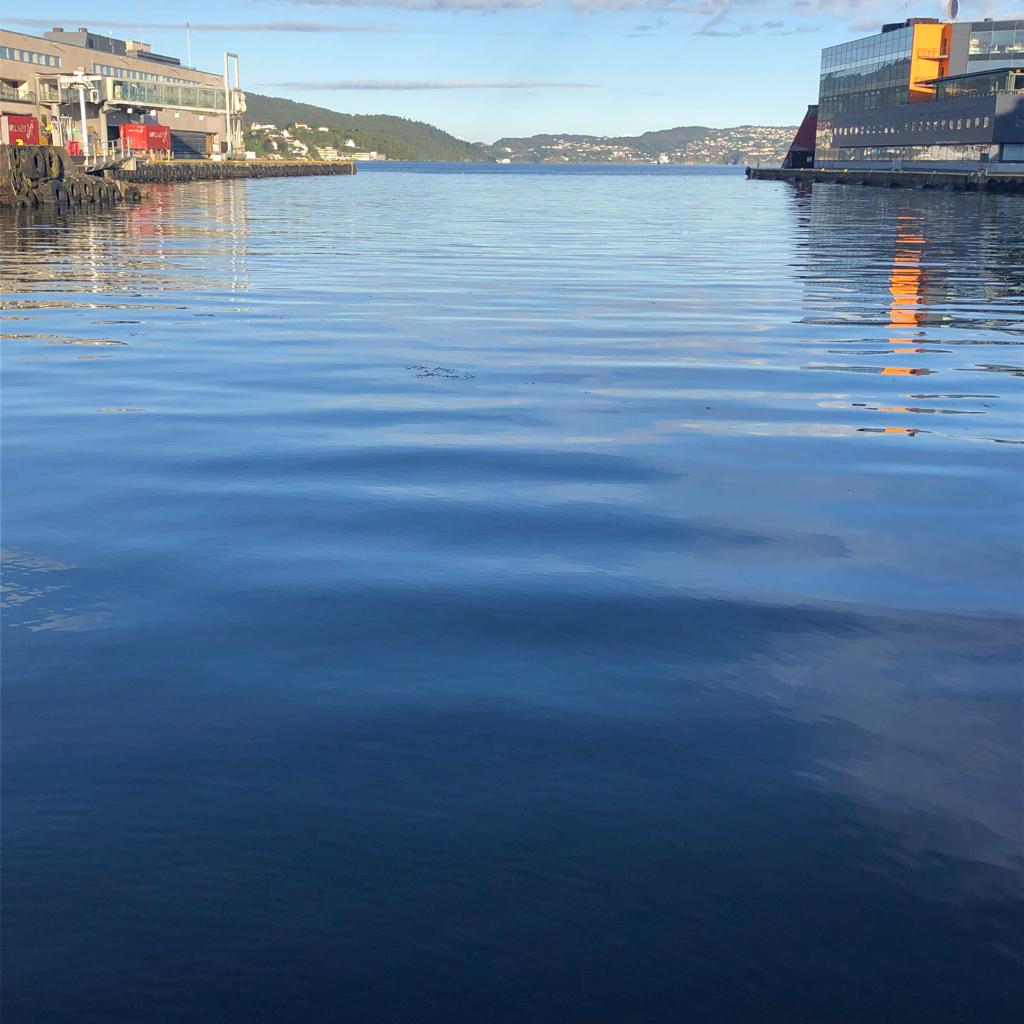
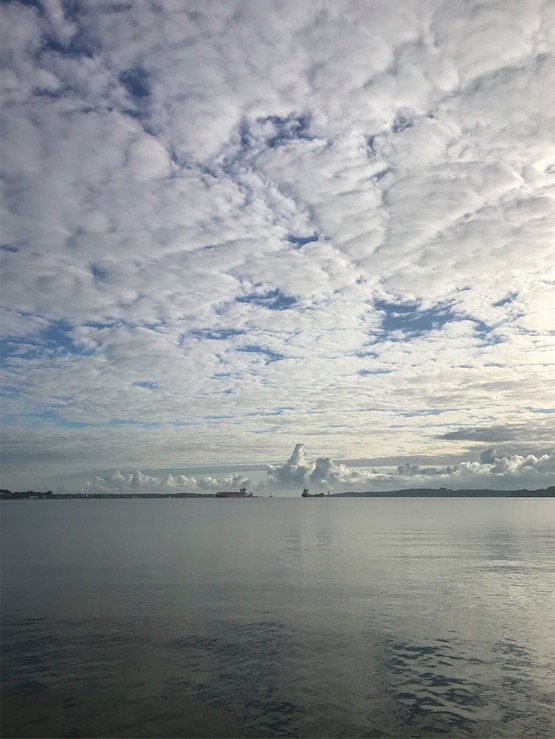
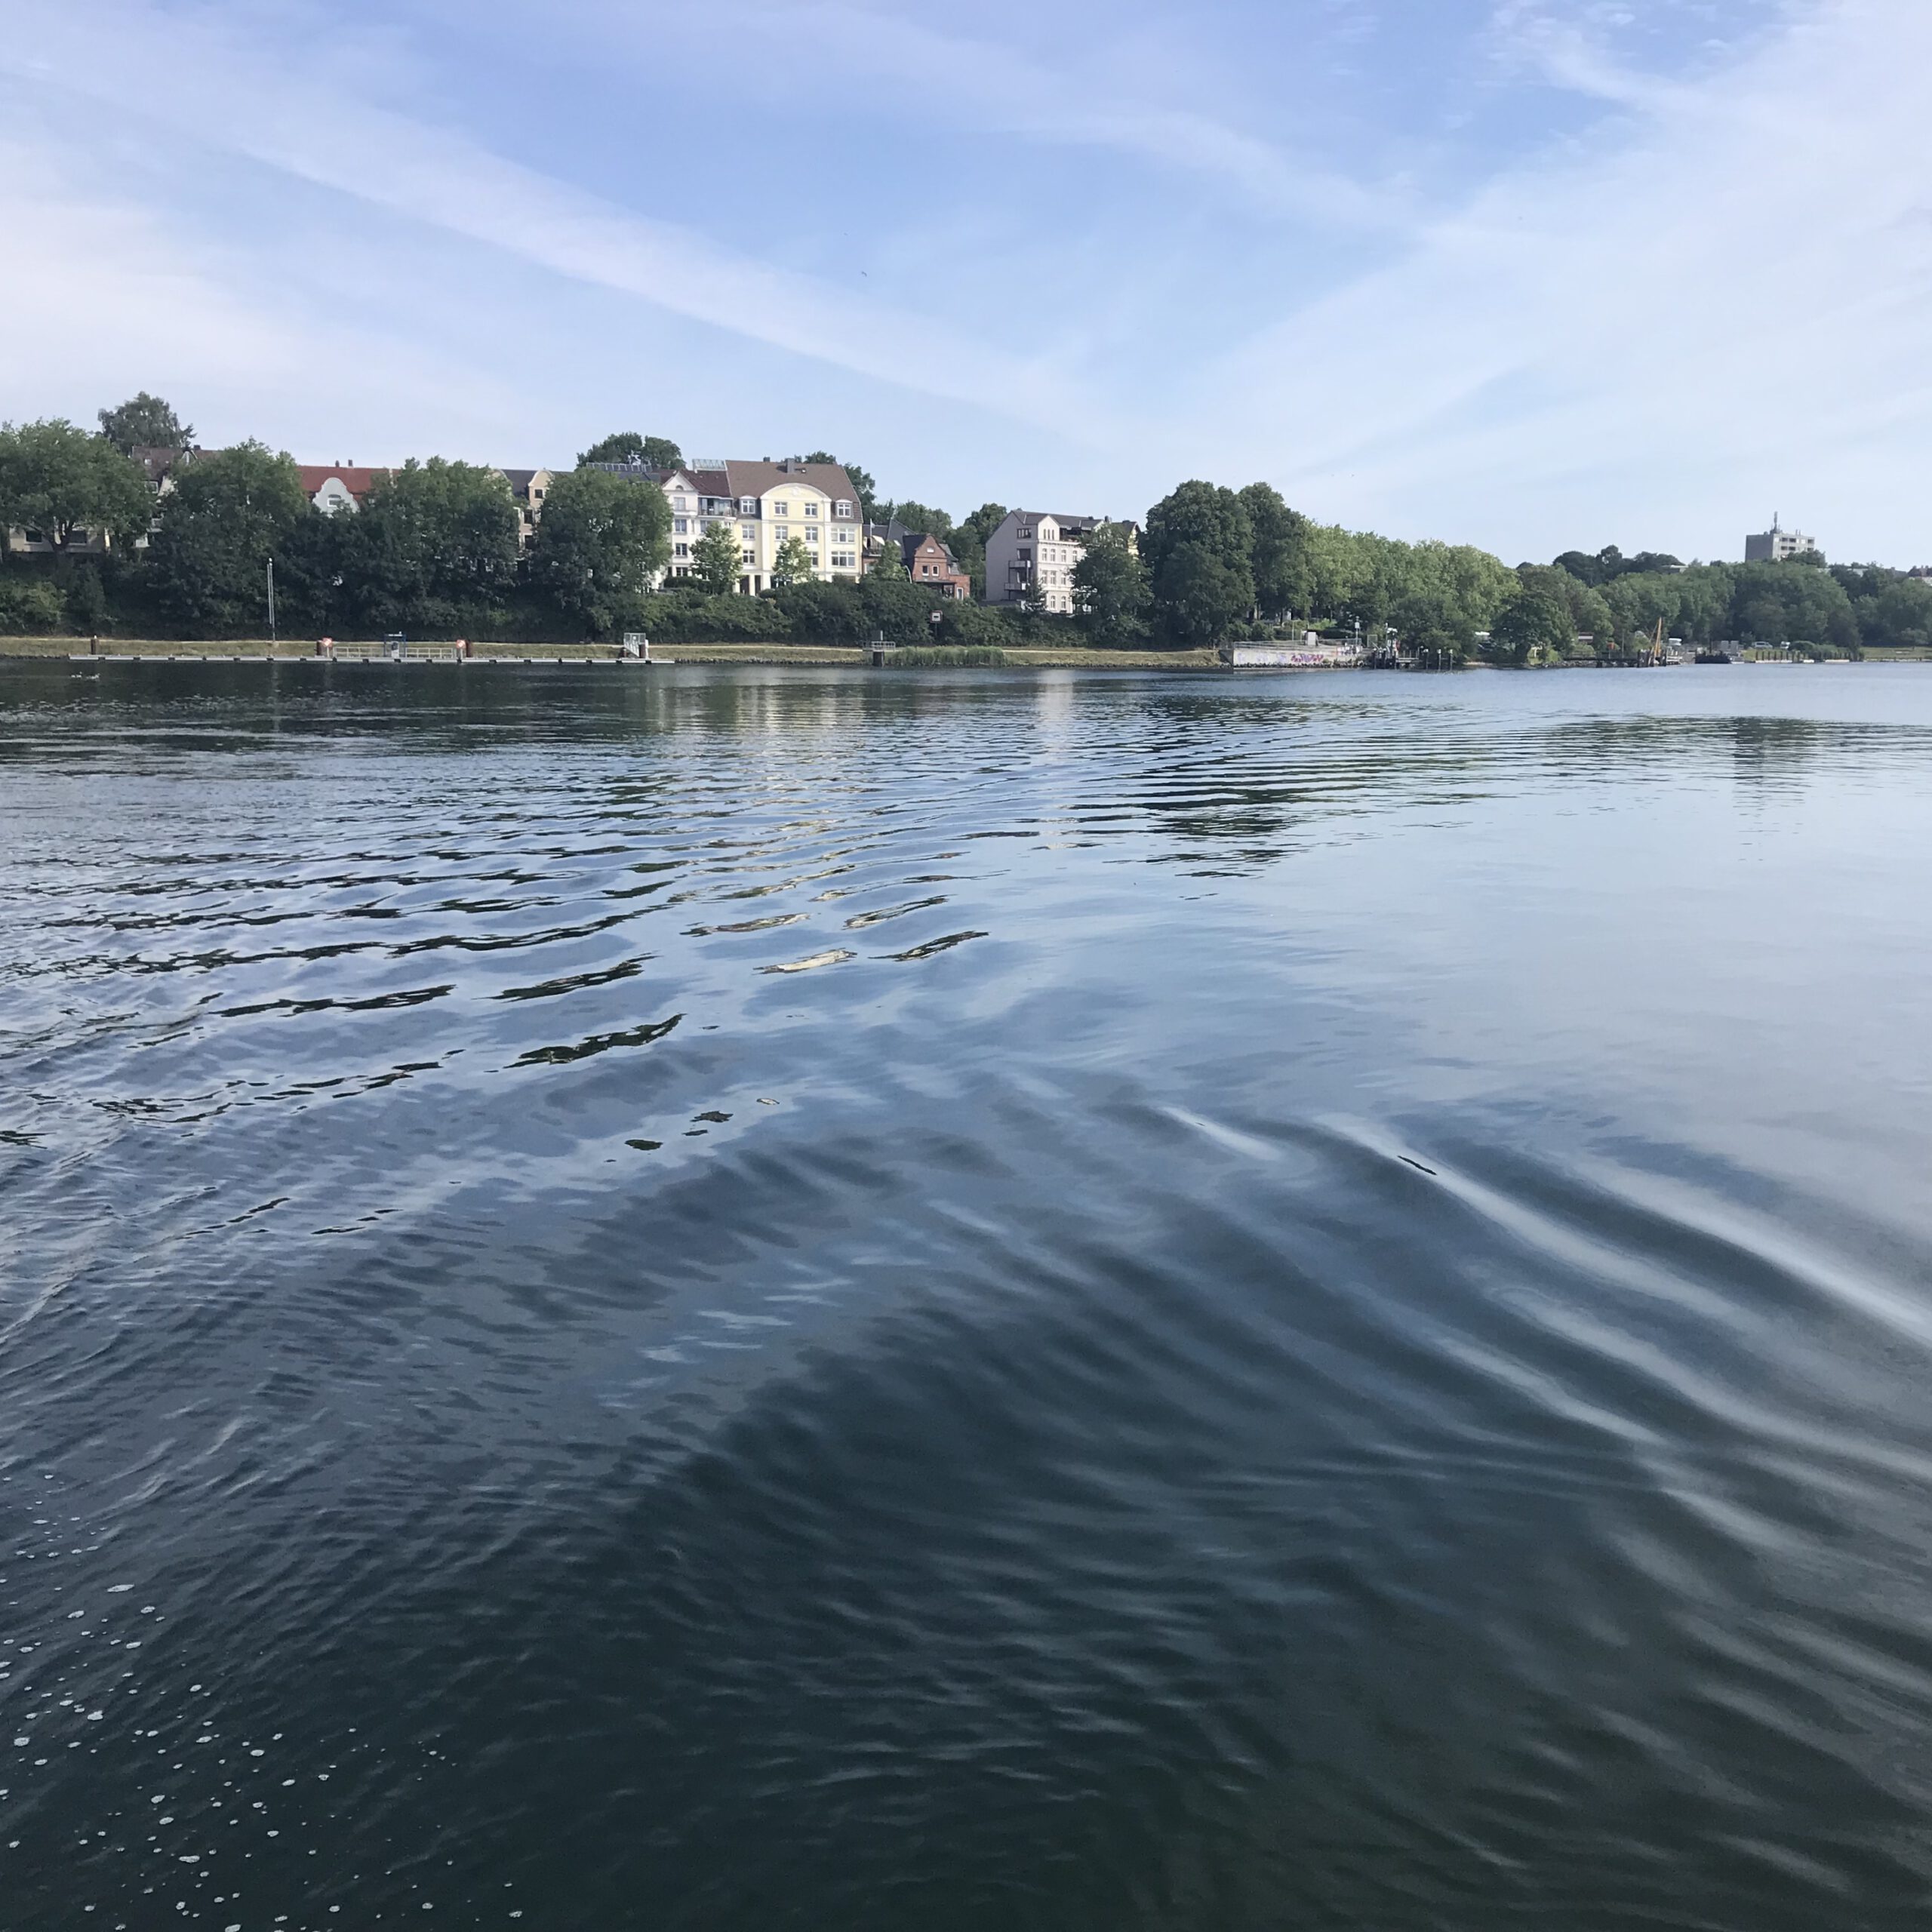
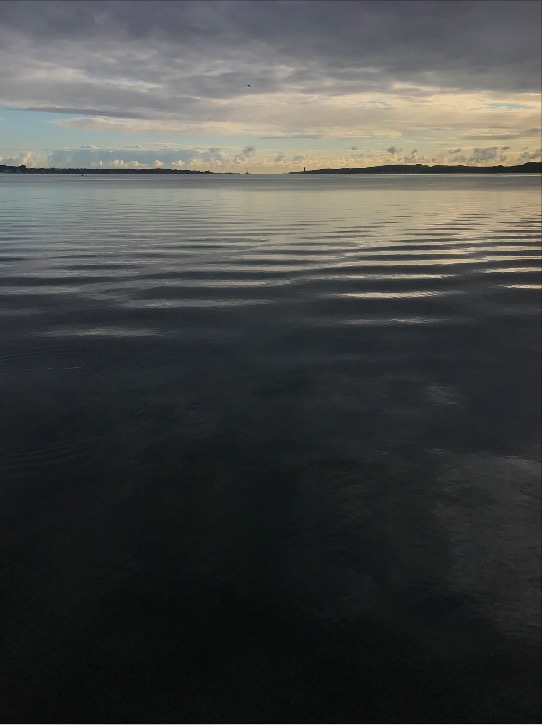
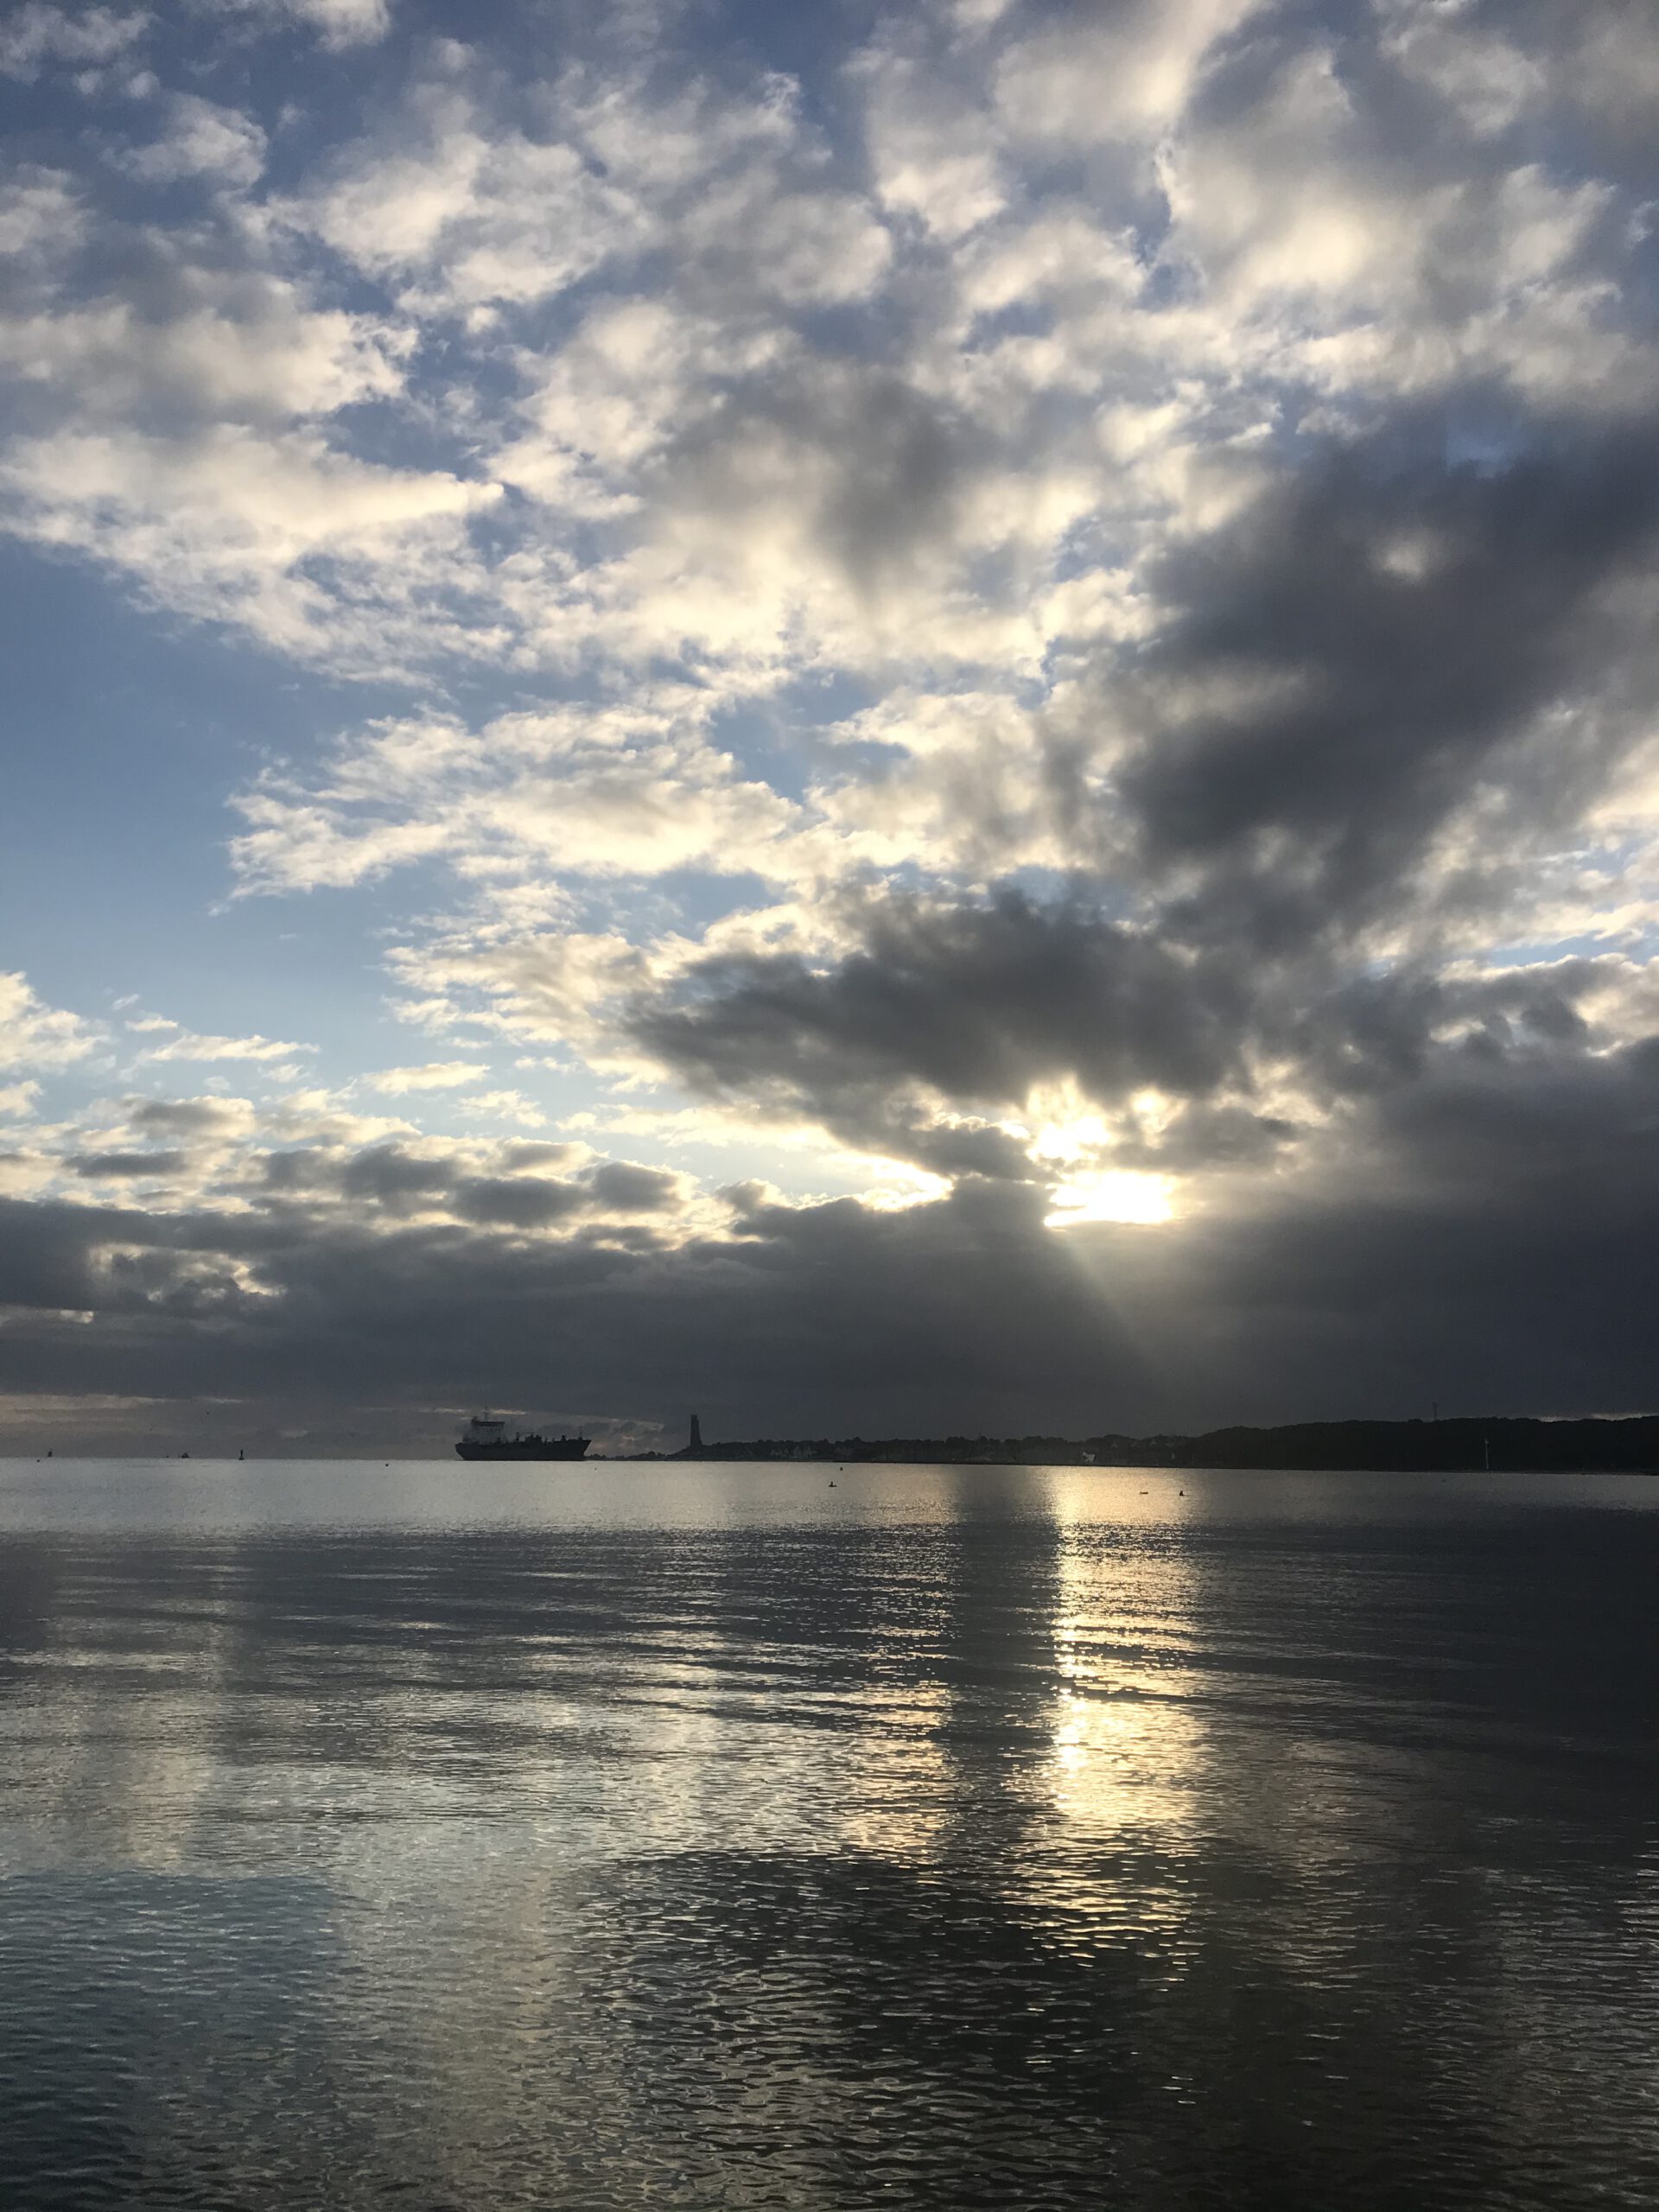
Here I love how the surface appears smooth even though there are very clearly waves on it. That means that the waves we see haven’t been caused locally by wind, otherwise there would have to be smaller wavelength stuff on them. Instead, they were generated further offshore and traveled here
7:26am — Kati (Schönbrunn, Wien)
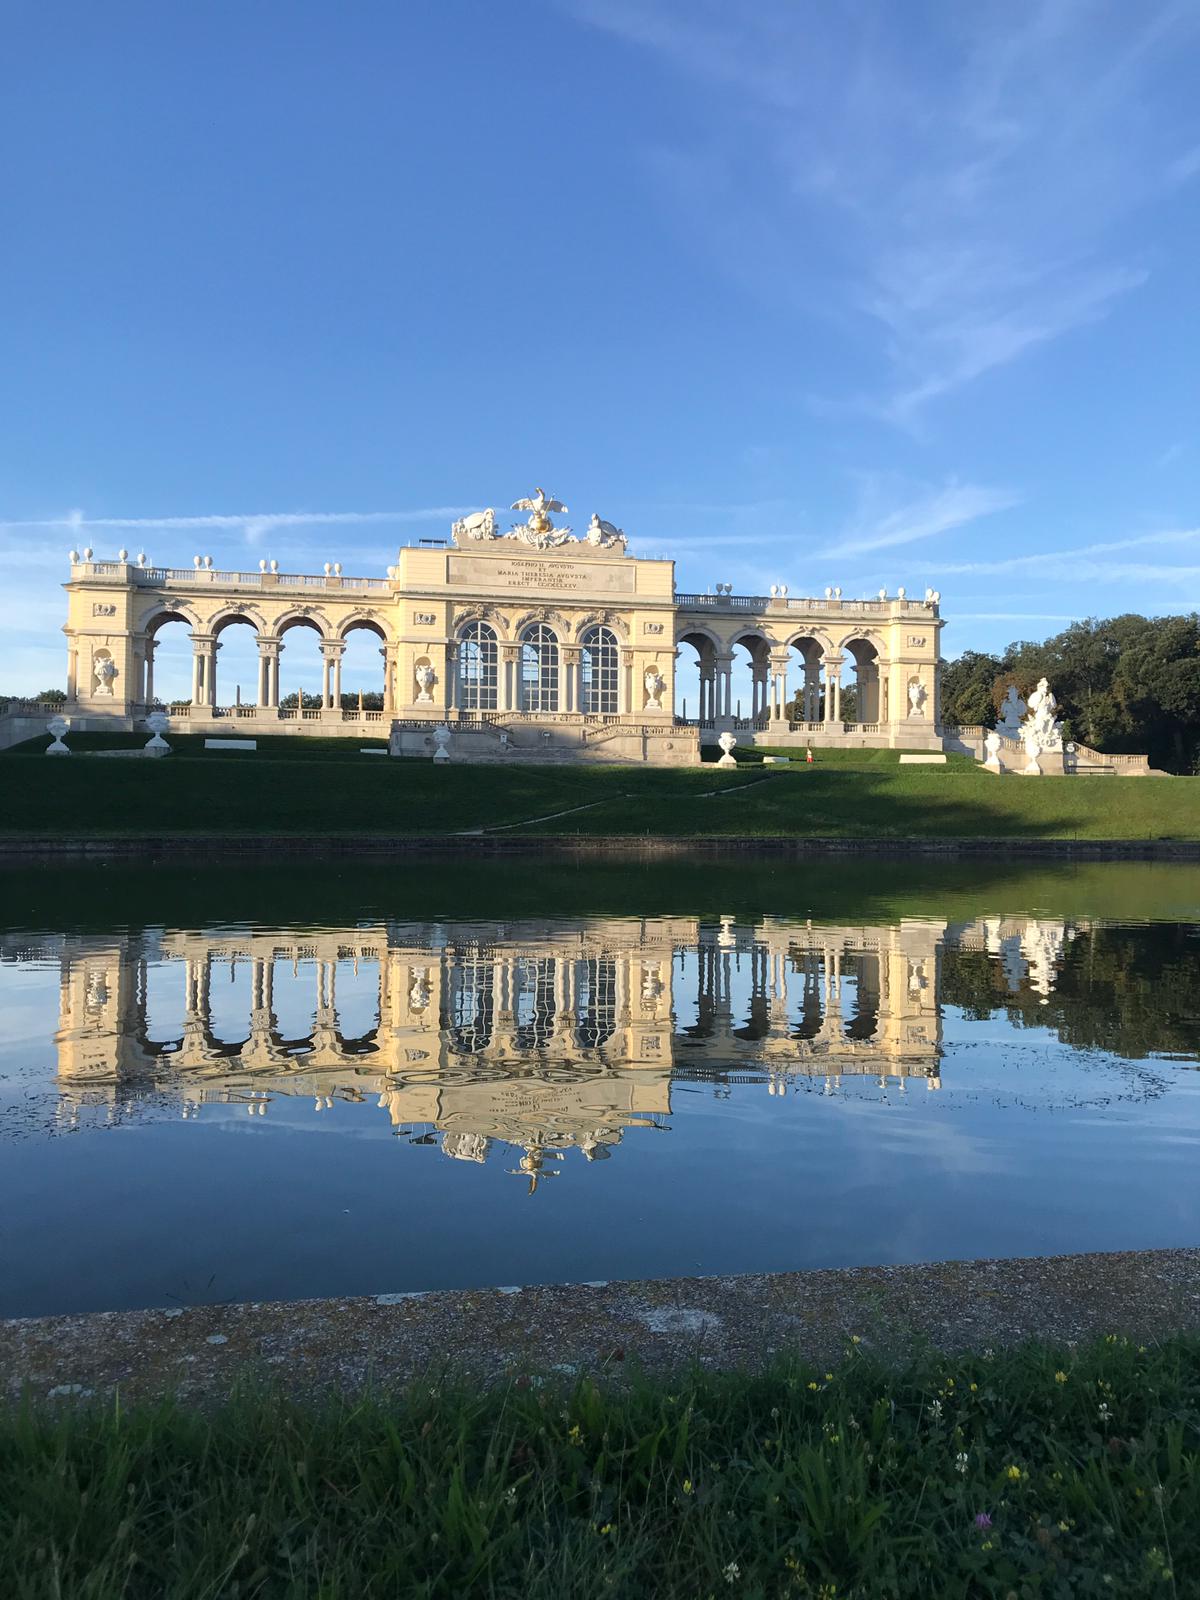
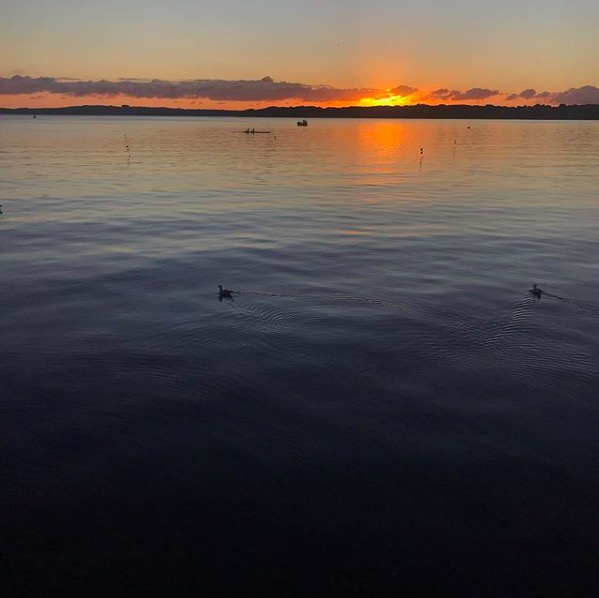
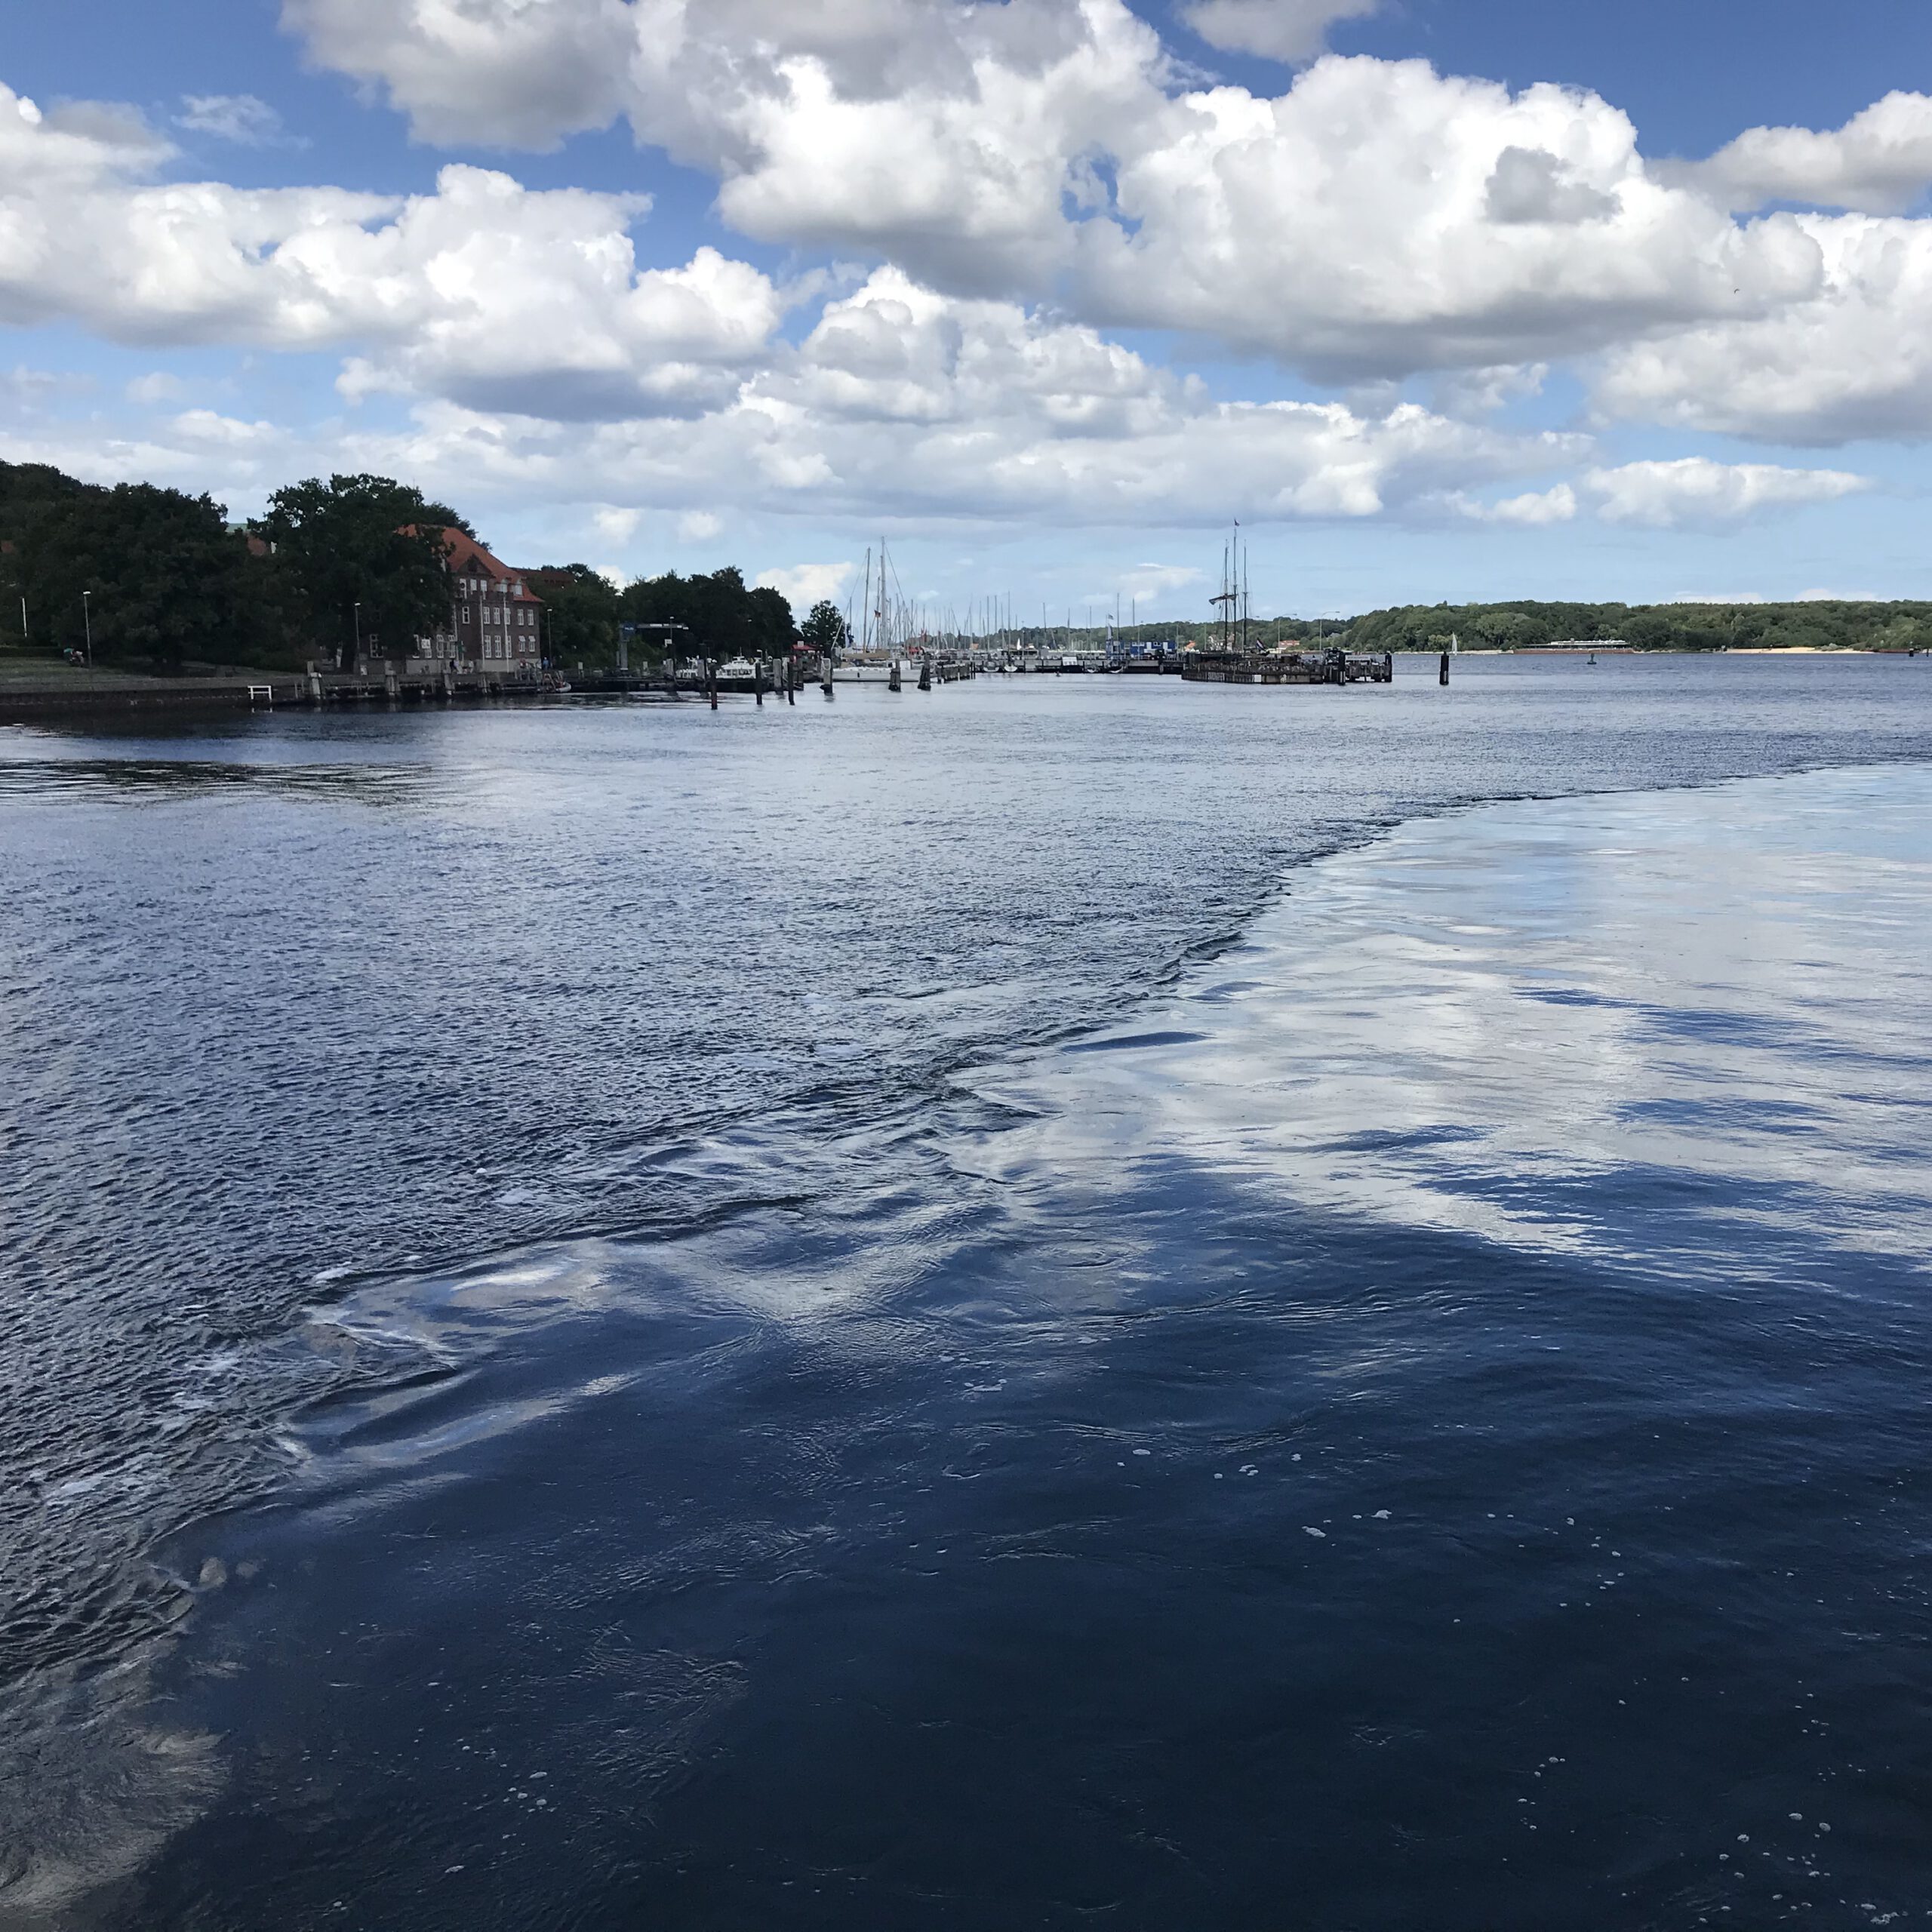
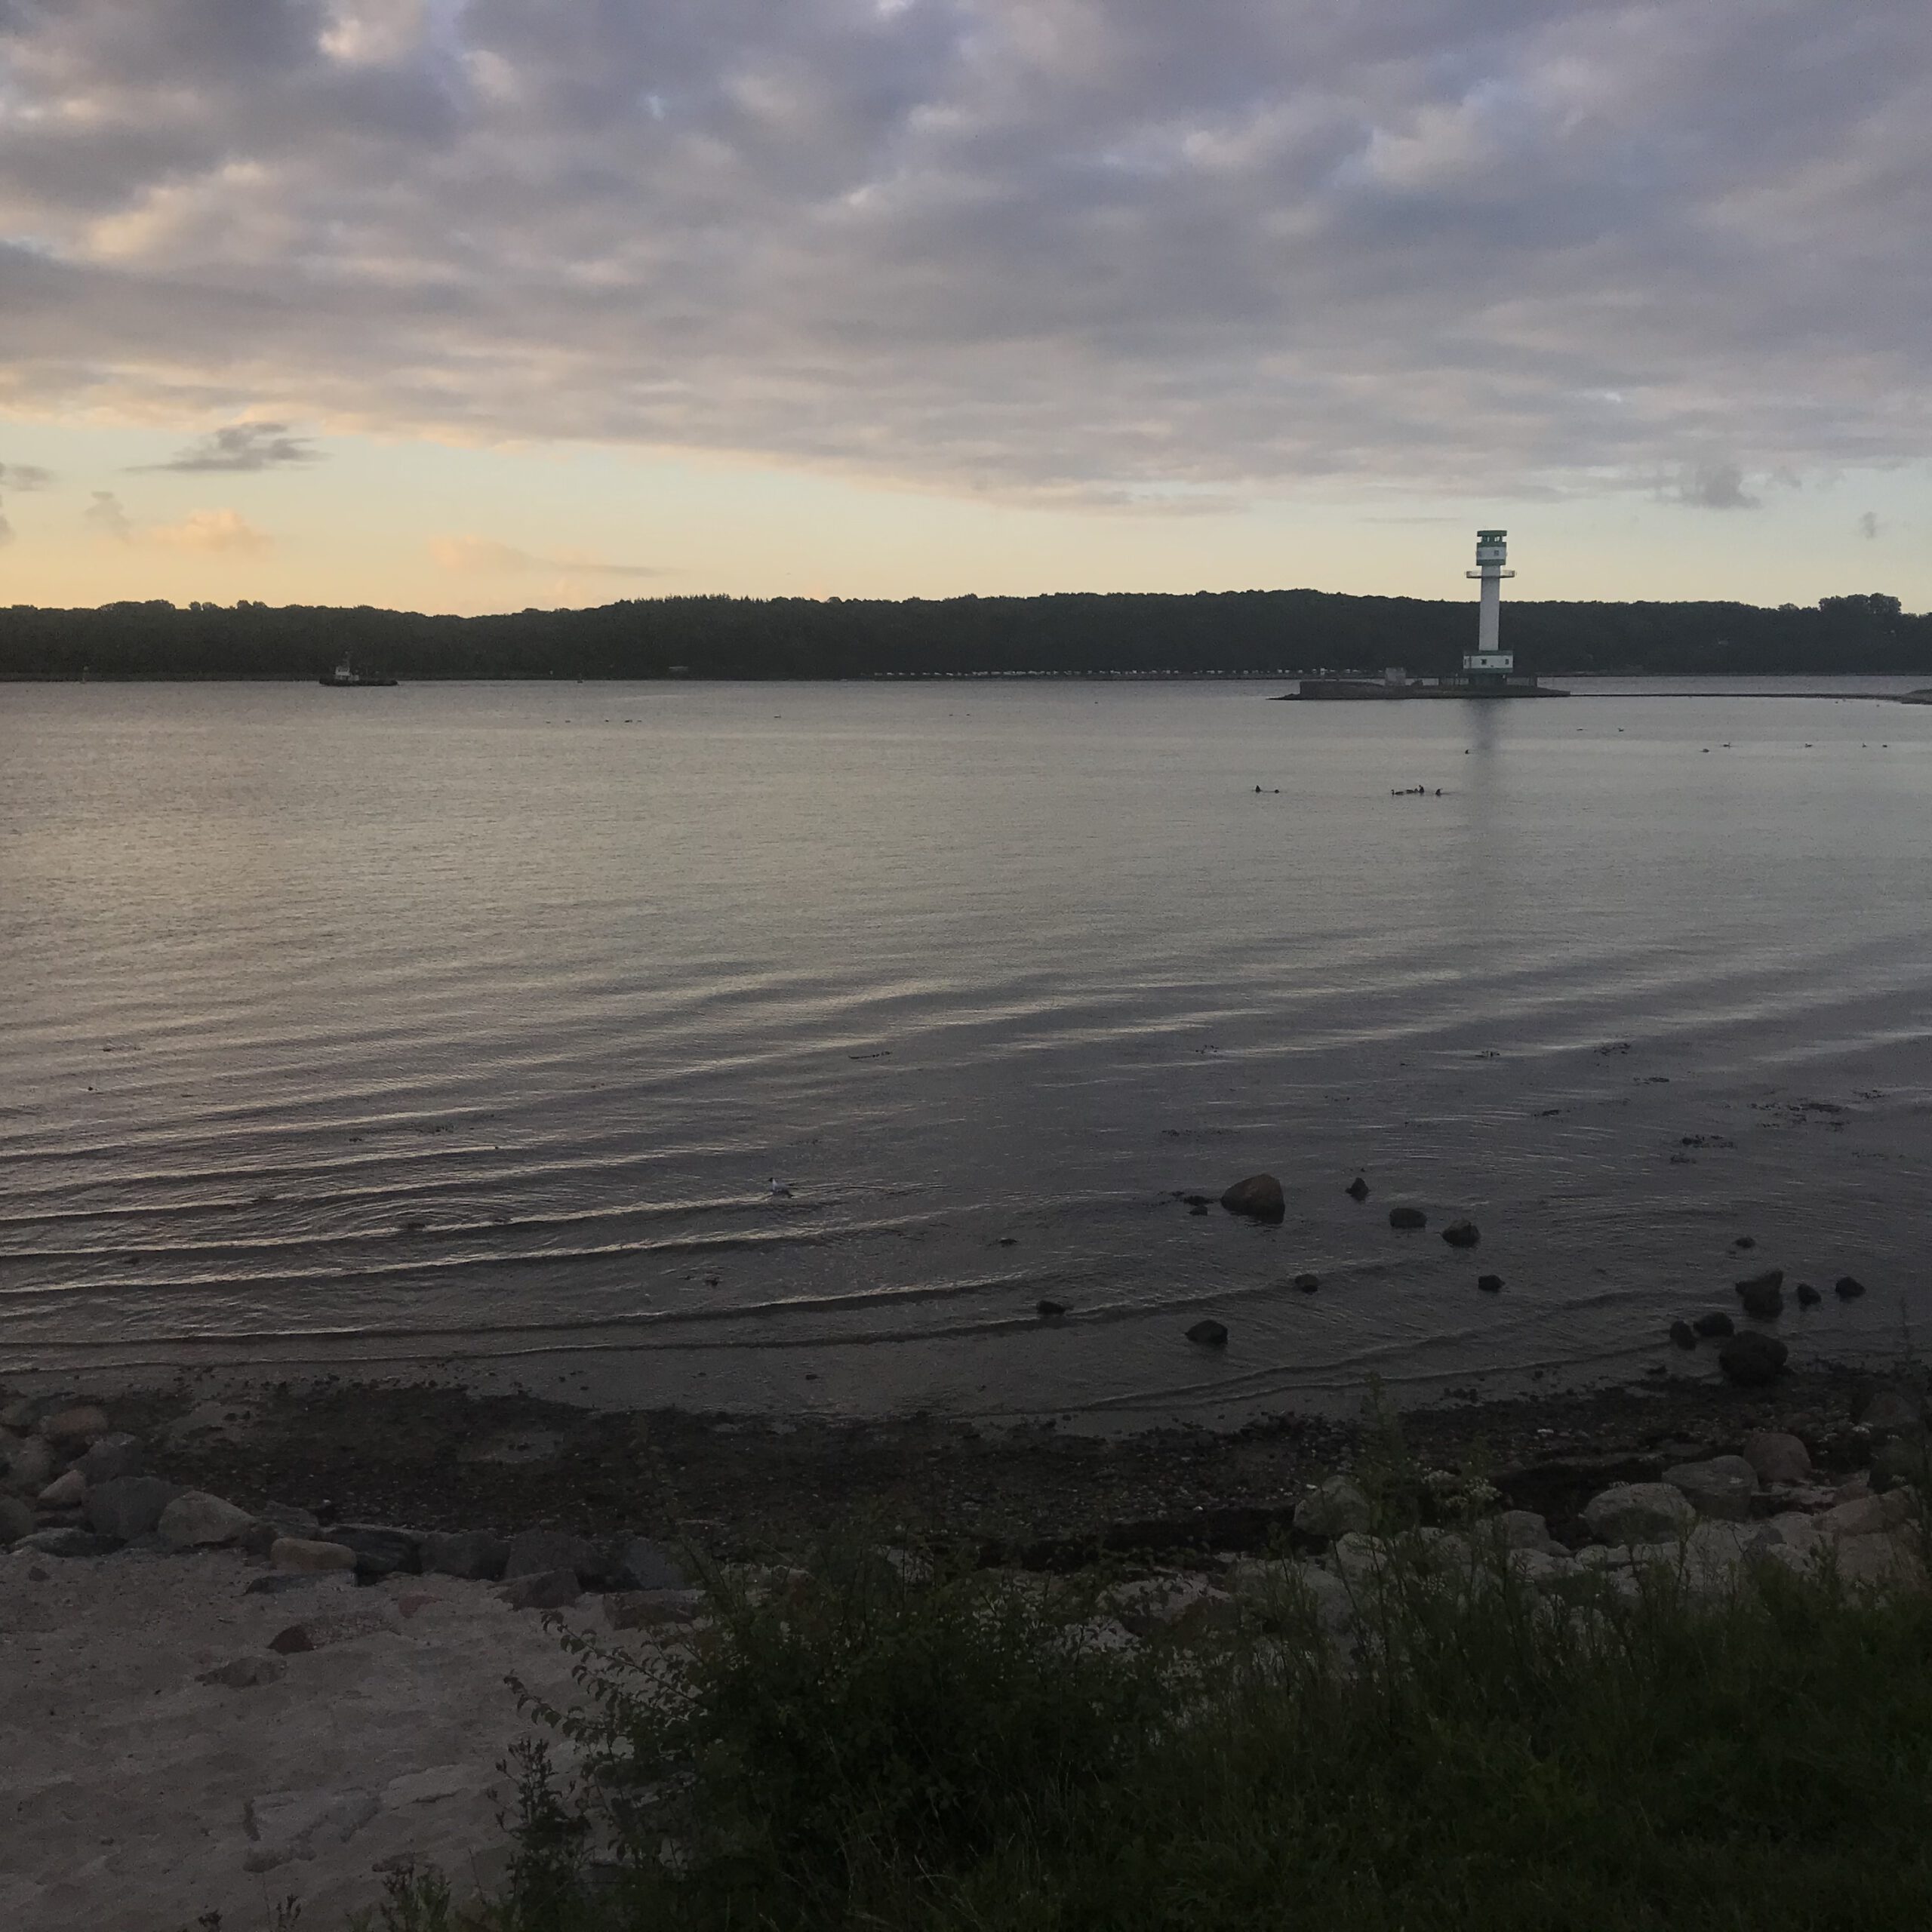
First thing I notice here: How pretty this looks with the reflection! And beautiful weather! Hardly any waves, but there are some structures in the lower right that look like there are possibly plants growing in the water, just breaking the surface
7:07am — Marisa (Hamburg)

Looks like it’s raining in Hamburg! What I always find super cool about rain drops is how they act as tiny lenses and show us an upside-down picture of the world
6:26am — Désirée (Möhnestausee)
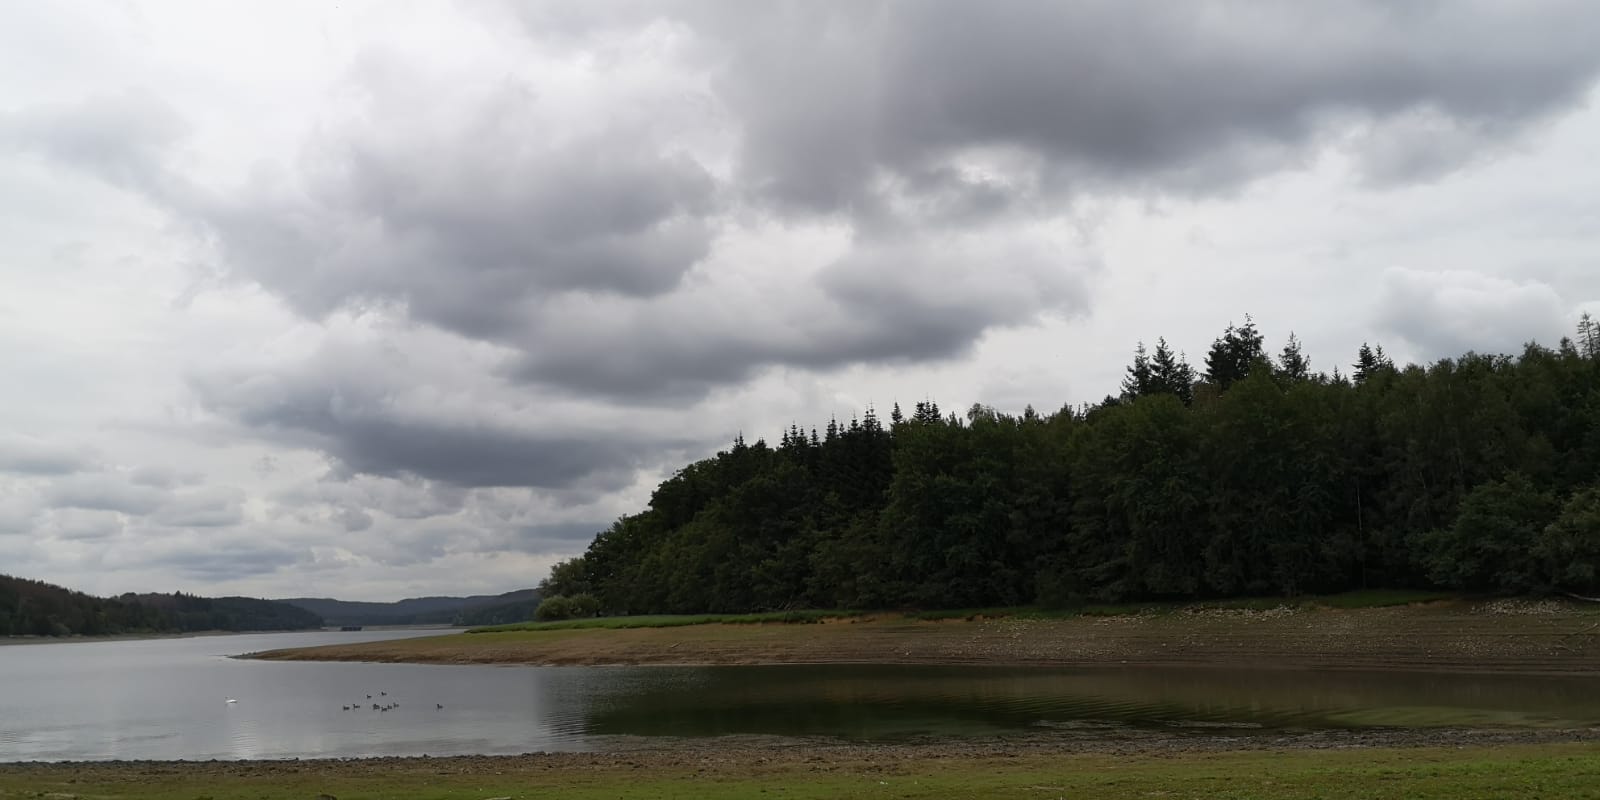
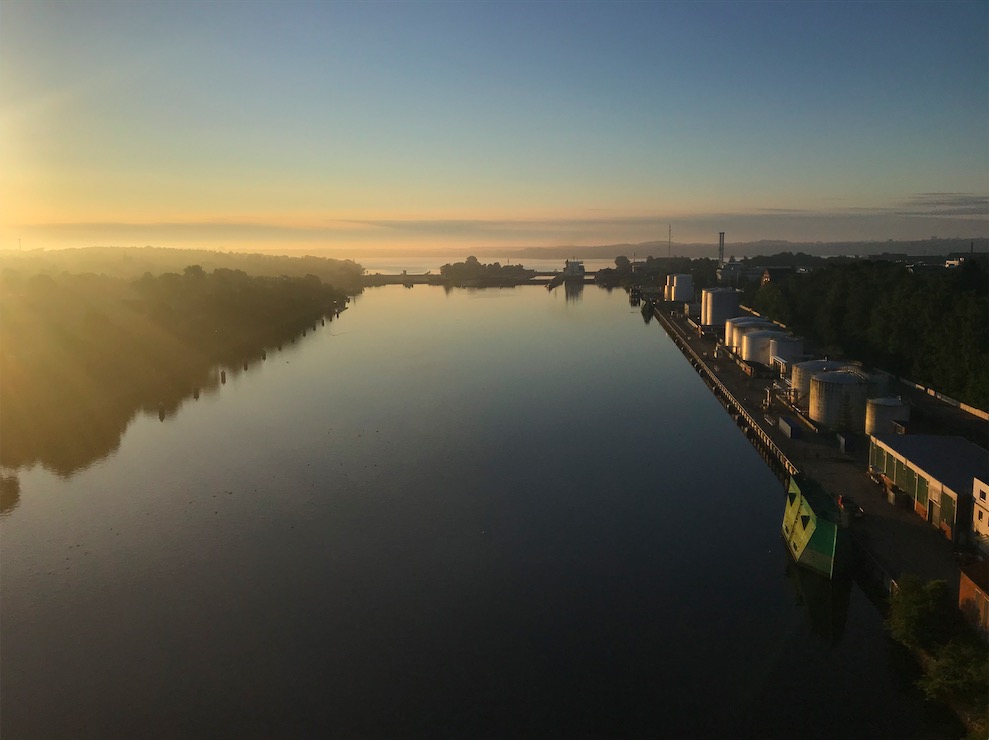
This is a picture taken at the Möhne reservoir — a river that has been dammed to create this lake. The water level is regulated, which you see in the horizontal stripes on the opposite side of the lake, each representing what the water level was like at some point in the past..
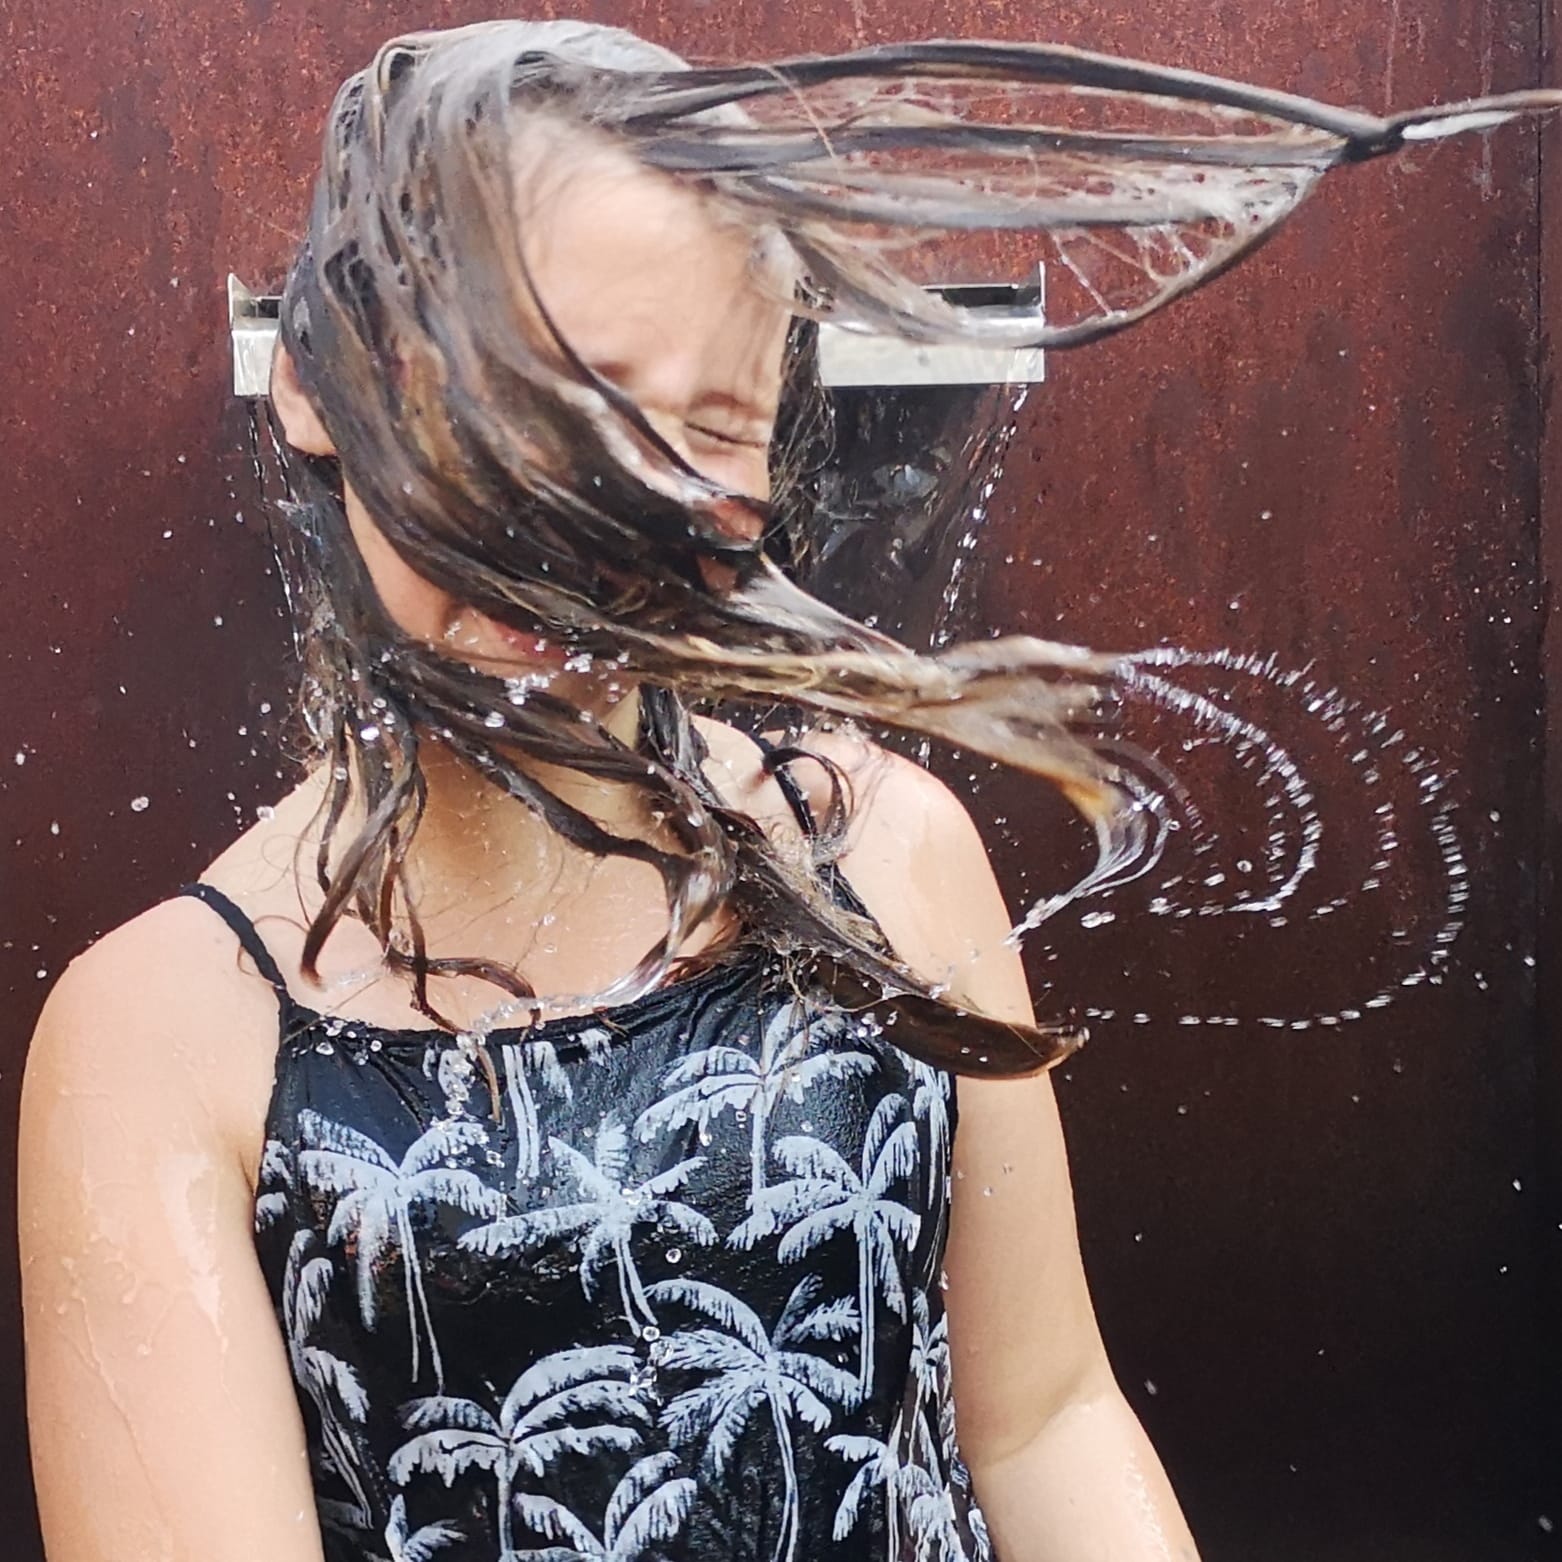
What an awesome pic! But wait — aren’t water drops (or anything, really) supposed to fly in a straight line, unless there is a force acting on them? There is obviously gravity acting, but why the curve? This riddle is solved by looking at the flying droplets, which are individual droplets. And even though they look as if they are following a curved path one behind each other, this is just our eye being tricked into that. Each drop is flying on a parabola (thanks, gravity) away from the spot where it detached from the end of the flying wet hair. But the drops are not following each other, they just happen to have detached from the hair along a path.
6:17am — FrozenBike (Khajoo Bridge in Isfahan)
I’m posting a couple of screenshots from that video to make it easier to discuss…
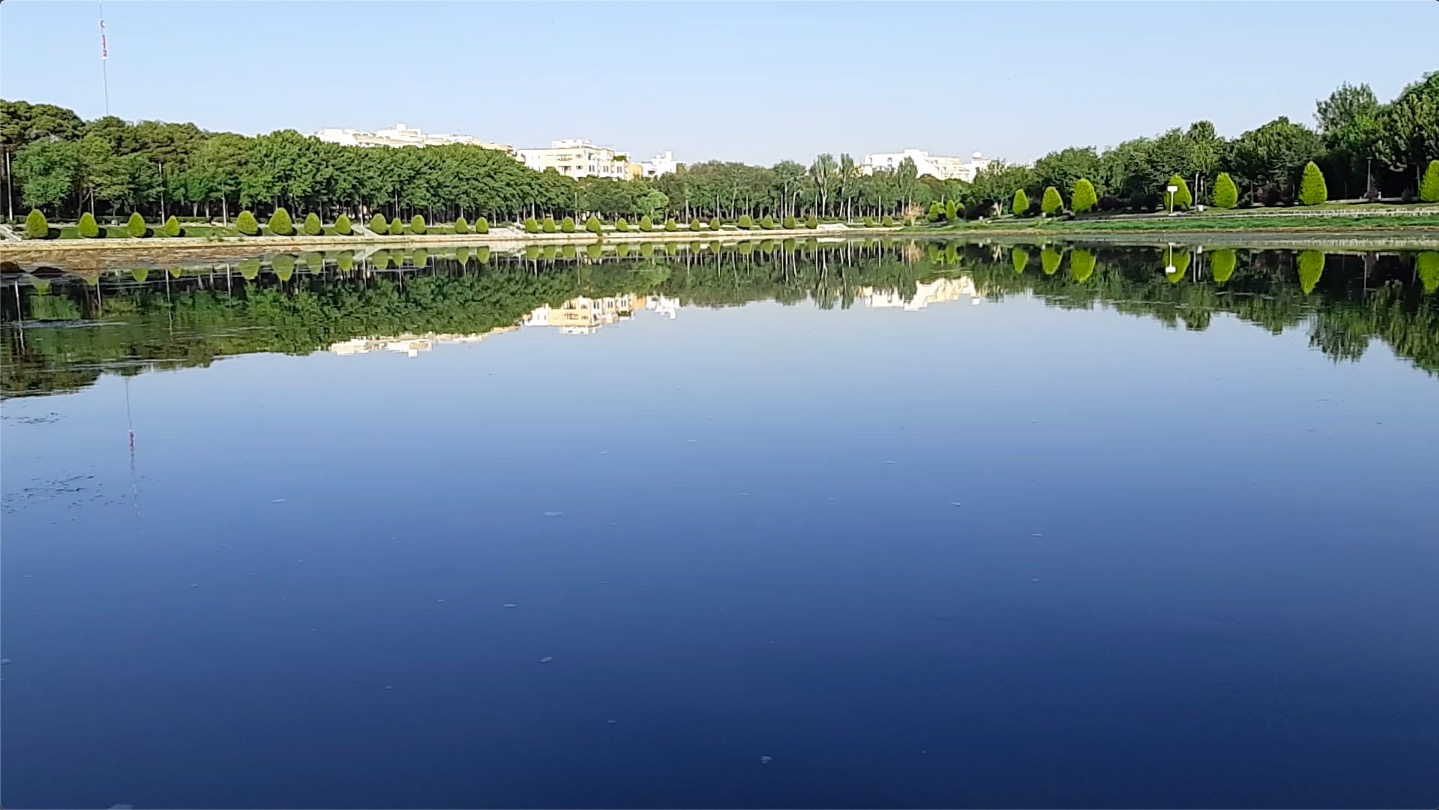
First, doesn’t this lake look absolutely beautiful? The calm surface is an almost perfect mirror of the sky because we are looking at the water at a shallow angle, thus we only see reflections and can’t look into the water
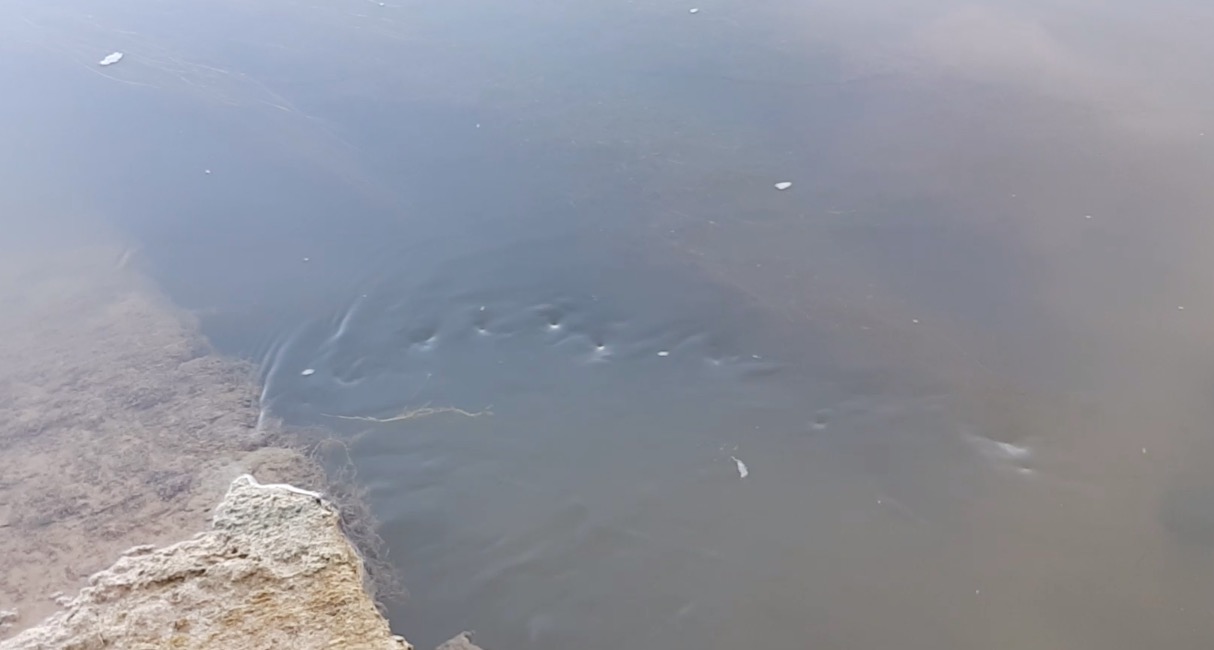
Then, we look down. See the plants in the water in the top left of the picture? They indicate quite a strong flow from top left to bottom right of the picture. But wait, there is an obstacle in the way! That stone introduces turbulence. There are waves that are created as water washes past, and there are also eddies shed because the current shear between the flowing water and the more stagnant water in the shelter of the stone is so strong. See that one water plant thingy right below the train of eddies? It seems to be moving in the turbulent flow, too!
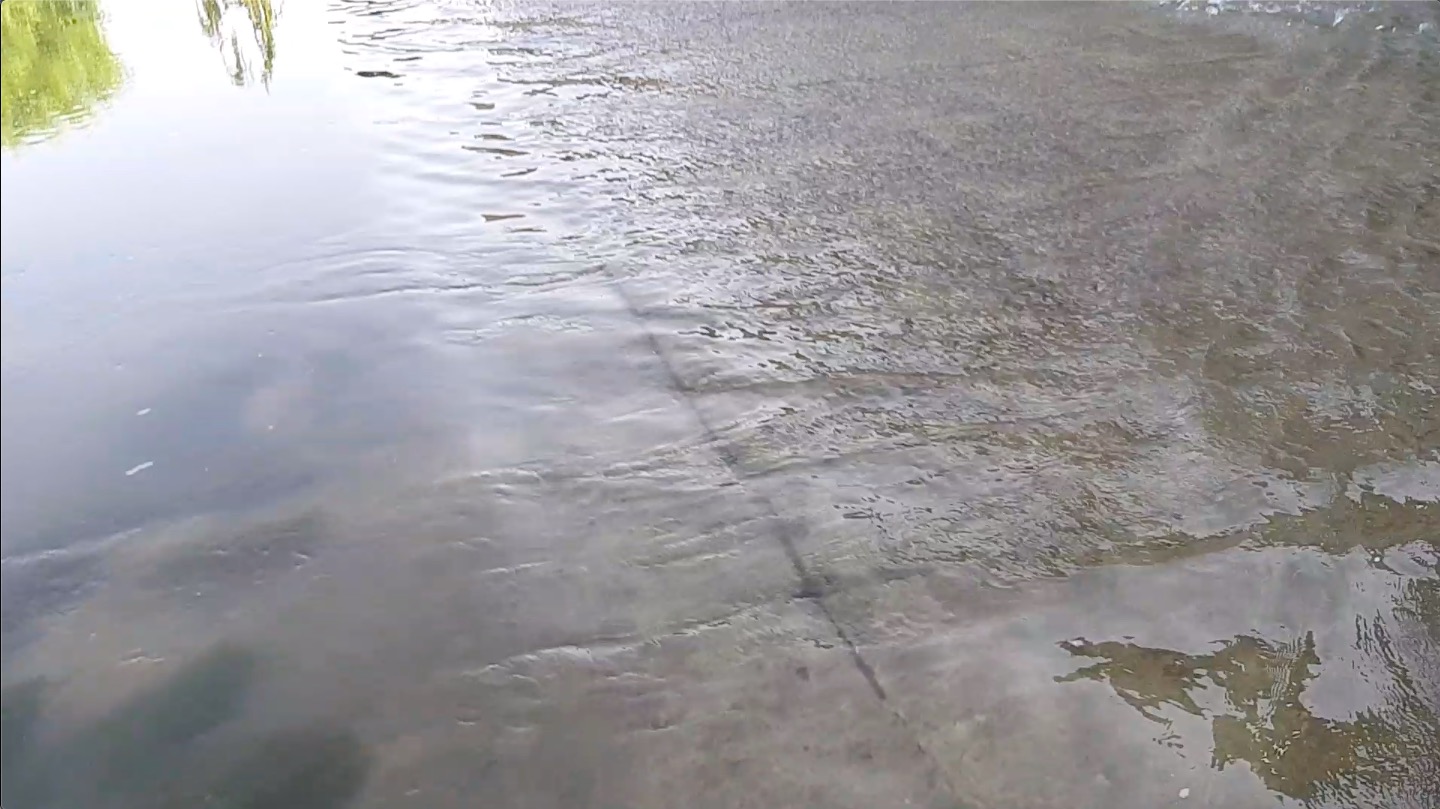
And we reach the next obstacle! At the top left, water is still flowing slow(ish), thus the surface is flat and we can clearly recognize the tree reflected in the water. But then we reach the threshold, and all of a sudden the flow goes from laminar to turbulent. See how the whole right side of the picture seems to be full of tiny bumps? That’s where the water is influenced by the structure of the bottom underneath
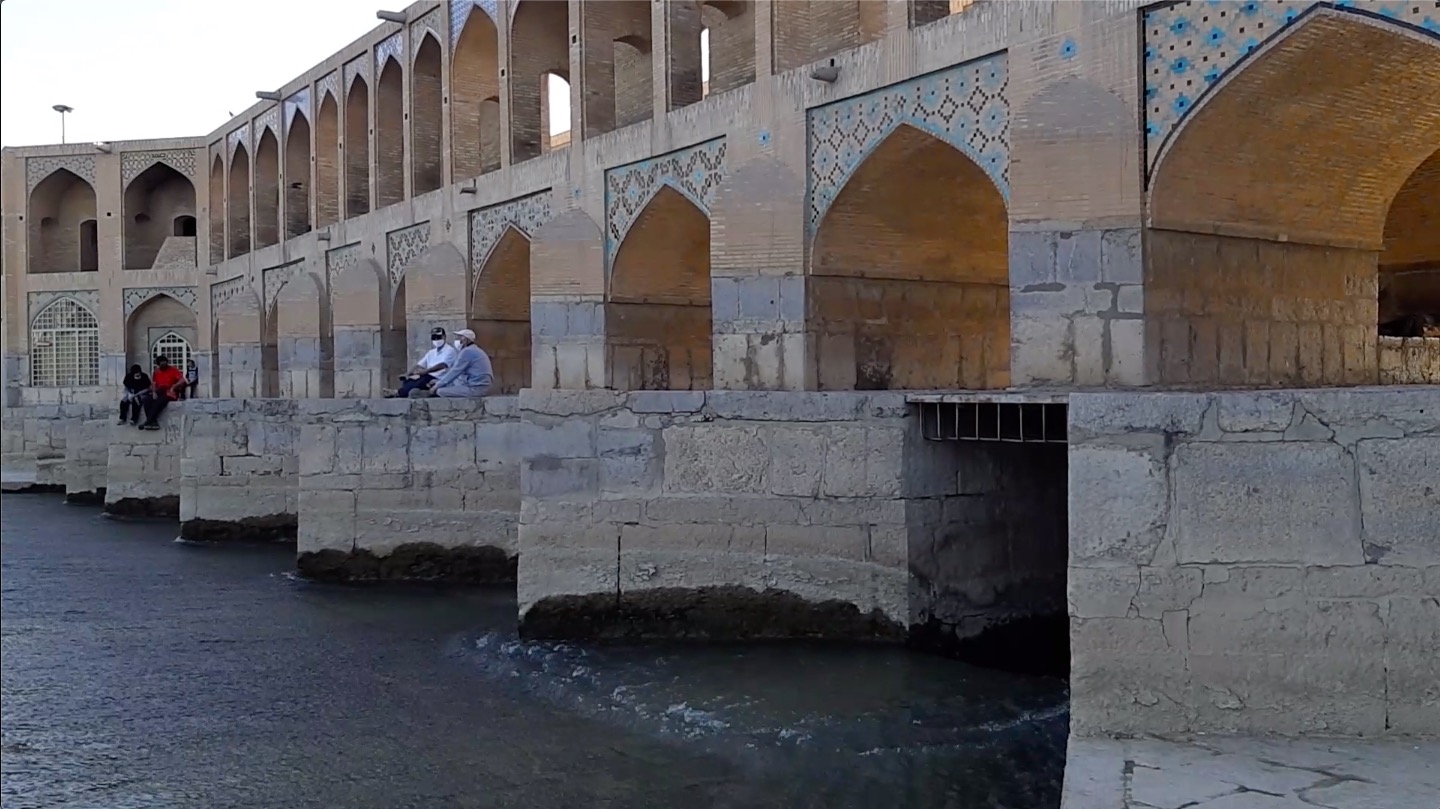
I absolutely LOVE that my blog and twitter have helped me meet and connect with so many wonderful people all over the world! Here we see Khajoo Bridge in Isfahan, Iran. So beautiful! As for wave watching: In the left side of the picture we see what was the right side of the picture above, the very fast, turbulent flow down the slope. And then at the bridge, there is a jump in surface height: As the water is deeper there, the flow slows down to subcritical speed and a hydraulic jump develops
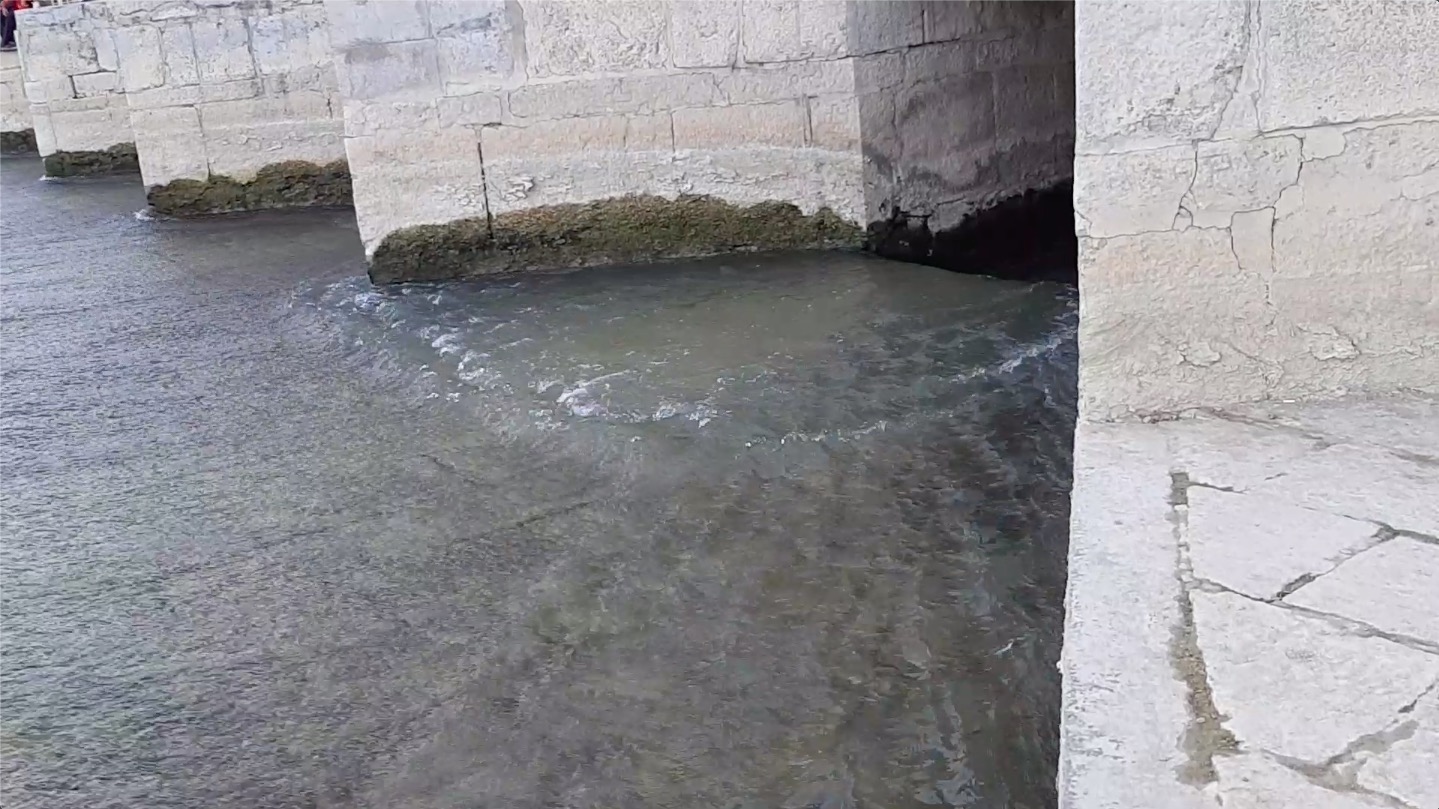
Last screenshot: The hydraulic jump shown in the last picture, only more prominently pictured. Also visible: The influence of that stone edge on the flow. See all the waves that radiate from it as it is restricting the flow? Super awesome!
6:06am — Chirine (Kiel)
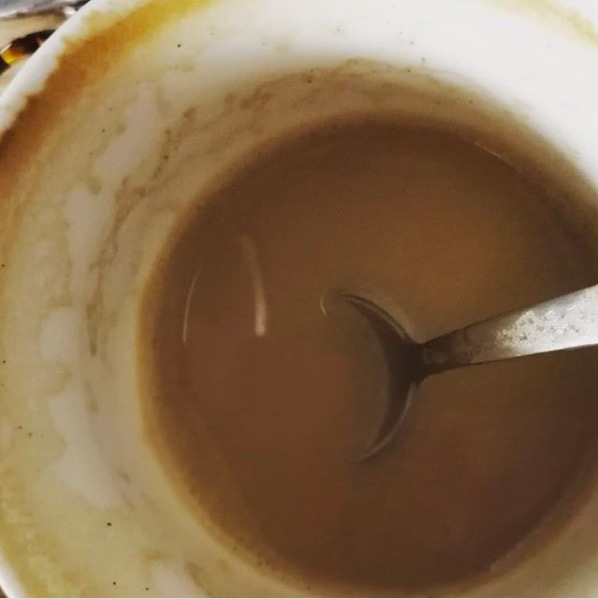
What I notice first is the tiny white sliver of light, close to where the spoon breaks the coffee’s surface. That’s showing us that the surface isn’t perfectly straight, but that it is deformed where the metal of the spoon and the coffee meet. The effect — cohesion between molecules — makes the coffee rise up a little at the edgs of the cup and also where the spoon breaks the surface. You might know this from the meniscus that shows up in test tubes and makes it difficult for the untrained eye to estimate how full a test tube really is