Tag Archives: density

Thermal forcing vs rotation tank experiments in more detail than you ever wanted to know

This is the long version of the two full “low latitude, laminar, tropical Hadley circulation” and “baroclinic instability, eddying, extra-tropical circulation” experiments. A much shorter version (that also includes the end cases “no rotation” and “no thermal forcing”) can be found here.

Several of my friends were planning on teaching with DIYnamics rotating tables right now. Unfortunately, that’s currently impossible. Fortunately, though, I have one at home and enjoy playing with it enough that I’m

  1. Playing with it
  2. Making videos of me playing with it
  3. Putting the videos on the internet
  4. Going to do video calls with my friends’ classes, so that the students can at least “remote control” the hands-on experiments they were supposed to be doing themselves.

Here is me introducing the setup:

Today, I want to share a video I filmed on thermal forcing vs rotation. To be clear: This is not a polished, stand-alone teaching video. It’s me rambling while playing. It’s supposed to give students an initial idea of an experiment we’ll be doing together during a video call, and that they’ll be discussing in much more depth in class. It’s also meant to prepare them for more “polished” videos, which are sometimes so polished that it’s hard to actually see what’s going on. If everything looks too perfect it almost looks unreal, know what I mean? Anyway, this is as authentic as it gets, me playing in my kitchen. Welcome! :-)

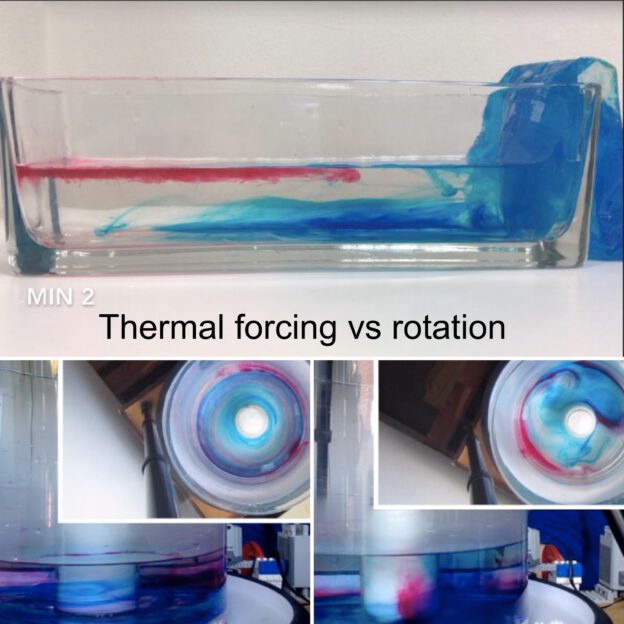
In the video, I am showing the two full experiments: For small rotations we get a low latitude, laminar, tropical Hadley circulation case. Spinning faster, we get a baroclinic instability, eddying, extra-tropical case. And as you’ll see, I didn’t know which circulation I was going to get beforehand, because I didn’t do the maths before running it. I like surprises, and luckily it worked out well!
Thermal forcing vs rotation

The first experiment we ever ran with our DIYnamics rotating tank was using a cold beer bottle in the center of a rotating tank full or lukewarm water. This experiment is really interesting because, depending on the rotation of the tank, it will display different regimes. For small rotations we get a low latitude, laminar, tropical Hadley circulation case. Spinning faster, we get a baroclinic instability, eddying, extra-tropical case. Both are really interesting, and in the movie below I am showing four experimentsm ranging from “thermal forcing, no rotation”, over two experiments which include both thermal forcing and rotation at different rates to show both the “Hadley cell” and “baroclinic instability” case, to “no thermal forcing, just rotation”. Enjoy!

Ice cubes melting in fresh water and salt water

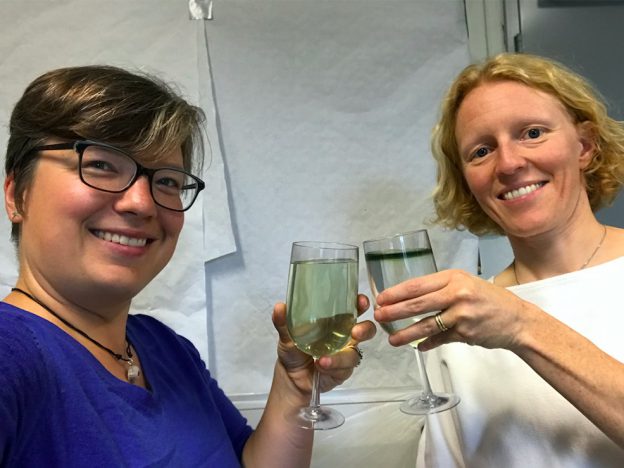
Today we are doing the melting ice cubes experiment in fancy glasses, because Elin is giving a fancy lecture tonight: The Nansen Memorial Lecture of the Norwegian Science Academy in Oslo! Cheers!

We each had green ice cubes in our glasses, but one of our glasses contained fresh water and the other one salt water, both at room temperature. Can you figure out who got which glass?

This time lapse might give you a clue…

To read more about this experiment, check out this blog post!

Demonstration: Nansen’s “dead water” in a tank!

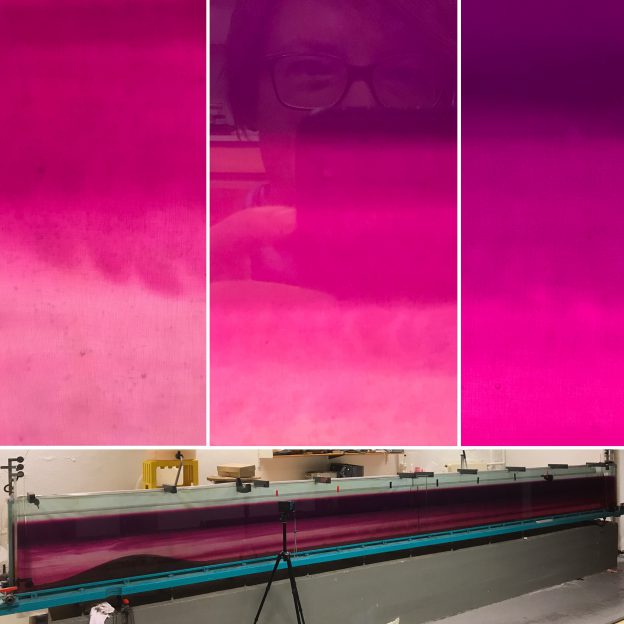
A ship that is continuously pulled with a constant force suddenly slows down, stops, and then continues sailing as if nothing ever happened? What’s going on there? We will investigate this in a tank! And in order to see what is going on, we have dyed some of the water pink. Can you spot what is going on?

The phenomenon of “dead water” is probably well known to anyone sailing on strong stratifications, i.e. in regions where there is a shallow fresh or brackish layer on top of a much saltier layer, e.g. the Baltic Sea, the Arctic or some fjords. It has been described as early as 1893 by Fridtjof Nansen, who wrote, sailing in the Arctic: “When caught in dead water Fram appeared to be held back, as if by some mysterious force, and she did not always answer the helm. In calm weather, with a light cargo, Fram was capable of 6 to 7 knots. When in dead water she was unable to make 1.5 knots. We made loops in our course, turned sometimes right around, tried all sorts of antics to get clear of it, but to very little purpose.” (cited in Walker,  J.M.; “Farthest North, Dead Water and the Ekman Spiral,” Weather, 46:158, 1991)

When observing the experiment, whether in the movie above or in the lab, the obvious focus is on the ship and the interface between the clear fresh water layer (the upper 5cm in the tank) and the pink salt water layer below. And yes, that’s where a large-amplitude internal wave develops and eats up all the energy that was going into propulsion before! Only when looking at the time lapse of the experiments later did I notice how much more was going on throughout the tank! Check it out here:

The setup for this experiment is discussed here and is based on the super helpful website by Mercier, Vasseur and Dauxois (2009). In the end, we ended up without the belt to reduce friction, and with slightly different layer depths than we had planned, but all in all it works really well!

Accidental double-diffusive mixing

When setting up the stratification for the Nansen “dead water” demo (that we’ll show later today, and until then I am not allowed to share any videos, sorry!), I went into a meeting after filling in layer 4 (the then lowest). When I came back, I wanted to fill in layer 5 as the new bottom layer. For this experiment we want the bottom four layers to have the same density (so we would actually only have one shallow top layer and then a deep layer below [but we can’t make enough salt water at a time for that layer, so I had to split it into four portions]), and I had mixed it as well as I could. But two things happened: a) my salinity was clearly a little fresher than the previous layer, and b) the water in the tank had warmed up and the new water I was adding with layer 5 was cold tap water. So I accidentally set up the stratification for salt fingering: warm and salty over cold and fresh! Can you spot the darker pink fingers reaching down into the slightly lighter pink water? How cool is this??? I am completely flashed. Salt fingering in a 6 meter long tank! :-D


Waves in a density stratification. One of the most beautiful tank experiments I’ve ever seen.

It’s pretty impressive when a mountain moves through a stratification and generates lee waves. But what I find even more impressive: The waves that travel behind the mountain when the mountain is long gone. See here:

This kind of stuff looks more like a numerical simulation than something actually happening in a tank, doesn’t it? I am pretty stoked that we managed to set up such a nice stratification! Those are the things that make me really really happy :-)

(The setup of this experiment is the same as in this post)

Tank experiment: Lee waves in a fancy density (and dye) stratification

Did you seriously think we’d stop tank experiments with only 2-layer systems? Nooo!

Today, the plan was to set up a continuous stratification, which I have been planning to do for many years. After fiddling with the setup all morning (do you have any idea how many fittings on all kinds of hoses are needed to get that to work well?), reality set in and we ended up doing a quasi-continuous stratification, i.e. 12 density layers dyed in 6 different colors*.

And this is what it looks like when you tow a mountain through that stratification (and try to ignore the excited audience being reflected in the tank): Still very nice lee waves and surprisingly little turbulence!

*We set up the tank to contain the same amount of salt as our 2-layer system yesterday, so instead of one big density jump from about 1000g/l to 1026g/l, this now happened in 5 smaller, more or less regular, jumps. And here is how we did it in the end: Two large reservoirs (unfortunately of different diameters), one containing freshwater, the other one filled up to the same height, containing as much salt as we had in our experiment yesterday. Now the height of the reservoirs was divided in 12 equal dzs, and for each dz that went out of the “freshwater” tank into the experimental tank, we added salt water of the same dz to the “freshwater” tank, which thus continued to increase in salinity. The water that we mixed that way went through a hose and entered the experimental tank through the bottom of the tank through a hole over which we had put the mountain (to contain mixing to a small volume and also so we didn’t have to watch water shooting out of that hole in our nice stratification). So as the water we added became increasingly dense, it nicely layered itself underneath the other water in the tank. And we just had to add more and more dye for the color gradient. Easy peasy :-)

The one where it would help to understand the theory better (but still: awesome tank experiment!)

The main reason why we went to all the trouble of setting up a quasi-continuous stratification to pull our mountain through instead of sticking to the 2 layer system we used before was that we were expecting to see a tilt of the axis of the propagating phase. We did some calculations of the Brunt-Väisälä frequency, that needs to be larger than the product of the length of the obstacle and the speed the obstacle is towed with (and it was, by almost two orders of magnitude!), but happy with that result, we didn’t bother to think through all the theory.

And what happened was what always happens when you just take an equation and stick the numbers in and then go with that: Unfortunately, you realize you should have thought it through more carefully.

Luckily, Thomas chose exactly that time to come pick me up for a coffee (which never happened because he got sucked into all the tank experiment excitement going on), and he suggested that having one mountain might not be enough and that we should go for three sines in a row.

Getting a new mountain underneath an existing stratification is not easy, so we decided to go for the inverse problem and just tow something on the surface rather than at the bottom. And just to be safe we went with almost four wavelengths… And look at what happens!

We are actually not quite sure if the tilting we observed was due to a slightly wobbly pulling of the — let’s use the technical term and go for “thingy”? — or because of us getting the experiment right this time, but in any case it does look really cool, doesn’t it? And I’ll think about the theory some more before doing this with students… ;-)

Dead water — the fancy experiment including Nansen himself

Now that we do have a really awesome 12-layer 6-color stratification, we obviously had to do the dead water experiment again. This time we chose to include a not-too-happy-looking Nansen on the ship, too!

I love this even more than the one we did yesterday!

Lee waves in the tank

Did you guess what we needed the stratification for? Yes — we are moving mountains again! :-)

What we want to look at: How a current reacts to an obstacle in its way, especially a current in a stratification. But since it is really difficult to set up a current in a tank, let alone a stratified one, we are doing the next best thing: Moving the obstacle relative to the water rather than the other way round.

And this is what it looks like:

Et voilà: Beautiful lee waves!

And look at the paper bits floating on the surface and how they visualize convergences and divergences in the upper layer!

The three layers in the pink all have (more or less) similar densities, and are only dyed slightly differently because we had to make several batches of dyed salt water to be able to fill the tank. But look how well they show that the wave is really happening at the interface, and that the other layers are phase locked. What would happen if the stratification inside the pink layer was stronger? Just wait and see…. ;-)