Category Archives: method

#Methods2Go: Methods for “informing” students in university classes

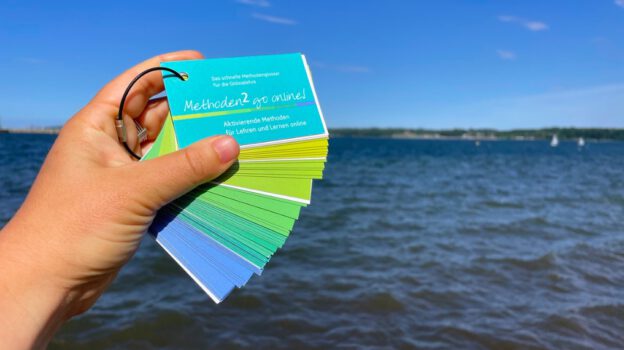
More methods today, inspired by E.-M. Schumacher’s “Methoden 2 go online!“! Today:

Informing

“Informing” in quotation marks, because that’s what that phase is called in the AVIVO model which underlies the structure of the Methoden 2 go online! collection by EM Schumacher, in other models the same phase might be called something that implies more student activity, like “acquiring new knowledge” or similar. Anyway, here we go:

Building a cognitive map

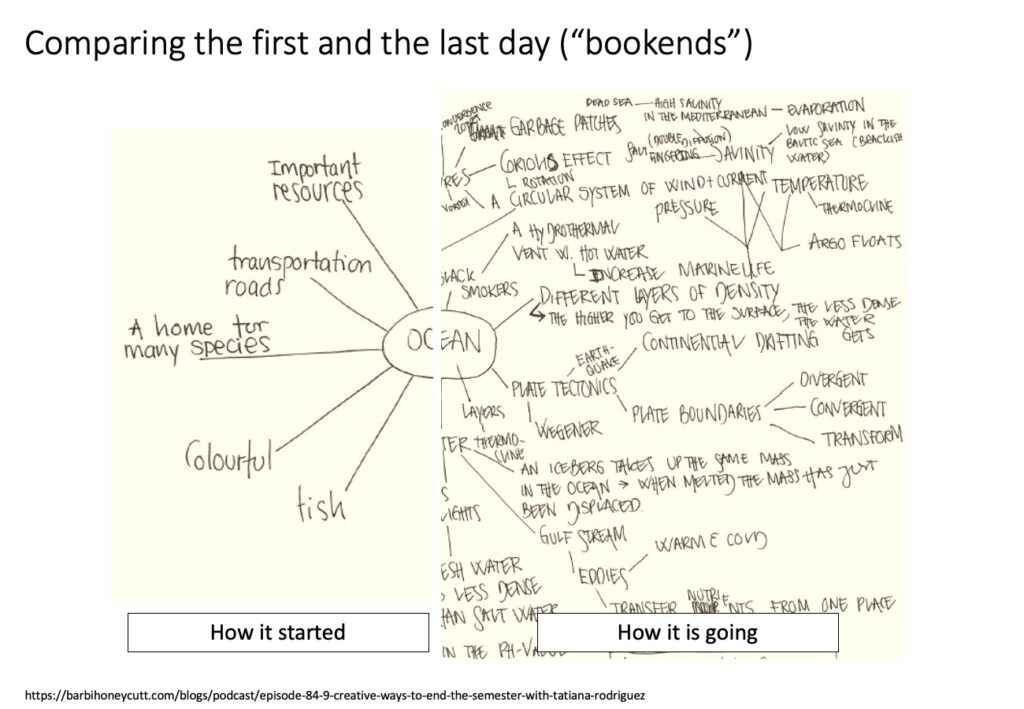
I’m a very visual thinker, so building cognitive maps is something I do a lot myself and like to encourage in my students, too. Below is an example of a concept map I asked students to draw before day 1 (left half) and day 9 (right half) of a course I was teaching. I can very well imagine asking students to use the last minute of a lecture (or maybe the first minute of a break in each lecture) to add to their concept maps over time. In the case shown below, the difference between what students expected to learn about going into the class and then what they learned about was quite interesting (and also maybe a function of “oceanography” usually being associated more with marine life than with physics), but students were quite proud of the complex maps that formed over the relatively short period of only two weeks, and it was a great way not only to visualise the concepts and how they connect to each other, but also how much they learned in such a short time!

The suggestion in “Methods 2 go online!” is that the teacher presents a mind map of the topics of the course, and that’s definitely also helpful for students to see how what they are about to learn connects to last week or the week before (as suggested in the advanced organiser paragraph here). But I like involving students in the activity, too!

Learning-speed duo

I wrote about this method here already (and how one might implement it virtually), and now I read the suggestions for virtual implementations: Doing the first phase (where two halves of the class read different texts or work on different exercises) asynchronously and then just asking mixed pairs to virtually meet up to discuss their respective texts. This also works well, of course!

I feel like this is a very short blog post, but then this topic is so huuuge that maybe starting small is actually the way to go. There are tons of other methods that I have talked about in other places, like for example group puzzles, but I’ll get back with more later!

That’s it for today! Next #TeachingTuesday we’ll be back with methods for “converting”!

CHESS/iEarth joint course on “communication skills in outreach and teaching”

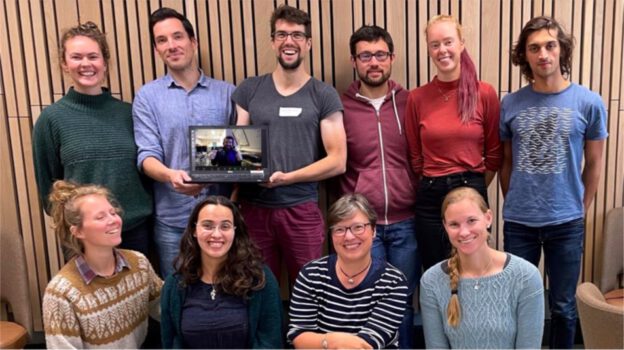
Kjersti Daae and I led the CHESS/iEarth joint course on “communication skills in outreach and teaching” in Bergen in September 2021; here is a short summary:

CHESS is training the climate scientists of tomorrow, iEarth is changing teaching culture in Norwegian geosciences. Naturally, PhD students from both centres have a lot to talk about, and that they are coming at it from different angles makes it even more interesting!

This course started out virtually in spring, and for 13 weeks, we met online for two hours to discuss a diverse range of topics with super interesting guest speakers:

  • Ivar Nordmo spoke about different metaphors of learning, and how the way we speak about learning influences our thoughts on the matter
  • Virginia Schutte gave us insights and practical tips both on JEDI (justice, equity, diversity and inclusion) and on science communication
  • Kikki Kleiven gave us new ideas about teaching geosciences
  • Sam Illingworth made each of us write 3 poems! (See a selection below)
  • Jostein Bakke gave us many tips for good outreach
  • Cathy Bovill and Mattias Lundmark worked with us on “students as partners”
  • Anders Alberg gave many suggestions for building good supervisor-supervisee relationships
  • Mirjam Glessmer talked about building networks in academia

And then, in September, we were in the lucky position to actually run an in-person workshop to bring it all together!

We ended up being 8 participants physically in Bergen (enjoying the beautiful new rooms in the basement of the Geophysical Institute, and the excellent catering from the new café there!) and one participant joining online.

The three days were structured to start out with a generous coffee break combined with a morning activity: Some fun science communication practice. On one day, for example, we wrote five lines about our research, and then checked with the xkcd “upgoer 5” editor which of the words we used are not part of the “ten hundred” most common words! We then rewrote and found out that some people are “rock-knowing” and others work on “the big blue water”!

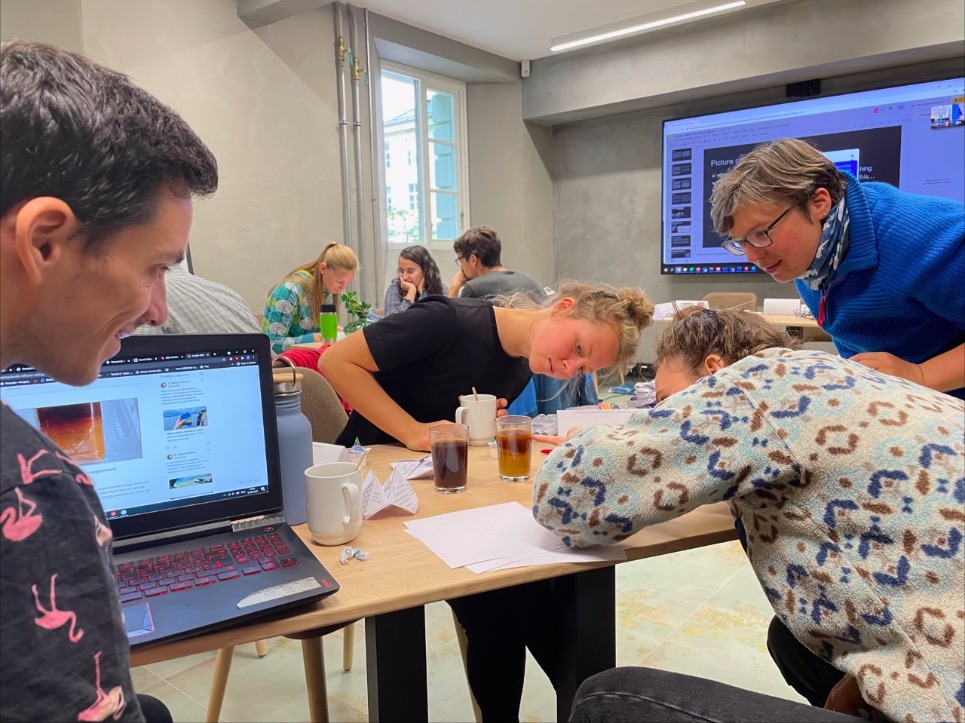
On another day, we made fortune tellers (some of us got distracted with the “kitchen oceanography” examples on the table, i.e. creating double-diffusive layers with milk and coffee… Which led to a lot more kitchen oceanography using coffee later on!)

Picture by Torgny Roxå


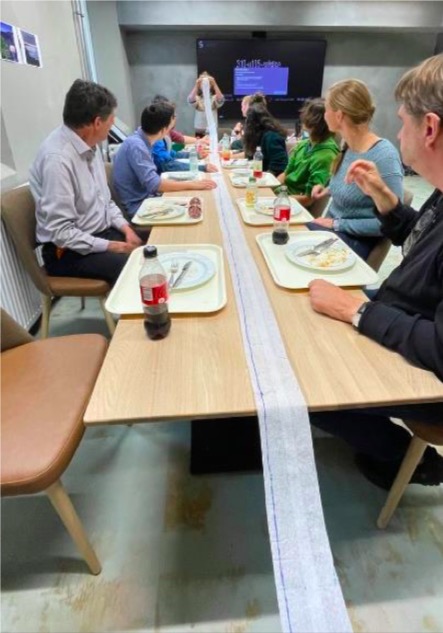
And on the last day, we tried to visualise things that are difficult to imagine, e.g. how wide a low-pressure system is relative to its height. Here is a nice example of showing how temperature has changed over a very long time (Thanks, Vanja, for jumping on the idea of using toilet paper rolls — I have always wanted to try that!).

But the most important part of the workshops were our phenomenal guest speakers.

Robert Kordts let a session on microteaching and gave helpful feedback (some of the things tried out in the microteachings were directly implemented as outreach for the Bjerknescenter the next day!). Anders Alberg worked with us on providing feedback and understanding research ethics. Torgny Roxå helped us get into why some people resist knowledge. And on the last day, Kikki Kleiven and Helge Drange shared their experience in doing science communication as climate scientists, and gave feedback on our own attempts.

All in all, a super inspiring three days!

Thank you to CHESS and iEarth for making this possible, and for our cool group of participants and guest speakers of being so constructive and engaged!

Where do you see this in your own life? Asking students to suggest examples

Heat fluxes are a topic that at first seems pretty theoretical, but with which we have tons of experiences in our everyday lives! A quick brainstorm for where we experience different types of heat fluxes gives so many examples:

  • having a lid on a pot suppresses convective heat fluxes beyond the lid!
  • coming out of the water on a windy day feels so much colder than on a non-windy day of the same temperature!
  • getting pasta water to boil on a windy camping trip is a lot more difficult than on a low-wind day
  • standing close to the fire makes one side of you feel toasty while the other side might be getting really cold
  • similarly, when sitting at an outdoor restaurant heated with those gas mushroom heaters, even holding a hand between your face and the heater will make your face feel noticeably colder
  • standing on a metal floor feels a lot colder than on a carpet of the same temperature

Asking students to come up with their own examples to discuss makes discussions a lot more fun and a lot more relevant to their own lives. Suddenly, a theoretical discussion becomes about explaining their own experiences, and possibly informing future actions (like for example with how to best cool a beer bottle on a hike). This works for any topic and opens up a whole new world to students when they suddenly see the topic applied in situations that they, or their peers, have personal experience with!

#Methods2Go: Methods for assessing previous knowledge in university classes

More methods today, inspired by E.-M. Schumacher’s “Methoden 2 go online!“! Today:

Assessing previous knowledge

Pre-tests

Using a virtual voting tool or a tool that allows for very short free-text answers to assess previous knowledge before class starts (or at the very beginning of class) is great for many reasons. Doing a “test” right before (or the night before) class helps you prepare for class, because you have a pretty accurate idea of what students know and don’t know, so you might include a summary of older content or launch right into something new, knowing that you are meeting students in a good spot. “Testing” at the beginning of a class activates prior knowledge and gets students focussed on the topic of class (as well as informing you about where students are at), but it doesn’t give you time to do major tweaks to the planned program.

I write “testing” in quotation marks, because the word sometimes implies that it something is part of the assessment. In this case, it can also just be part of the learning process, providing formative feedback. Or you could give it a tiny number of points and have all pre-tests sum up to something like 5% of the grade — enough to make students want to participate and not just throw away the oppotunity to earn points, but not enough to put actual pressure on students.

Advance organiser

An advanced organizer is usually a visualization of important topics (e.g. as a concept map) to help students organise information and gain orientation of where they are at with respect to all that will happen throughout a semester. It could also just be a table of content if you aren’t feeling fancy. In any case, it’s good to show one to students in the beginning and talk about how topics relate to each other and how much time you are estimating each one will take, and it’s even better when revisited regularly, including updated information if the content or time planning has changed.

A-Z of a topic

The idea behind an “A-Z” of a topic is to find a relevant term for every letter of the alphabet, and describe what it means and how it’s relevant for the topic. I’ve seen those on scicomm Instagram a lot (for example @scied_alice did one on physics, randomly linking here to D for “Doppler effect”), and I can imagine them well in teaching — both to activate previous knowledge on a topic and towards the end of the semester to consolidate all the new information. These are fun, and maybe even more so if you can include them in some kind of social forum — sharing them on social media, or starting off each lesson by presenting one letter that a group prepared for that day. If there is no fun social aspect, this might feel a bit like kindergarden busywork. But I guess that’s the same for most methods: A method is only as good as the way you implement it!

That’s it for today! Next #TeachingTuesday we’ll be back with methods for “informing” students!

#Methods2Go: Methods for “arriving” in class, i.e. getting to know people & raising interest

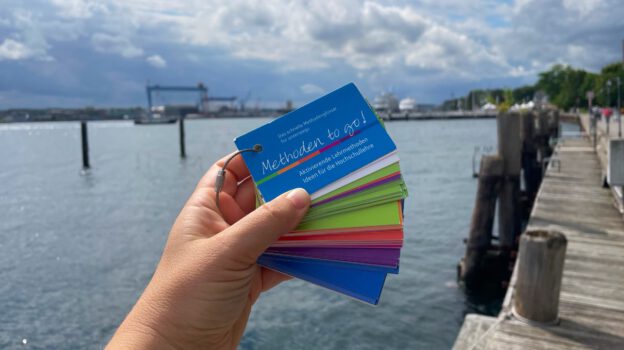
Remember my recent #Methods2Go blog posts, inspired by E.-M. Schumacher’s “Methoden to go”? There is more! She kindly sent me the new “Methoden 2 go online!“* — bringing us tons of methods that are adapted for online use!

*this is not a sponsored post, all opinions are my own

This set of flashcards is structured in two parts: The first one presenting a lot of model using the AVIVA model (which gives five phases of a teaching unit: Arriving, assessing preVious knowledge, Informing, conVerting, evAluating (This works a lot better in German ;-)), and the second one listing interesting virtual learning tools. As already with “Methoden to go”, it’s a lot of fun to flip through and inspires thought!

Let’s get started, today with:

Arriving

Voting by covering the camera

Students use little pieces of paper (or their thumbs) to cover the camera to signal “no” as a response to a question, or leave the camera open (and thus their faces visible) to signal “yes”. This is great for a very quick vote on things, but also for students getting to know each other and finding out similarities (for example where they live, who has previous knowledge on or experience with what topic, …).

Awaking interest

I described the idea behind the “awaking interest” method in this blog post — this works just as well online as offline!

Feedback and interaction cards

The idea here is that teachers send out a file with symbols that students print and then use to hold up in front of the camera in response to questions (so a little bit like my ABCD cards, except with more symbols). At first, I thought this was a bit silly — almost all video meeting platforms do have chats and those “raise hand” buttons etc, but on the other hand I’ve been in plenty of meetings where messages in the chat and raised hands went unnoticed, so maybe holding something up in front of the camera is worth a try? Still seems like overkill to me to send out something that students have to print (also because I don’t have a printer at home and know how annoying it is if you need something printed during a pandemic), but maybe telling students that if they hold up a piece of paper with a questionmark on it, you will know they want to ask something rather than them just stretching? Might be worth a try!

“Wanted” poster

In order for you to get to know students and them getting to know each other, it might be a good idea to ask them for a couple of key facts about themselves, and to ask them to fill those in for example in a shared google slides doc, or whatever learning management system you are using. One question I like to ask students is to present their nerd topics (more about that here). Of course, it’s important to then make time to look through all those different presentations and acknowlege both the effort they went to and the content they put there. Otherwise you are sending a pretty strong signal that you don’t actually care as much about them as you pretended to when you gave this task…

Getting to know people via their virtual backgrounds

Ask students to set their virtual backgrounds to pictures that are meaningful to them, then let them talk about why it’s meaningful. I like this idea! I like to ask students to present their nerd topics, and while I usually ask them to post the pictures for that in a shared google slides document, for larger groups it could be useful if students kept the picture they talked about as virtual background so it’s easier to connect the topics with the names and faces.

P.S.: I am usually a proponent of avoiding virtual backgrounds as a teacher so as to not give students the impression that you try to hide as much of yourself from them as possible, but that doesn’t mean that they can’t be useful sometimes ;-)

That’s it for today! Next #TeachingTuesday: Methods for assessing previous knowledge!

“Things I wanted to say but didn’t get the chance…”: A method to include missing voices!

I’m currently leading another virtual 3-day workshop on “introduction to university teaching”, and yesterday I left a prompt on the shared slide deck we are working on, “Things I wanted to say but didn’t get the chance…”, for participants to react to when they gave me the continue, start, stop feedback on that day. As I explained to the participants, the idea is that there are many reasons why participants might choose to not contribute even a relevant point in the heat of the moment. They might be shy, they might think the thought wasn’t that super relevant, they might not want to derail the conversation, they might be afraid of the reaction they might get, they might not be sure of how well technology will work and if a bad network connection might lead to awkward moments, and many more. But what a pity if all those thoughts are lost, especially since I would bet that there is a systemic bias in who speaks a lot and who doesn’t. So including this way to hear missing voices seemed a good idea, and it was interesting to see what it brought up! I’ll always do this now! What do you think, will you, too?

#Methods2Go: methods to end lessons with in university teaching

Another method idea from E.-M. Schumacher’s “Methoden to go” pool of suggestions!

Today: a method to end a lesson with.

Cheat sheet

I’m pretty confident that anyone who has ever written a really good cheat sheet will not actually need it to cheat with later on. Putting together all the relevant information is a condensed manner is such a great way of thinking it through that learning is practically inevitable. So asking students to write a cheat sheet is a great method! I’ve heard of many colleagues who let students bring in one piece of paper (A4, or some other specified size) on which students can write anything they think will help them with the exam, and the experience seems to always be that student preparation is excellent. And even if students need to look up something from their cheat cheet (for example to make sure they remember an equation correctly) — what’s the harm in that? Then they had already recognized that this was an important equation to write down and remember that they had written it down.

What other methods do you like to end your lessons with?

That’s it, those were my thoughts on “Methoden to go” by E.-M. Schumacher! But, luckily, she just brought out a new product, Methoden 2 go online!, with which we’ll continue next #TeachingTuesday!

Using student representatives to improve communication with your class

Maybe it’s a German thing, but we have had student representatives starting as early as in primary school: two students per class, a boy and a girl, that get selected by the class and that have the mandate to speak for the whole group whenever the teacher wants easy access to what the class thinks about certain topics, but doesn’t want to open up a discussion with everyone, or when there are issues the class wants to bring to the teacher’s attention without making it obvious who raised the issues.

I remember that at least one year, we talked about what that role contained: How you needed to be approachable to all kids in the class, not just a small clique, and how you needed to keep things told to you in confidence to yourself. And how the teacher wouldn’t project complaints on the messenger, but would also know that they were just conveying a message that they might or might not agree with.

This obviously also works at university level: Sometimes it’s good if students don’t have to approach the teacher themselves about something that is bothering them. And sometimes it is easier to check in with one or two students to get a quick feedback than trying to get individual feedback from every student, or discussing with the whole class.

However, for me having student representatives is really one step on the way from not talking to students to talking to as many students as possible, which would be the ideal case. Not necessarily because you might not get all the information by not talking to everybody (which you might not), but because I think it matters to students to be asked and heard, more so through a conversation or even anonymous feedback forms than through student representatives. Unless you make it very clear that you want to get everybody’s feedback on an issue, but that you are asking the student representatives to collect and compile it for you, in which case it would probably be a good idea to provide a little time for those discussions to show how serious you are about making sure everybody is represented and heard, not just the student representative and their best friends.

What do you think? What are your experiences with student representatives?

Our presentation at #FieldWorkFix: “An interactive mobile adventure on coastal protection”

This summer I had a fun little side project: I was co-supervising a Bachelor thesis in geography at Kiel University! Janina Dreeßen, with Katja Kuhwald as her main supervisor, did an excellent job, and I am presenting her work at the #FieldWorkFix conference today. If you can’t join later, here are my slides and what I’m planning to say. Enjoy!
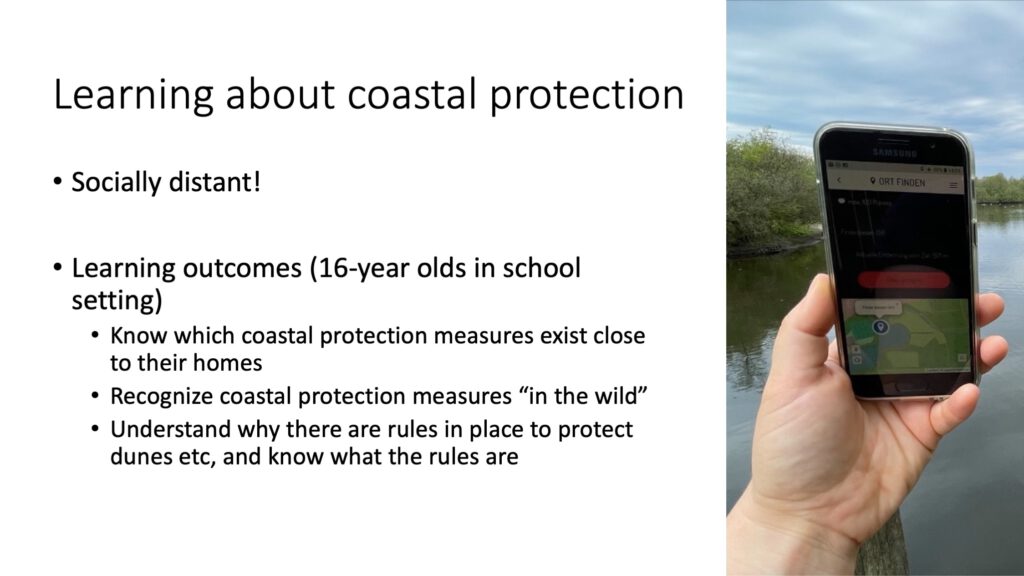
Janina’s task was to create a learning opportunity on coastal protection for 16-year olds in a school setting, to run it with some students from her target group, and to do a preliminary evaluation of how it worked. And that’s what I want to present here (of course she also did a review of both the subject of coastal protection, and the literature on how students learn with digital media and on excursions, but that’s beyond the scope of this presentation).

The learning outcomes that Janina focussed on were

  • to be able to name which coastal protection measures exist close to the students’ homes (i.e. on a specific part of the German Baltic Sea coast),
  • to recognising those coastal protection measures “in the wild” and understand their functioning, and
  • to explain why there are rules in place to protect dunes etc, and what the rules are.

Because of Covid-19 regulations in Germany this spring, we wanted to create something that could be done outside, and socially distant.
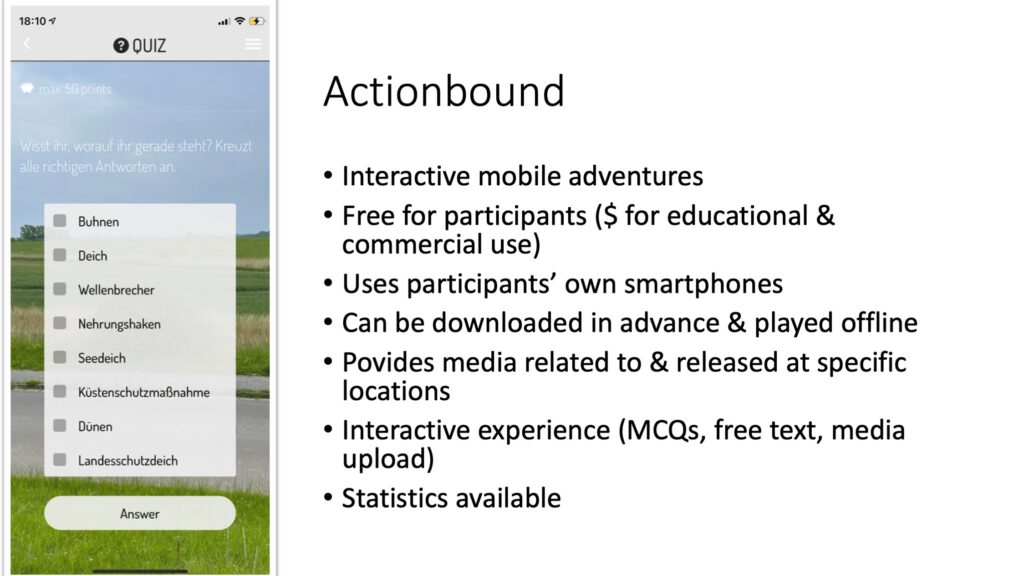
We decided to create a virtual scavenger hunt using the app Actionbound that provides the platform and an easy drag-and-drop interface to create interactive mobile adventures. Actionbound serves as a virtual guide to different locations, which you can navigate to following an arrow or looking at a map, and you can prescribe whether the mobile phone’s GPS actually has to show that a location has been reached (within a couple of meters) for the scavenger hunt to continue, or whether you trust your players to find it, or you can also allow to skip it.

Within the app, you can provide media related to, and released at, specific locations: Movies, sounds, pictures, texts; so there is a great potential to use this in teaching. Actionbound scavenger hunts are also interactive experiences, as it is possible to create quizzes using multiple-choice questions, ask for free text answers, or media uploads. All of these can be made compulsory (so you can’t continue the scavenger hunt unless you respond) or voluntary, so they can be skipped.

Actionbound runs on the participants’ own smartphones, and scavenger hunts can be downloaded in advance and played offline, if data usage is restricted or the network in the region might be a problem.

The person who creates a scavenger hunt is provided with usage statistics: How many people played, how long they played, what they answered, the files they uploaded, those kinds of things.

Playing a scavenger hunt using Actionbound is free for players. Creating scavenger hunts is free for private use (so great if you want to just test it!), but for educational or commercial use, you have to buy licenses. We were lucky as we could get a free educational license under the umbrella of GEO-Tag der Natur, which bought licenses and distributed them for free to people creating scavenger hunts to be played on the topic and within the timeframe of that larger project (no coincidence here, that’s my project and Janina’s idea was a perfect match for what we were looking for :-)).
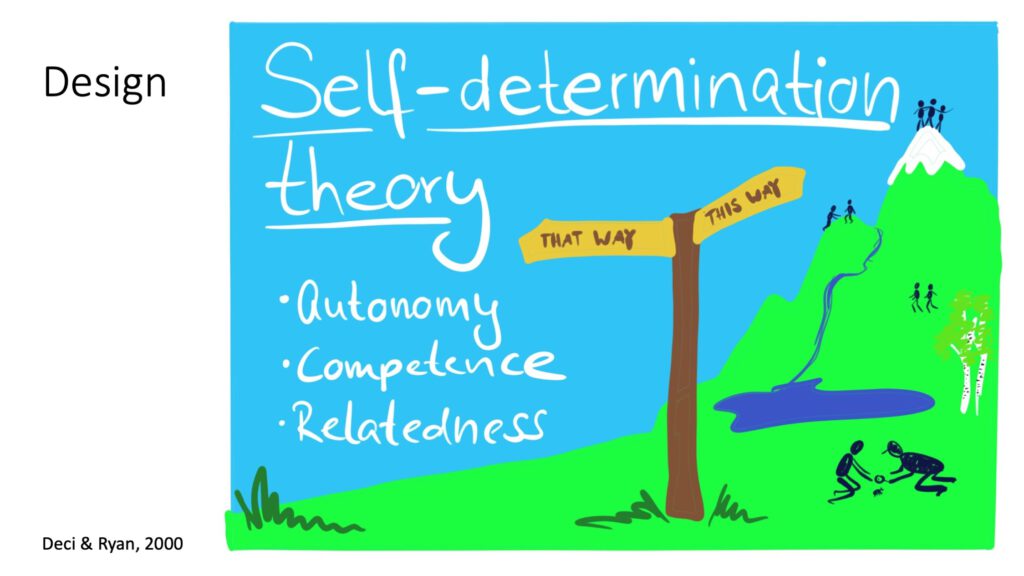
The design of our scavenger hunt was guided by our interpretation of the self-determination theory by Deci and Ryan (e.g. 2000, but many more). This theory suggests that learning is optimal when it is intrinsically motivated, and that in order to feel intrinsic motivation, three basic needs have to be met: autonomy, competence and relatedness.
Autonomy means that we need to feel that we have control over our behaviour, that we have choices that we can make in whatever way we please. Obviously in a school setting, there is always going to be external constraints, but the more we can give students ownership over what is going on, the more likely they are to feel motivated.
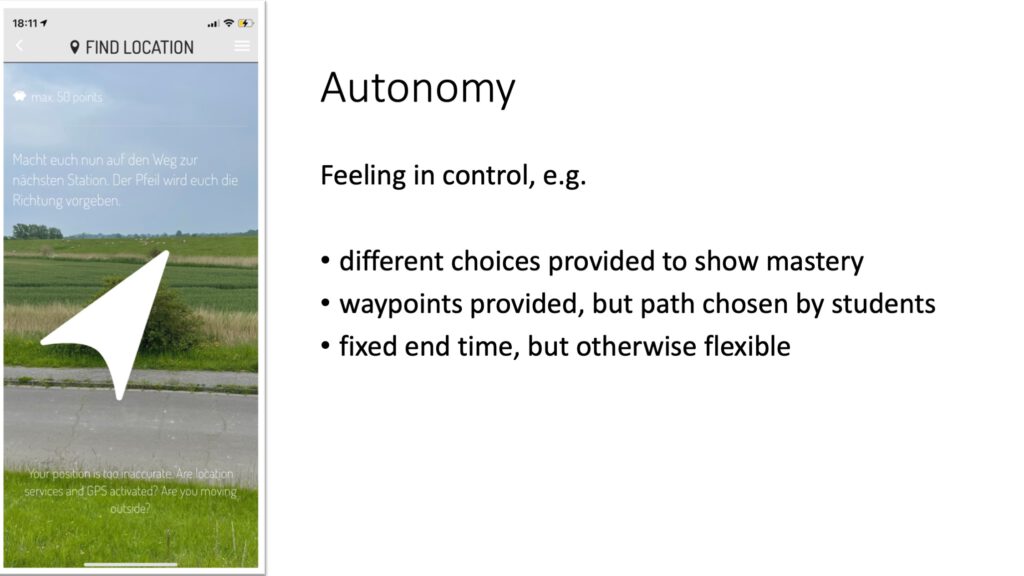
For our scavenger hunt this means that, where possible, we provide different options for how tasks can be done (and I will give an example of that later).

We do want everybody to reach specific waypoints and look at different things along the way, but we give participants flexibility for how exactly they reach those waypoints (there is an obvious way, but they can also do detours on the way if they like), and how they organise their time. We do that for example by letting them know when they have reached the mid-way point and what type of larger tasks are still ahead of them, so they can estimate how much time they will need to get back to the starting point, and decide when and where they would like to take their breaks.

Below, you see a map of the area we were focussing on: We start out in location (1), then students head to stations 2 to 11, and then everybody meets up at station (12) in the end, to drive back to school together. On this tour, students see many features that are relevant to coastal protection, some of which you can probably spot from this satellite picture: We see for example the marina, the slip hook which contains a nature reserve, sand banks offshore off the coastline, a dyke, and groynes.
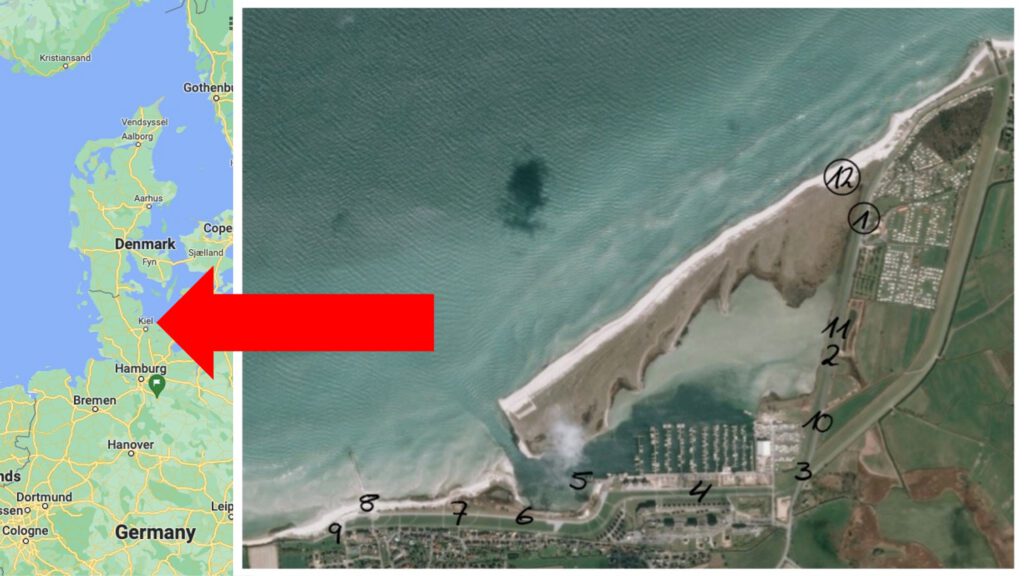
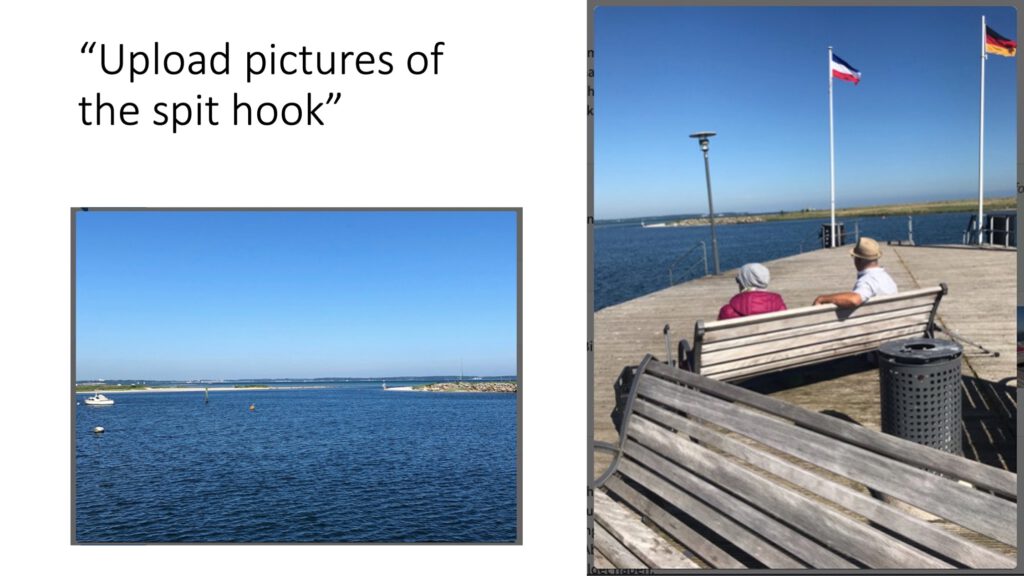
We do want to know whether students recognise relevant features along this tour that they’ve been introduced to earlier, so one task was for example to take and upload a picture of the “spit hook” — a term that they were likely not familiar with before and where they had to make the transfer from the map above to the feature you see in the pictures below. It was visible on all pictures students submitted, although better on some than on others.
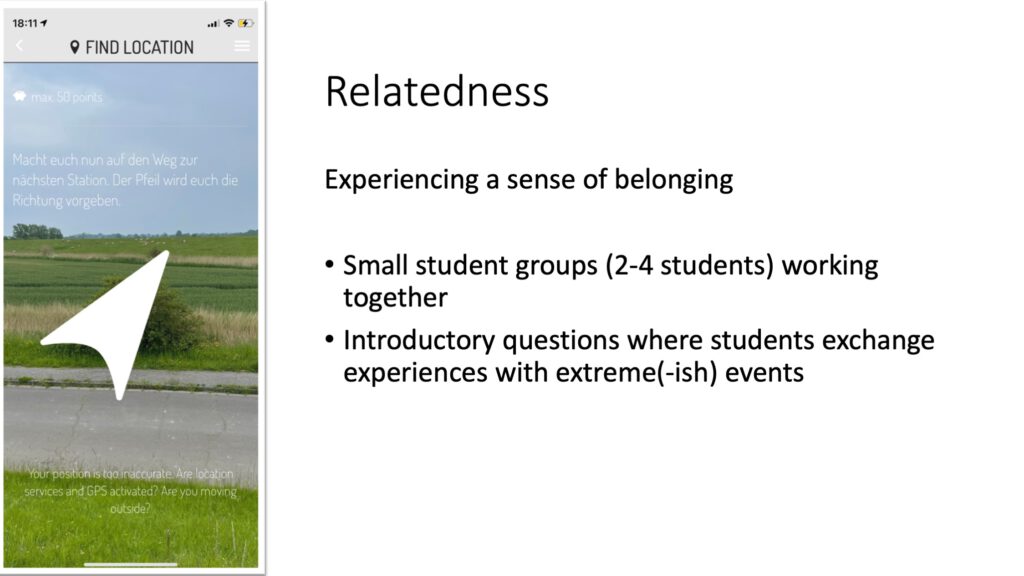
Back to basic needs that need to be fulfilled in order to feel intrinsic motivation! The second basic need, the feeling of connection, we try to address by letting students work in small groups of 2 to 4. Within those groups, we foster a sense of belonging by starting the scavenger hunt off by asking them about their personal experience with extreme(-ish) events.
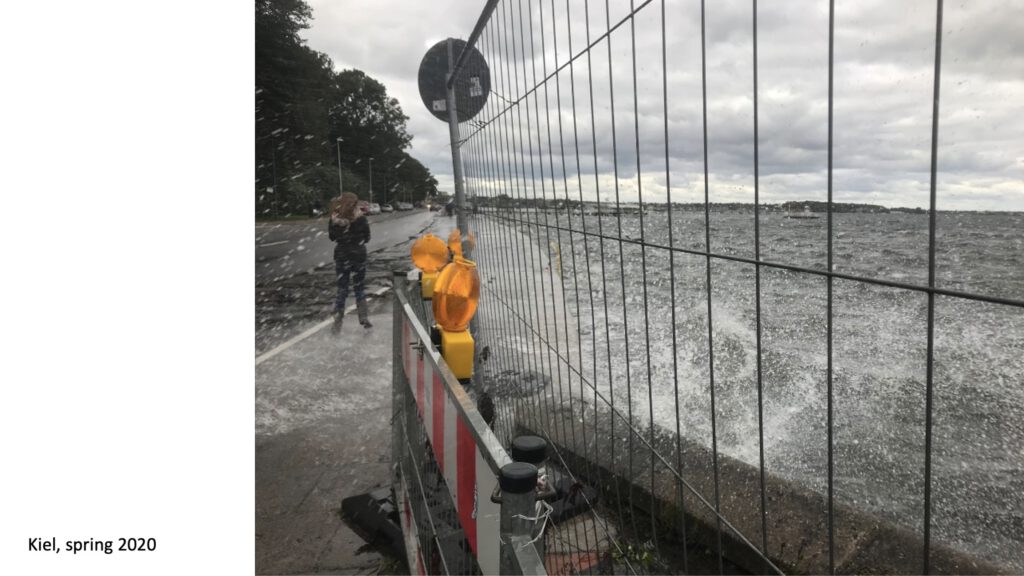
This, for example, shows a relatively common (as in about once a year) event in Kiel, the next bigger city to where this scavenger hunt is located, that students doing this tour are likely familiar with: Storm surges in the Baltic Sea often lead to roads close to the water being closed and flooded, and waves breaking over the sea walls. Damages to sea walls can regularly be seen (also because it takes years before they are being repaired), and booms to close roads off with with “road closed due to flooding”-signs are permanently installed, so students should have some personal experiences and prior knowledge that can be activated. Talking about personal experiences and sharing stories about them is a good way bond with others.
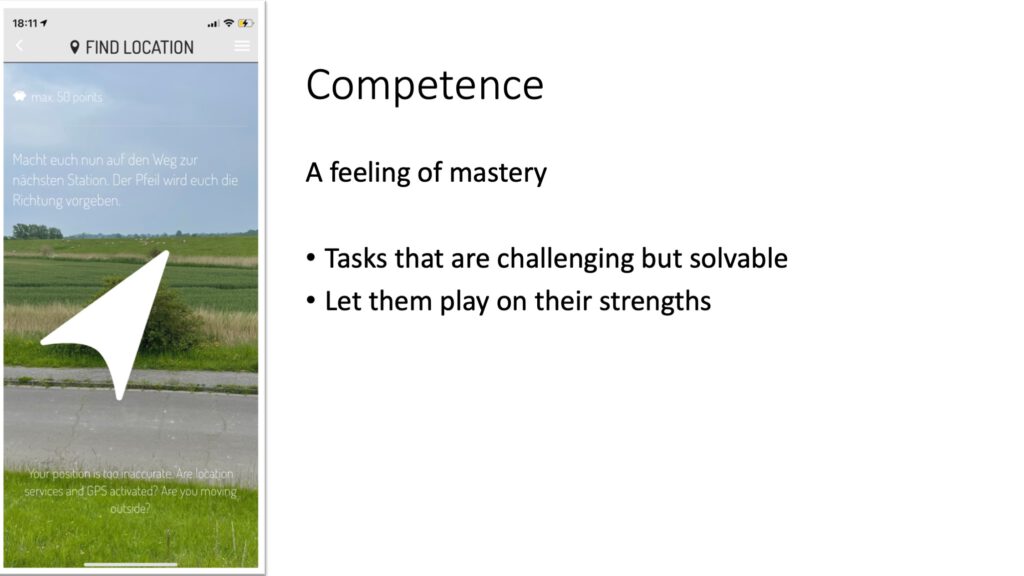
The third basic need that must be fulfilled is a feeling of mastery, which we tried to ensure both by scaffolding our tasks and by making sure that students could make choices that would allow them to show their strengths.
For example, the last task of our scavenger hunt was to create a movie about a coastal protection measure of their choice, in whatever format they chose. They were given this task at the farthest point out, so they could walk back past all the coastal protection measures they had seen on their way out, contemplating the task, and then use free time towards the end to implement it.

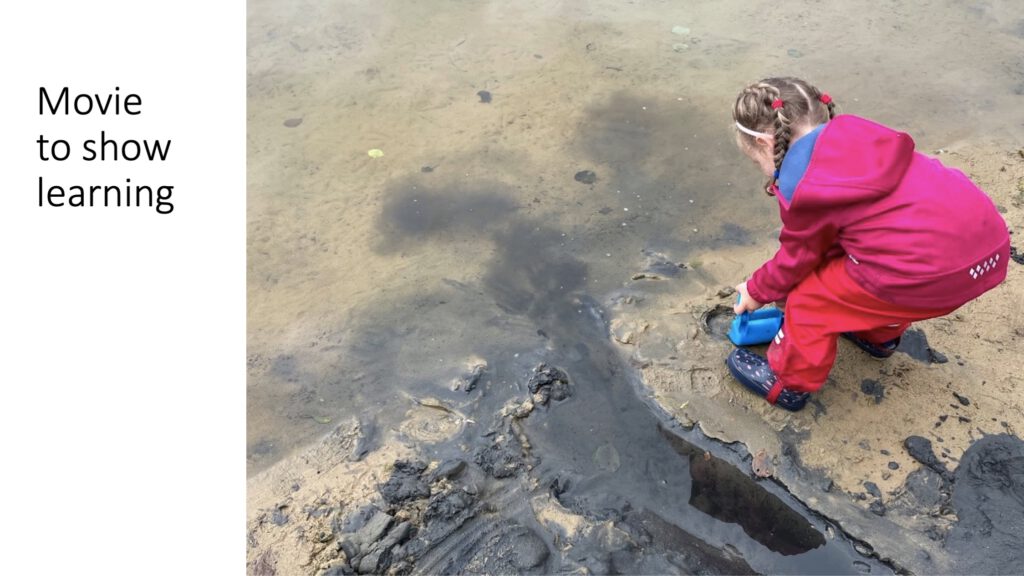
I expected students would submit something that looks like what we show here (although that’s my incredibly adorable and smart three year old niece and not a 16 year old student): building structures on the sandy beach, maybe discussing the design criteria behind them, and then maybe making a large wave to show how it breaks (or doesn’t break) the structure.
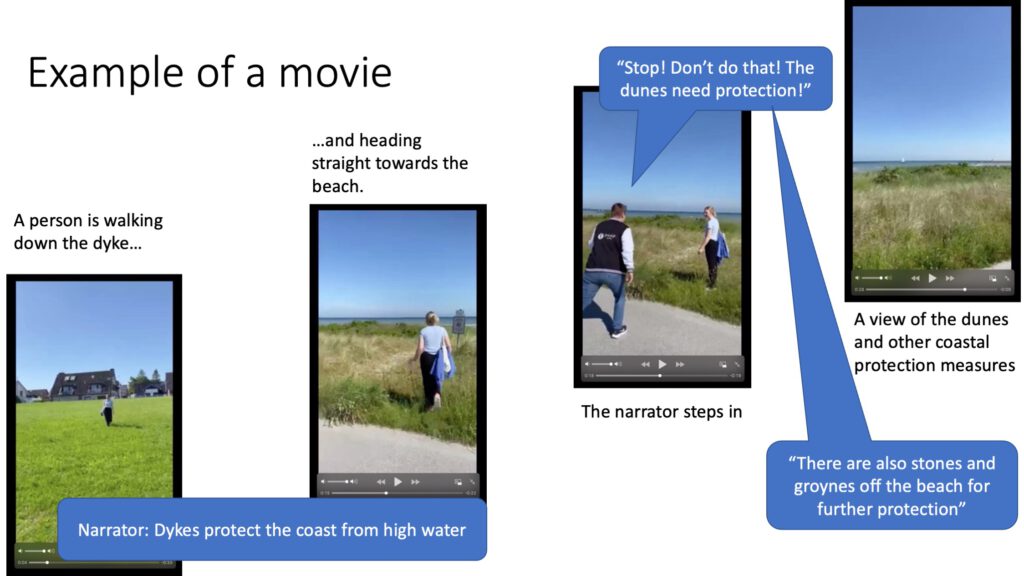
Here is one example of a movie that was uploaded (and other examples include someone sitting on a bench, talking about coastal protection in a story-telling sort of way), that was clearly thoroughly thought-through and produced: The movie shows a person walking down a dyke towards the sea. As she is walking, a narrator talks about how dykes protect settlements from storm surges. The camera follows the person walking down the dyke as she crosses a street and starts stepping on the dunes, where the narrator (who is now also visible on camera) steps in and tells her to stop, and explains how there are rules in place to protect the dunes. He then also points out other coastal protection measures that are visible in the distance.
So now we are coming to our conclusions. Throughout this process, and testing this scavenger hunt on a 10th grade geography class, what did we learn?

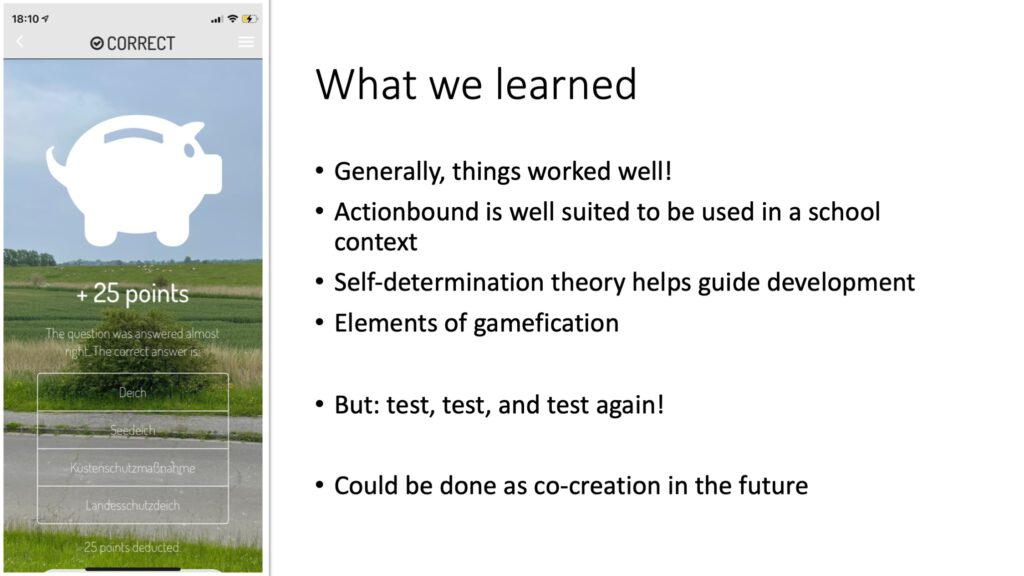
Generally, things worked really well. Being able to deliver inputs at specific locations without students following a guide around gave them a feeling of autonomy which they seemed to enjoy, and we were positively surprised by the quality of most of the artefacts we collected via the app. Despite (or maybe even because of) it’s game-like appearance, Actionbound turned out to be well suited for use in a school context, although the effort of creating a scavenge hunt is not inconsiderable. In our case, we created a scavenger hunt that can be played by many different school classes over months or even years, and the effort needed to set something like this up might be more realistic than if it is just done for use with one single class.

Using self-determination theory to guide development was also useful for us, because it reminded us to include elements beyond the classical tasks of “read this, then answer the question to show us that you understood what you read”. Including elements of gamification made it fun and memorable, but did hopefully not distract from learning.

But another thing we learned (which we had also been advised before, but I guess this is something everybody needs to learn for themselves): test, test, and test again! It is frustrating if, for example, “dog” is the expected and accepted answer to the question of who is not allowed in the dunes, and “dogs” then isn’t counted as correct, or even looses you points. Those kind of things we only caught when testing with the school class, but would ideally have caught earlier.

And then we were very lucky with the weather — this might not have been fun if it hadn’t been warm and sunny, and we did not have a backup plan!

One thing I would try and implement more next time is to have students really do something at the location they are at — not just observe, but actually either collect something that they bring home to analyse later, or have them work on an artefact that stays in this location and that other groups can build on (giant sandcastle? wall painting? …?). Because now for us it was great that students could see the coastal protection measures “in the wild”, to scale, interacting with the ocean (albeit on a calm day), but I would like to strengthen that connection with the actual physical location even further in the future.

One last thought: I would really like to do a similar thing as co-creation in the future, where students design scavenger hunts to teach other students about a topic they first did some research on themselves. That would a) be a great way to document their own learning (instead of e.g. writing a report), and b) likely lead to scavenger hunts that are even better tailored to that specific target group, and even more fun to do. Actionbound has that option already implemented, and I think that could be great!
But that’s for another time.

Thanks, Janina and Katja, for this fun project! :)
#Methods2Go: Methods to secure results in university teaching

More method ideas from E.-M. Schumacher’s “Methoden to go” pool of suggestions!

Today: methods to secure results.

Learning walk

I’ve been using plenty of virtual “gallery walkes” recently, where students have worked on a joint google slides document (either each on their own slide, or each group on their own slide) and we then go through those slides together. There are several ways to do this walk — either students go through the slide deck on their own or with their groups, potentially discussing things and leaving comments, or we go through all the slides together and talk about them with the large group. But obviously, something similar works really well in in-person meetings, too (and that’s where the method originally came from).

In a “learning walk” (or gallery walk), visualized key results are put up throughout a room and students walk from one to the next to recapitulate the ideas. They could be guided by a specific question (probably a good idea) or just use this as an opportunity to recap everything they learned so far.

I can imagine this really well at the end of a semester, with key graphics on display (possibly without captions) and the task to make sure that everybody can explain all of the graphics. I would then encourage students to talk to each other, or even to leave notes with key points, thus co-creating the explanations for the key graphics. I might start out with having small groups work on a first draft for each of the graphics, and then open that up for peer feedback + additional points being added throughout the duration of the learning walk.

Learning diary

In a learning diary, students document their learning process. This can happen as part of an assessment, or formative feedback, or without ever showing it to a teacher. What I like about learning diaries is the more or less continuous documentation of the learning process, and I think it’s a helpful and motivating routine to take on, and also great to make sure notes stay in one place and easily accessible.

I have used what I thought of as “lab books” (but which is basically a learning diary) for many years now, and that’s exactly how I use them: To have all my notes in one place. On talks I’ve attended, workshops I’ve joined, articles I have read, goals I have set, tasks I have worked on (sometimes I set the first double page up as a Kanban board with the columns “waiting”, “to do”, “doing”, “done”, and post small sticky notes to the respective places, and then once a month I put all the “done” notes on a page for that month, thus creating an archive of what I achieved that month. Super satisfying, because usually this stuff does not become tangible that way!).

I’m using actual paper books for this (and I don’t see that changing anytime soon — commitments made on paper make me feel a lot more committed to them than if I just type something, and also I remember my notes by where something was on a page, what pen I used, and other similar pointers), but I am sure there are plenty of virtual methods that might work just as well or even better for others.

Structural mapping technique

A teacher provides flashcards or sticky notes with key terms, students use them to map out connections on a large piece of paper. It’s as easy as it sounds, but great for students to discuss relations between terms, maybe adding others that they need to bridge “long distances” or that they think are important to include.

I like the idea of students representing structures of concepts not just by describing them with words, but by how they sort them in space. It makes discussions a lot easier because miscommunication becomes more obvious when there are physical representation of a shared (or not) understanding.

Glossary

Throughout the semester, difficult and/or technical terms are collected and explanations for those terms are written in a shared document, either by individual students taking turns, by small groups, or by the whole class. Those terms and corresponding explanations are collected and distributed to everybody to use as glossary in preparation for the exam, or just for future reference. Love this as a co-created product of shared understanding!

That’s it for today! We’ll continue next #TeachingTuesday with “methods to end a lesson with”.

What other methods do you like to secure results at the end of a lesson?