Category Archives: demonstration (easy)

Stream lines and paper towels

We’ve been talking about stream lines a lot recently (see for example the flow around a paddle or flow around other stuff). I’ve always heard stories about a neat way of visualizing stream lines that I wanted to show on my blog. So I set out to try it, but it just never worked exactly the way I had imagined it should. Anyway, here you go:

We take paper towels and cut an “obstacle” in it. In this case, it’s a drop-shape. The paper towel is set up such that one end is dunked in water, and that once the water has been sucked up a little, it neatly flows down a slope through the towel. In the picture below you see that the water just came over the edge of the cutting boards.
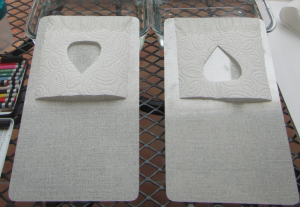
IMG_2102So once a flow has established (and only then, because I wanted to go for steady state stream lines, not some stuff that happens while things are still adjusting), I started dotting dye in to trace the flow:
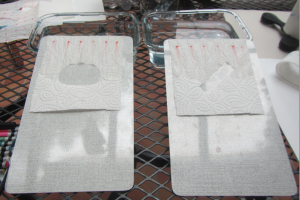
IMG_2103As you can see, each dot leaves a streak. In this case, though, the streaks are not nearly clear enough for me, so I decided to “recharge” a little further downstream (making sure I put the dye exactly on one of the stream lines, obviously).
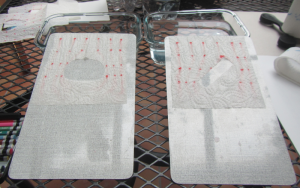
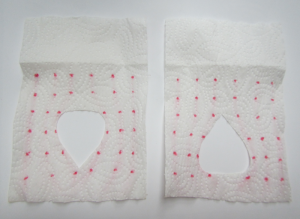
IMG_2104And voila! The flow really goes around the object similarly to what we would have imagined. And this is what the finished drop-shaped obstacle looks like:

IMG_2106

stream lines on paper towel

As you see, next time it’s important to make sure there is more paper towel left downstream of the obstacle. We already get interference from the bottom edge of the paper towel where the flow is interrupted.

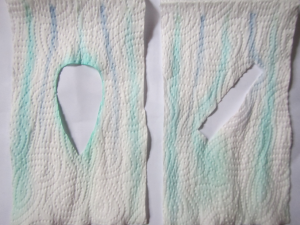
It’s also important to figure out what kinds of pens work: The picture below is from a test I did at my parents’ which worked a lot better than the pens I tried above.

IMG_2107

stream lines on paper towel

And finally I am not sure how the embossed pattern in the paper towel influences the flow. So maybe I should try and find something with either a smaller pattern or something more regular. Plenty to do still!

So, all in all: Interesting visualization which I am definitely going to try again at some point, but there are still a couple of kinks I need to find fixes for!
Ball balancing on air flow

Recently, someone at my university told me about a case of experiments connected to aerodynamics* that they occasionally use for demonstrations and outreach. Obviously, I asked if I might possibly borrow the case, and fast forward: my dad and I spent a whole weekend playing.

I’m gonna go through all the experiments over the next couple of posts, so let’s get started!

The first experiment has a slight ring of the balls balancing on water jets. I’m a little torn on which one I like better. The experiment below looks a little more like magic, because the air jet is invisible. But the balls are balancing on water jets. Water! Tough choice!

IMG_1839

Ball balancing on air jet

So this is what happens: The ball sits on the edge of the jet. The jet speeds up where it flows around the ball, and according to Bernoulli the pressure sinks and the ball is being pushed into the jet by the air pressure from outside the jet.

In the movie below you see how the ball can balance quite stably if left alone in the position it finds for itself, and how it reacts to the air flow being disturbed.

*This is the case: Experimentierbox Flug und Fliegen. This is not an affiliate link, they don’t know me and I don’t get anything for linking.

When diet coke cans don’t float better than regular coke cans

This is why you should always test an experiment before you run it…

On recent travels, when I saw that they were serving drinks out of tiny cans, I asked for coke and coke light, because I really like the experiment where you put two coke cans in water and the diet one floats while the regular one sinks.

Soft drinks in cans. Who knew you could do science with them?

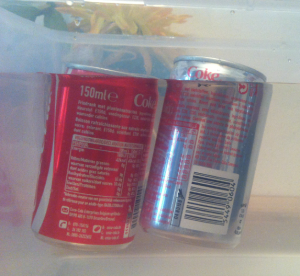
And then I had those two new tiny cans sitting in my kitchen. My parents came over and we talked about how I am so happy I got those tiny cans, because it is less equipment to lug around when I travel to workshops or courses. And then my mom says that she has never seen the experiment for real. So of course, I have to show her. And what happens? This!

Screen shot 2015-04-06 at 4.28.11 PM

What??

Yes, the regular coke might have sunk a little deeper, but this is really not as impressive as the experiment is supposed to be!

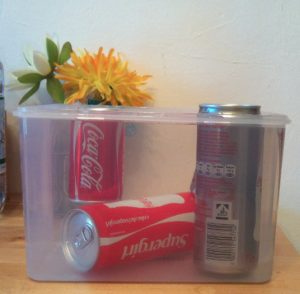
Good thing I moved the cans (which a friend’s friend brought to Norway for me, which I then brought from Norway to Iceland and then back to Norway) with me to Germany… As you see: The large cans still show what I wanted them to show!

Screen shot 2015-04-06 at 4.27.49 PM

Better.

So who knows what is going on here? Too much head space in the tiny cans relative to the amount of soft drink they contain? New formula? Anything else?

And the moral of the story: ALWAYS try your experiments when you are using new equipment before you show them to anyone. Who would have thought that this experiment was not fail safe???

Vortex streets on a plate

You might think that three hours of canoe polo on a Saturday morning would be enough water for the day, but no.  As when I did the experiment for the “eddies in a jar” post a while back, sometimes I just need to do some cool oceanography. So last Saturday, this is what I did:
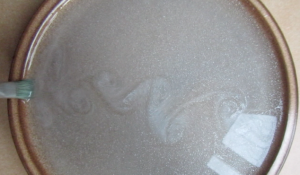
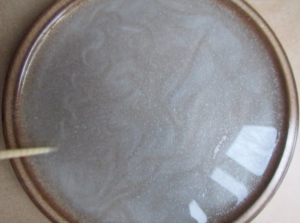
Screen shot 2015-02-21 at 4.38.32 PMI took a plate, mixed some sugar, silvery water color, and water, pulled some stuff through the water and that was pretty much it. As a first order approximation, pulling an object through a stagnant water body is the same as the water body moving past a stationary object. And since it is usually pretty difficult to visualize flow around stationary objects (at least if you don’t want to pollute that little creek nor waste a lot of water). So this is really exciting.

Screen shot 2015-02-21 at 5.01.02 PM

Depending on the size of the object you pull through the water, and its speed, all kinds of different eddies develop. So fascinating! Watch the movie below to get an impression. (It’s really only an impression – it’s 2 minutes out of the 40 or so that I filmed ;-))

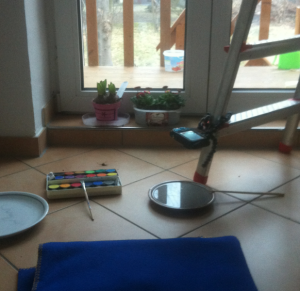
And for those of you who are always like “oh, I would love to, but I couldn’t possibly do this at home!”: This is what it looked like in my kitchen when I filmed the video above:Screen shot 2015-02-21 at 4.27.15 PM

The plate I am filming is the one underneath the camera (I love my gorilla grippy). My water colors from back when I was in primary school, a paint brush, a chop stick, the plate I tried first that turned out to not have enough contrast with the silver paint, a blanket because the tiles are cold to sit on. Oh, and the flowers that I have been meaning to put into nice pots for a couple of days now. So – no big mystery here! Go try! And let me know how it went.

Signal velocity

How can a signal travel faster than the phase of a wave, or individual particles?

I remember having a really hard time with the concept of a signal traveling faster than the phase of a wave or than individual particles when I first heard about it during my first year at university. I know my physics professor had an example he thought would help us, and I remember that it was something about being on a playground and stepping on something, but I remember that even then I didn’t get what point he was trying to make.

Anyway. I have blinds in my living room, and whenever I open or close them, I somehow think about this. In the movie below you’ll see me crank the blinds up and down. From the reflection of the lit door in the background you can see that the camera stays in more or less the same position during the movie (yes, dad, next time I’ll use a tripod!), and from the sound you hear that I’m cranking with more or less the same rate throughout the movie. And yet you see the blinds seemingly move with two different velocities: One when all the panels move in parallel, and one when the signal that something started moving (or stopped, as in the second case) propagates through the blinds as the gaps between the panels open or close.

Now tell me: Is this a good example? Or why not? What would be better?

Eddies in a jar

Rotating experiments in your kitchen.

Do you know those Saturday mornings when you wake up and just know that you have to do oceanography experiments? I had one of those last weekend. Unfortunately, I didn’t have a rotating table at hand, but luckily most of my experiments work better than the exploding water balloon time-lapse I showed you on Monday, so this is what I did:

MVI_0698

Dye spiral

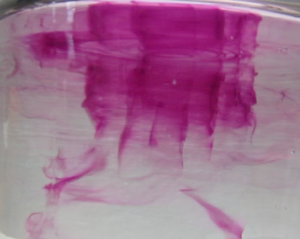
I took a large cylindrical jar, filled it with water, stirred, let it settle down a little bit and then injected dye at the surface, radially outward from the center. Because the rotating body of water is slowed down by friction with the jar, the center spins faster than the outer water, and the dye streak gets deformed into a spiral. The sheet stays visible for a very long time, even as it gets wound up tighter and tighter. And you can see the whole eddy wobble a bit (or pulsate might be the more technical term) because I introduced turbulence when I stopped stirring. So pretty, the whole experiment. And so satisfying if you need a really quick fix of oceanography on a Saturday morning!

Watch the movie below if you want to see more. Or even better: Go play yourself! It’s easier than making one of those microwave mug cakes and sooo goooooood :-)

Playing with time lapse

One of my not-so-bright ideas as you’ll see…

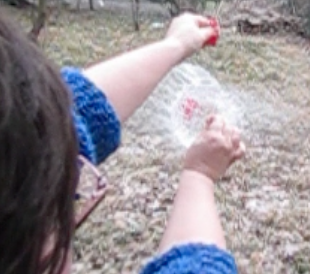
Last week we talked about the thought experiment on how all objects have to fall at the same rate. Which is clearly only true in a vacuum, otherwise all those smart innovations like parachutes would be kinda pointless. But today I had just set up my camera to film a time-lapse of a water balloon in which I was going to poke a hole with a needle when it started snowing. So I ended up with a demonstration of things falling at different rates, namely snowflakes in the background and the contents of my water balloon in front.

MVI_0701

Exploding water balloon


The point I wanted to make though was a different one. I’ll have to repeat the experiment some other time, when a) I have someone to help me either film or poke the hole, so the main focus isn’t my hands, and b) when I’ve thought it through well enough to be well clear of the open doors of my winter garden. I like water a lot, and I’ve plenty of times joked about how I would like to flood my winter garden for nice experiments, but yeah. In reality I kinda like it to be dry… Anyway, here is the movie for you. Point of this post: Some experiments don’t work out exactly the way as planned. But they are still fun! :-)


Steam boat

A pop pop boat in action!

Following up on the steam-powered spinning top we talked about earlier, today we have a steam-powered pop pop boat.

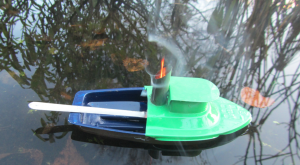
IMG_0432

My little steam boat out at sea

The mechanism is exactly the same as for the spinning top, except the boat is propelled forward rather than spinning around its own axis.

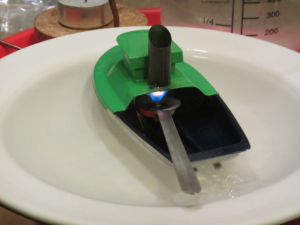
IMG_0446

Tiny candle on spoon heats up water tank that is connected to the tubes that come out at the stern of the boat, driving the boat forward.

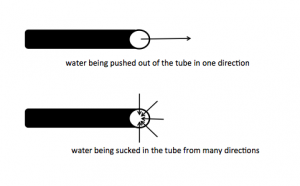
Since the water that is pressed out of the tube is being sucked back in one might wander why the boat is still driving forward rather than driving forward and then being pulled backwards when the water is pulled back up into the tube. Here is why:

poppopboat

Water coming out of the tube is pushed mainly backward, water sucked in is sucked in from many different directions. An analogy that someone told me about is that it is fairly easy to blow out a candle that is some distance away, whereas it is really really difficult (probably impossible) to suck it out from the same distance.

Watch the movie to see the boat drive around:

[vimeo 115379711]