Category Archives: hands-on activity (easy)

Surface tension and office supplies.

Lots of stuff an be made to float on water just because of surface tension.

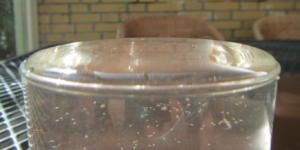
This morning, I was taking pictures of heaps of waters on coins. I was planning to follow up on that post with pictures of a dome of water on a full mug. So far so good.

IMG_6570

Surface tension preventing this over-full mug from overflowing.

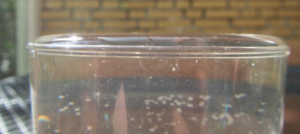
Then, I was planning on putting paper clips on top to show how surface tension would keep them afloat.

IMG_6569

More surface tension.

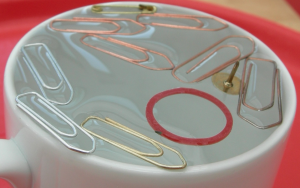
Except it DID NOT WORK. Maybe there was dish soap residue in the glass? Maybe I was too clumsy? I have no idea what was wrong. Anyway, I was on the phone with my mom later that day, and within half an hour I had the picture below in my inbox.

DSCN8540

Paper clips and other stuff floating on the surface of a mug filled with water. All because of surface tension.

I guess you can make almost anything float on the surface if you put your mind to it… ;-)

Surface tension – heaps of water.

The classical way of demonstrating surface tension.

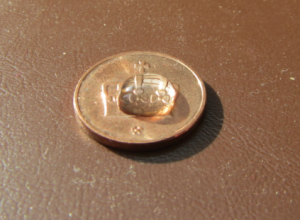
When talking about surface tension, the classical thing to do is to talk about the shape of drops of water.

IMG_6525

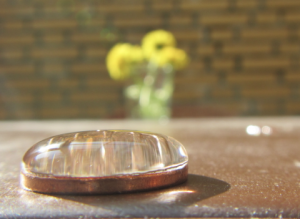
Water drop on a coin.

As seen before in this post, the drops of water act as lenses.

IMG_6528

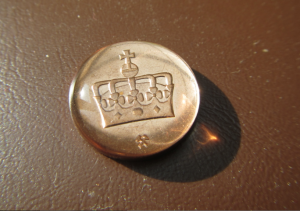
It is pretty amazing how much water you can pile on a single coin!IMG_6533

If you can’t see it from the photos, here’s a video. But rather than watching the video, you should try it yourself. It’s fun!

Vacuum pumps

What else did you think we tested them on?

Before using my parents’ vacuum pumps (“vacuum” being used in a loose sense of the word…) on water in this post, we obviously had to make sure they worked. And can you guess how you best test that?

Really. What else did you think we tested them on?

Happy Easter!

Bubble size depending on pressure

More playing with a vacuum pump.

In this post, we talked about how decreasing the pressure on water can make dissolved gases come out of solution. But what happens if you suddenly increase the pressure again?

This is the same movie as in the previous post, just to remind you of what we did: We decreased the pressure and then let it increase again quickly (you hear the ssssssssssss when the air is streaming back into the bottle).

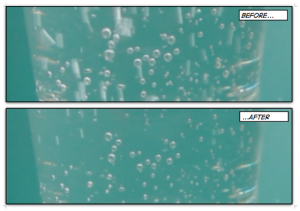
So to show it in one picture, what happens is basically this:

bubbles2

Bubbles under low pressure (top) and high pressure (bottom). Screen shots from the movie above.

The lower the pressure, the larger the bubbles. When you let the air back into the bottle, the bubbles collapse (or shrink, if you want to be less dramatic).

That reminds me that I really need to film a movie similar to the one below where one can clearly see how bubble size increases the closer the bubbles come to the surface.

Isn’t it awesome to realize that the more you film and write and think about adventures in oceanography and teaching, the more ideas you have of what you want to do next? :-)

Gases dissolved in water

A simple experiment to show that there are really gases dissolved in water.

Luckily, my parents like to play at least as much as I do. So when I got back from doing “real science” in Bergen the other day, they picked me up at the airport and showed me their latest toys: Vacuum pumps! [edit: Not really vacuum vacuum, but at least much lower than atmospheric pressure. And apparently those pumps are sold with the original purpose of re-sealing wine bottles]

Vacuum pumps are great to show that there are actually gases dissolved in water, because oftentimes that isn’t all that obvious. But when the pressure of the head space of a bottle is decreased, gases that were happily dissolved under atmospheric pressure start coming out of solution.

bubbles

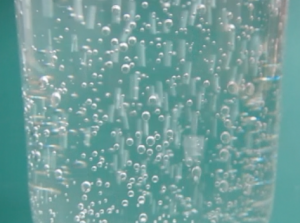
Gas being bubbled out of water by decreasing the pressure of the head space of the bottle.

Here is a comparison of normal tap water and sparkling water (sparkling water obviously containing much more dissolved CO2 than tap water, hence more bubbling).

The insulating properties of marshmallows

Ending hot-beverages-week in style.

So now we know how to cool down your tea by blowing on it and how to cool it down quickly (or not) by adding milk. So what if you wanted your hot chocolate to stay warm for as long as possible?

Yes! You should add marshmallows to prevent heat transfer both by evaporation and conduction.

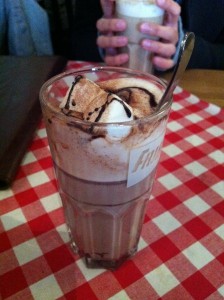
2011-06-24 17.47.00

Elsa, I’m pretty sure it was you I had that hot chocolate with back in 2011. Recognize your hands?

Actually, no matter what temperature you like your chocolate best at – you should always add marshmallows! :-)

For those of you who want to read more about marshmallows and ocean mixing, check out a very nice post here. For those others getting worried that I’ll only talk about tea until the end of time – nope! Tea week is now officially over and we’ll be back with “real oceanography content” pretty soon!

Tea and milk

More physics applications  connected to tea.

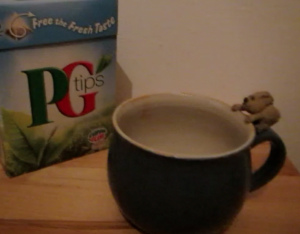
After the frustrations of taking pictures of steam in my last post, I decided that I could use the very same cute mug to show other stuff, too. I know it has been done over and over again, but we have new students every year, don’t we, so someone has to keep telling the old stories, right?

So. When should you pour the milk into your tea? Right away or a little later?

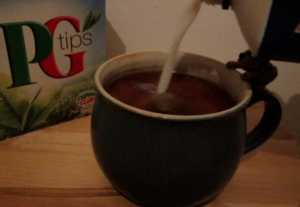
MVI_6063_2

Milk and tea

The answer, as you know, is “it depends”.

Do you want your tea as hot as possible? Then put the milk in right away and it won’t cool the tea down as much. Want the milk to cool down the tea as much as possible? Then wait for as long as you can before pouring it in.

The explanation behind this is of course that the cooling due to evaporation is happening faster the larger the temperature difference between the tea and the surrounding air. If you let it sit without milk, due to the larger temperature difference it cools down faster than if you poured in the cold milk, thus cooling it closer to room temperature, and then waited.

And there are even occasions when you would you put milk into the cup before adding the tea: If you have delicate china and don’t want to risk ruining it by pouring in almost boiling tea. Plus allegedly that way the milk doesn’t scald and form those weird flakes?

Blowing on hot tea

Why would it be interesting to talk about this in a science class?

As a kid I used to wonder why blowing on a hot soup or beverage should be a good idea. Wouldn’t my breath be warmer than room temperature, and hence shouldn’t the soup get warmer instead of colder?

Then I didn’t think about this question for 25 or so years (scary, I know), and then today, when I was blowing on my tea, I realized that by now I knew why I was doing it, even though I had never related my science knowledge to the everyday act of blowing on hot tea.

So why do we blow on hot tea?

The main reason is that at the tea’s surface, evaporation takes place. We can oftentimes see the steam coming off. The molecules that left the cup condense in a fog over the cup. If they stay in place, evaporation will slow. If we blow them away, the air is replaced with colder surrounding air, and evaporation continues.

Another reason is that as we blow on the surface, we create ripples. Hence the surface area is larger than before and more exchange can happen over a larger area. But I would guess that that effect is much smaller than the first one.

The main reason I wanted to write this blog post was because I could see the picture I wanted to show before my eyes: This sweet cup with the rabbit on the handle and the steam rising from it. Turns out it is really difficult to take pictures of that! At least with my camera and my lack of patience. And believe me – I tried for a full 15 minutes with different light sources at different angles and everything! So for now all you get to see is the video below where it is slightly better visible than in a still picture – and please try to imagine the steam! And I will be back once I’ve figured out how to document it properly!

An overturning experiment (part 3)

By popular demand: A step-by-step description of the overturning experiment discussed here and here.

I wrote this description a while ago and can’t be bothered to transfer it into the blog format, so please go and find a .pdf here. This .pdf addresses young children in the first part, and grown-ups in the second part.

Have fun and if you use this in school or with your own kid, please let me know how it went! I love to hear from my readers! :-)


An overturning experiment (part 2)

How to adapt the same experiment to different levels of prior knowledge.

In this post, I presented an experiment that I have run in a primary school, with high-school pupils, in a Bachelor-level course and in a Master-level course. The experiment itself was run identically in all cases. However, the introductions, explanations and discussions about it obviously differed.

For example, in the primary school, I introduced this experiment by showing pictures of lions and penguins and other animals that the pupils knew live in warm or cold climates, and we talked about where those animals live. In the end this aimed at how temperatures are a lot colder at the poles than at the equator. This is the differential heating we need for this experiment to work. While this is something that I felt the need to talk about with the primary school kids, this can be assumed as a given with older students (or at least that is the assumption that I made).

With the university-level courses, one of the points that I made sure came up during the discussion are the limitations of this model. For example that we apply both heating and cooling over the full depth of the water column. How realistic is that? Or the fact that we heat at one end and cool at the other, rather than cooling on either end and heating in the middle?

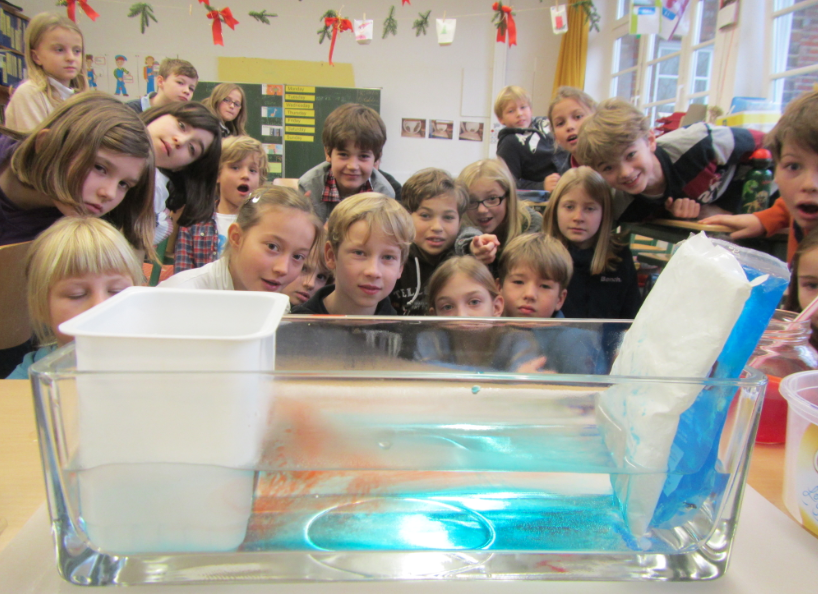
With the university-level courses, we could also discuss other features that we could see during the experiment. Remember this image, for example?
IMG_3214

The thermal conveyor belt experiment.

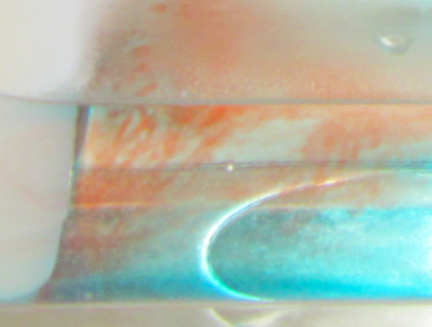
Let me zoom in on something.
IMG_3214_2

Curious features in the thermal conveyor experiment. Do you know what this is about?

Do you see these weird red filaments? Do you think they are a realistic part of the thermal circulation if it was scaled up to a global scale?

Of course not. What we see here is salt fingering (oh, and did you guys notice that a diagram of how salt fingering works is displayed at the very top left of my header? I wasn’t exaggerating when I said that it was my favorite process ever!). So basically, this is a process that is caused by the different diffusivities of heat and of the red dye. And while it is pretty large scale in our small tank, you cannot scale it up just like that when talking about the real ocean. And it is also really difficult to get rid of salt fingers for this experiment, in fact I haven’t yet managed. But I am open to suggestions! :-)

Another point that I would talk about with university-level students that I would probably not bring up with primary school kids (- although, why not if I had more time than just those 45 minutes per class?) is that ocean circulation is driven by more than just differential heating. Even when just considering the density-driven circulation, that is additionally influenced by changes in salinity. Put that together with wind-driven circulation and we are starting to talk about a whole new level of complicated…

But anyway. My point is that even primary school kids can benefit from doing this kind of experiments, even if what they take away from the experiments is not exactly the same as what older students would take away.

One of the main messages the primary school kids got seems to have been that you need to take curd cheese beakers for your warming element (look here for some reports (in german)). Not exactly my main message, but at least they were very observant of how the experimental setup was designed ;-)