Tag Archives: melting ice cubes experiment

Melting ice cubes – what contexts to use this experiment in (post 4/4)

What contexts can the “ice cubes melting in fresh water and in salt water” experiment be used in?

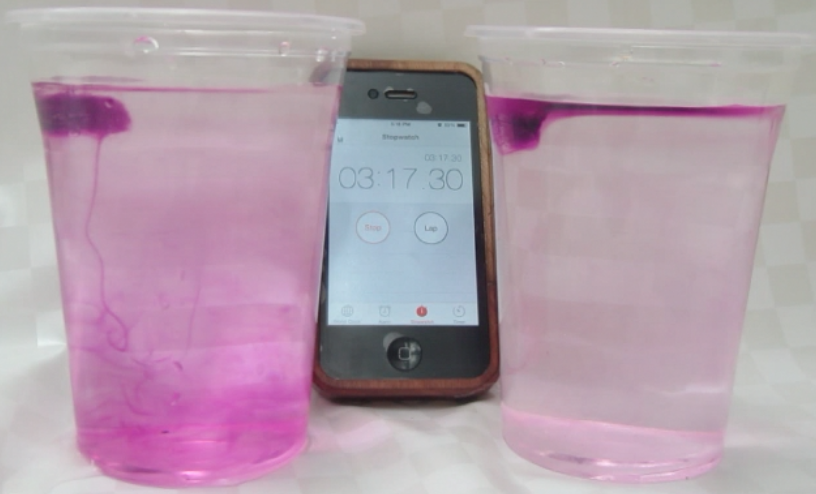
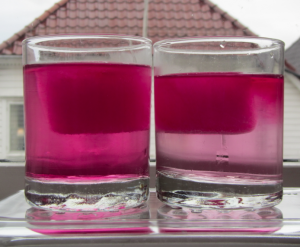
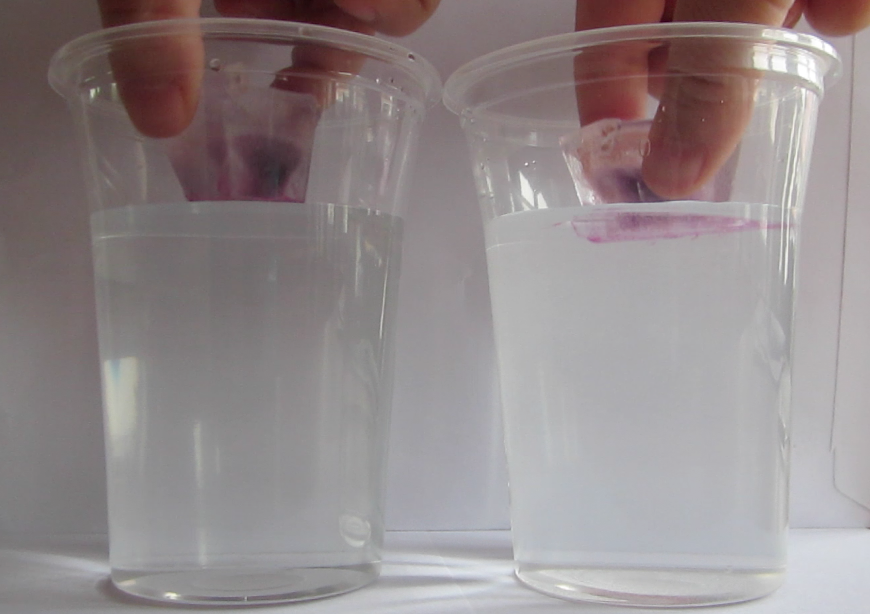
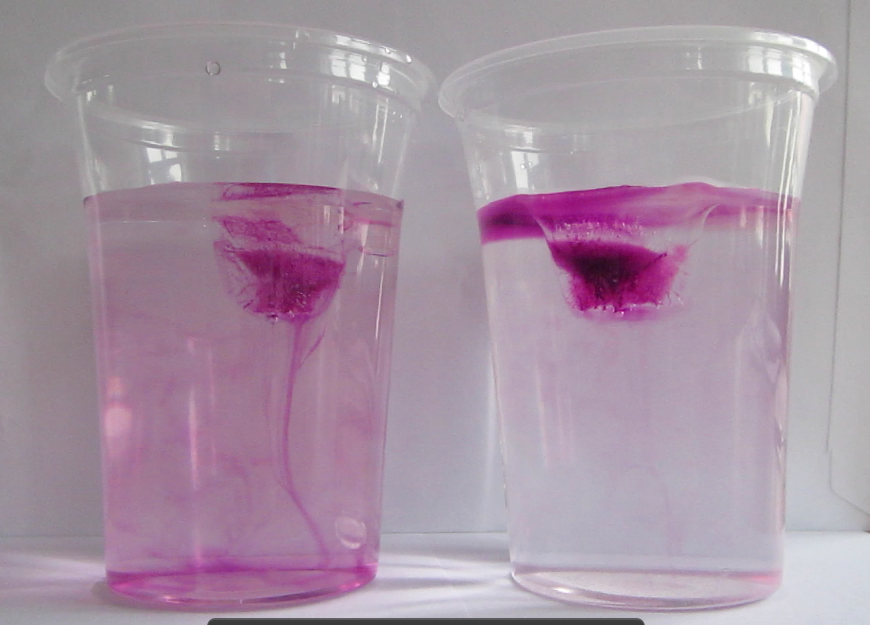
As you might have noticed, I really like the “ice cubes melting in fresh water and in salt water” experiment. Initially, I had only three posts planned on the topic (post 1 and 2 showing different variation of the experiment and post 3 discussing different didactical approaches to the experiment), but here we are again. Since I like this experiment so much – here are suggested contexts in which to use the experiment.

1) The scientific method.

No matter what introductory class you teach, at some point you will talk about the scientific method. And what is better than talking about the scientific method? Correct, having students experience the scientific method! This experiment is really well suited for that, because you can be fairly sure that most students will come up with a hypothesis that their experiment will not support.

2) Laboratory protocols.

For courses that include a laboratory component (like mine does), at some point you will have to talk about how to document your experiments. Again, since the hypothesis will typically not be supported by the results of the experiment, this is a great example on how important it is to write down the hypothesis and how you are planning on testing it, and then noting all the observations, not only the one that are along the lines of what you suspected. Also recording the little errors that occur along the way (“someone swapped the cups with the ice cubes, so we are not sure any more which one is which”) is very important, and if you have a class doing this experiment, you can be sure that at some point someone will make a mistake, not write it down and then be very confused afterwards. Great teaching and learning opportunity!

3) Different teaching methods.

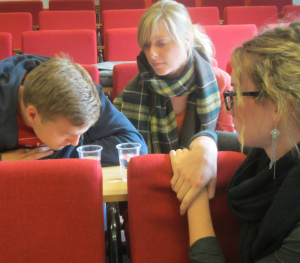
If you are teaching about didactical models, this experiment is very well suited for this, too (see my post 3 on the topic and the Lawrence Hall of Science resource). Just have different people work on the experiment using the different methods and then discuss what and especially how people learned using those methods. The Lawrence Hall of Science resource mentions a fourth method (and I didn’t want to give the impression that I am recommending it, therefore I omitted it in my post 3) – the “read and answer” method, where students read about density, stratification and density-driven circulation and then answer questions like “what is density?” or “what is thermohaline circulation”. Again, not recommended for your oceanography class, but adding this option might be very relevant if you are teaching students or educators how to (not) teach.

4) Oceanography and climate

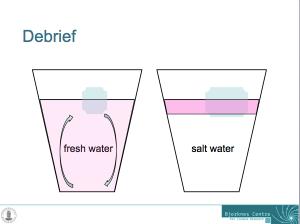
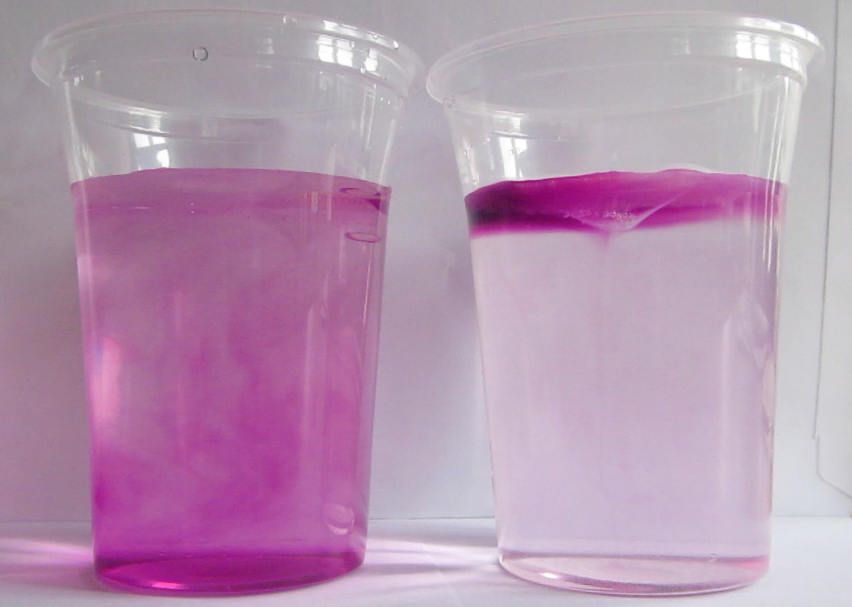
Yes, this is probably the main reason why you are doing this experiment in class. Now you can talk about salt in the ocean. About density-driven currents (and are there other things that drive currents apart from density differences?). About the importance of ocean currents, heat transport, the global overturning circulation, fresh water and many more.

Can you think of more contexts for this great experiment? Let me know! (Depending on your browser, you can comment on this post in the “leave a reply” box below or, if you don’t see that box, by clicking the speech bubble next to the title of the post.)

Melting ice cubes – one experiment, many ways (post 3/4)

Different didactical settings in which the “ice cubes melting in fresh and salt water” experiment can be used.

In part 1 and 2 of this series, I showed two different ways of using the “ice cubes melting in fresh water and salt water” experiment in lectures. Today I want to back up a little bit and discuss reasons for choosing one over the other version in different contexts.

Depending on the purpose, there are several ways of framing this experiment. This is very nicely discussed in materials from the Lawrence Hall of Science (link here), too, even though my discussion is a little different from theirs.

1) A demonstration.

If you want to show this experiment rather than having students conduct it themselves, using colored ice cubes is the way to go (see experiment here). The dye focuses the observer’s attention on the melt water and makes it much easier to observe the experiment from a distance, on a screen or via a projector. Dying the ice cubes makes understanding much easier, but it also diminishes the feeling of exploration a lot – there is no mystery involved any more.

Demonstration of melting ice cubes. The melt water is clearly marked by the dye. This makes it a good demonstration, but diminishes the satisfying feeling of discovery by the observer, because the processes are clearly visible right away rather than having to be explored.

2) A structured activity.

Students are handed (non-colored) ice cubes, cups with salt water and fresh water and are asked to make a prediction about which of the ice cubes is going to melt faster. Students test their hypothesis, find the results of the experiment in support with it or not, and we discuss. This is how I usually use this experiment in class (see discussion here).

The advantage of using this approach is that students have clear instructions that they can easily follow. Depending on how observant the group is, instructions can be very detailed (“Start the stop watch when you put the ice cubes in the water. Write down the time when the first ice cube has melted completely, and which of the ice cubes it was. Write down the time when the second ice cube has melted completely. …”) or more open (“observe the ice cubes melting”).

3) A problem-solving exercise.

In this case, students are given the materials, but they are not told which of the cups contains fresh or salt water (and they are instructed not to taste). Now students are asked to design an experiment to figure out which cup contains what.

This is a very nice exercise and students learn a lot from designing the experiment themselves. However, this also takes a very long time, more than I can usually afford to spend on experiments in class. After all, I am doing at least one hands-on activity in each of the lectures, but am still covering the same content from the text book as previous lecturers who used their 180 minutes per week just lecturing. And I am considering completely flipping my class room, but I am not there yet.

4) An open-ended investigation.

In this case, students are handed the materials, knowing which cup contains fresh and salt water. But instead of being asked a specific question, they are told to use the materials to learn as much as they can about salt water, fresh water, temperature and density.

As with the problem-solving exercise, this is a very time-intensive undertaking that does not seem feasible in the framework we are operating in. Also it is hard to predict what kind of experiments the students will come up with, and if they will learn what you want them to learn. On the other hand, students typically learn much more because they are free to explore and not bound by a specific instruction from you.

Ice cubes melting in fresh water and salt water (post 2/4)

The “ice cubes melting in fresh water and salt water” experiment the way I usually use it in class.

— Edit — For an updated description of this experiment please go to this page! — Edit —

You might remember the “ice cubes melting in fresh water and salt water experiment” from a couple of days ago. Today we are going to talk about it again, but with a little twist on it. See, when I showed you the experiment the other day, I used dyed ice cubes, so the melt water was colored and it was easy to track. Doing that, I focussed you attention on the melt water. This is not how we do it in class.

In class, students get clear ice cubes, and before they put them in the cups, I ask them to make a prediction. Which of the ice cubes will melt faster, the one in fresh water or the one in salt water? Everybody has to make a prediction. And having run this experiment with 100+ people by now, I can tell you: Approximately 5% predict the right outcome. And that is not 5% of the general population [edit: this used to say “5% of the general circulation”!], that is 5% of people who were either attending my class or a workshop on oceanography with me, who were attending a workshop on teaching oceanography, or my nerdy friends. So don’t be sad if you get it wrong – you are in good company.

So now that everybody has made a prediction, the ice cubes go into the cups with fresh water and salt water. In the beginning, the excitement is usually moderate. After all, you are staring at a plastic cup with an ice cube floating in it. But then, after the first minute or so, there is no denying any more: The ice cubes have started melting. And one of them is melting a lot faster than the other one. The one in fresh water is melting a lot faster than the one in salt water! How can this be? At this point, students typically start secretly (because remember – no tasting in the lab!) tasting the water in the cups to make sure that they didn’t actually swap the cups. After all, it should be the ice cube in the salt water melting faster, shouldn’t it?

But no, it is true: The ice cube in fresh water is melting faster than the one in salt water. But how??? Enter food coloring.

MVI_9248

Dyed ice cubes melting in fresh water (left) and salt water (right). Edited on Sept. 14th, 2014. Since this seems to be the most popular post on this blog I thought people might appreciate a better picture… And if you are really curious go check out the newer posts on the topic, a lot has happened over the last year!

Glasses filled with fresh water and salt water, and one ice cube in each. Drops of food dye have been added on the ice cubes to visualize the circulation. The left glass is homogeneously pink, whereas the right glass has a pink layer on top and only little pink below that layer.

If at this stage one or two drops of food coloring are dripped on the ice cubes, this dye helps visualize the circulation similarly to the dyed melt water I showed you the other day [which, incidentally, one of the student groups yesterday observed without food dye or me prompting. Great job!].

And now the whole thing makes much more sense: In the fresh water case, melt water is denser than the water in the cup and sinks to the bottom of the cup. As it is sinking away from the ice cube, it is being replaced with warmer water from the cup. Hence the ice cube is always floating in relatively warm water which helps it melt.

Sketch showing the explanation for why the ice cubes melt faster in fresh water than in salt water.

In salt water, on the other hand, the melt water forms a layer on top of the water in the cup. Even though it is very cold, it is still less dense than the salty water in the cup. The ice cube is more and more surrounded by its own melt water and not by the warmer water in the cup as was the ice cube in the fresh water. Therefore, the ice cube in the fresh water is melting faster than the one in salt water!

The experiment run in the lecture theater.

This experiment is easy to run in all kinds of settings. However it helps if the student groups are spaced out enough so that the instructor can reach all of the groups and listen in on the conversations to get a feel of how close to a solution the students are, or chat to the students to help them figure it out.

There will be two follow-up posts to this one: One about different didactical settings, and one different contexts this experiment can be used in.

Ice cubes melting in salt water and freshwater (post 1/4)

Experiment to visualize the effects of density differences on ocean circulation.

This is the first post in a series on one of my favorite in-class experiments; I have so much to say about it that we’ll have to break it up into several posts.

Post 1 (this post) will present one setup of the experiment, but no explanations yet.

Post 2 will present how I use this experiment in GEOF130, including explanations.

Post 3 will discuss how this experiment can be used in many different setups  and

Post 4 will discuss different purposes this experiment can be used in (seriously – you can use it for anything! almost…).

So, let’s get to the experiment. First, ice cubes are inserted into two cups, one filled with fresh water at room temperature, the other one filled with salt water at room temperature. In this case, the ice cubes are dyed with food coloring and you will quickly see why:

Ice cubes are added to cups filled with water at room temperature: fresh water on the left, salt water on the right.

As the ice cubes start to melt, we can see the dyed melt water behaving very differently in fresh water and salt water. In fresh water, it quickly sinks to the bottom of the cup, whereas in salt water it forms a layer at the surface.

Melt water from the ice cube is sinking towards the bottom in the cup containing fresh water (on the left), but it is staying near the surface in the cup containing salt water (on the right).

After approximately 10 minutes, the ice cube in freshwater has melted completely, whereas in salt water there are still remains of the ice cube.

After 10 minutes, the ice cube in the fresh water cup has melted completely (left), whereas the one in the salt water cup is not gone completely yet (right).

Why should one of the ice cubes melt so much faster than the other one, even though both cups contained water at the same (room) temperature? Many of you will know the answer to this, and others will be able to deduce it from the different colors of the water in the cups, but the rest of you will have to wait for an explanation until the next post on this topic – we will be doing this experiment in class on Tuesday and I can’t spoil the fun for the students by posting the answer today already! But if you want to watch a movie of the whole experiment: Here it is!

(Yes, this really is how I spend my rainy Sunday mornings, and I love it!)

– I first saw this experiment at the 2012 Ocean Sciences meeting when Bob Chen of COSEE introduced it in a workshop “understanding how people learn”. COSEE has several instructions for this experiment online, for example here and here. My take on it in the “on the Cutting Edge – Professional Development for Geoscience Faculty” collection here.