Instruction for a very simple DIY tidal model.
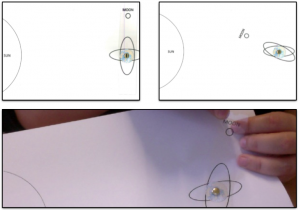
Today, we built a very simple DIY tidal model in class. It consists of two sets of tidal bulges: One locked in place relative to the sun on the piece of cardboard that we use as the base, the other one with its very own little moon on a transparency mounted on top. Both sets of tidal bulges are held in place by a split pin and a model earth. Now the sun and moon can be arranged all in one line, or at a 90 degree angle towards each other, or anything in between, and the tidal bulges can be mentally added up. If all goes well, this helps students understand the reasons for the existence of spring and neap tides (and from the feedback I’m getting, everything did go well).

The tidal model. Upper plots: Different constellations of the earth-moon-sun system. Lower plot: the model “in action”.
It is also a great way of introducing the difficulties of tidal prediction on earth. In the model, the whole earth is covered with water, so tidal bulges are always directly “underneath” the sun and the moon, respectively. On Earth, this is hindered by the existence of continents and by friction, among others. Since the little earth in the DIY model has continents on it, this really helps with the discussion of delay in tides, tides being restricted to ocean basins, amphidromic points, declination of the earth etc.. And last not least – these are only two tidal components out of the 56 or so that tidal models use these days. As I said – a _very_ _simple_ DIY tidal model!
Find a printable pdf here (and now the solar tidal bulge is a lot smaller than the one in the picture above for a more realistic model)

