Tag Archives: CMM31

Measuring density

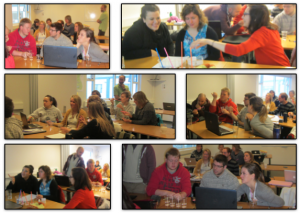
Students build a device to measure density.

As described in this post, I like to have students build “instruments” to measure the most oceanographic properties (temperature, salinity and density). I find that they appreciate oceanographic data much more once they have first-hand experience with how difficult it is to design instruments and make sense of the readings.

Students designing a hydrometer.

Measuring (relative) density is by no means easy. There are a lot of conceptual things to understand when developing hydrometers – one question that comes up every time is what to mark. The first idea tends be to mark displacement on the cup – either a zero-mark without the hydrometer in the cup and then the water level once the hydrometer is floating in the water, or the level of the bottom of the hydrometer. Which makes it fairly hard to measure other samples than the ones the instrument was initially calibrated with.

The student group working on the task was faced with – and overcame – many difficulties. The straw was top-heavy, so in order to float more or less vertically, it had to be cut down. They had four different test solutions, but they did not know the densities of those solutions, only their salinities, hence they developed their own density scale relative to which they measured the density of their solution. Pretty ingenious!

Tasting sea water reloaded

Doing the “tasting sea water” activity again with a different group of students.

A very good introduction to the concept of salinity is the “tasting sea water” activity. Last time I ran that activity, students were very quick to correctly connect the samples with the correct sampling locations without much discussion going on. This time round, though, there was a lot of discussion. Students quickly sorted samples in order of increasing salinity, but there was no agreement to be found on whether the Baltic or the Arctic should be fresher. Since I only pointed to a location and didn’t specify the depth at which the sample had been taken, some students argued that the Arctic was very fresh at the very top, whereas the Baltic was brackish. Others said that the Baltic was a lot fresher than any oceanic location.

salt-tasting

Students tasting four different samples of “sea water” with salinities corresponding to Arctic sea ice, the Baltic sea, the open ocean and the Mediterranean. Samples have to be associated with locations on a map.

In another group, there was a big discussion going on about how in marginal seas, evaporation or precipitation can dominate.

It is always great to see how much you can discuss and learn from an activity as simple as this one!

Introducing voting cards (post 3/3)

How do you introduce voting cards as a new method in a way that minimizes student resistance?

As all new methods, voting cards (see post on the method here, and on what kind of questions to ask here) first seem scary. After all, students don’t know what will happen if they happen to chose the wrong answer. Will they be called out on it by the instructor? Will everybody point at them and laugh? And even if they chose the correct answer, will the instructor make them explain why they chose that answer?

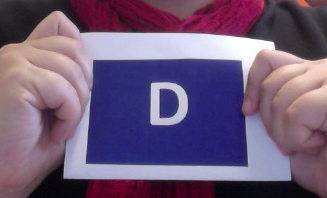
Some of my students in a staged photo. They are showing their favorite color to demonstrate the method for you. Thanks for posing for me!

When I introduce voting cards to a new group of students, I make sure to talk through all issues before actually using the cards. It is important to reassure the students that wrong answers will not be pointed out publicly, for example. It helps to use a very simple question that does not have right or wrong answers (“Which of these four colors is your favorite? Show me the one you like best!”) for the very first vote, so students get to experience the process without there being anything at stake. While showing their favorite color, they see that they cannot actually see their neighbors’ choices without making it very obvious (at least not in the classical lecture theatre setting that we are in, but even in other settings it is difficult). Hence their peers cannot actually see their own choice, either, without again making it very obvious.

In the picture above, students are very happy to show their votes to everybody – after all, there is no wrong answer and I asked them to pose. But this is what it typically looks like after students have gotten used to the method. During the first classes, voting usually looks more like this: Very close to the chest, held with both hands, shielding it from the neighbors.

During the first classes, voting usually looks like pictured above: Very close to the chest, held with both hands, shielding it from the neighbors.

Still there is probably going to be some resistance about committing to one answer because, after all, the instructor will still see it. But in my experience this can be overcome when the reasons for choosing the method are made sufficiently clear – that it benefits them to commit to one answer, because making thought processes explicit helps their learning. That it helps me, because I get a better feel of whether everybody understood a concept or only just the two vocal students, and whether I need to go into more detail with a concept or not. That it is a great basis for discussions.

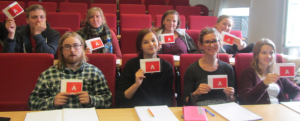
Photo of an actual vote. In fact of the first vote after I asked them to pose for a staged photo (the one shown above). This question was clearly too easy!

After a couple of classes, voting cards are not even needed any more (although it can’t hurt to hand them out – it feels like less pressure if you could fall back on holding something up rather than speaking in public); discussion starts without having to be initiated through a voting process and subsequent questions for clarification. Also if they chose to still vote, students get much more daring in the way they hold up the cards – they stop caring about whether their peers can see what they voted for. So all in all a great technique to engage students.

How to pose questions for voting card concept tests (post 2/3)

Different ways of posing questions for concept tests are being presented here

Concept tests using voting cards have been presented in this post. Here, I want to talk about different types of questions that one could imagine using for this method.

1) Classical multiple choice

In the classical multiple choice version, for each question four different answers are given, only one of which is correct. This is the tried and tested method that is often pretty boring.
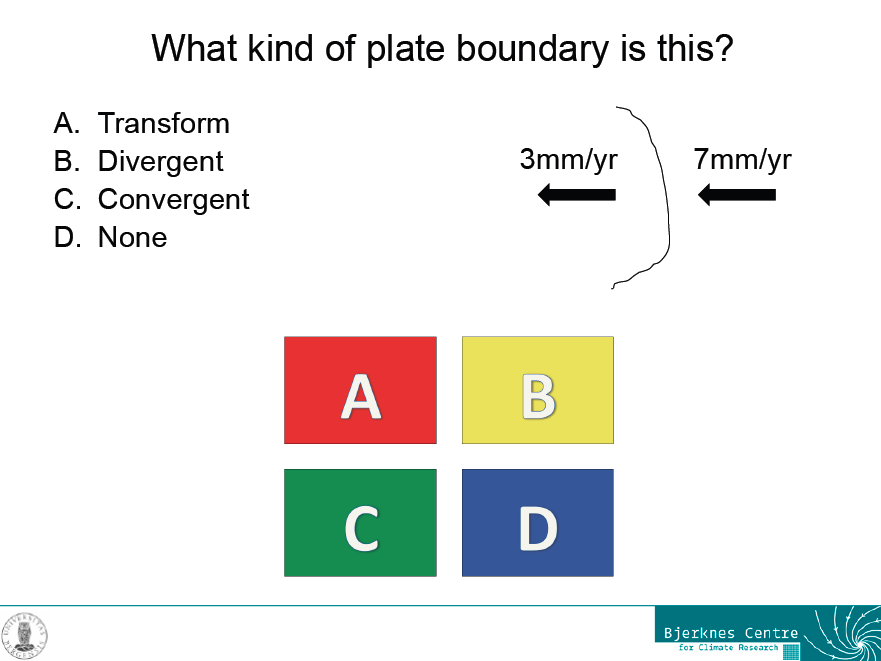
An example slide for a question with one correct answer

However, even this kind of question can lead to good discussions, for example when it is introducing a new concept rather than just testing an old one. In this case, we had talked about different kinds of plate boundaries during the lecture, but not about the frame of reference in which the movement of plates is described. So what seemed to be a really confusing question at first was used to initiate a discussion that went into a lot more depth than either the textbook or the lecture, simply because students kept asking questions.

2) Several correct answers

A twist on the classical multiple choice is a question for which more than one correct answer are given without explicitly mentioning that fact in the question. In a way, this is tricking the students a bit, because they are used to there being only one correct answer. For that reason they are used to not even reading all the answers if they have come across one that they know is correct. Giving several correct answers is a good way of initiating a discussion in class if different people chose different answers and are sure that their answers are correct. Students who have already gained some experience with the method often have the confidence to speak up during the “voting” and say they think that more than one answer is correct.

3) No correct answer

This is a bit mean, I know. But again, the point of doing these concept tests is not that the students name one correct answer, but that they have thought about a concept enough to be able to answer questions about the topic correctly, and sometimes that includes having the confidence to say that all answers are wrong. And it seems to be very satisfying to students when they can argue that none of the answers that the instructor suggested were correct! Even better when they can propose a correct answer themselves.

4) Problems that aren’t well posed

This is my favorite type of question that usually leads to the best discussions. Not only do students have to figure out that the question isn’t well posed, but additionally we can now discuss which information is missing in order to answer the question. Then we can answer the questions for different sets of variables.
ABCD_lake

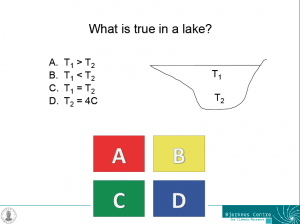
One example slide for a problem that isn’t well posed – each of the answers could be correct under certain conditions, but we do not have enough information to answer the question.

For example for the question in the figure above, each of the answers could be correct during certain times of the year. During summer, the temperature near the surface is likely to be higher than that near the bottom of the lake (A). During winter, the opposite is likely the case (B). During short times of the year it is even possible that the temperature of the lake is homogeneous (C). And, since the density maximum of fresh water occurs at 4degC, the bottom temperature of a lake is often, but not inevitably, 4degC (D). If students can discuss this, chances are pretty high that they have understood the density maximum in freshwater and its influence on the temperature stratification in lakes.

5) Answers that are correct but don’t match the question.

This is a tricky one. If the answers are correct in themselves but don’t match the question, it sometimes takes a lot of discussing until everybody agrees that it doesn’t matter how correct a statement is in itself; if it isn’t addressing the point in question, it is not a valid answer. This can now be used to find valid answers to the question, or valid questions to the provided answers, or both.

This is post no 2 in a series of 3. Post no 1 introduced the method to the readers of this blog, post no 3 is about how to introduce the methods to the students you are working with.

A, B, C or D?

Voting cards. A low-tech concept test tool, enhancing student engagement and participation. (Post 1/3)

Voting cards are a tool that I learned about from Al Trujillo at the workshop “teaching oceanography” in San Francisco in 2013. Basically, voting cards are a low-tech clicker version: A sheet of paper is divided into four quarters, each quarter in a different color and marked with big letters A, B, C and D (pdf here). The sheet is folded such that only one quarter is visible at a time.

A question is posed and four answers are suggested. The students are now asked to vote by holding up the folded sheet close to their chest so that the instructor sees which of the answers they chose, whereas their peers don’t.

Voting cards are sheets of paper with four different colors for the four quarters, each marked with a big A, B, C or D.

This method is great because it forces each individual student to decide on an answer instead of just trying to be as invisible as possible and hope that the instructor will not address them individually. Considering different possible answers and deciding on which one seems most plausible is important step in the learning process. Even if a student chose a wrong answer, remembering the correct answer will be easier if they learn it in the context of having made a commitment to one answer which then turns out wrong, rather than having not considered the different options in enough detail to decide on one. “I thought A made sense because of X. But then we discussed it and it turns out that because of Y and Z, C is the correct answer” is so much more memorable than “I didn’t care and it turned out it was D”. Since the answers are only visible to the instructor and not to the other students, the barrier of voting is a lot lower because potentially embarrassing situations are being avoided. It is, however, also much harder to just observe the peers’ votes and then follow the majority vote.

In addition to helping students learn, this method is also beneficial to the instructor. The instructor sees the distribution of answers with one glance and rather than guessing how many students actually understand what I was talking about, I can now make an informed choice of the next step. Should I have students discuss with their neighbor to find an agreement and then ask the class to vote again? Elaborate more on the concept before asking students to discuss among themselves? Ask individual students to explain why they chose the answer they chose? Knowing how much students understood is very helpful in choosing the right method moving forward with your teaching. And even without staring directly at specific students, it is easy to observe from the corner of the eye whether students have trouble deciding for an answer or whether they make a quick decision and stick to it.

I have been using this method in this year’s GEOF130 lecture, and in a recent Continue. Stop. Start. feedback that I asked my students to fill in, every single student (who handed back the form, but that’s a topic for a different post) mentioned how the “A, B, C, D questions” or “quizzes” (which I both interpret as meaning the voting cards) help them learn and that I should definitely continue using them.

This post is number 1 of 3 on the topic of voting cards. Post no 2 will give examples of different types questions/answers that work well with this methods (for example always having only one correct answer might not be the most efficient strategy to foster discussions), and how to use them to maximize benefit for your teaching. Post no 3 will focus on introducing voting cards as a new method with least resistance by focussing on benefits to student learning and reassuring them on how the instructor will handle the information gained from seeing everybody vote.