Fantastic wave and current watching at Piel Island

We saw Piel Island with a very cool castle ruin across the bay when visiting the South Walney Nature Reserve the other day,  and were intrigued by it. Depending on the tides, you can drive over by car, walk, or take a ferry, which is what we did.

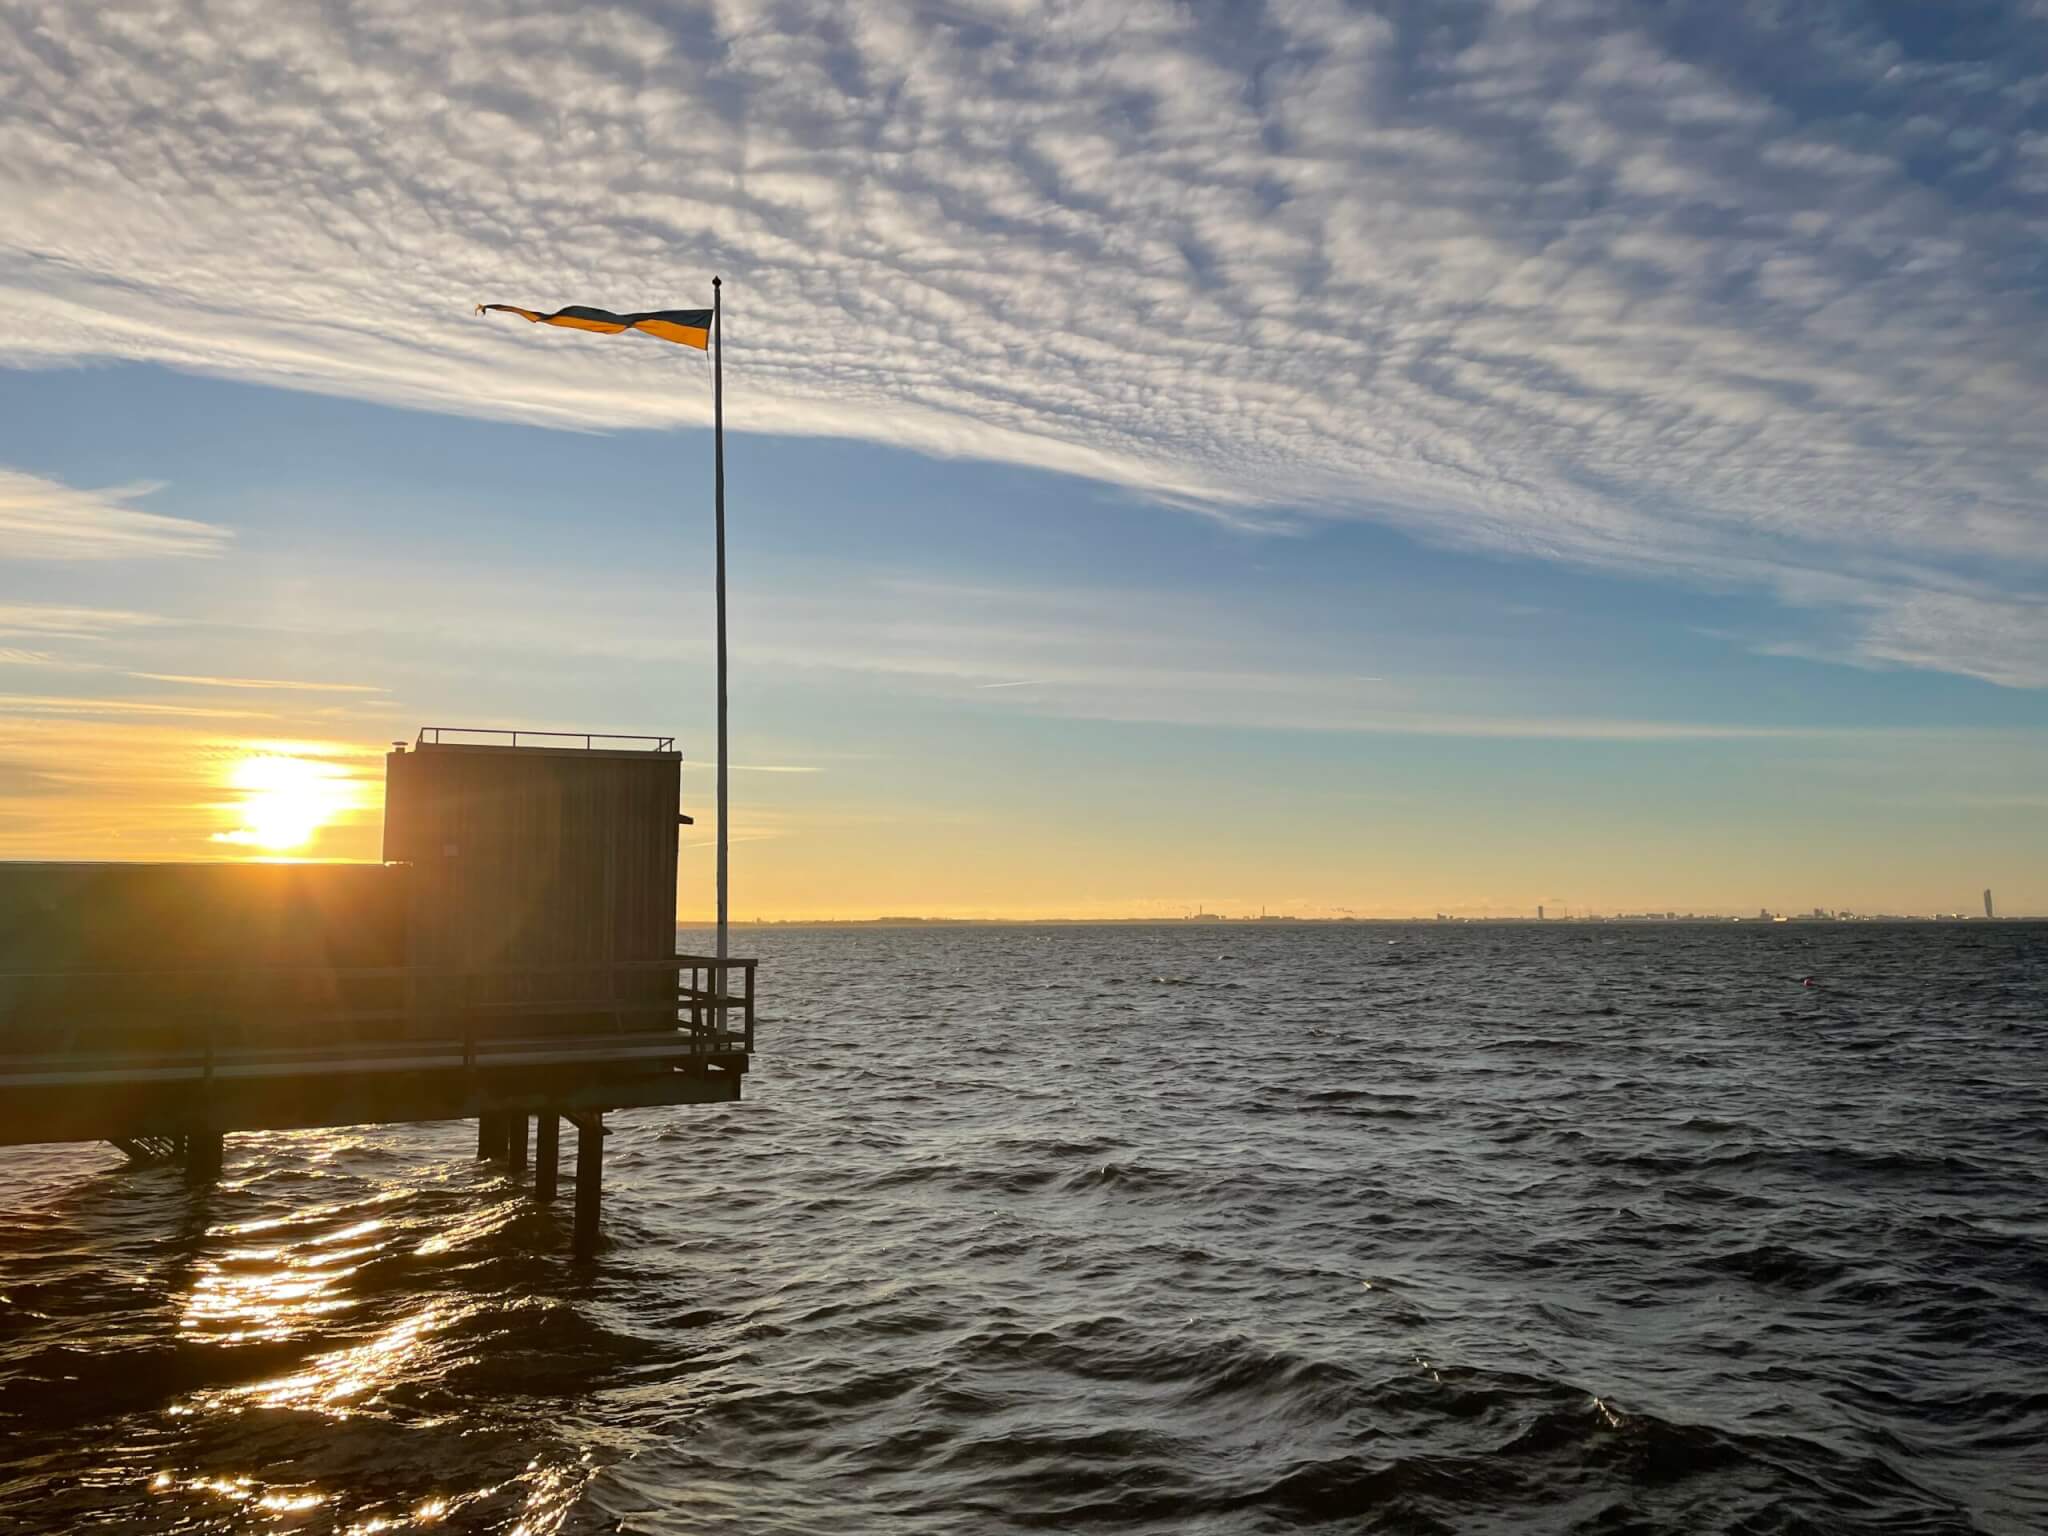
Arriving at the spot where the ferry was supposed to leave, we were greeted with this beautiful sight: A pier going down into the water, creating beautiful wave pattern in the strong incoming tide! We see a hydraulic jump similar to the one we saw on Walney Island, except that this one is even cooler: It happens in the area where the pier is just below the water surface, but a strong current goes underneath the pier on the land side as soon as it is above water level.

Above, you see the current going left-to-right, creating a lot of turbulence where water comes out from underneath the pier (see those eddies where the water looks as if it was boiling?). You also see the waves hitting the pier on the left side, and then standing waves towards the right of the pier, locked in place because they are propagating upstream with the current’s exact velocity, thus staying in place (aka “standing”).

This is super fascinating! To me, anyway ;-)

Once on Piel Island, there is a lot of really cool wave watching to be done, too.

Below, you see waves reaching the island and “wrapping around it” — i.e. being refracted towards regions of lower velocities, which means that they will be bent towards the shore, no matter which direction they originally came from.

You can observe this for quite a big part of the island as you walk around it! The original wave direction is the one seen in the bottom left, all the rest of the wave field has been refracted by the change in water depth!

But obviously there is a limit to how long you can play this game. Below, you still see waves wrapping around the island, but they aren’t reaching the shore more or less parallel to it.

But even just watching all these crests break, one after the other, along the shore looks pretty cool!

But, obviously, if waves get wrapped around an island, but not completely, there must be areas where wave fields going around either side of the island meet up at an angle to each other. Like here:

And once again, this time moving:

And another very good spot to see this kind of pattern is a little headland like below:

Can you spot the distinct checkerboard pattern of the waves, and see how they break where a crest meets another crest?

I can watch these kind of things forever without getting tired of it!

And once more, as a short movie, because waves are even more awesome when they are moving:

Or waves more generally, especially breaking waves.

How beautiful is this?

I can really watch waves for hours without getting tired of it.

But anyway, walking further around the island, here is a spot with fewer waves: Here we are in the lee of the island, the area that is sheltered from the wind by the island itself.

Oh, and this is the ferry that got us over to the island. As you might notice below, the current has turned and is now going out — unfortunately I didn’t take another video or even good picture! But you see the edge of the jetty in the lower right, and the current downstream of the obstacle with a very different surface texture than the surrounding water. And then there is always next time… ;-)

On our way back home, we stopped for scones and coffee (sorry, no tea) and had the amazing views you see below. These channels don’t look dangerous by themselves when they are empty, but thinking back to how quickly the tide comes in around here they don’t seem as harmless any more, do they?

But oh so pretty! :-)

Tidal bore in Arnside

Does that warning sign above (that I showed as a teaser in yesterday’s post on wave watching in and around Arnside) make you as curious as it made me?

Usually, water rises for approximately 6 hours until high tide is reached, and then falls again for another approximately 6 hours until low tide is reached. A tidal bore, however, is an incoming tide that behaves differently from what we typically see. In a tidal bore, rather than slowly rising, the leading edge of the tide comes as one wave shortly before high tide, so the tide raises extremely quickly. (SO OF COURSE I HAD TO SEE IT!!!!!!!!)

Because this can get very dangerous if you don’t expect this to happen, there are warning signs everywhere around Arnside, and a WWII air raid siren is sounded twice before the bore arrives (that’s what you will hear when you play the video below!)

There is a lot of conflicting information out there on when to expect the bore. Why is predicting of the arrival time of the bore so difficult? While tidal forcing by the moon, the sun, and tons of other things is known very accurately, a tidal bore more than a “normal” tide is influenced by other factors, especially the wind, and the shape of the estuary and thus changes in friction (which changes constantly, see yesterday’s post).

And not only don’t we know exactly when the bore will arrive relative to predicted high water times, there is a lot of conflicting information out there on when the siren in Arnside is sounded relative to the bore. To be safe, I had to take the most conservative approach to make sure we didn’t miss it. Luckily, Astrid and Felipe were willing to wait with me for a looong time to see the Arnside tidal bore, even though none of them was really keen on it! Always important to have patient friends ;-)

Anyway, once the tidal bore arrives, it is super spectacular (I think!). We weren’t there on one of the recommended days — high tide was only 8.4 meters and locals tell you to not bother for anything below 10 meters — but I still thought it was so impressive! The video below shows it at 8 times its actual speed to give you a quick first impression:


And here are the most interesting 3 minutes of the bore when it passes right in front of us. So cool how there is actually a wave trough right before the leading edge of the bore!

https://vimeo.com/350775286

And once the front has passed, this is far from over! Once the front has passed, the calm waters of the estuary are replaced by a strong current running upstream relative to the river’s original direction of flow, now quickly raising water levels all throughout the estuary. And not only that: Also very interesting flow pattern, some of which are shown in the video below.

After the front had passed and we were walking back into town, we met a couple of very excited people who had absolutely no idea what just had happened and who were all “I HAVE NEVER SEEN ANYTHING LIKE THIS! WHAT WAS THIS???”. Remember, this is what the estuary looks like before the bore arrives: lots of mud, very little water. Hardly any waves. So having the bore come in — when you’ve been waiting for it for 90 minutes, but probably even more so when you aren’t expecting anything at all — is really really impressive. And it makes you realize that they aren’t kidding when they tell you about extreme danger due to fast rising tides… Imagine water filling up all the channels at that speed — you’d be cut off from shore extremely quickly, and then separated from the shore by really strong currents. So it’s an amazing spectacle to watch, but one that one should definitely not underestimate!

Wave watching in and around Arnside

Arnside is a beautiful little town on the banks of the river Kent, and Astrid and I went on a nice hike along the shores of the estuary a little while ago.

The difference between high water and low water is quite impressive here, and we started our hike right after high tide to make sure we wouldn’t be cut off by an incoming tide. Which was definitely the safest thing to do, but also made for pretty muddy shoes…

There is a ton of amazing wave watching to be done in the Kent river bed. For example the waves being diffracted around these rocks.

Or this diffraction at a “slit” between the rocks.

And the whole landscape is just gorgeous!

Very intriguing to me: A foam stripe that seems to be coming out of nowhere. Or, better, that we can’t see the cause of just yet. It’s coming from somewhere downstream (to the left).

But where is it coming from? From somewhere behind that headland. Let’s go inquire!

A little further down the coast line, we see that the foam stripe ends on a sandbank.

And coming closer still, we see that the foam is created by waves breaking on that sandbank and a second one a little further offshore. It gets collected where the bank brakes the water surface, and is then just driven downwind, but stays together, forming the stripe.

This is a closer look of the waves breaking on the sand banks.

And speaking of sand banks: There is some cool wave action in between the sand banks, too! Waves are driven in by the wind through the channel from the left. This is  a clearly visible wave field with larger wavelengths and heights than the rest of the small basin, where waves are only created locally once the wind reaches the water surface. See how on the left edge of the basin the water is sheltered from the wind by the higher edge of the sand bank?

Again, what a pretty landscape!

I really like the contrast of the lush green grassy areas and then the sandy muddy tidal river in the background.

Walking a little further, we now see a large muddy area. When we were walking here, a local told us that when he was a kid, all this area was also grass land and it only became sandy and muddy a couple of decades ago. Fascinating how the landscape changes!

But even on timescales of hours the landscape changes, and all the sandbanks and channels move with each incoming and outgoing tide.

It’s so beautiful here!

Our walk took us away from the water and up a little hill, but that gave us the opportunity to look at the channels from a different perspective.

And even the whole estuary. Do you see the rail bridge below? That’s the one we saw in the very first picture of this post.

Back in Arnside, we are approaching low tide. Which means that we have lots of freshly exposed mud with new ripples in it, as well as still water running off it. Below you see a really cool turbidity current coming out of the channel with the seagull, going into the larger reservoir. See how it carries mud with it and how the channel is meandering and clearly changing right in that moment?

Another picture, just moments later, and already has the shape of the channel changed!

Or the edges of this little basin that get exposed little by little as the tide goes out.

And then there is of course more wave watching to be done. See how this wave changes direction as it runs around the little headland?

Soooooo pretty!

And thanks to two kids playing in the water, we get even more waves where they threw a ball into the little basin.

And those waves spread over time…

Checking in with the seagull and the turbidity current again. See how much dissolved mud is being washed out all the time?

And as you might have guessed in a tidal river like river Kent — there is even more to see. Which is why we came back a couple of days later to see what all the warning signs were about…

I’ll tell you about that tomorrow!

The perfect wave — and why this is not a fake image

This picture might look fake, but it’s not.

But what about it does scream “fake!”? To me, there are several things:

  • the almost perfect sinusoidal shape of the waves
  • the way how wavelengths and amplitudes decrease with distance
  • the almost complete lack of other waves except for the one dominant field
  • the way we can look into the water and see the jungle beneath the waves

Of course, all of these can be explained:

  • the almost perfect sinusoidal shape of the waves: We are used to seeing waves that have longer troughs and pointier crests. The waves we see here are the wake of a small boat which caused a large disturbance that then propagates over the lake, keeping its shape fairly well.
  • the way how wavelengths and amplitudes decrease with distance: Usually when we see wave heights increasing towards the shore, we would at the same time see wavelengths decreasing since the increasing wave height would be due to the waves running up a slope and being slowed down. In deep water (i.e. water deeper than a wavelength, which is the case here), longer wavelengths propagate faster than shorter ones, therefore longer waves outrun shorter ones. And the leading wave is the actual wake, the largest disturbance, whereas later waves are just oscillations before the surface comes back to rest.
  • the almost complete lack of other waves except for the one dominant field: Usually we would expect to see a bunch of different wavelengths occurring at the same time if we were looking at a wind generated wave field, but in this case we are looking at a dominant wave field created by a boat. There was almost no wind that day; wind waves are just the small ripples perpendicular to the dominant wave field.
  • the way we can look into the water and see the jungle beneath the waves: this is due to a phenomenon called total internal reflection. Spooky, isn’t it?

Here is how the waves developed over time from when the boat passed by until they reached the jetty on which I was sitting:

I really like another way of looking at that wave field, and that is how my camera roll shows them. Which wave picture of all of these is your favourite?

This is my personal favourite:

#friendlywaves: You send me a picture, I (try to) explain the wave field!

Do you like observing wave fields and pondering what might have caused them? Why they look the way they do? What caused them? What they can tell us about the wind, the sea floor, the trajectory of a ship?

This is actually not an easy task and takes a lot of practice and a good understanding of the physics involved. If we observe the waves in real life, we can observe the wave field developing over time, turn our heads or walk a little to see what’s happening around that corner, feel the wind or hear the ship. But it might still be difficult to figure out what is going on.

If you really want to know what is going on, though, or want to send me a little friendly challenge to see if I can figure something out that you already have the solution to, you might enjoy to send me a #friendlywaves#friendlywaves means: You take a picture of waves, send it to me via email or social media, and I write a blogpost, explaining as much as I possibly can related to the wave field. And you get to tell me if I got it right, because you were there and I wasn’t!

Check out the blogposts tagged #friendlywaves for examples of previous #friendlywaves that people sent me.

If you have any interesting pictures, please don’t hesitate to send them my way, I love a good challenge! :-)

Watching the tides cause an hydraulic jump in the Irish Sea!

Looking at the picture above, taken in the South Walney Island Nature Reserve on our walk yesterday, what is the first thing you notice?

For me, it is not the cute little hide which is a perfect spot for seal and bird watching, for me it is — obviously! — what is going on with the waves! So much so that I spent the better part of an hour looking at the opposite direction of where all the seals were frolicking in the waves (except for one that came and played in the most fun part of the sea — more about that later).

Looking at the picture below, do you notice how different the different areas of water surface look? To the left of the wave breaker and going offshore from there, the surface is quite rough, with many waves of different wavelengths. But then going directly offshore from the wave breaker, the surface is smooth(er)! Followed by a rougher stripe, before it becomes smooth again, and a couple of well-defined wave crests reach the shore.

Zooming in on that area right off the wave breaker, you see that there are actually waves breaking towards the smoother area, away from the beach. Any idea what’s going on here, what might be causing those waves? (Hint: Even though there is a boat in the background, it is not some ship’s wake!)

What we can observe here is actually a pretty cool phenomenon, called a hydraulic jump. Due to the tide going out, there is a current developing around the tip of Walney Island, going from left to right in the picture above. This current goes over the still-submerged part of the wave breaker. Since the cross section through which the water has to squeeze is all of a sudden a lot smaller than before and after, the water has to accelerate. And it accelerates so much that waves traveling on it are just flushed downstream and the surface looks smooth(er). Only when the cross section is wider and the water has slowed down, waves become visible again.

The spot where waves are exactly as fast as the current, but running against it, is called “hydraulic jump”. You can spot it right where the waves are breaking: They are trying to go back upstream but don’t manage to, so they stay locked in one place (see here for an analogy of people running up and down escalators to explain this phenomenon). You do see hydraulic jumps “in the wild” quite often, for example in rapids in rivers (and even more so in regulated rivers, very nice example here!). In case of the hydraulic jump right here, there was a seal playing in the current, clearly enjoying the wave action (and quite possibly also feeding on poor fish that suddenly get swept away with the current).

And indeed, 20 minutes later, the same spot looks like this: the surface roughness is a lot higher towards the right of the wave breaker, but all in all there are much fewer, and much smaller waves.

And another 20 minutes later, the formerly submerged wave breaker is revealed!

I find it always so cool when you see a wave field and just from what that wave field looks like, you can deduce what the ground underneath has to be like! In this case from seeing the hydraulic jump, you know that the wave breaker has to continue on offshore.

Wanna see the whole thing in action? Then here is a movie for you!

https://vimeo.com/348247842

And the coolest thing is that this spectacle will repeat with every outgoing tide, so pretty much twice a day! And I am fairly confident that it will also happen halfway between, again, when the tide comes in and the current goes in the opposite direction. I would love to go back and check!

Enjoying the South Walney Island Nature Reserve

Wanna come on a walk with me and Astrid around the southern tip of Walney Island?

This is what our parking spot looked like when we arrived (we did park on this side of the gate, obviously).

I find the salt marshes so impressive — all that grass that gets flooded every 12 hours! At low tide I keep taking pictures of crabs and little sea critters that got stranded in grass.

But very nicely visible how important the grass is for coastal protection: Waves get dampened out pretty quickly if they are running through grass!

But let’s start walking. See the high tide lines on the beach? Great markers of some of the last high waters. This kind of stuff — parallel lines in the sand, mirroring the water line — looks very calming to me!

In the South Walney Nature Reserve, there are several hides where you can sit and bird (or seal) watch, or enjoy the shade or shelter. They are so lovingly done, and all include information about the wildlife to be observed. One even has an exhibition of the different sands found in different locations around the island!

…and about other stuff found on the beach: beach shingle, rabbit poo and cow dung! I love this!

Moving on, we got closer to the lighthouse, which, unfortunately, isn’t open to the public any more. Just imagine the kinds of views you would get from up there!

And then, as we were approaching another hide (the red cabin in the picture below), I spotted something else that held me captivated for the better part of an hour. And I don’t mean the seals frolicking in the sea! Can you spot it?

Here is a closer look. Do you see what is going on there?

I’ll publish a blogpost with the explanation later today (it just got too much to put into one post), so stay tuned if you want to look more closely at the water with me!

Walking back, here is a view of an old castle ruin across the bay. See the now exposed salt marshes and gullies?

And here we are, back where we started. Go back to the picture up top of this same gate — isn’t it amazing that all this grassland was flooded only a couple of hours earlier, and will be flooded again in just a couple of hours? I am so used to seeing the german Wadden Sea coast where low tide exposes nothing more but mud

Astrid sent me a #friendlywaves from Whitstable for remote #wavewatching

Astrid, #wavewatching supporter from Day 1, sent me these pictures for a #friendlywaves post. Today, I want to start with a spoiler picture (or, rather, I did start with a spoiler picture already — see above) that shows you the setting at low tide to help us explain the wave pattern that we then observe at high(er) tide.

Note the headland in the picture above? Below shows what it looks like when it is covered in water:

Astrid, as a real #wavewatching pro, also sent me a video, so I can show you the super cool interference happening here.

Wave crests from far offshore (probably caused by a storm somewhere far away) arrive in shallower water and get broken up into parts on either side of the (now submerged) headland. But on either side, the wave crests also change their shape, being refracted towards the headland. And some of the wave crests make it over the headland, now at an angle to each other, meeting waves from the other side. And where they meet, they steepen up and even break occasionally. Doesn’t it look super cool to watch waves run towards each other in such a way, creating these interference pattern?

This wave pattern always reminds me of one that I saw years ago — coincidentally with Astrid! — when we were in Iceland in 2013, the day after my dad’s heart surgery. And while watching those waves then was beautiful and calming, seeing this pattern still always reminds me of a pretty traumatic time. So I am happy that this new wave pattern will now at least partially overwrite some of those memories with a very happy day: Herzlichen Glückwunsch und alles alles Gute, liebe Simone* & family!

*That is Astrid’s friend Simone, not my own sister Simone, although of course alles Gute to her, too :-)

“Using social media in science communication — the Kiel Science Outreach Campus shows how it’s done” (part 2)

One of the 2018 achievements that I feel pretty proud of is developing a social media strategy for the science communication research project Kiel Science Outreach Campus, and implementing it together with the project’s 11 PhD students (plus a couple more colleagues who we “entrained” along the way). And the second article we wrote about the social media project has just been published! (See first part here, new (second) article here).

Check it out, as well as our Twitter @KiSOC_Kiel and Instagram @KiSOC_Kiel — both lead to the project’s central social media. Sadly, these accounts have not been kept alive after I left, but checking out especially the Instagram is still pretty interesting, because it links to all the different PhD students’ accounts, which are awesome, and which are actually what we describe in the article. A lot of inspiring content to be found there!

P.S.: The pretty design was made by Sonja Taut — thanks so much for that! :-)

A #friendlywaves from Tampa, Florida

Anyone who might be new to my blog because of yesterday’s presentation at #SiPManc — please don’t be scared and run away, this is the most complicated #friendlywaves I have ever gotten, usually things are A LOT easier! :-)

I love #friendlywaves! Victor sent me the picture above. He took it in 2017 in Tampa, Florida, and I think it’s so fascinating! There is so much going on, let’s try to make sense of it!

First, the most obvious thing making waves here: The two boats. Clearly they are making waves, and they might explain a lot of what we see here. But on the other hand, they might not.

Below, you see the part of the wave field that is 100% due to these two ships: Their V-shaped wakes (in red) and the turbulent wake behind one of the ships (in yellow).

The very prominent wave pattern (marked in red in the image below) might be due to these two ships as was suggested to me, but if it is, then those ships changed course quite drastically before they created the waves I marked in the previous picture (and I can see no evidence of such a change of course, usually a turn would leave a trace similar to this one).

If the boats, as I assume they did, came out from underneath the bridge and sailed in a more or less straight line (and that seems to be the case judging from their wakes as indicated in the picture above), there is no way they could have made waves that travel in front of their V-shaped wake. Similarly to how you can’t hear the supersonic aircraft before the supersonic boom (because the sound can’t travel faster than the speed of sound and the pressure signal thus gets formed into the Mach cone), waves can’t outrun their wake (which is like their 2D Mach cone). So I don’t believe that those waves were made by those two ships. Rather, I believe that they were made by a ship that is no longer visible in the area we are able to see.

So remember, this is the wave pattern we are trying to explain (Marked is only one wave crest, but you see that there are several parallel to the marked one):

We do nicely see how the wave is reflected by the straight sea walls. But what direction is it traveling in? And what caused it? Let’s speculate!

First: let’s consider the very weird shape of the body of water shown in the picture. Quick search for Tampa on Google Maps lets me believe is that the picture was taken more or less from the position of the white star and the view is the area between the two red lines. Looking at that map, we see that the water we see opens up into four different water ways: One to the north, one to the east, one to the south east, and one to the south west. The two to the south eventually open up into Tampa Bay.

The wave field that we are trying to explain would look somewhat similar to what I drew in below (green):

My best explanation of that green wave field above is this: A boat that went on the course that I drew in in yellow:

So far, so good. Wanna know why I believe this is what happened? Then this is the picture for you!

Assuming the boat followed along the yellow track, the other lines are the wake it would have produced:

  • green: Those are two parts of the wave field that I marked above that I am fairly confident of: The wake propagated across the body of water, got reflected and came then over towards the photographer. Note how not all waves reach the shoreline close to the photographer yet? That’s because they are the “newer” waves that haven’t traveled for long enough to reach that spot
  • light blue: The “newest” waves that aren’t very long yet and are traveling in an area where we can’t clearly make out the presence or absence, let alone direction, of waves. They are fanning away from the “green waves” because the ship is turning (similar to here).
  • dark blue: Those is a part from the wake that originated on the other side of the ship, got reflected, and now traveled across the body of water to reach the point where the picture was taken from. They do so at an angle that looks like they might be reflections of the incoming green waves (which is another possibility which I can’t rule out with 100% certainty). Newer wakes from that side, once they’ve been reflected on the shore, will lead to waves almost parallel to the green part of the wake and would be indistinguishable from those in the picture.
  • orange: Those are “old” wakes that must have happened when the ship came out of that inlet, but that would not interfere with our picture because their reflection stays caught within the inlet itself.

This is the best explanation of what must have happened that I can come up with, and I have thought about this quite some time (more on that at the end of this post) :-)

But then there are tons of shorter wave length waves that we have to explain, too: See those marked in red, yellow and green below.

I am confident that the ones I marked in red are wind-driven waves coming across the open area. Their direction also agrees quite well with the wind directions the flags indicate (marked with a white arrow above). I believe that the ones I marked in yellow and in green are two separate wave fields at a slight angle, but that might be an optical illusion, I am not quite sure.

If we go back to the map, I believe the wave fields I marked above would look pretty similar to the ones I drew in below (I changed the red waves above to magenta waves below, because red was already taken. Note the wind direction marked with a white arrow: it looks pretty much perpendicular to the now-magenta wave crests):

And looking at the angles in that depiction of the waves, I could imagine that the green wave field is a reflection of the magenta wave field where that one hits the shore on the side where the picture was taken from (see light blue wave crests). As for the yellow one: I still have no idea what caused that. But maybe there need to be some mysteries left to life? ;-)

To end on something that I am confident in: The half circles near the bottom of the picture are the result of something (two buoys? two small boats?) moored on that pier, bobbing up and down in the waves, thus radiating wave rings with shorter wavelengths and higher frequency than the wave that is exciting the movement.

But after all this hard work (more on that at the bottom of this post) — let’s take a minute and look at those beautiful interference pattern again where the wave fields cross each other and create a checkerboard pattern. How amazing is this?

Phew! I love #friendlywaves, but this was quite a challenge! How did I do, Victor? :-)

If you or anyone else have any comments or suggestions — I would love to chat about alternative explanations!

P.S.: Just to give you an idea of what my process was like: It involved late night scribbles on a tea bag (because that was the best “paper” I had available on my bedside table in the hotel in Manchester) and I needed to play scenarios through in my head…

…and some sketches on my phone while I was on a train…

This is how much I love wave watching! :-)