Tag Archives: Rossby wave

Rossby-#WaveWatchingWednesday

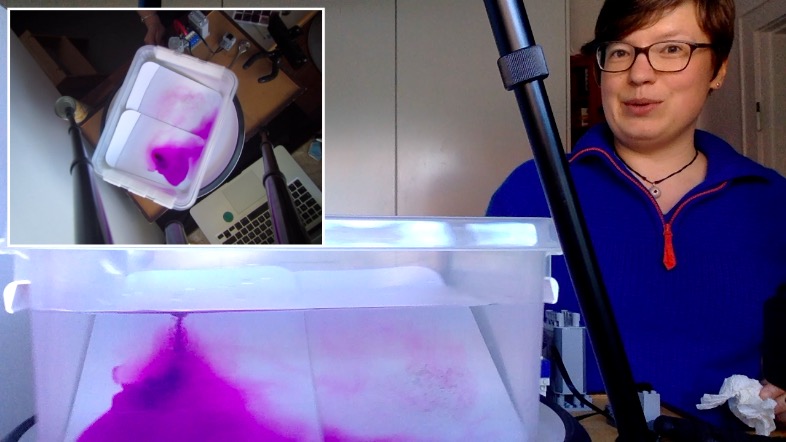
Several of my friends were planning on teaching with DIYnamics rotating tables right now. Unfortunately, that’s currently impossible. Fortunately, though, I have one at home and enjoy playing with it enough that I’m

  1. Playing with it
  2. Making videos of me playing with it
  3. Putting the videos on the internet
  4. Going to do video calls with my friends’ classes, so that the students can at least “remote control” the hands-on experiments they were supposed to be doing themselves.

Here is me introducing the setup:

Today, I want to share a video I filmed on planetary Rossby waves. To be clear: This is not a polished, stand-alone teaching video. It’s me rambling while playing. It’s supposed to give students an initial idea of an experiment we’ll be doing together during a video call, and that they’ll be discussing in much more depth in class. It’s also meant to prepare them for more “polished” videos, which are sometimes so polished that it’s hard to actually see what’s going on. If everything looks too perfect it almost looks artificial, know what I mean? Anyway, this is as authentic as it gets, me playing in my kitchen. Welcome! :-)

In the video, I am using an ice cube, melting on a sloping bottom in a rotating tank, to create planetary Rossby waves. Follow along with the whole process:

Also check out the video below that shows both a top- and side view of a planetary Rossby wave, both filmed with co-rotating cameras.

Previous blog posts with more movies for example here.

Now. What are you curious about? What would you like to try? What would you do differently? Any questions for me? :-)

Rotating tank experiments on a cone

I had so much fun playing with rotating tank experiments on a cone this afternoon! And with Torge Martin (who I have the awesome #DryTheory2JuicyReality project with) and Rolf Käse (who got me into tank experiments with an amazing lab course back in 2004, that I still fondly remember). We tried so many different things, that I will at some point have to describe in detail, but for now I just need to share the excitement ;-)

Here, for example, a blue fish-shaped ice cube. This experiment is pretty much the topographic Rossby wave experiment described here, except now we aren’t on an inclined plane, but on a cone. Which is basically an infinitely long inclined plane — the ice cube doesn’t encounter a boundary as it travels west, it just goes round and round the tank until it melts. And look at the cool Rossby waves!

Then we did another one of our favourite experiments, the Hadley cell circulation. What was really fascinating to observe was how turbulence the turbulence that was introduced by dripping dye into the tank changed scales. At first, we had the typical 3D pattern with plumes shooting down. But over time, the pattern became more and more organized, larger, and 2D. See below: The blue dye had been in the tank for a little longer than the red dye, so the structures look completely different. But interesting to keep that in mind when interpreting structures we observe!

Here is another view of the same experiment. Since we are cooling in the middle and rotating very slowly (about 3 rotations per minute), the eddy structures aren’t completely 2D, but they are influenced by an overturning component.

This looks even cooler when done on a cone. Can you see how there is both an overturning component (i.e. the plumes running down the slope) and then still a strong column in the middle?

This just looks so incredibly beautiful!

And one last look on the eddies that develop. We saw that there are cyclonic eddies happening in the center of the tank and anti-cyclonic eddies at the edge. Since we are on a cone, I could imagine that it’s just due to conservation of vorticity. Stuff that develops near the center and moves down the slope needs to spin cyclonically since the columns are being stretched, and on the other hand things that develop near the edge must move up the slope, thus columns being compressed. What do you think? What would be your explanation?

Topographic Rossby waves in a tank

This experiment just doesn’t want to be filmed by me. Even though I spent more time on preparation of this experiment than on almost any other experiment I have ever done! I have written up the theory behind this experiment, run it with a blob of dye to visualize the wave, then with a ring of dye. But for some reason, something goes wrong every time. Like people opening the door to the lab to come and visit me just the very second I am about to put dye into the tank, resulting in me jumping and a lot of dye ending up in the wrong spots… Or the tank itself getting the hickups. Or the cameras not playing nicely if for once the experiment itself goes well.

Anyway, it is still a very cool experiment! So here are some pictures.

In all those pictures, the tank is rotating a lot more slowly than recommended in the instructions. I thought that might make it all easier to run (5rpm; dial at approximately 7 for GFI big tank, similar to Taylor column). And it looks just fine, except that the restoring force back to the middle isn’t really there (as was to be expected, since the surface is almost flat and the parabolic shape is needed for a difference in water depth).

Third attempt

Below, you see the “ridge”, a piece of hose that connects a solid cylinder in the middle of the tank to the tank’s outer wall. The tank is turning counter-clockwise.

The flow looks substantially different upstream and downstream of the ridge: Upstream, it is laminar and close to the middle cylinder. Downstream, it’s meandering (the Rossby waves!) and diffusive.

Fifth attempt (same as above)

In this experiment, the difference between the flow up- and downstream of the ridge are even more obvious. Look at those eddies!

It’s quite amazing to see how a small disturbance can make the entire system unstable.


Topographic Rossby wave

Next attempt at the topographic Rossby wave! This time with following the geosci.uchicago.edu instructions more closely…

…and then the tank had hickups, so we did get waves, but a lot more diffusive than we had hoped, because the tank slowed down a lot more and in a more bumpy fashion than I had planned…

Setup of the topographic Rossby wave experiment

For a demonstration of topographic Rossby waves, we want the Coriolis parameter f to stay constant but have the depth H change. We use the instructions by geosci.uchicago.edu as inspiration for our experiment and

  • build a shallow ridge into the tank, from a cylinder in the middle to the outer wall. My solution: Take a 1.5 cm (outer) diameter hose, tape it to the bottom of a tank to achieve a ridge with smooth edges
  • 7 cm water depth
  • spin up the tank to approximately 26 rpm
  • wait for it to reach solid body rotation (ca 10 min)
  • introduce dye all around the cylinder in the middle
  • reduce rotation slightly, to approximately 23 rpm so the water inside the tank moves relative to the tank itself, and thus has to cross the ridge which is fixed to the tank
  • watch it change from laminar flow to eddies downstream of the ridge. Hopefully ;-)

Planetary Rossby waves

I ran my new favourite experiment again, the planetary Rossby waves. They work super well on the DIYnamics table we built in Kiel and they also worked really well the other day in Bergen.

I mainly ran it today because I wanted to get an idea of how robust the experiment is, i.e. what to prepare for when running it with students in terms of weird results that might have to be explained.

Here is a side view of the square tank with a sloping bottom. The blue ice cube is melting. The melt water is forming a Taylor column down to the bottom of the tank. Some of it then continues down the slope.

Here we are looking at the slope and see the same thing (plus the reflection at the surface). Note how the ice cube and its  meltwater column have already moved quite a bit from the corner where I released it!

When the blue ice cube had crossed half the width of the tank and the blue melt water had almost reached the other edge, I released a green ice cube. Sadly the dye wasn’t as intense as the blue one. But it’s quite nice that the wave length between the individual plumes going down the slope stays the same, for all the blue plumes as well as for the new green ones.

Here in the side view we see the columns of the blue and green ice cube, and we also see that each of the plumes going down the slope still has Taylor columns attached at its head.

Here is an accelerated movie of the experiment, 20x faster than real time. Not sure why there is still sloshing in the tank (this time I made sure it was level), but it’s very nice to see that the ice cubes are spinning cyclonically, faster than the tank! As they should, since they are sitting on Taylor columns…

I think next time I really want to make a side view movie of the Taylor columns and plumes. Not quite sure yet how I will manage the lights so they don’t get super annoying…

Planetary Rossby waves filmed with co-rotating camera

And here is my new favourite experiment again: Planetary Rossby waves! This time filmed with a co-rotating camera.

We have a square tank with a sloping bottom at solid body rotation (except this annoying slogging because the rotating table wasn’t levelled out [meaning: I didn’t level it before starting the experiment…]). We then release a blue ice cube in the eastern corner of the shallow end of the tank and watch as the melt water column stretches down to the bottom, and is driven back up the slope to conserve vorticity. A planetary Rossby wave develops and propagates westward!

Above, we are looking at the tank east-to-west. Note the sloping bottom with the deep side on the left. And just look at all these beautiful eddies!

This is what it looks like in motion:

Watch the full experiment here if you are still curious after seeing the 1.5 minutes above :-)