Tag Archives: DIYnamics

Baroclinic instabilities / Hadley cell circulation in a tank

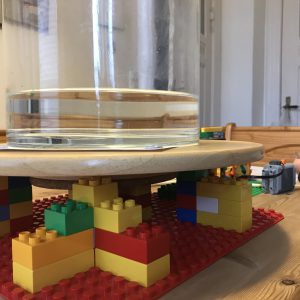
The DIYnamics-inspired turntable that Torge and myself have been working on for our “dry theory to juicy reality” project is finally working well!

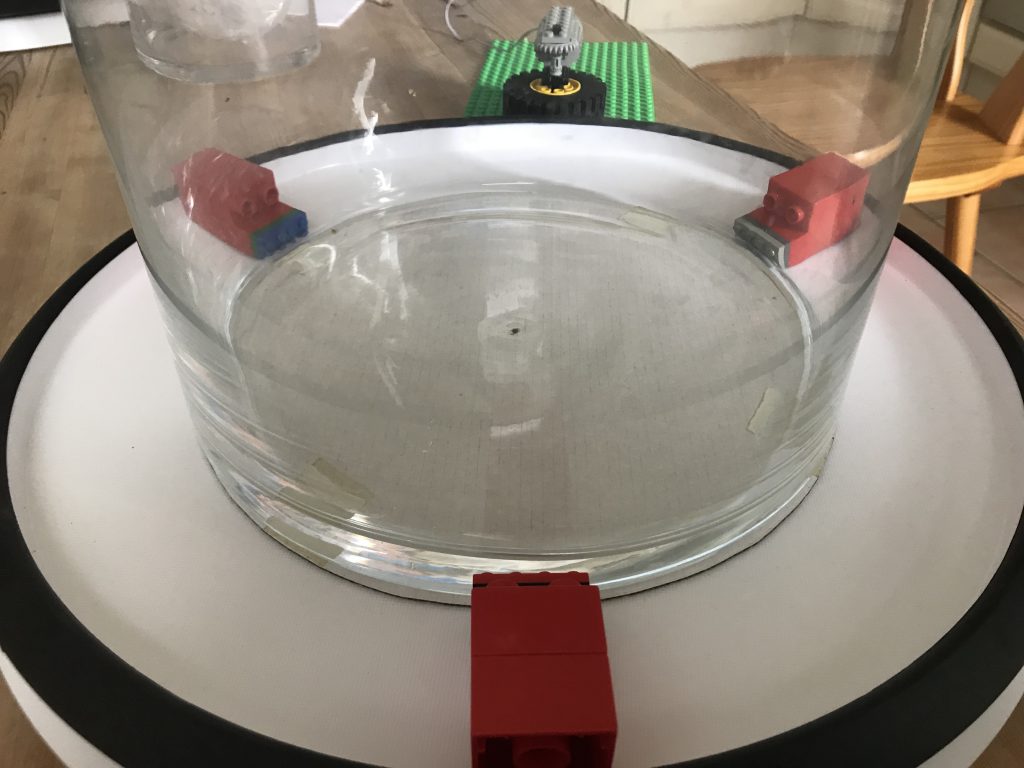
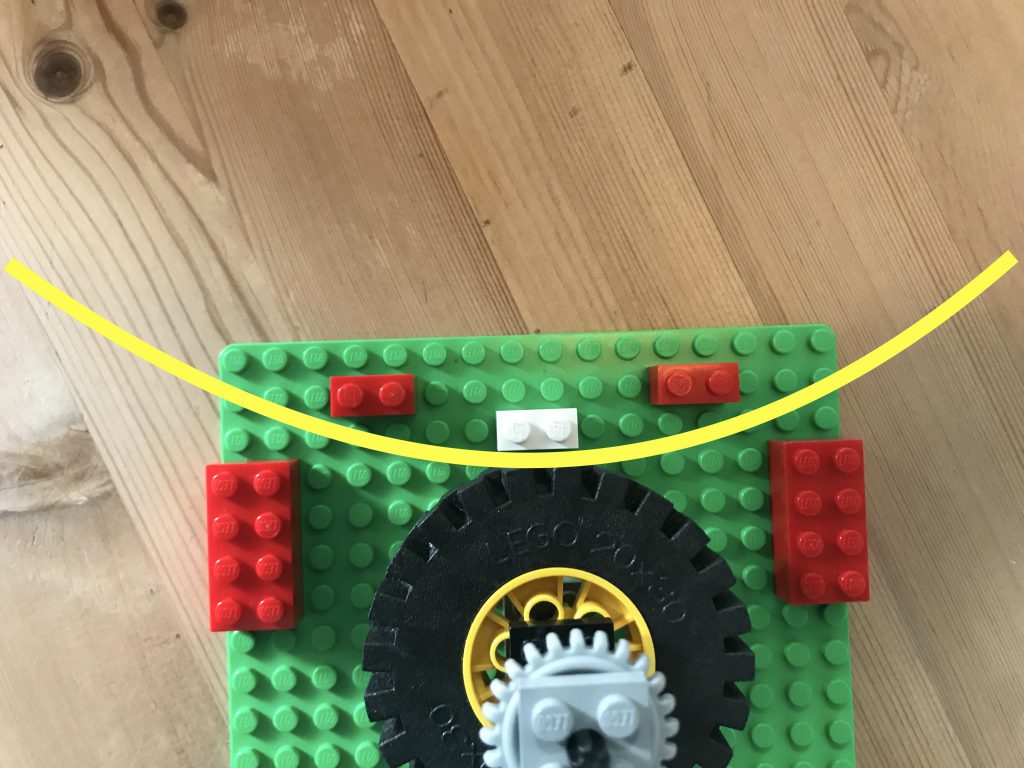
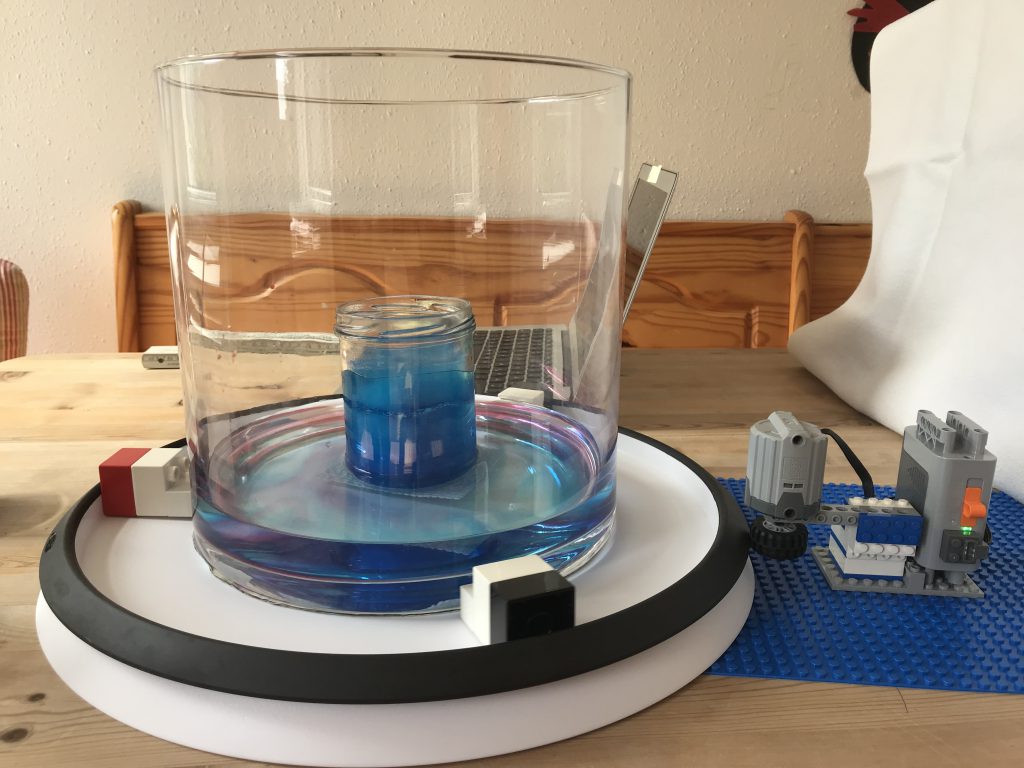
This is what the setup now looks like (how simple is that?!) and we had an exciting morning testing different experiments!

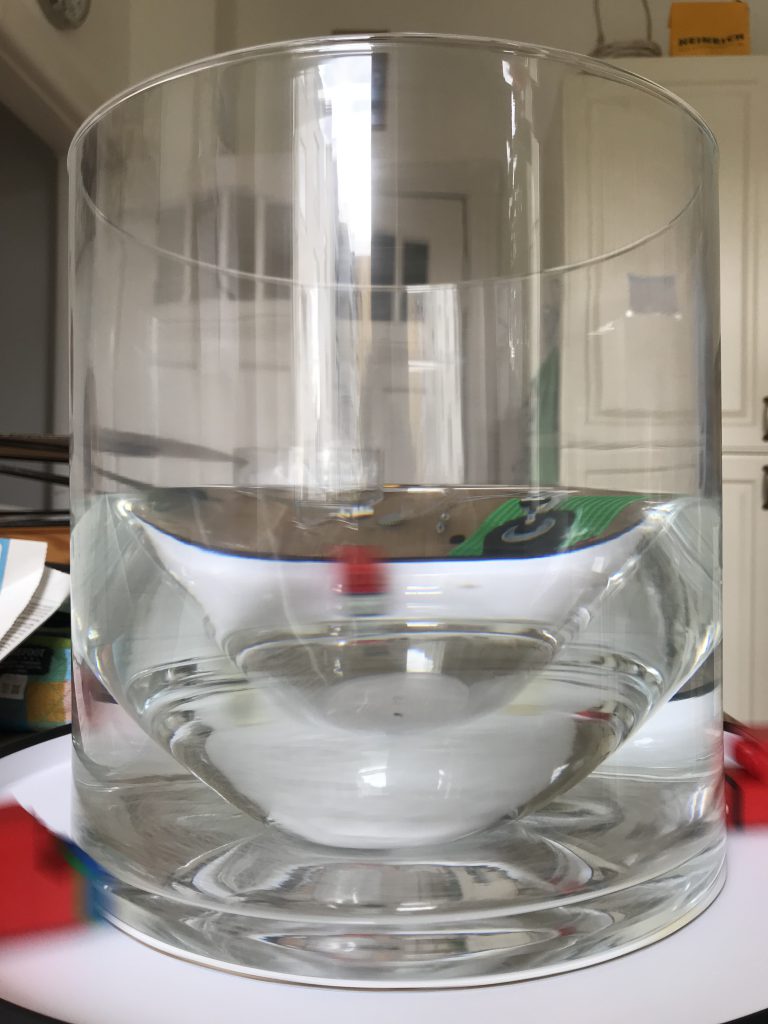
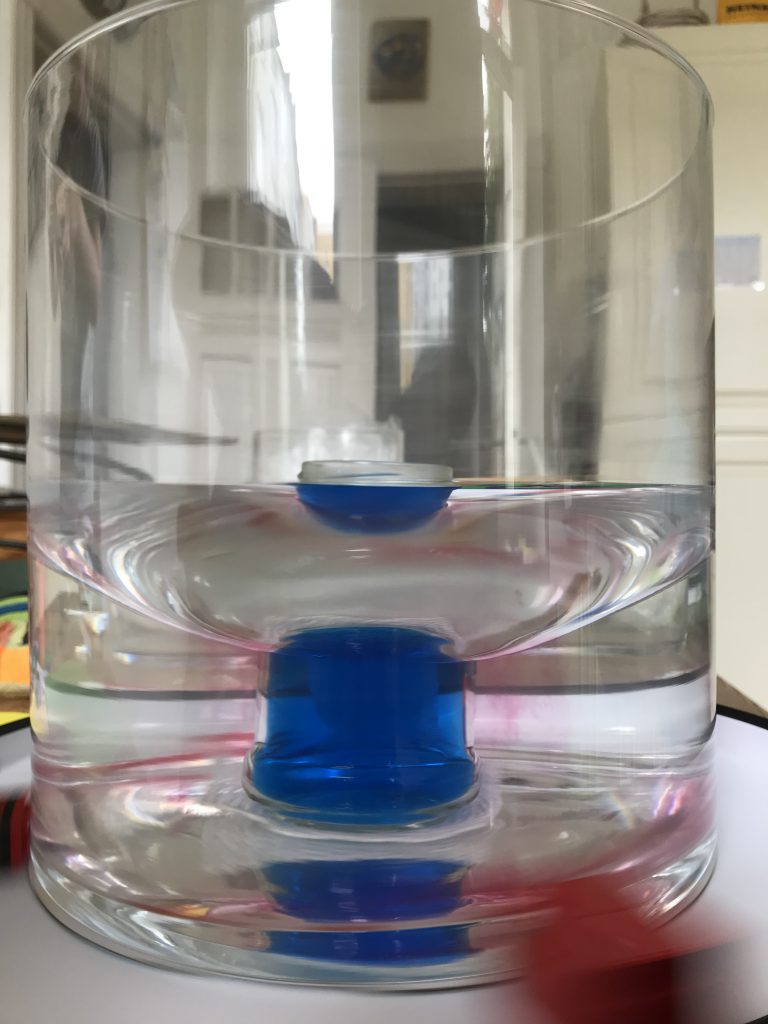
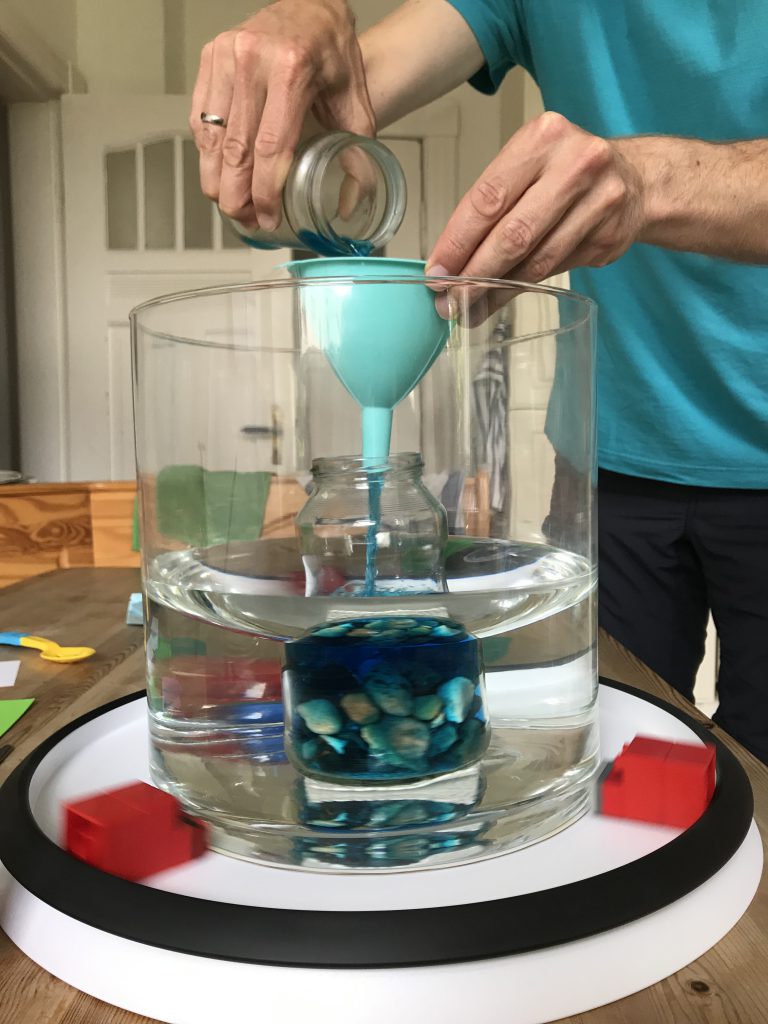
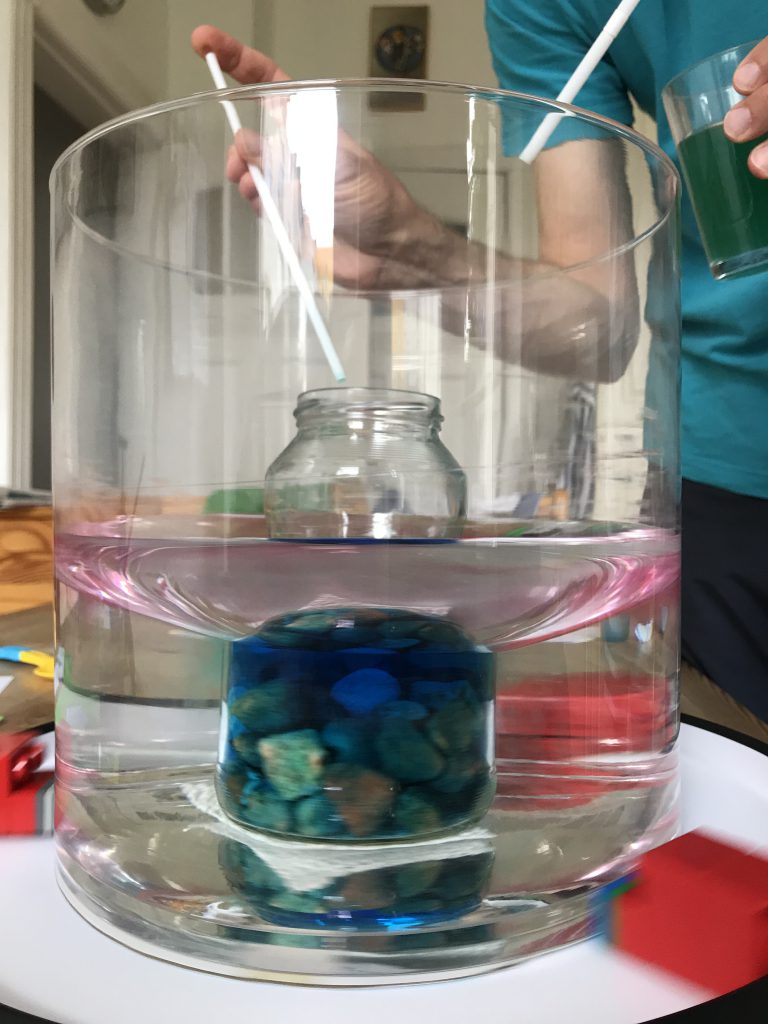
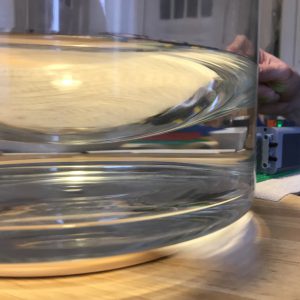
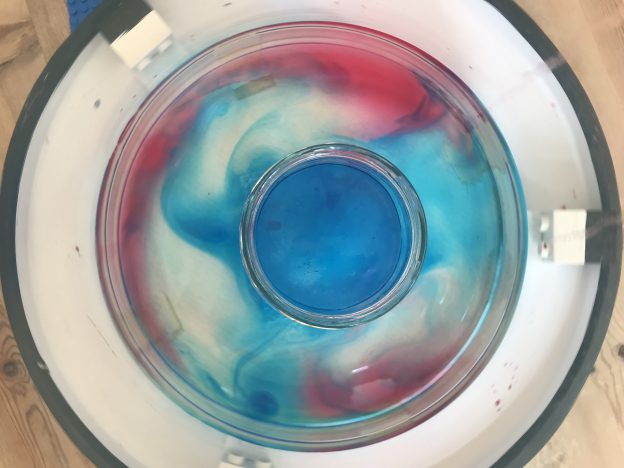
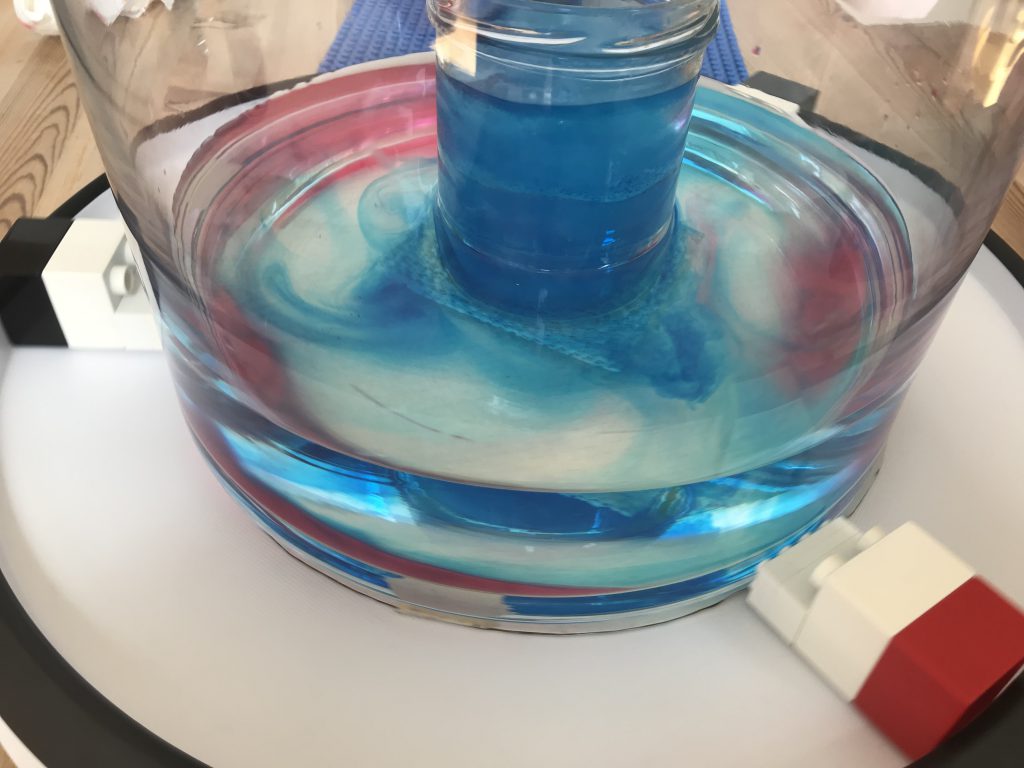
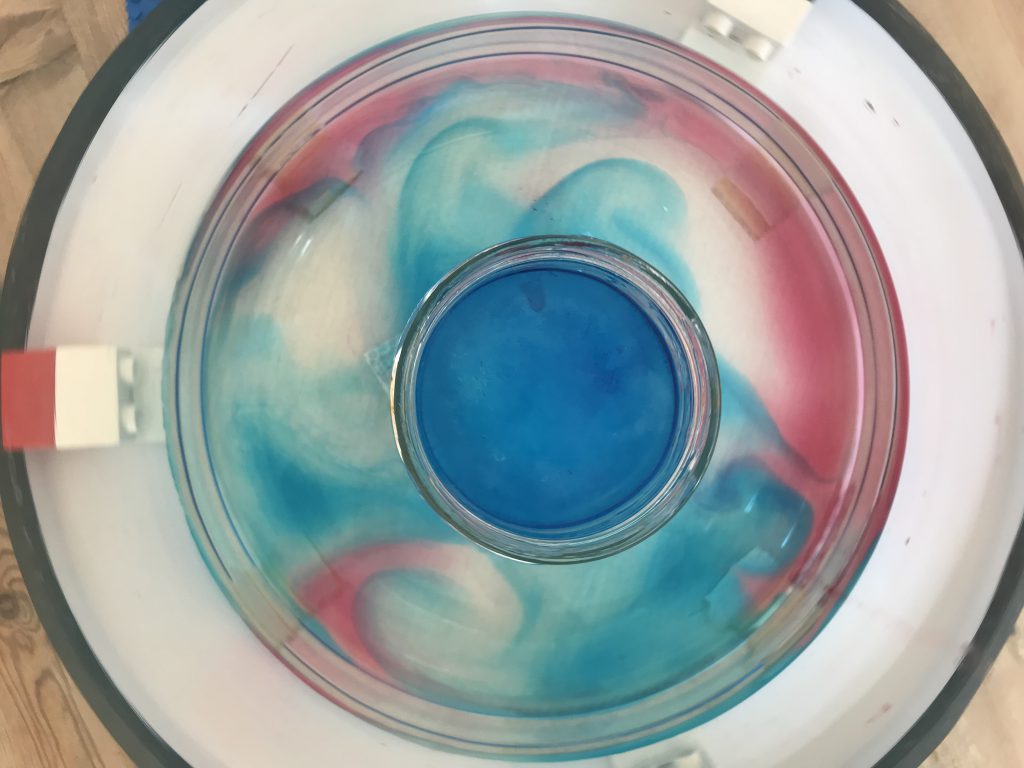
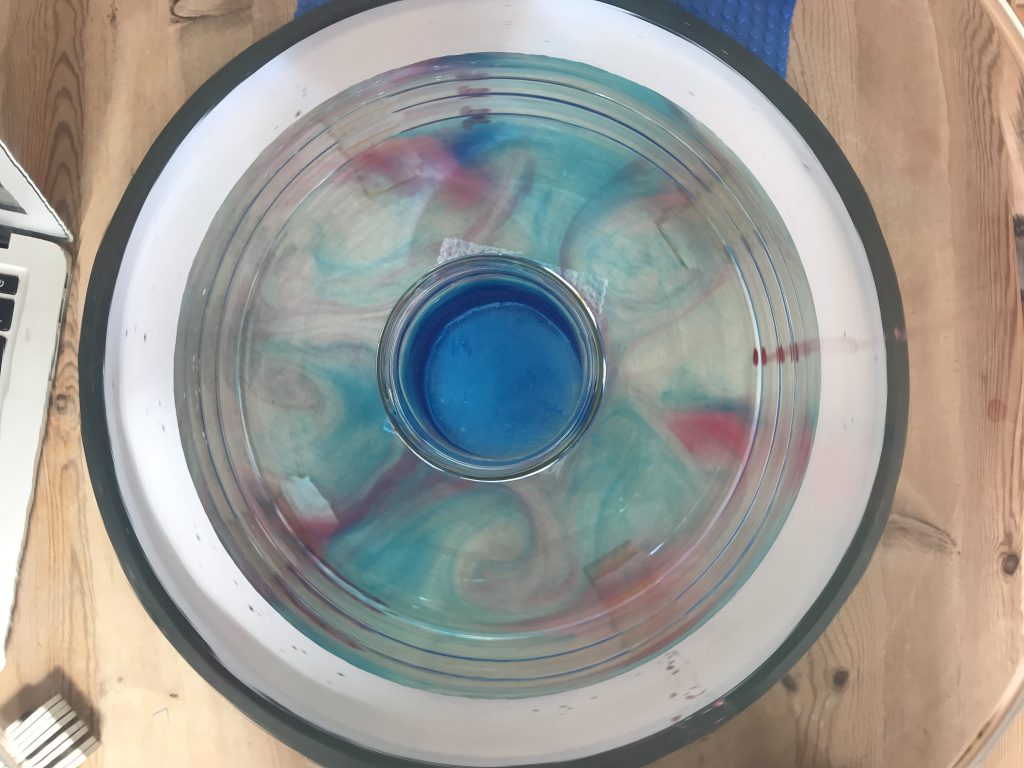
The one experiment that we have been using as test case in all our previous sessions is the Baroclinic Instability / Hadley cell circulation. There are sketches of the setup and the expected circulation in this blogpost, so just a quick reminder: We place a cold core in the center of our tank (here a glass with blue ice in it), spin the tank (at approximately 20rpm) into solid body rotation, and introduce dye (blue towards the center, red towards the outer edge of the tank).

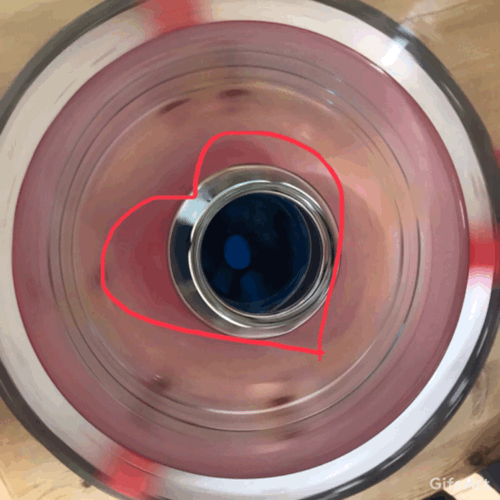
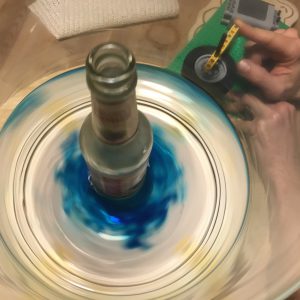
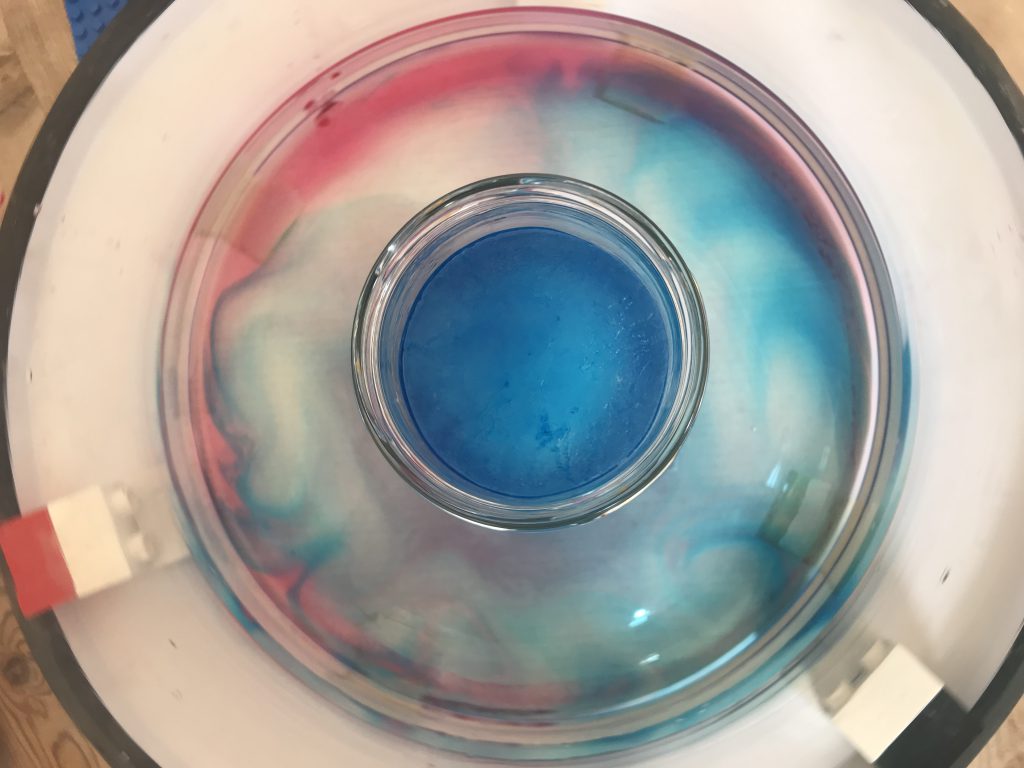
And what happens then is just beautiful: We get 2D instabilities that transport cold (blue) water outwards and warmer (room-temperature, red) water towards the center of the tank.

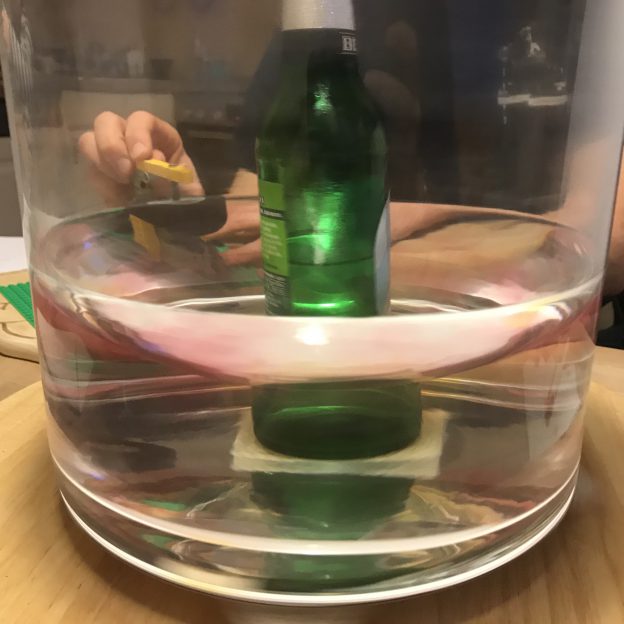
We’ve run the experiment three times with different water levels (and once with Southern Hemisphere rotation just for fun) and it worked beautifully each time.

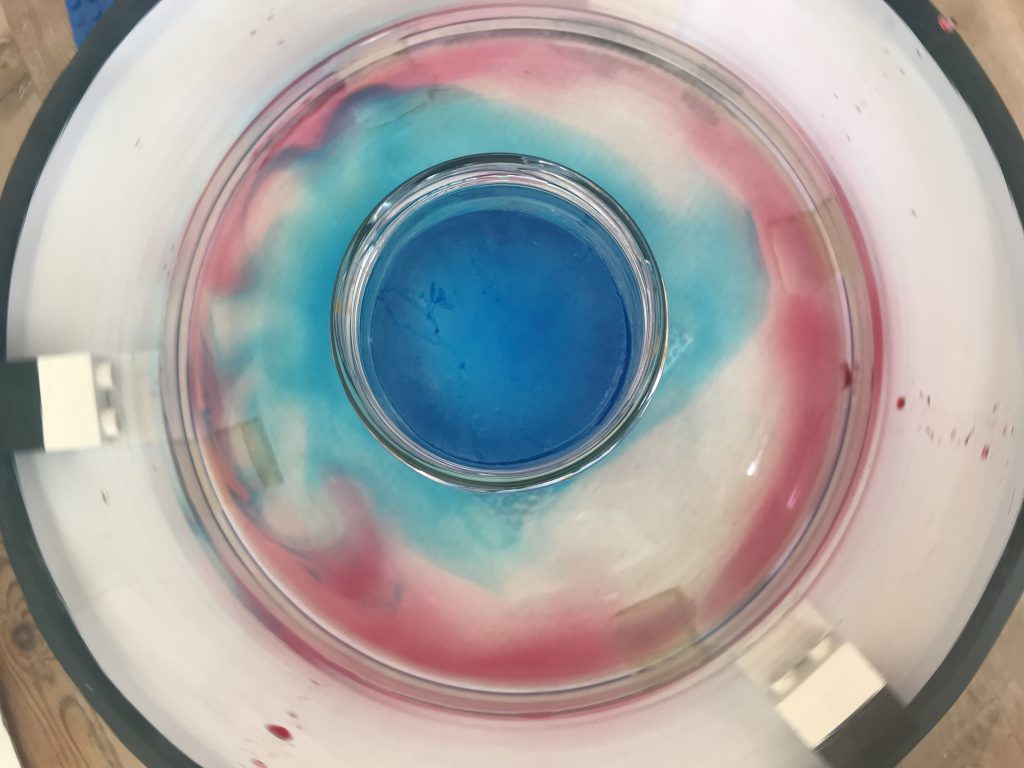
I find it always fascinating how there is hardly any mixing between the red and blue curtains (and there shouldn’t be any because rotating flows become 2D (as shown here)).

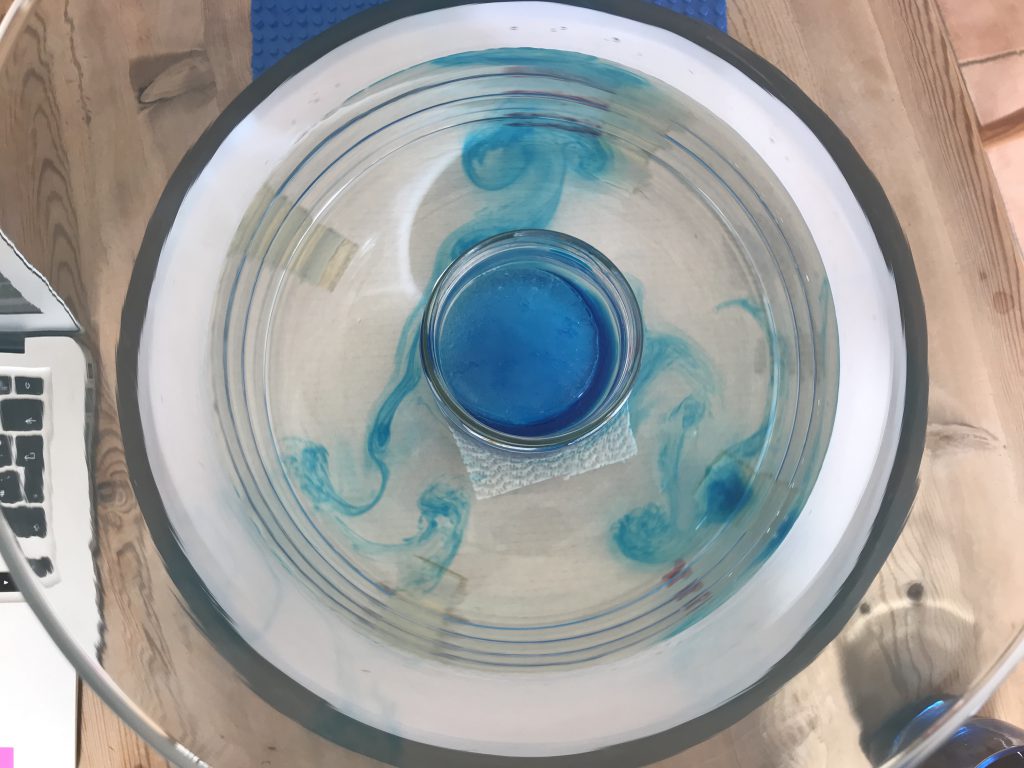
Just look at how the dye curtains form when we first add the blue dye…

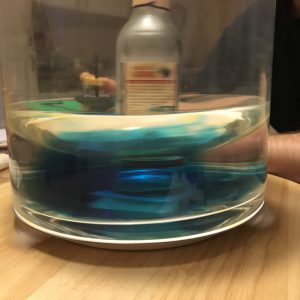
And then a little later added some red dye…

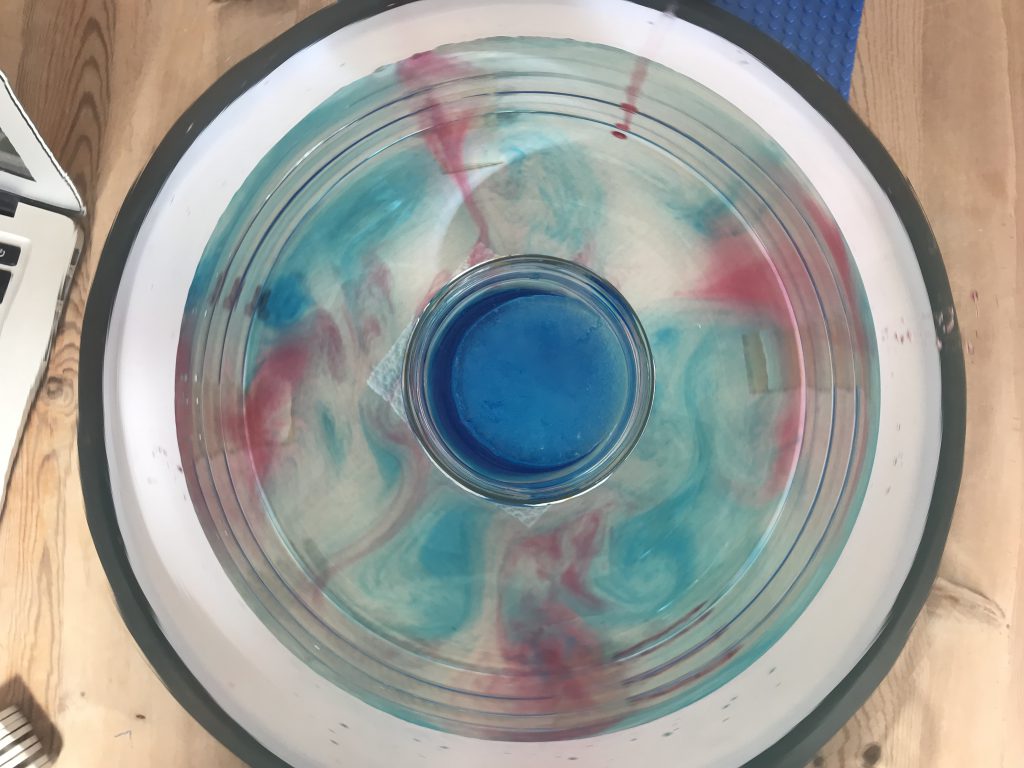
And then let the field develop.

So I think we’ve got this experiment down and can run it with the students once the semester starts up again in October! :-)

Working on our own affordable rotating table for oceanographic experiments!

Inspired by the article “Affordable Rotating Fluid Demonstrations for Geoscience Education: the DIYnamics Project” by the Hill et al. (2018), Joke, Torge and I have been wanting to build an affordable rotating table for teaching for a while now. On Saturday, we met up again to work on the project.

This post is mainly to document for ourselves where we are at and what else needs to happen to get the experiments working.

New this time: New rotating tables, aka Lazy Susans. After the one I’ve had in my kitchen was slightly too off-center to run smoothly, we bought the ones recommended by the DIYnamics project. And they work a lot better! To center our tank on the rotating table and keep it safely in place, we used these nifty LEGO and LEGO Duplo contraptions, which worked perfectly.

We also used a LEGO contraption to get the wheel close enough to drive the rotating table. The yellow line below shows where the rim of the rotating table’s foot needs to sit.

And this is how the engine has to be placed to drive the rotating table.

First attempt: Yes! Very nice parabolic surface! Very cool to see time and time again!

Now first attempt at a Hadley cell experiment: A jar with blue ice is placed at the center of the tank. Difficulties here: Cooling sets in right away, before the rotating tank has reached solid body rotation. That might potentially mess up everything (we don’t know).

So. Next attempt: Use a jar (weighted down with stones so it doesn’t float up) until the tank has reached solid body rotation, then add blue ice water

Working better, even though the green dye is completely invisible…

We didn’t measure rotation, nor did we calculate what kind of regime we were expecting, so the best result we got was “The Heart” (see below) — possibly eddying regime with wavenumber 3?

Here is what we learned for next time:

  • use better dye tracers and make sure their density isn’t too far off the water in the tank
  • use white  LEGO bricks to hold the tank in place (so they don’t make you dizzy watching the tank)
  • measure the rotation rate and calculate what kind of regime we expect to see — overturning or eddying, and at which wave number (or, even better, the other way round: decide what we want to see and calculate how to set the parameters in order to see it)
  • use white cylinder in the middle so as to not distract from the circulation we want to see; weigh the cylinder down empty and fill it with ice water when the tank has reached solid body rotation
  • give the circulation a little more time to develop between adding the cold water at the center and putting in dyes (at least 10 minutes)
  • it might actually be worth reading the DIYnamics team’s instruction again, and to buy exactly what they recommend. That might save us a lot of time ;-)

But: As always this was fun! :-)

P.S.: Even though this is happening in a kitchen, I don’t think this deserves the hashtag #kitchenoceanography — the equipment we are using here is already too specialized to be available in “most” kitchens. Or what would you say?

My first attempt at building a rotating table for kitchen oceanography using LEGO

Inspired by the article “Affordable Rotating Fluid Demonstrations for Geoscience Education: the DIYnamics Project” by the Hill et al. (2018), I spent a fun Sunday afternoon with my friends Joke and Torge in their kitchen, playing with Legos, water and food dye.

Turns out building a rotating table isn’t as easy as we had hoped, because my Lazy Susan’s axle is unfortunately really off centre (how did I never notice before?), which makes it pretty difficult to drive it with a grinding wheel, and the LEGO motor we were using only has one speed (which would have to be regulated by changing the diameter of the gears). That makes it really difficult to spin up a tank at rest if you go at it zero to full force…

But we got it to spin! Look at the cool paraboloid surface!

Next issue, though: my awesome glass vase which looks like it should work well as a tank has a really irregular bottom, which makes it very difficult to have anything stand in the centre without too much of a wobble. Also, for the Hadley Circulation experiment we were trying to set up here, when do you add in the cooling in the center? Would be best to do it after the tank is spun up, but that is such a pain to do! And I messed up the dye here, too.

But at least you can see a little bit of what it will be like when we are done, right?

Next time:

  • better Lazy Susan
  • better lighting
  • think about how to film it, therefore either have a co-rotating camera or a white background

And then it will be almost ready to be used in teaching. Well, almost…

Funny how tank experiments that you think should be quick and easy to set up & run always take sooo much longer than expected. But it’s so much fun that I really don’t mind! :-)