Tag Archives: temperature

Why folic acid might be good for people, but not so good for tank experiments

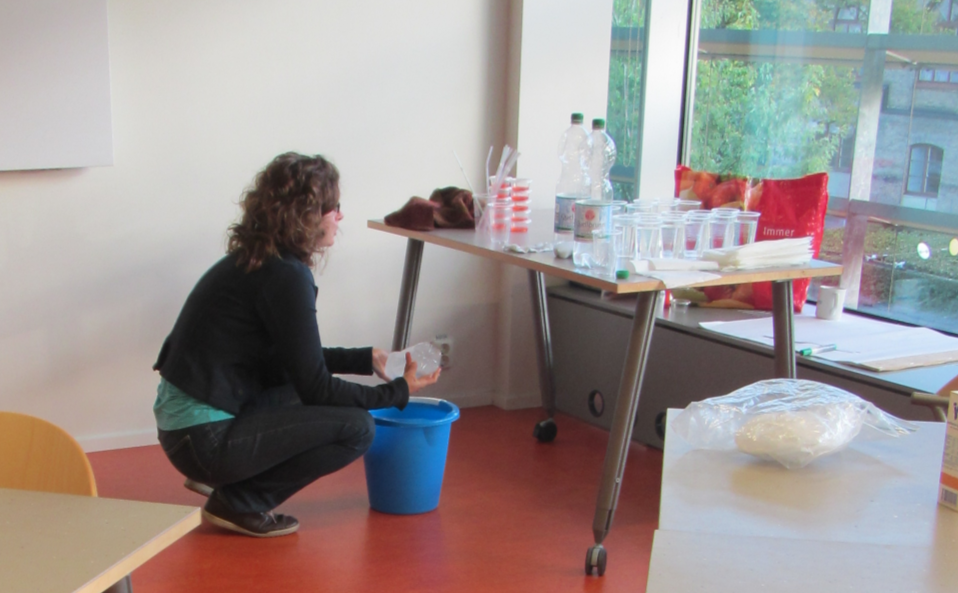
I had to do the complete series of experiments, of course…

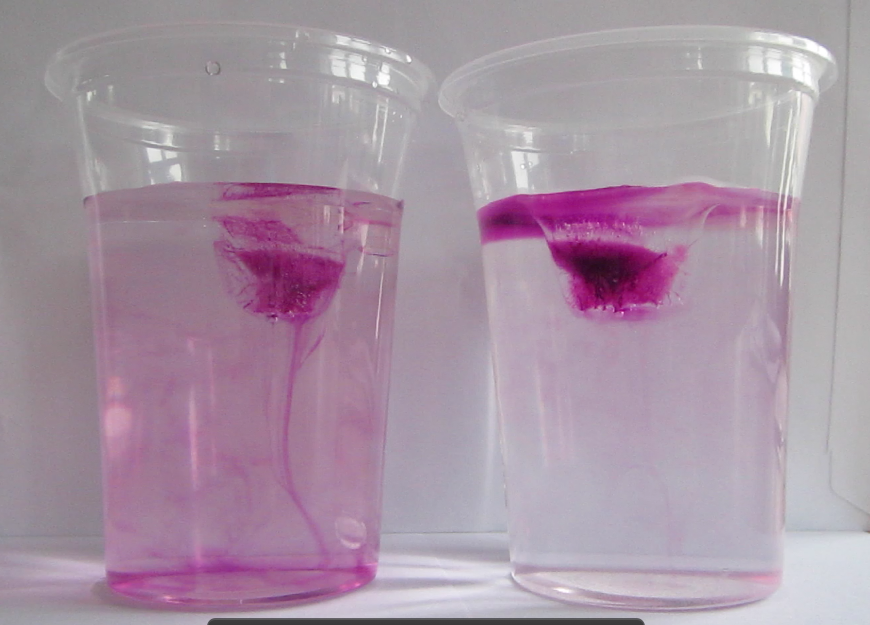
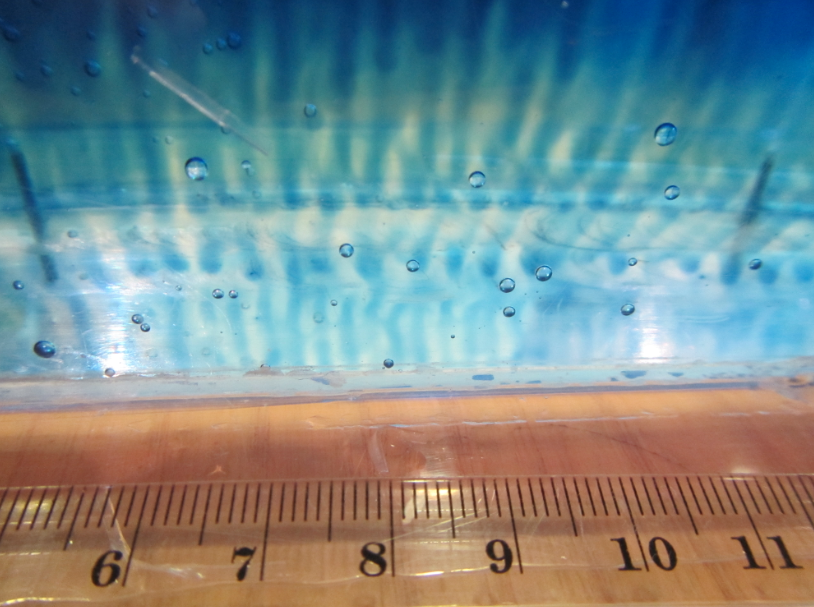
The other day I mentioned that I had used salt from my kitchen for the “ice cubes melting in fresh and salt water” experiment, and that that salt was the super healthy one that was both iodized and containing folic acid. And what happened is that the experiment looked like I was using milk. Not what I had envisioned.

MVI_9236

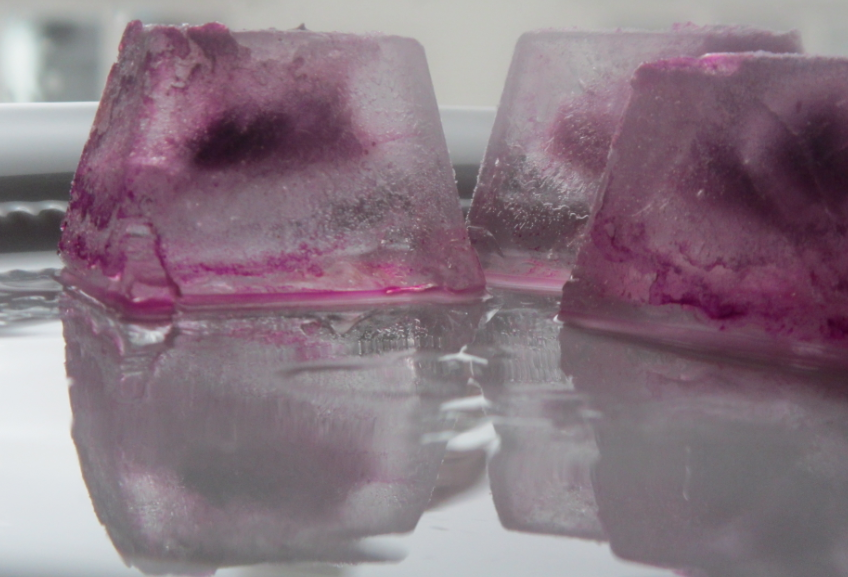
Ice cubes melting in fresh water (left) and in iodized-salt-with-folic-acid water (right)

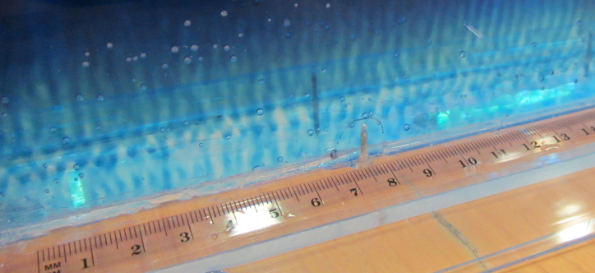
Since I had often before used just regular table salt – which is usually iodized – I was intrigued by the opaqueness that seemed to be due to the addition of folic acid. Or was it? That I had never noticed the milky-ness of the salt water didn’t necessarily mean that it had not been milky before. So this is what the same experiment looks like if regular iodized table salt is used:

MVI_9249

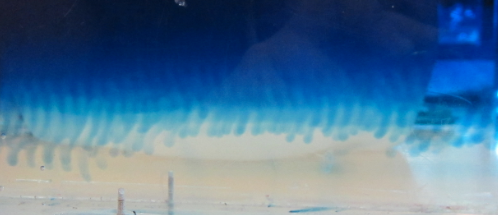
Ice cubes melting in fresh water (left) and in iodized-salt water (right). Turbulence in the freshwater beaker due to me stirring (don’t ask)

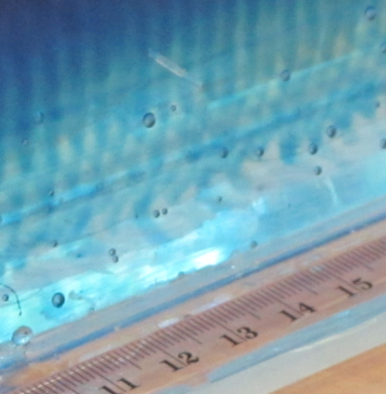
In the literature it is always recommended to use kosher salt for experiments. Kosher meaning in this context that the salt should be only NaCl with no other additions. I happened to have some at hand after having bought it for the “teaching oceanography” workshop in San Francisco last year (after the salt that I brought for the workshop didn’t make it to the US. Long story). So this is what that looks like:

MVI_9248

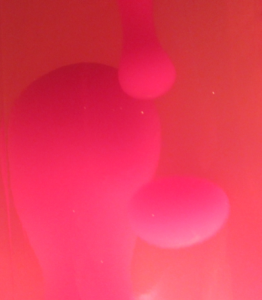
Ice cubes melting in fresh water (left) and in kosher salt water (right)

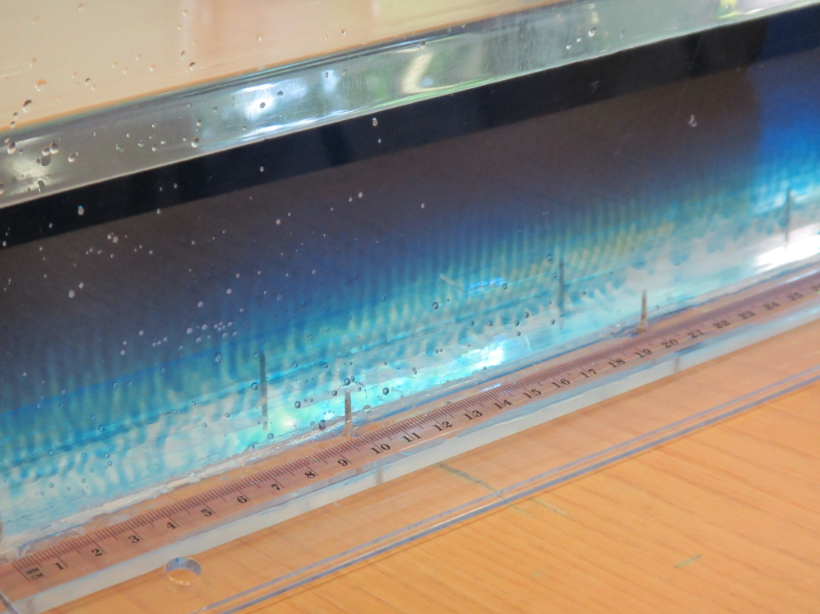
In summary: Folic acid is what makes the salt water look opaque – but iodized salt is completely fine for tank experiments. I think it’s tiny air bubbles that cling to something folic acid-y, but I have no clue what is going on. I noticed that the dusty stuff settled down over night (so the top experiment here is a lot clearer than the experiment I ran with the same batch of water the day before), but even the next day the water wasn’t completely clear.

Anyway, now we know. And I came out of this series with more movies of ice cubes melting in fresh water and salt water!

Links to previous posts on the topic after the cut.

[Edit: Using my mom’s iodized, but not folic acid containing, table salt leads to milky water, too. So there you have it. I have no clue what is going on!]

Continue reading

Melting ice cubes, again

Somehow I am stuck on this demonstration!

I can’t let go of this experiment. Last time I posted about it, someone (Hallo Papa!) complained about the background and how I should set a timer and a ruler next to the beakers for scale. The background and timer I did something about, but the ruler I forgot. Oh well, at least there is room for improvement still, right?

I always find it fascinating to see how differently the ice melts in fresh water and salt water. Below you see how convection has completely mixed the fresh water with the melt water, whereas the melt water forms a layer on the salt water. You can even still distinguish horizontal currents in there!

IMG_9241

The beakers after ice cubes have melted in fresh water (left) and salt water (right)

For everybody who still enjoys watching the experiment: Here is a movie. Top one as time lapse, bottom one in real time, all 8 minutes of it. Enjoy!

The links to the “melting ice cubes” series after the cut.

Continue reading

Conducting experiments at EMSEA14

Kristin’s and my workshop at EMSEA14.

As I mentioned before, Kristin Richter and I are running the workshop “Conducting oceanographic experiments in a conventional classroom anywhere” at the European Marine Science Educator’s Association Meeting in Gothenburg, Sweden. There is quite an active Twitter crowd around, so you can follow the storyfied meeting or look out for #EMSEA14 on Twitter.

Our workshop has been represented quite well there, too, so I’ll just post a couple of my own pictures here.

IMG_9702

Final preparations: Kristin is mixing salt water

IMG_9704

Watching intently the melting ice. As my former boss would say: It’s like watching paint dry.

IMG_9708

Except that it is really fascinating and that there are so many things to discuss!

IMG_9717

Kristin and I took turns presenting the workshops, which was great. Plus it was really nice to have two instructors walking around, talking to the groups, instead of just one.

IMG_9725

Kristin talking about using our favorite experiment to practice applying the scientific method.

For further reading, here are our slides.

Plus there are a lot of post dealing with the exact same experiment after the cut below. And there are two more posts on this exact experiment coming up that are scheduled already, one tomorrow, the other one in two weeks time. And thanks to a very nice family of participants I already have plenty of ideas of how to modify this experiment in the future!

[edit: There finally is a picture of me in the workshop, too, to show that I actually did contribute and not just leave it all to Kristin:

IMG_9779

So I did actually do something, too, and not just take pictures. Plus did you notice how there is a EMSEA sign on the podium? There were signs on the doors, too, both on the inside and outside, so one of them was visible even when the door was wide open. Such good thinking of the organizers! Gothenburg University does have a seriously impressive infrastructure in any case: Tables and chairs on wheels so the whole room could easily be modified to suit our needs. Awesome.]


The icy elevator

Weird things happening when ice cubes melt.

Remember I said that there were weird and wonderful things going on when I last ran the melting ice cubes in salt and fresh water experiment? It is really difficult to see in the picture below (sorry!) but you can probably spot the ice cube floating at the surface and the melt water sinking down, inducing some turbulence? And then there is a small ice bit a bit to the right of the center of the picture. And that ice bit is floating upwards.

MVI_9219

Dyed ice cube floating at the surface, and small ice bits floating up

Watch the melting ice cubes video below to see all the thing in action, it is visible really well as soon as the picture is moving:

So what is going on there? I think the solution to this riddle lies in me forcing ice to freeze even though it contains more salt (or in this case, red food dye) than it is happy with. Remember how dyed ice cubes look?

IMG_4523

Ice cubes frozen from colored water

So basically there is dye trapped in the middle of the cube, because cooling is happening from all sides, hence ice is starting to form from all sides, pushing the dye to the center of the ice cube. In the ocean, cooling would of course only happen from above, so salt is being rejected as brine.

Anyway, since I wanted to dye the ice cubes to make things more visible for this blog, I am adding a dissolved substance to the water that would usually not be there. Hence I am making the ice slightly denser than it would otherwise be. So when small ice bits chip away from the main cube (which still contains large parts of pure fresh water ice from the sides of the cube where, during the freezing, the dye could still be rejected; and which therefore still floats), they are denser than the water and sink. But as they melt, the dye washed out, and eventually the remaining ice is fresh, hence less dense, enough to float up again.

The whole thing looks pretty fascinating.

What do you think, is that the correct explanation? Or can you come up with a better one? Let me know!

P.S.: Everybody I showed this video to was fascinated by how the little piece of ice is floating up. But what I find a lot more fascinating is how it came to be at the bottom of the beaker in the first place! After all, ice is supposed to float on water (or drift up again if pulled down and then released) but how did it get down there???

Melting ice cubes reloaded

Or why you should pay attention to the kind of salt you use for your experiments.

The melting ice cubes in salt and fresh water is one of my favorites that I haven’t written about in a long time, even though (or possibly: because) I wrote a whole series about it last year (see links at the end of this post).

Now that the EMSEA14 conference is almost upon us and Kristin and I busy preparing our workshop, I thought I’d run the experiment again and – for a change – take the time to finally know how much time to schedule for running the experiment. This is the experiment that I have run most often of all in all kinds of classes, but there you go… Usually I have more time than just 30 minutes, and there is so much other content I want to cover in that workshop!

There are a couple of things that I learned running this experiment again.

  • It takes at least 10 minutes to run the experiment. My water was slightly colder than usual room temperature, my ice cubes slightly smaller, though. And those 10 minutes are only the time the ice takes to melt, not the time it takes to hand out the materials and have the groups settle down.
  • There is a reason it is always recommended to use kosher salt for these kind of experiments. Look at the picture from one of the old posts in comparison to the ones from today: The iodized salt containing folic acid I had in my kitchen dissolves into really milky water. I really should have walked the two extra meters to get the good salt from my oceanography supplies in the other room!
Melting_ice_cubes_2

Ice cubes melting in fresh water (left) and salt water (right) – old experiment

IMG_9220

Ice cubes melting in fresh water (left) and salt water (right) – experiment today

  • Some food dyes are the devil. My whole kitchen is red. Plus the ice cubes didn’t freeze nicely (for a post on ice cubes freezing from salt water click here), the ice chipped when I tried to get the cubes out of the ice cube tray. I definitely can’t have that mess at a workshop. So here is another argument for using non-dyed ice cubes! The more important argument being that you think more if the cubes are not dyed and you don’t immediately see the explanation…

But it is always a fun experiment to run, and there are always new things to spot. Watch the video below and see for yourself! (Explanations on the weird phenomena coming up in a future post!)

The links to the “melting ice cubes” series:

Ice cubes melting in salt water and freshwater (post 1/4)

Ice cubes melting in fresh water and salt water (post 2/4)

Melting ice cubes – one experiment, many ways (post 3/4)

Melting ice cubes – what contexts to use this experiment in (post 4/4)

Other posts on this experiment:

Dangers of blogging, or ice cubes melting in fresh water and salt water

Guest post: The mystery of the cold room

Salt fingering

My absolute favorite experiment ever: salt fingering.

I know I’ve said it before about another experiment, even today, but this is my absolute favorite experiment and I still get endlessly fascinated. I’ve written about salt fingering before, and given tips on run the experiment, but today we tried a different setup.

We used the same tank as in the “influence of salinity and temperature on density“, put warm, dyed water on the one side of the dam and cold fresh water on the other side.

Contrary to Rolf’s advice, we didn’t aim for specific temperatures and salinities to hit the density ratio in a specific way, but just went for really hot and really cold.

We pulled the parting out, and after a couple of minutes, salt fingers started to develop.

Unfortunately, they are really difficult to take pictures of.

But a lot of students watched and will hopefully remember what they saw.

And even if not – I thought it was awesome and Rolf said they were the best salt fingers he had seen yet – even though we just winged it ;-)

Thermally driven circulation

One of my all-time favorite experiments.

The salt group got a bit bored from watching ice cubes melt, so I suggested they look at temperature differences for a change, and they ran the “leaking bottles” experiment.

MVI_8938

Thermally-driven circulation.

Watch a movie combining their four different setups below!

Effects of temperature and salinity on density and stratification

Removing a barrier between waters of different densities and watching what happens. (deutscher Text unten)

Today, one of the groups performed a classical experiment (shown for example here) – but the awesome thing is that they came up with the planning pretty much by themselves in order to determine the effects of temperature and salinity on density. They compared water of the same temperature, but one fresh and one salty; warm salty vs cold fresh water; and cold salty vs warm fresh water. They predicted the outcome correctly, and we are showing two movies below: One normal movie and one in slow motion. Enjoy!

Heute hat eine Gruppe ein klassisches Experiment reproduziert. Allerdings haben sie es quasi selbstständig entwickelt.

Um den Effekt von Temperatur und Salzgehalt auf die Dichte zu bestimmen, werden zwei Wassermassen in einen Tank gefüllt, durch ein Wehr getrennt. Das Wehr wird herausgezogen und die dichtere Wassermasse schichtet sich unter die weniger dichte. Die Gruppe hat drei Fälle verglichen: Wasser gleicher Temperatur mit und ohne Salz; warmes salziges Wasser mit kaltem süßen; und warmes süßes Wasser mit kaltem salzigen. Der Film unten zeigt eine Zeitlupe der Bewegung.

:-)


Lava

Don’t you just love lava lamps?

I got a lot of weird looks when I excitedly told people about two years ago that I had just bought a lava lamp. But what’s not to love about them? Plus they are great for teaching. These days kids don’t know them any more, so they are missing out on a really nice mental image of how convection works. Be it in the Earth’s mantle or in the ocean…

IMG_6106

“Lava” flow.

When I moved into my new flat, for the first week I only had an inflatable air bed and my lava lamp in my living room (oh, and a lot of boxes of course). So I have spent a lot of time looking at how the flow changes over time.

Today, all I want to share is this 9 minute movie of the lava lamp. But I’m working on a post where I’m discussing the temporal development of the flow. Sounds interesting? Stay tuned! :-)

Tea and milk

More physics applications  connected to tea.

After the frustrations of taking pictures of steam in my last post, I decided that I could use the very same cute mug to show other stuff, too. I know it has been done over and over again, but we have new students every year, don’t we, so someone has to keep telling the old stories, right?

So. When should you pour the milk into your tea? Right away or a little later?

MVI_6063_2

Milk and tea

The answer, as you know, is “it depends”.

Do you want your tea as hot as possible? Then put the milk in right away and it won’t cool the tea down as much. Want the milk to cool down the tea as much as possible? Then wait for as long as you can before pouring it in.

The explanation behind this is of course that the cooling due to evaporation is happening faster the larger the temperature difference between the tea and the surrounding air. If you let it sit without milk, due to the larger temperature difference it cools down faster than if you poured in the cold milk, thus cooling it closer to room temperature, and then waited.

And there are even occasions when you would you put milk into the cup before adding the tea: If you have delicate china and don’t want to risk ruining it by pouring in almost boiling tea. Plus allegedly that way the milk doesn’t scald and form those weird flakes?