Tag Archives: temperature

Accidental double-diffusive mixing

When setting up the stratification for the Nansen “dead water” demo (that we’ll show later today, and until then I am not allowed to share any videos, sorry!), I went into a meeting after filling in layer 4 (the then lowest). When I came back, I wanted to fill in layer 5 as the new bottom layer. For this experiment we want the bottom four layers to have the same density (so we would actually only have one shallow top layer and then a deep layer below [but we can’t make enough salt water at a time for that layer, so I had to split it into four portions]), and I had mixed it as well as I could. But two things happened: a) my salinity was clearly a little fresher than the previous layer, and b) the water in the tank had warmed up and the new water I was adding with layer 5 was cold tap water. So I accidentally set up the stratification for salt fingering: warm and salty over cold and fresh! Can you spot the darker pink fingers reaching down into the slightly lighter pink water? How cool is this??? I am completely flashed. Salt fingering in a 6 meter long tank! :-D


Experiment: Temperature-driven circulation

My favorite experiment. Quick and easy and very impressive way to illustrate the influence of temperature on water densities.

This experiment is great if you want to talk about temperature influencing density. Although it doesn’t actually show anything different from a temperature driven overturning experiment, where circulation is determined by hot water rising and cold water sinking, somehow this experiment is a lot more impressive. Maybe because people are just not used to see bottles pouring out with the water coming out rising rather than plunging down, or maybe because the contrast of the two bottles where one behaves exactly as expected and the other one does not?

Anyway, it is really easy to do. All you need is a big jar and two small bottles. Cold water in one of the small bottles is dyed blue, hot water in the other small bottle is dyed red. Both are inserted in the jar filled with lukewarm water (movie below).

Using bottles with a narrower neck than mouth is helpful if you want to use the opportunity to talk about not only temperature-driven circulation, but also about double-diffusive mixing (which you see in form of salt fingers inside the red bottle in the picture above).

Isn’t this beautiful?

P.S.: This text originally appeared on my website as a page. Due to upcoming restructuring of this website, I am reposting it as a blog post. This is the original version last modified on December 2nd, 2015.

I might write things differently if I was writing them now, but I still like to keep my blog as archive of my thoughts.

Melting ice cubes experiment — observing the finer details

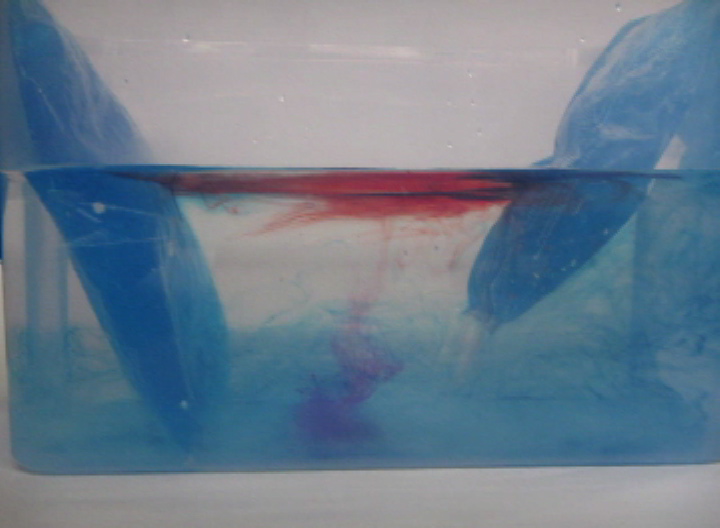
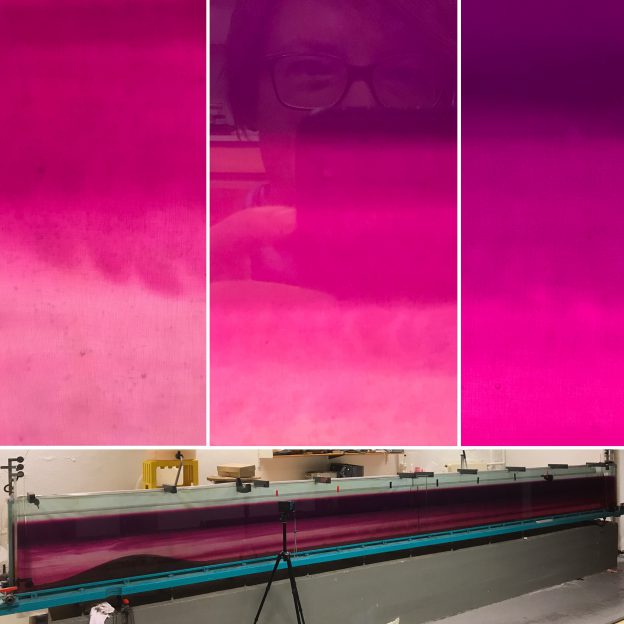
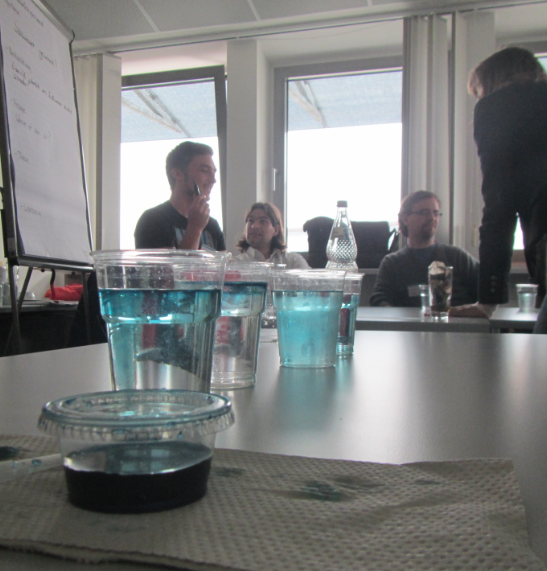
If you don’t know my favourite experiment for practically all purposes yet (Introduction to experimenting? Check! Thermohaline circulation? Check! Lab safety? Check! Scientific process? Check! And the list goes on and on…), check it out here. (Seriously, of you don’t recognize the experiment from the picture below, you need to read up on it, it’s awesome! :-))

dyed_ice_cubes_02

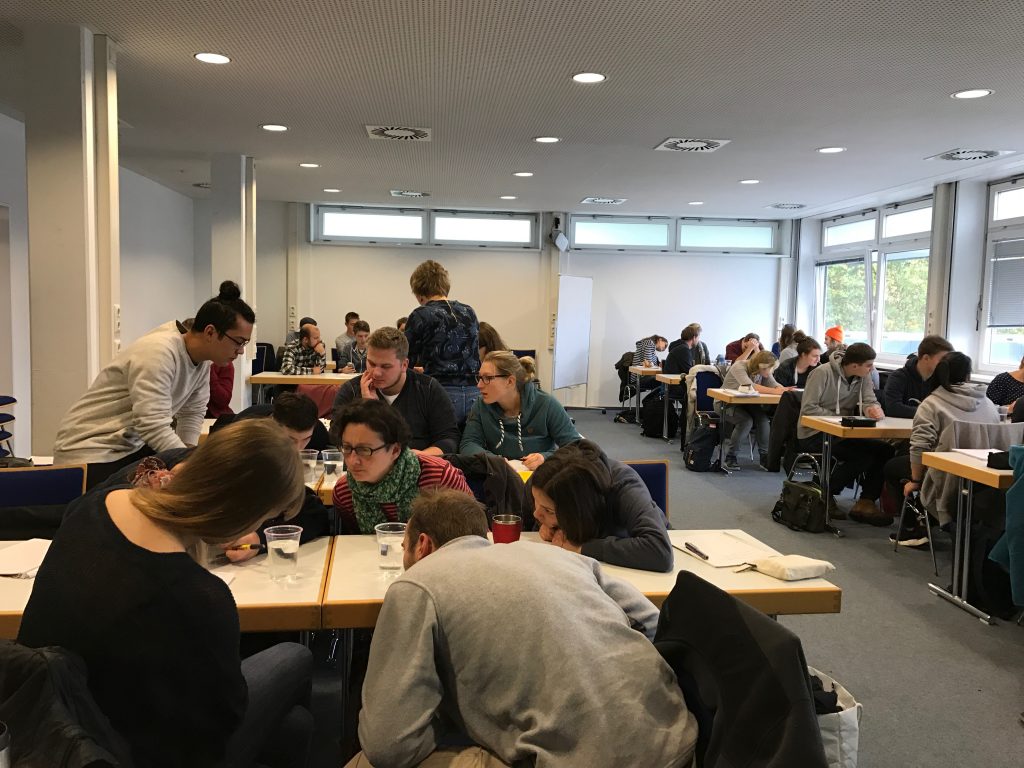
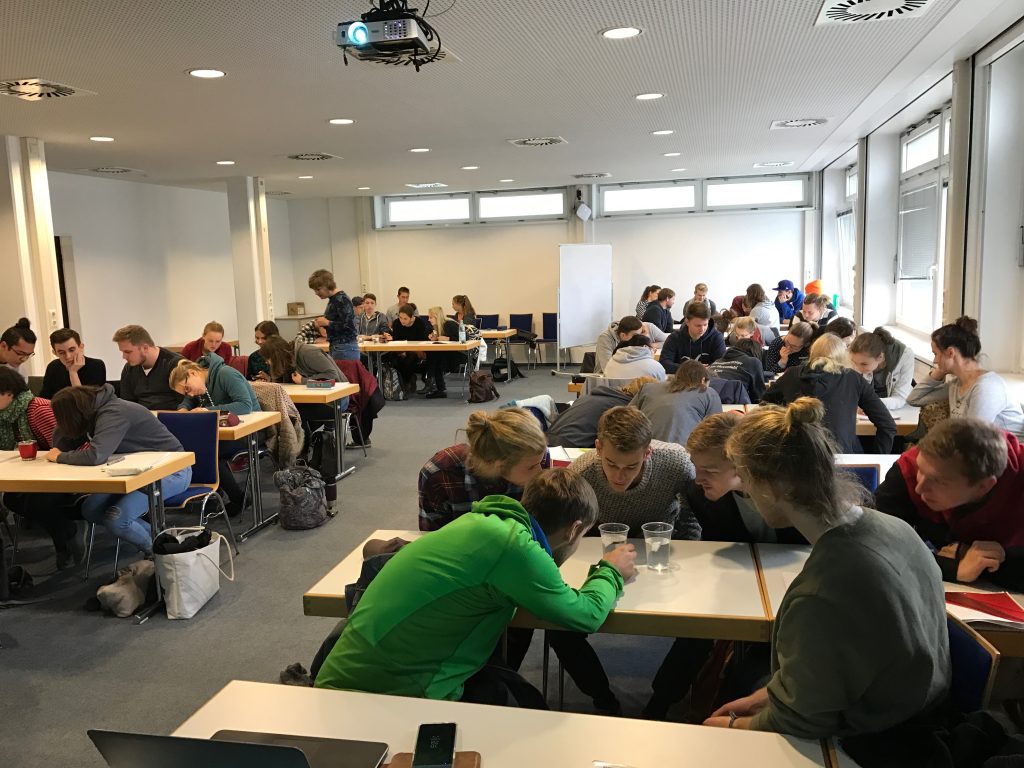
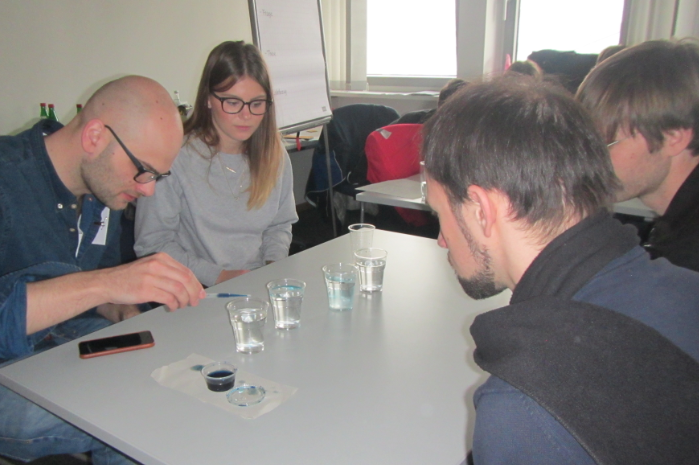
Susann and I got funding from PerLe (our university’s project to support teaching innovation) to add a couple of cool new features to Susann’s “intro to meteorology” lecture, and doing a hands-on experiment with 50 students in a lecture theatre in their second lecture was only one of the first of many more to come.

We used the experiment to introduce the students to oceanic circulation, and this experiment is, in my experience, very engaging and sparks curiosity, as well as being very nicely suited as a reminder that things are not as easy as they seem to be when you see those nice plots of the great conveyor belt and all the other simplified plots that you typically see in intro-level lectures. Especially understanding that there are many different processes at play simultaneously, and that they have different orders of magnitude and might act in different directions helps counteract the oversimplified views of the climate system that might otherwise be formed.

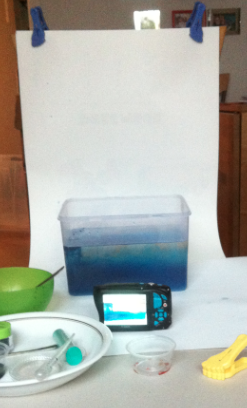
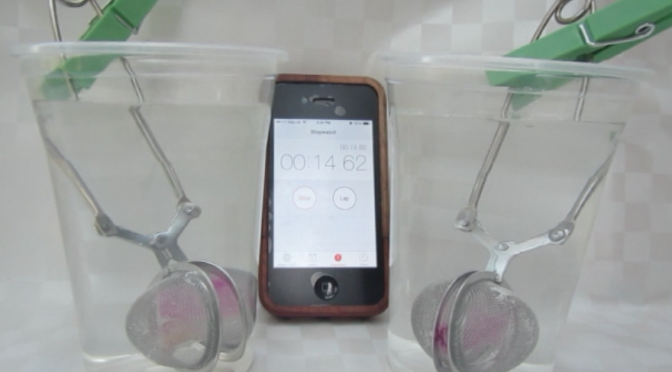
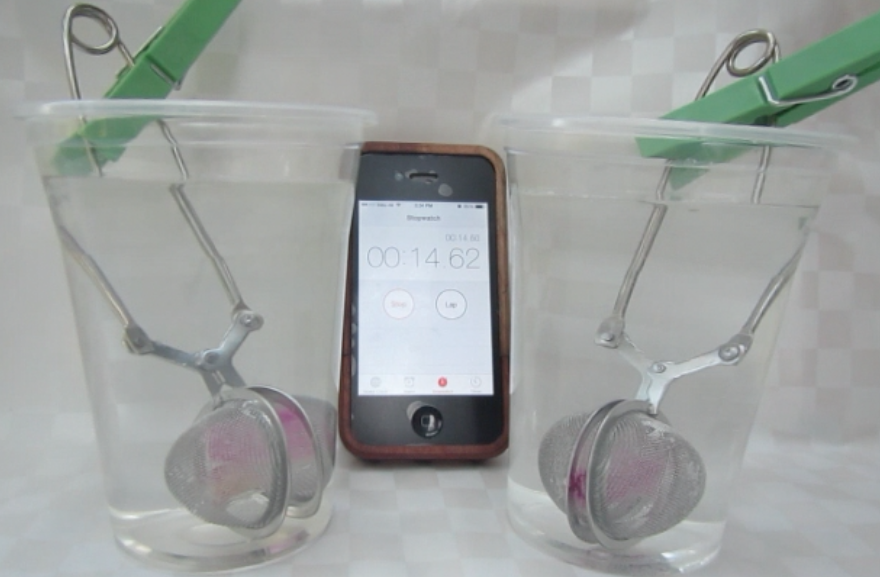
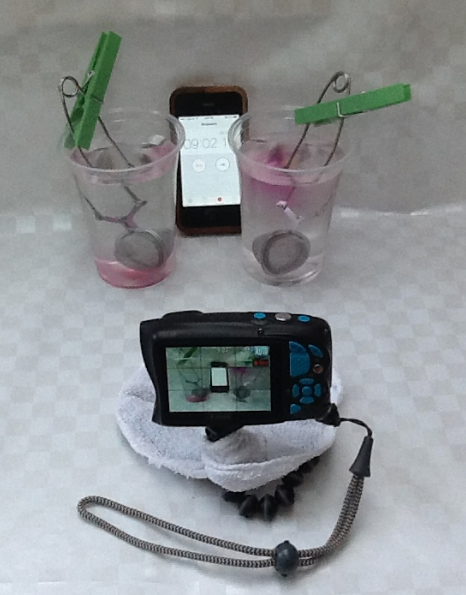
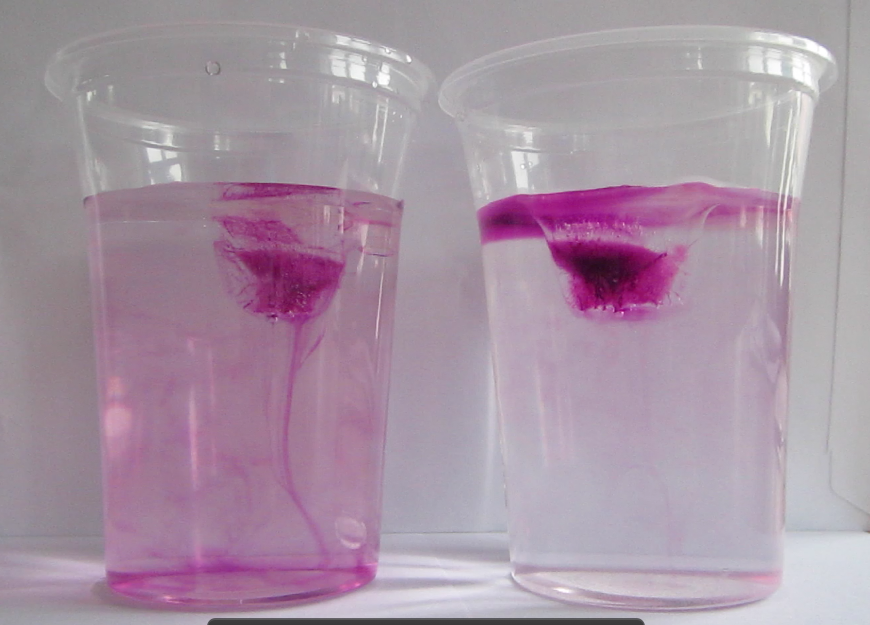
I usually use dye to make it easier to observe what’s going on in the experiment (either by freezing it directly into the ice cubes as shown in the picture on top of this blog post, or by dripping it onto the melting ice cubes when students have started to observe that — counter to their intuition — the ice cube in the fresh water cup is melting faster than the one in the salt water cup).  We had dye at hand, but I decided on the spur of the moment to not use it, because the students were already focussing on other, more subtle, aspects that the dye would only distract from:

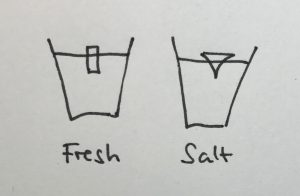
The shape of the ice cubes

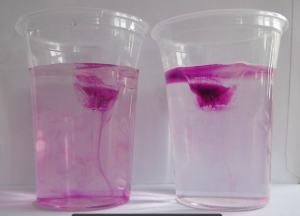
In many of the student groups, the most prominent observation was that the shape of the melting ice cubes was very different in the fresh water and salt water case. In the fresh water case, the ice cube melted from the sides inwards: as a cylindrical shape with a radius that was decreasing over time, but in any instance more or less constant for all depths. In the salt water case, however, the ice cube melted upwards: The top did not melt very much at all, but the deeper down you looked the more was melting away. Why?

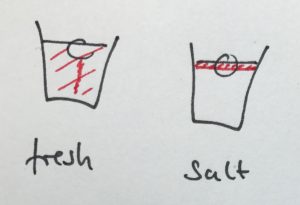
Condensation on the sides of the cup

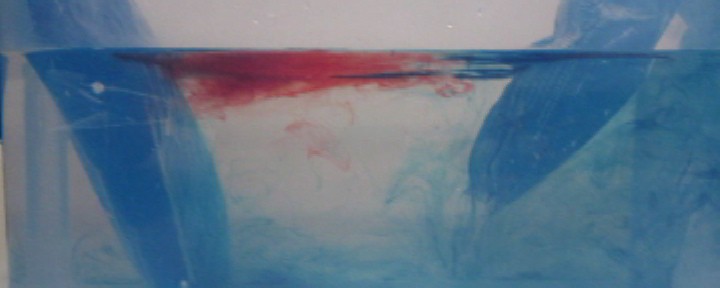
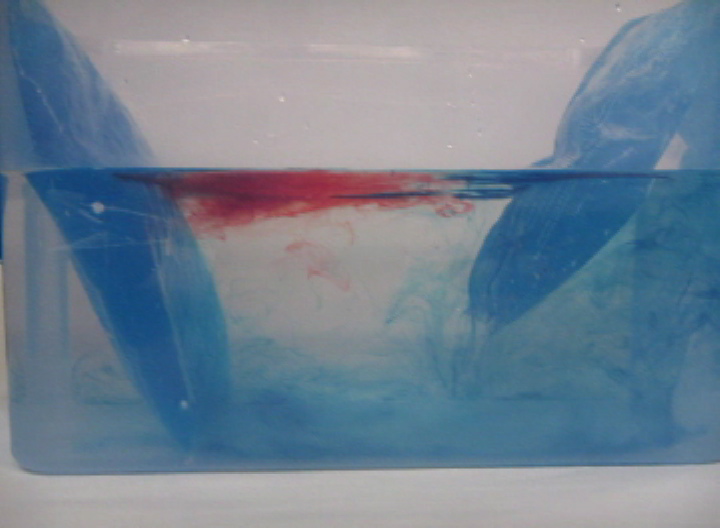
Another observation that I prompted was in what regions the cups showed condensation. In the fresh water case, there was a little condensation going on everywhere below the water line, and sometimes there were vertical streaks down from where the ice cube was touching the wall. In the salt water case, there was only a small band of intense condensation close to the water level.

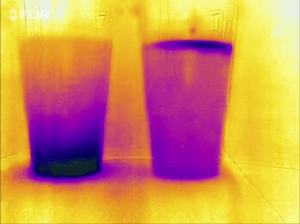
This, not surprisingly, looks very similar to what a thermal imaging camera sees when observing the experiment (as described in this post).

screen-shot-2017-06-11-at-17-12-55

Taken together, those two observations are quite powerful in explaining what is going on, and it seemed to be a fun challenge for the students to figure out why there was condensation on the outside of the cups in the first place (does condensation occur in warmer or colder places?), what it meant that different places ended up being warmer or colder, and how all of that is connected to global ocean circulation. Definitely an experiment I would recommend you do! :-)

Ice cubes melting in fresh water and salt water. By Mirjam S. Glessmer

Using the “melting ice cube” experiment to let future instructors experience inquiry-based learning.

Using the “melting ice cube” experiment to let future instructors experience inquiry-based learning.

I recently (well, last year, but you know…) got the chance to fill in for a colleague and teach part of a workshop that prepares teaching staff for using inquiry-based learning in their own teaching. My part was to bring in an experiment and have the future instructors experience inquiry-based learning first hand.

So obviously I brought the ice cubes melting in fresh water and salt water experiment! (Check out that post to read my write-up of many different ways this experiment can be used, and what people can learn doing it). On that occasion the most interesting thing for me was that when we talked about why one could use this — or a similar — experiment in teaching, people mainly focussed on the group aspect of doing this experiment: How people had to work together in a team, agree to use the same language and notation (writing “density of water at temperature zero degree Celsius” in some short syntax is not easy when you are not an oceanographer!).

IMG_3179

And this experiment never fails to deliver:

  • you can be 100% sure that at least in one group, someone will say “oh wait, which was the salt water again?” which hands you on a plate the opportunity to say “see — this is a great experiment to use when talking about why we need to write good documentation already while we are doing the experiment!”
  • you can also be 100% sure that in that group, someone will taste the water to make sure they know which cup contains the salt water. Which lets you say your “see — perfect experiment to talk about lab safety stuff! Never ever put things in your mouth in a lab!”
  • you can also be sure, that people come up with new experiments they want to try. At EMSEA14, people asked what would happen if the ice cubes were at the bottom of the beaker. Today, people asked what the dye would do if there was no ice in the cups, just salt water and fresh water. Perfect opportunity to say “try! Then you’ll know! And btw — isn’t this experiment perfect to inspire the spirit of research (or however you would say that in English – “Forschergeist” is what I mean!). This is what you see in the pictures in this blog post.

IMG_3184

So yeah. Still one of my favorite experiments, and I LOVE watching people discover the fascination of a little water, ice, salt and food dye :-)

Experiment_06

Photo taken by Ulrike Bulmann

Experiment_08

Photo taken by Ulrike Bulmann

Btw, when I gave a workshop on active learning last week and mentioned this experiment, people got really really hooked, too, so I’ll leave you with a drawing that I liked:

IMG_4306

One of the most exciting things about work travel?

One of the most exciting things about work travel? Staying in tons of different hotels, which all have different opportunities to play with water.

For example at a recent team event, there was this tap with a really efficient aerator, that made the hydraulic jump look even more exciting than usual:

IMG_3611

And then at a conference last week, this happened:

Wasserhahn_Stuttgart

Can you see what happened? Obviously, I turned the water on, and the right side of the armature fogged up because of all the cold water going through! (Even though I can assure you: My shower was nice and warm!)

And I am not even going to apologise for how excited I get by observing these kinds of things. Remember the kind of tap I have at home?

2015-11-18 13.15.31

Still the coolest tap I have ever seen! :-)

The importance of playing in outreach activities.

Some time ago, I wrote two blog posts on the importance of playing in outreach activities for the EGU’s blog’s “educational corner” GeoEd. Both have now been published, check them out! Here is the link on EGU’s website (here) and in case that ever stops working, it is also available on my own website (here – including a lot of bonus materials that didn’t make the cut over at EGU)

What do you think? What makes for the best outreach activities?

My favorite demonstration of the coolest mixing process: Salt fingering!

I am updating many of my old posts on experiments and combining multiple posts on the same topic to come up with a state-of-the-art post, so you can always find the best materials on here. And today I would like to present you my favorite experiment: Salt fingering!

Check out the new page I made for salt fingering!

IMG_9084

Self-portrait with salt fingers

As you guys might have noticed, I’ve been playing around with my site a quite bit. My blog has moved to mirjamglessmer.com/blog in order to make room for static pages of my favorite experiments or teaching tips right at the landing site mirjamglessmer.com. What do you think? Good idea? Did you notice anything that isn’t quite working yet or do you have advice or wishes? Let me know!

Temperature-driven overturning experiment – the easy way

In my last post, I showed you the legendary overturning experiment. And guess what occurred to me? That there is an even easier way to show the same thing. No gel pads! (BUT! And that is a BIG BUT! Melting of ice cubes in lukewarm water is NOT the process that drives the “real” overturning! For a slightly longer version of this post check this out).

So. Tank full of luke warm water. Red dye on one end. Spoiler alert: This is going to be the “warm” end.

overturning-ice-1
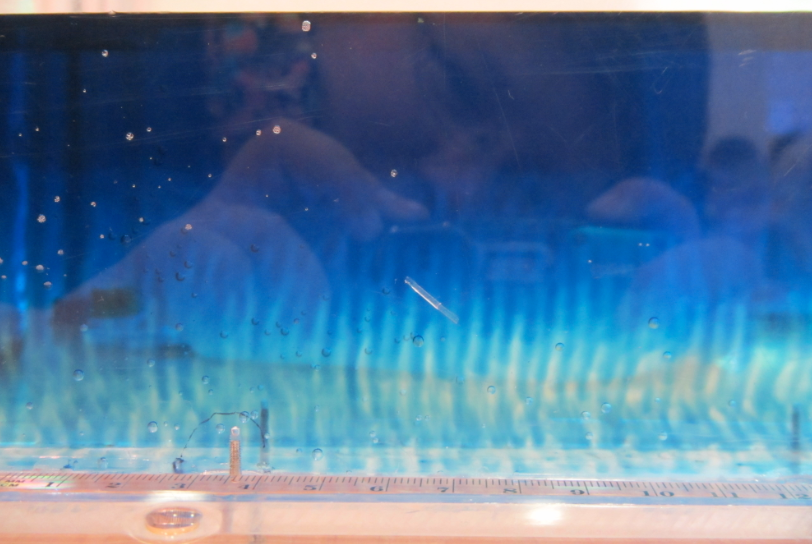
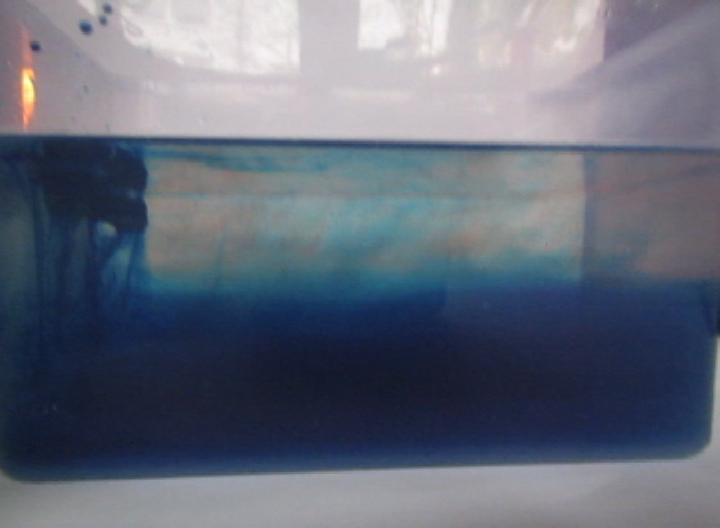
Now. Ice cubes on the “cold” end. For convenience, they have been dyed blue so that the cold melt water is easily identifiable as cold.

overturning-ice-2
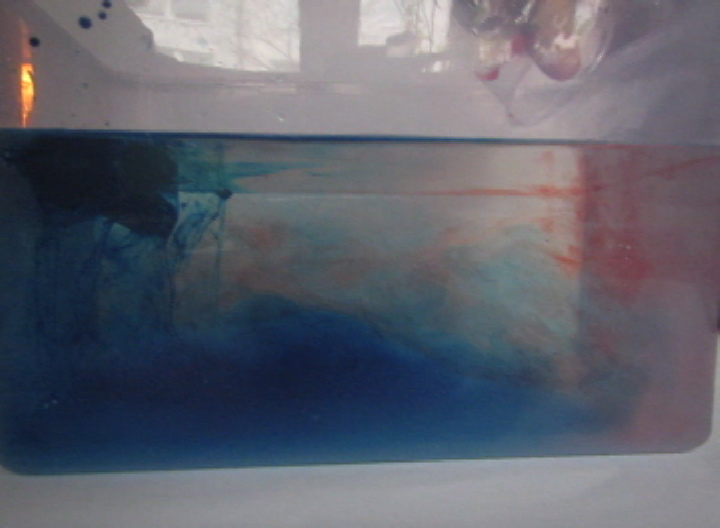
A very easy way to get a nice stratification! And as you see in the video below, awesome internal waves on the interface, too.

overturning-ice-3

And because I know you like a “behind the scenes”:

I took this picture sitting on my sofa. The experiment is set up on the tea table. The white background is a “Janosch” calendar from 15 years ago, clipped to the back of a chair. And that is how it is done! :-)

Screen shot 2015-11-02 at 3.41.24 PM

Overturning experiment. By Mirjam S. Glessmer

A very simple overturning experiment for outreach and teaching

For one of my side-projects I needed higher-resolution photos of the overturning experiment, so I had to redo it. Figured I’d share them with you, too.

You know the experiment: gel pads for sports injuries, one hot (here on the left), one cold (here on the right). Blue dye on the cold pad to mark the cold water, red dye on the warm pad as a tracer for warm water.

overturning

Thermally-driven overturning circulation: Warm water flowing near the surface from the warm pad on the left towards the right, cold flow from the cool pad at the bottom right to left.

A circulation develops. If you drop dye crystals in the tank, the ribbon that formed gets deformed by the currents for yet another visualization of the flow field.

overturning2

Thermally-driven overturning circulation. In the middle of the tank you see a ribbon of dye, caused by falling dye crystals, being transformed by the currents in the tank.

Lighting is a problem this time of year. I chose natural light over artificial, and it came out ok, I think.

And here is the video:

Ice cubes melting at the bottom of the beakers

Because surely there is one more post in this topic? ;-)

For those of you who haven’t heard about the “melting ice cube” obsession of mine, please check out the links to other posts at the end of this post. For everybody else’s sake, let’s dive right in!

When Kristin and I ran the workshop at EMSEA14, a couple of people asked very interesting questions. One that I totally had to follow up on was this: What would happen if the ice cubes were forced to the bottom of the beakers? Of course we knew what theory said about this, but who cares? I still had to try.

If you have ever tried holding down ice cubes with straws…

MVI_9786

…and we have a movie of this! :-)

…you might know that that is quite difficult. So this is the experimental setup I ended up with:

MVI_0251_01

Ice cubes melting at the bottom of a fresh water and a salt water beaker

Zooming out a little bit, this is my fancy equipment:

Screen shot 2014-10-12 at 8.59.10 AM

The camera gets a white skirt over the tripod because the reflection of the tripod is seriously annoying

Zooming out a little more, this is the whole setup:

Screen shot 2014-10-12 at 8.58.46 AM

Chair on table in my winter garden, holding the white-ish oilcloth that serves as background. I should invest in a proper rod for the upper edge of the oil cloth, the current one has suffered a bit…

I know that some people want to try the experiment for themselves, so I’ll hide the rest of the experiment behind the cut, at least until Kristin tells me that she’s done it :-)

Continue reading