Tag Archives: melting ice cubes experiment

Considered exemplary: My “ice cubes melting in fresh water and salt water” in the “on the cutting edge” teaching collection! :-)

After reading recently that I am being considered the queen of the melting ice cube (aaaaw, thank you!!!), having my movies of the experiment featured in Elin Darelius and Petra Langebroek’s article on “fun in the kitchen”, and hearing that the activity I posted on the “On The Cutting Edge”‘s website using the very same experiment has been awarded “exemplary” status (so excited!), I simply had to talk about this experiment again. Even though just two days ago I talked about using it as a tool to let future instructors experience inquiry-based learning. One really cannot talk about this experiment enough!

Go check it out on On The Cutting Edge’s website, check out my own summary page with all the best tips and tricks, watch the movie below or look at all the posts tagged with “melting ice cubes experiment“. And then go and DO THE EXPERIMENT!

Ice cubes melting in fresh water and salt water. By Mirjam S. Glessmer

Using the “melting ice cube” experiment to let future instructors experience inquiry-based learning.

Using the “melting ice cube” experiment to let future instructors experience inquiry-based learning.

I recently (well, last year, but you know…) got the chance to fill in for a colleague and teach part of a workshop that prepares teaching staff for using inquiry-based learning in their own teaching. My part was to bring in an experiment and have the future instructors experience inquiry-based learning first hand.

So obviously I brought the ice cubes melting in fresh water and salt water experiment! (Check out that post to read my write-up of many different ways this experiment can be used, and what people can learn doing it). On that occasion the most interesting thing for me was that when we talked about why one could use this — or a similar — experiment in teaching, people mainly focussed on the group aspect of doing this experiment: How people had to work together in a team, agree to use the same language and notation (writing “density of water at temperature zero degree Celsius” in some short syntax is not easy when you are not an oceanographer!).

IMG_3179

And this experiment never fails to deliver:

  • you can be 100% sure that at least in one group, someone will say “oh wait, which was the salt water again?” which hands you on a plate the opportunity to say “see — this is a great experiment to use when talking about why we need to write good documentation already while we are doing the experiment!”
  • you can also be 100% sure that in that group, someone will taste the water to make sure they know which cup contains the salt water. Which lets you say your “see — perfect experiment to talk about lab safety stuff! Never ever put things in your mouth in a lab!”
  • you can also be sure, that people come up with new experiments they want to try. At EMSEA14, people asked what would happen if the ice cubes were at the bottom of the beaker. Today, people asked what the dye would do if there was no ice in the cups, just salt water and fresh water. Perfect opportunity to say “try! Then you’ll know! And btw — isn’t this experiment perfect to inspire the spirit of research (or however you would say that in English – “Forschergeist” is what I mean!). This is what you see in the pictures in this blog post.

IMG_3184

So yeah. Still one of my favorite experiments, and I LOVE watching people discover the fascination of a little water, ice, salt and food dye :-)

Experiment_06

Photo taken by Ulrike Bulmann

Experiment_08

Photo taken by Ulrike Bulmann

Btw, when I gave a workshop on active learning last week and mentioned this experiment, people got really really hooked, too, so I’ll leave you with a drawing that I liked:

IMG_4306

Oceanography PBL workshop and case

My awesome colleague Marisa ran another workshop on Problem-Based Learning (PBL) in which I was lucky enough to assist. For the last workshop for people who are planning to use PBL in their teaching, we used the solar eclipse to build a case around. Since this time we weren’t as lucky to have a solar eclipse happening on our second workshop day again, we were in need of a new case. We wanted something that was interesting and challenging enough to our audience of engineers to realize that PBL is a method that can definitely be used for hard science and engineering stuff, too, and that was obscure enough that none of the participants would know all the answers right away, but that on the other hand was solvable with only about an hour of individual research in step 6 between the first and second workshop day. So we were pretty much looking for a magic unicorn.

Enter the oceanography case!

Paul: People always say that Arctic melting is a positive feedback loop. But I don’t think that’s true, that’s all part of the big climate conspiracy! When the ice melts, this decreases the salinity of the sea ice. If there is less salt in the water, though, the ice melts less fast. This means that the process stabilizes itself!


Marie: Come on, Paul, don’t believe everything people tell you! As a scientist you should really be less gullible. The melting of the Arctic is influenced by so many other processes, for example the different albedos of ice and open water. That must be at least as important as the salinity!


Now Paul starts looking for scientific proof for his theory. Marie starts researching as well, she tries to find something Paul can observe himself so her argument doesn’t rely on papers Paul might not trust.

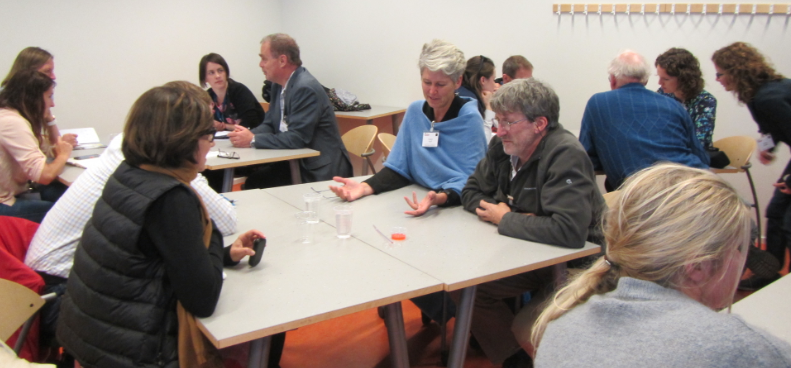
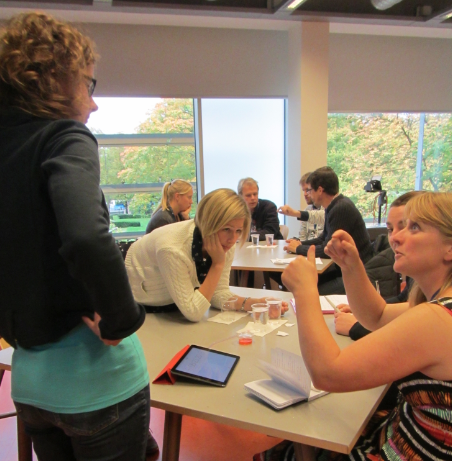
Even more so than in the previous PBL workshop, it was absolutely fascinating how the discussion evolved. Also, this time people were talking about my favorite topic and it was super interesting to see what a crowd of PhD students and PostDocs in engineering knew – and didn’t know – about the climate system.

Steps 1-4 went uneventfully, as described in this post. In step 5, we ended up with four questions that the participants wanted to do research on during step 6, namely

  • How does the albedo influence melting of Arctic sea ice?
  • How is the salinity of Arctic sea water influenced by the melting of Arctic sea ice?
  • How does the salinity of the water surrounding the ice influence the ice’s melting?
  • How does atmospheric CO2 influence Arctic melting?

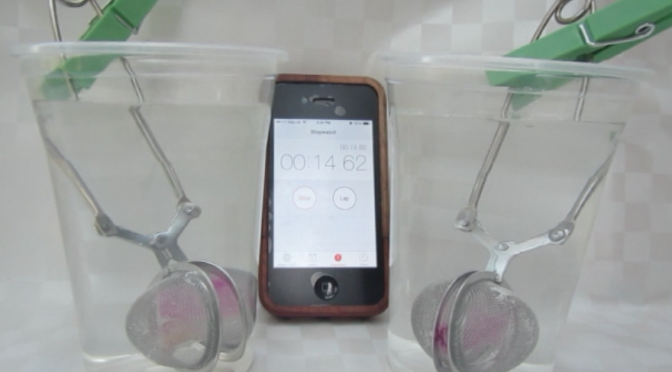
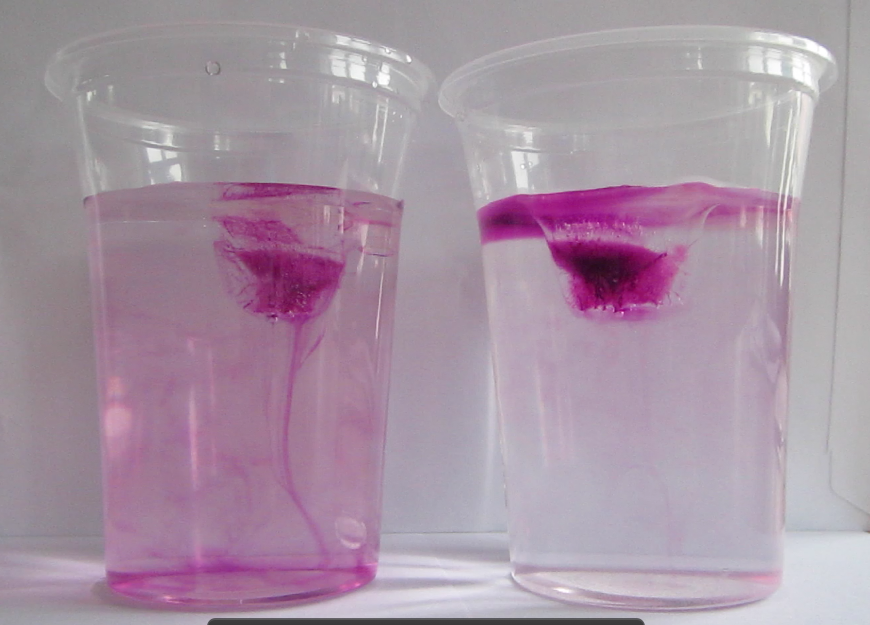
Faithful readers of my blog will have recognized from the case already where the whole PBL session was heading: I wanted them to do my favorite experiment! Just by doing the experiment they could have shown Paul that more salt in sea water doesn’t mean that ice floating in it will melt faster. Luckily they were all good sports and came up with more research questions than just that one, but after discussing their answers to their research questions, we obviously had to do the experiment.

IMG_1752

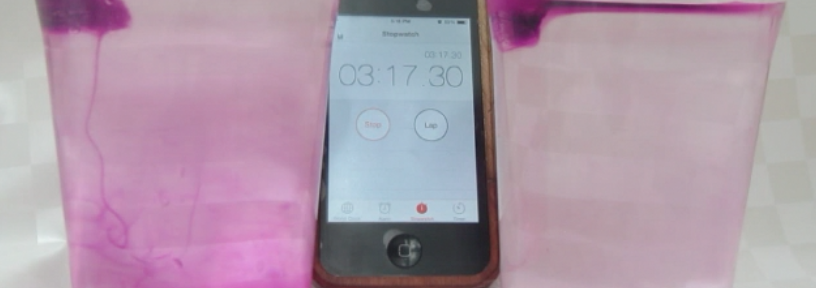
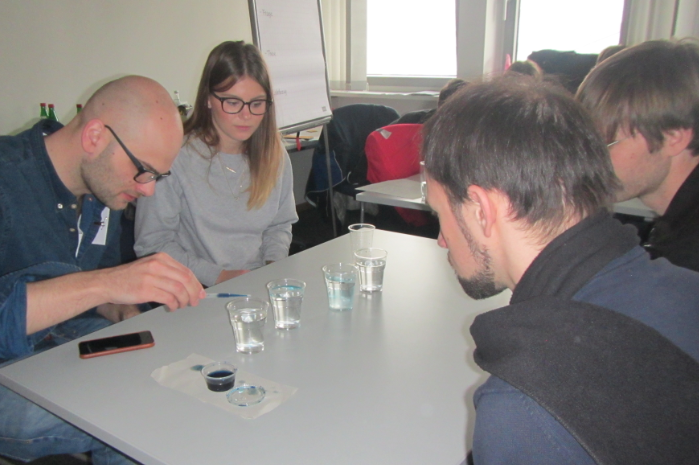
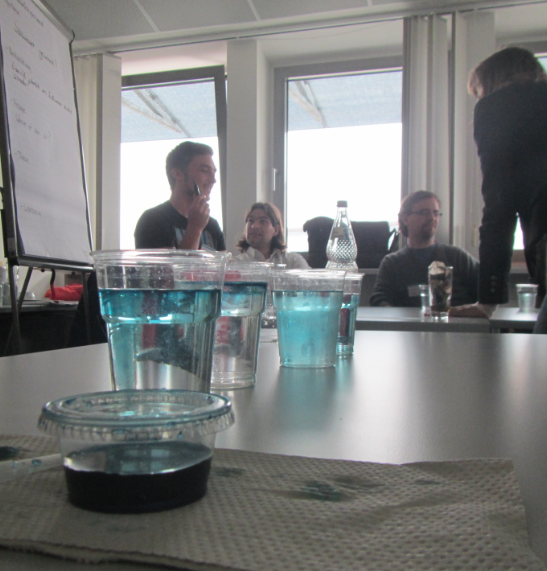
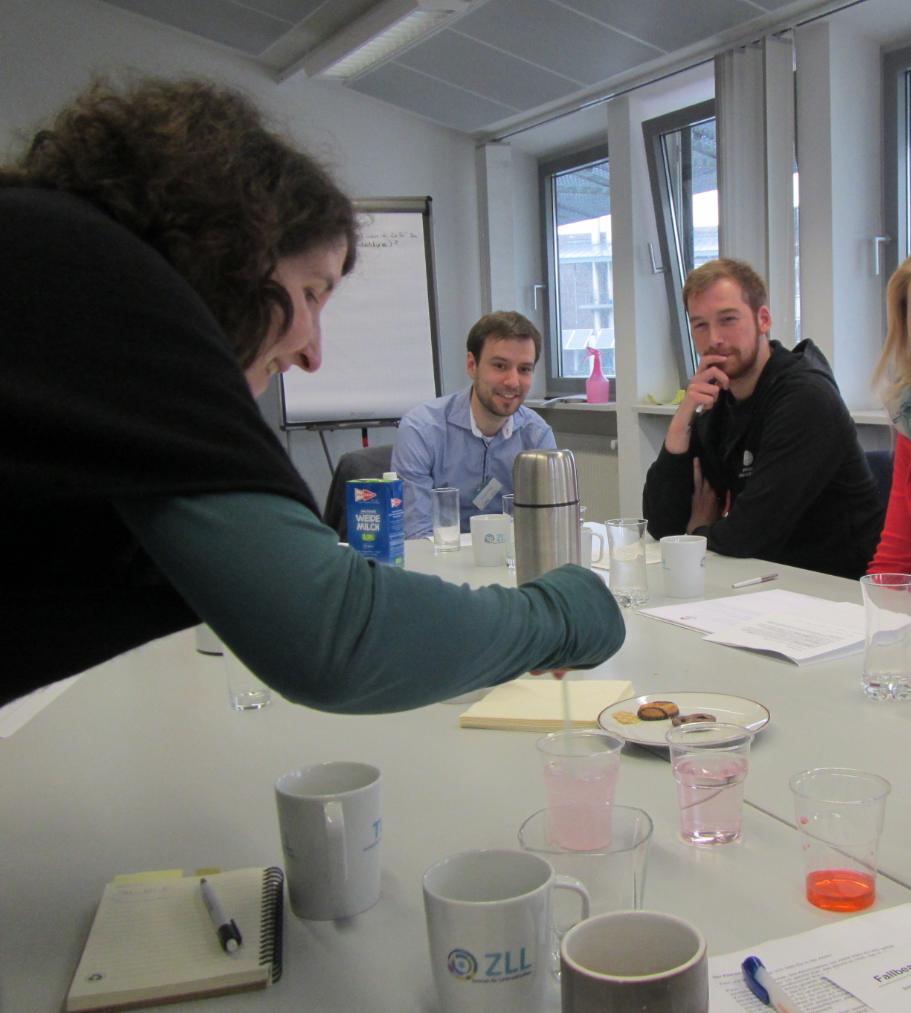
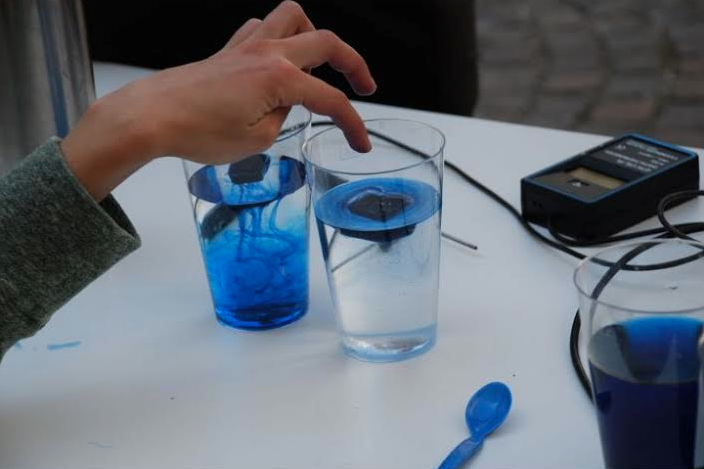
Marisa uses food dye as a tracer for melt water

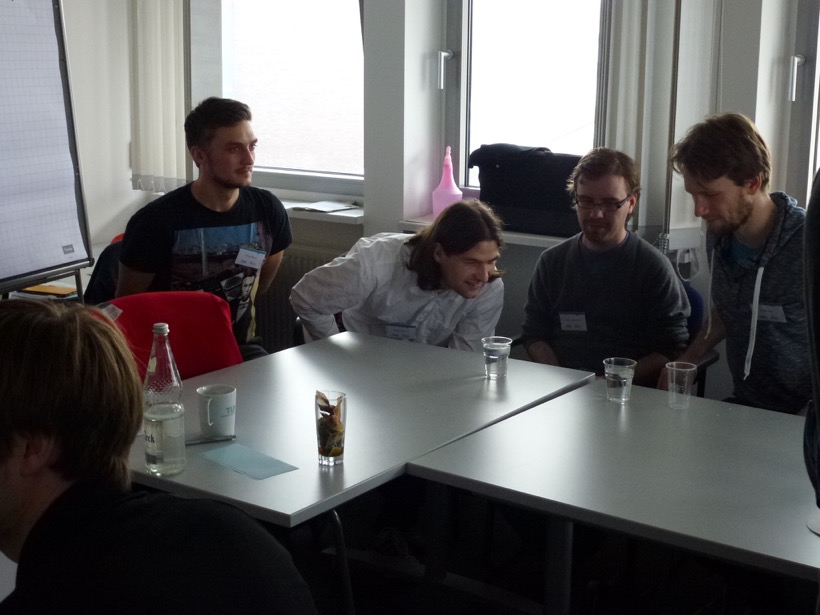
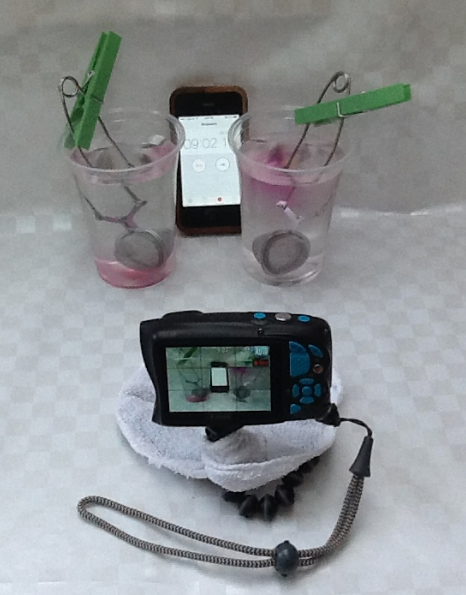
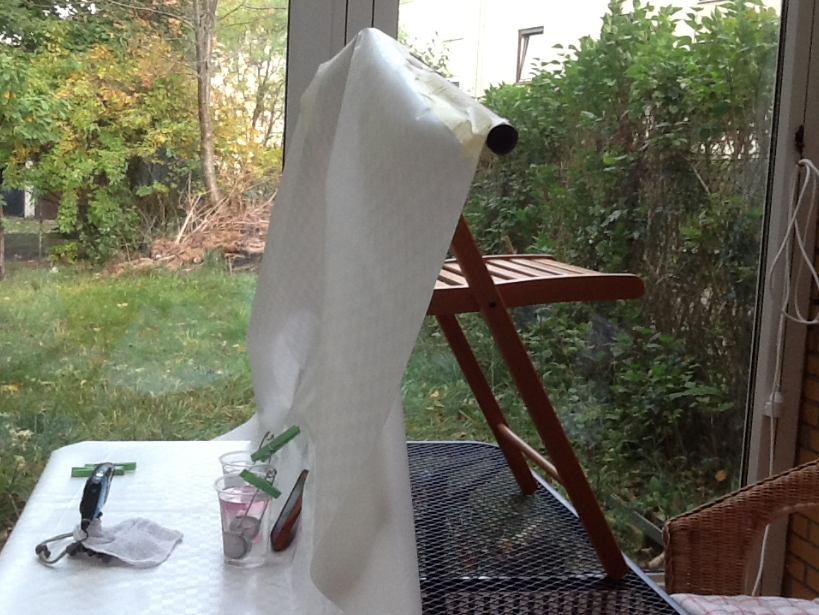
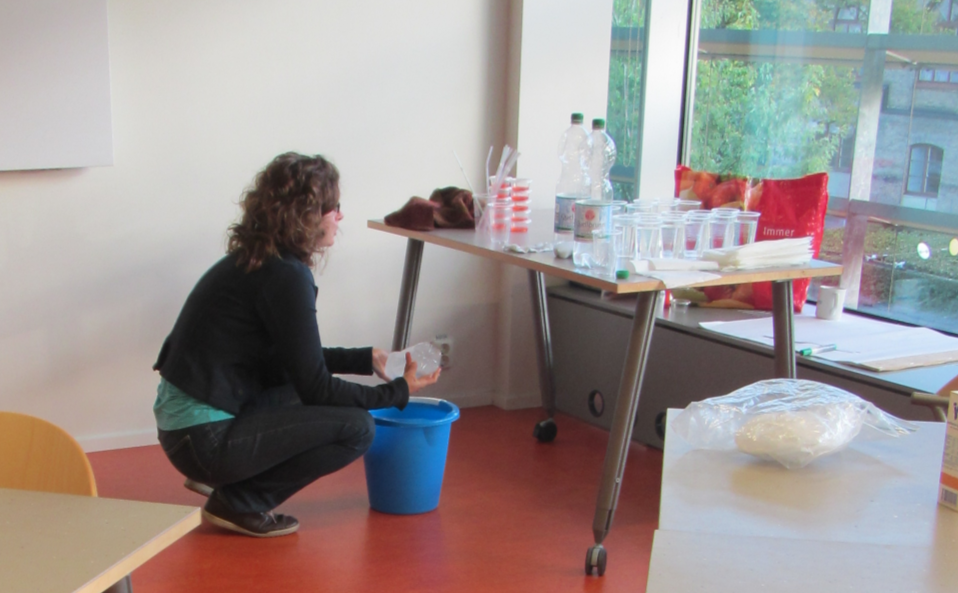
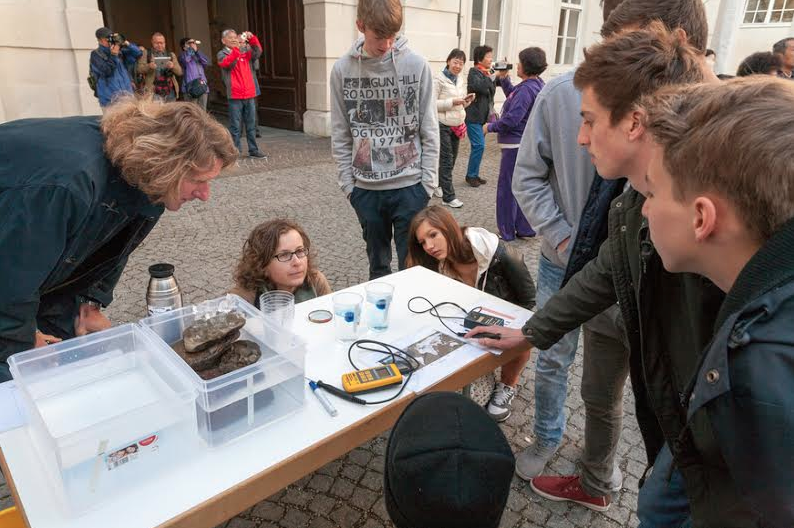
As always, participants did the experiment in groups of 2 or 3. My ice cubes had suffered quite a bit during the day, so the experiment was quite quick. Usually I bring ice cubes in a huge thermos, but this time a) that thermos was at work and my ice cubes were at home on the day of, and b) I only needed so few ice cubes that I thought a thermo mug would do fine. Yeah. Suffice to say, next time I’ll use the thermos again.

IMG_1758

And what would happen if we stirred?

In the previous PBL session on this case, there had been quite a long discussion about temperature gradients and stirring, so obviously we had to conclude the experimental part by stirring.

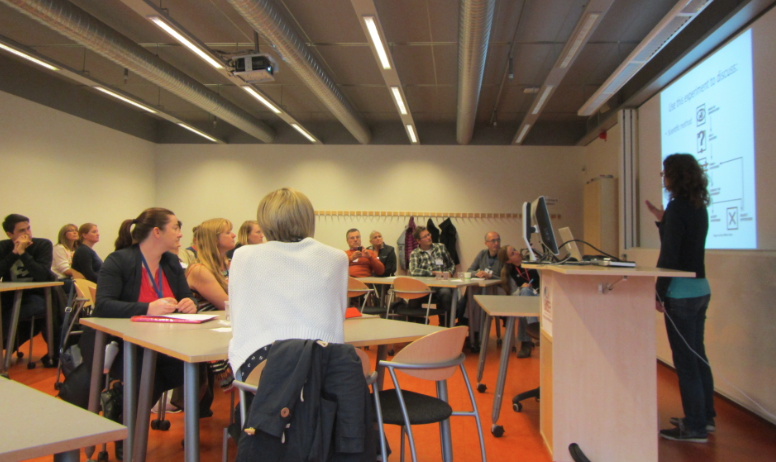
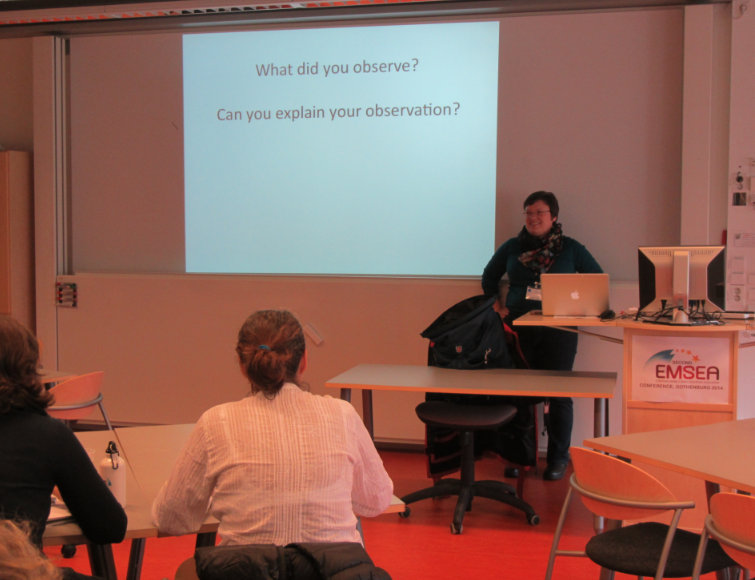
So that was that. How did PBL work for an oceanography case? I really loved it. The first session was really exhausting (as all first PBL sessions are, at least in my limited experience). There were a lot of discussions that went fairly deep into the topic of climate change, and also a broad range of topics related to the melting Arctic was covered. I was actually pretty surprised how far people went into formulating models and how much they knew about different aspects, yet how difficult it was to put everything together. When writing the case, I had expected a lot less of an in-depth discussion of the issue, especially since none of the participants had an explicit ocean/climate background. So really positive surprise here how well it went!

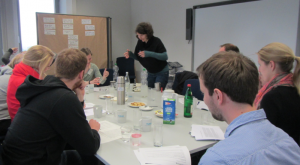
The second session, where everybody brought their results together was great fun, and not only for me (or at least that’s what I think). The goal of our workshop was to have instructors, who will likely use PBL in their own teaching soon, experience the method in a student’s role. Therefore we couldn’t solve all the burning questions of ocean and climate during that second session and had to focus on reflection and the how-tos of the PBL method. But I would definitely use this (or a slightly modified) case in oceanography teaching! And I would also use this case for the same purpose again, although then I would probably make it a little bit more confined in order to leave more time for the meta-aspects of the workshop.

Thanks, Marisa, for another great workshop, I always learn SO MUCH from watching you lead discussions! :-)

Ice cubes melting at the bottom of the beakers

Because surely there is one more post in this topic? ;-)

For those of you who haven’t heard about the “melting ice cube” obsession of mine, please check out the links to other posts at the end of this post. For everybody else’s sake, let’s dive right in!

When Kristin and I ran the workshop at EMSEA14, a couple of people asked very interesting questions. One that I totally had to follow up on was this: What would happen if the ice cubes were forced to the bottom of the beakers? Of course we knew what theory said about this, but who cares? I still had to try.

If you have ever tried holding down ice cubes with straws…

MVI_9786

…and we have a movie of this! :-)

…you might know that that is quite difficult. So this is the experimental setup I ended up with:

MVI_0251_01

Ice cubes melting at the bottom of a fresh water and a salt water beaker

Zooming out a little bit, this is my fancy equipment:

Screen shot 2014-10-12 at 8.59.10 AM

The camera gets a white skirt over the tripod because the reflection of the tripod is seriously annoying

Zooming out a little more, this is the whole setup:

Screen shot 2014-10-12 at 8.58.46 AM

Chair on table in my winter garden, holding the white-ish oilcloth that serves as background. I should invest in a proper rod for the upper edge of the oil cloth, the current one has suffered a bit…

I know that some people want to try the experiment for themselves, so I’ll hide the rest of the experiment behind the cut, at least until Kristin tells me that she’s done it :-)

Continue reading

Why folic acid might be good for people, but not so good for tank experiments

I had to do the complete series of experiments, of course…

The other day I mentioned that I had used salt from my kitchen for the “ice cubes melting in fresh and salt water” experiment, and that that salt was the super healthy one that was both iodized and containing folic acid. And what happened is that the experiment looked like I was using milk. Not what I had envisioned.

MVI_9236

Ice cubes melting in fresh water (left) and in iodized-salt-with-folic-acid water (right)

Since I had often before used just regular table salt – which is usually iodized – I was intrigued by the opaqueness that seemed to be due to the addition of folic acid. Or was it? That I had never noticed the milky-ness of the salt water didn’t necessarily mean that it had not been milky before. So this is what the same experiment looks like if regular iodized table salt is used:

MVI_9249

Ice cubes melting in fresh water (left) and in iodized-salt water (right). Turbulence in the freshwater beaker due to me stirring (don’t ask)

In the literature it is always recommended to use kosher salt for experiments. Kosher meaning in this context that the salt should be only NaCl with no other additions. I happened to have some at hand after having bought it for the “teaching oceanography” workshop in San Francisco last year (after the salt that I brought for the workshop didn’t make it to the US. Long story). So this is what that looks like:

MVI_9248

Ice cubes melting in fresh water (left) and in kosher salt water (right)

In summary: Folic acid is what makes the salt water look opaque – but iodized salt is completely fine for tank experiments. I think it’s tiny air bubbles that cling to something folic acid-y, but I have no clue what is going on. I noticed that the dusty stuff settled down over night (so the top experiment here is a lot clearer than the experiment I ran with the same batch of water the day before), but even the next day the water wasn’t completely clear.

Anyway, now we know. And I came out of this series with more movies of ice cubes melting in fresh water and salt water!

Links to previous posts on the topic after the cut.

[Edit: Using my mom’s iodized, but not folic acid containing, table salt leads to milky water, too. So there you have it. I have no clue what is going on!]

Continue reading

Melting ice cubes, again

Somehow I am stuck on this demonstration!

I can’t let go of this experiment. Last time I posted about it, someone (Hallo Papa!) complained about the background and how I should set a timer and a ruler next to the beakers for scale. The background and timer I did something about, but the ruler I forgot. Oh well, at least there is room for improvement still, right?

I always find it fascinating to see how differently the ice melts in fresh water and salt water. Below you see how convection has completely mixed the fresh water with the melt water, whereas the melt water forms a layer on the salt water. You can even still distinguish horizontal currents in there!

IMG_9241

The beakers after ice cubes have melted in fresh water (left) and salt water (right)

For everybody who still enjoys watching the experiment: Here is a movie. Top one as time lapse, bottom one in real time, all 8 minutes of it. Enjoy!

The links to the “melting ice cubes” series after the cut.

Continue reading

Conducting experiments at EMSEA14

Kristin’s and my workshop at EMSEA14.

As I mentioned before, Kristin Richter and I are running the workshop “Conducting oceanographic experiments in a conventional classroom anywhere” at the European Marine Science Educator’s Association Meeting in Gothenburg, Sweden. There is quite an active Twitter crowd around, so you can follow the storyfied meeting or look out for #EMSEA14 on Twitter.

Our workshop has been represented quite well there, too, so I’ll just post a couple of my own pictures here.

IMG_9702

Final preparations: Kristin is mixing salt water

IMG_9704

Watching intently the melting ice. As my former boss would say: It’s like watching paint dry.

IMG_9708

Except that it is really fascinating and that there are so many things to discuss!

IMG_9717

Kristin and I took turns presenting the workshops, which was great. Plus it was really nice to have two instructors walking around, talking to the groups, instead of just one.

IMG_9725

Kristin talking about using our favorite experiment to practice applying the scientific method.

For further reading, here are our slides.

Plus there are a lot of post dealing with the exact same experiment after the cut below. And there are two more posts on this exact experiment coming up that are scheduled already, one tomorrow, the other one in two weeks time. And thanks to a very nice family of participants I already have plenty of ideas of how to modify this experiment in the future!

[edit: There finally is a picture of me in the workshop, too, to show that I actually did contribute and not just leave it all to Kristin:

IMG_9779

So I did actually do something, too, and not just take pictures. Plus did you notice how there is a EMSEA sign on the podium? There were signs on the doors, too, both on the inside and outside, so one of them was visible even when the door was wide open. Such good thinking of the organizers! Gothenburg University does have a seriously impressive infrastructure in any case: Tables and chairs on wheels so the whole room could easily be modified to suit our needs. Awesome.]


Melting ice cubes reloaded

Or why you should pay attention to the kind of salt you use for your experiments.

The melting ice cubes in salt and fresh water is one of my favorites that I haven’t written about in a long time, even though (or possibly: because) I wrote a whole series about it last year (see links at the end of this post).

Now that the EMSEA14 conference is almost upon us and Kristin and I busy preparing our workshop, I thought I’d run the experiment again and – for a change – take the time to finally know how much time to schedule for running the experiment. This is the experiment that I have run most often of all in all kinds of classes, but there you go… Usually I have more time than just 30 minutes, and there is so much other content I want to cover in that workshop!

There are a couple of things that I learned running this experiment again.

  • It takes at least 10 minutes to run the experiment. My water was slightly colder than usual room temperature, my ice cubes slightly smaller, though. And those 10 minutes are only the time the ice takes to melt, not the time it takes to hand out the materials and have the groups settle down.
  • There is a reason it is always recommended to use kosher salt for these kind of experiments. Look at the picture from one of the old posts in comparison to the ones from today: The iodized salt containing folic acid I had in my kitchen dissolves into really milky water. I really should have walked the two extra meters to get the good salt from my oceanography supplies in the other room!
Melting_ice_cubes_2

Ice cubes melting in fresh water (left) and salt water (right) – old experiment

IMG_9220

Ice cubes melting in fresh water (left) and salt water (right) – experiment today

  • Some food dyes are the devil. My whole kitchen is red. Plus the ice cubes didn’t freeze nicely (for a post on ice cubes freezing from salt water click here), the ice chipped when I tried to get the cubes out of the ice cube tray. I definitely can’t have that mess at a workshop. So here is another argument for using non-dyed ice cubes! The more important argument being that you think more if the cubes are not dyed and you don’t immediately see the explanation…

But it is always a fun experiment to run, and there are always new things to spot. Watch the video below and see for yourself! (Explanations on the weird phenomena coming up in a future post!)

The links to the “melting ice cubes” series:

Ice cubes melting in salt water and freshwater (post 1/4)

Ice cubes melting in fresh water and salt water (post 2/4)

Melting ice cubes – one experiment, many ways (post 3/4)

Melting ice cubes – what contexts to use this experiment in (post 4/4)

Other posts on this experiment:

Dangers of blogging, or ice cubes melting in fresh water and salt water

Guest post: The mystery of the cold room

Guest post: The mystery of the cold room

Guest post by Kristin Richter!
Today I’m excited to bring to you a guest post from Innsbruck, Austria, written by my friend Kristin Richter. Kristin ran the oceanography lab in Bergen before I took over, and she is a total enabler when it comes to deciding between playing with water, ice and food dye, or doing “real” work. Plus she always has awesome ideas of what else one could try for fun experiences. We just submitted an abstract for a conference together, so keep your fingers crossed for us – you might be able to come see us give a workshop on experiments in oceanography teaching pretty soon! But now, over to Kristin.
A little while ago, I made an interesting experience while presenting some science to students and the general public on the “Day of Alpine Science”  in Innsbruck using hands-on experiments. Actually, my task was to talk about glaciers but being a physical oceanographer I felt like I was on thin ice. Well, glaciers, I thought, hmmm … ice, melting ice, going into the sea, … sea, … sea ice! And I remembered how Mirjam once showed a nice experiment to me and some friends about melting ice in fresh and salt water. And suddenly I was all excited about the idea.
To at least mention the glaciers, I planned to fill two big food boxes with water, have ice float (and melt) in one of the tanks and put ice on top of a big stone (Greenland) in another tank filled with water to show the different impact of melting land ice and sea ice on sea level. Since melting the ice would take a while (especially on a chilly morning outside in early April) I would have enough time to present the “actual” experiment – coloured ice cubes melting in two cups of water – one with freshwater, and the other one with salt water.
Screen Shot 2014-04-24 at 12.17.01

Melting ice. A comparison of sea ice and glaciers melting’s impact on sea level, ice cubes melting in fresh and salt water on the right. Photo by “Forschungsschwerpunkt Alpiner Raum”, University of Innsbruck.

As we expected many groups with many students, I needed a lot of ice. I told the organizers so (“I need a lot of ice, you know, frozen water”) and they said no problem, they will turn on their cooling chamber. The day before, I went there and put tons of water into little cups and ice cube bags into the chamber to freeze over night.The next morning – some hundreds of students had already  arrived and were welcomed in the courtyard – I went to get some ice for the first group. I opened the cooling chamber,… and froze instantly. Not so very much because of the cold temperature but because I was met by lots of ice cube bags and little cups with… water. Like in LIQUID WATER! Cold liquid water, yeah, but still LIQUID! Arrrghhhh, my class was about to begin in a few minutes and I had NO ICE. “Ah, yes”, volunteered the friendly caretaker, “come to think of it, it is just a cooling chamber!”I started panicking, until a colleague pointed out the Sacher Cafe (this is Austria after all) and their ice machine across the road. I never really appreciated ice machines, but that one along with the friendly staff saved the day. Luckily, I brought some colored ice cubes from at home – so I was all set to start.

Screen Shot 2014-04-24 at 12.16.50

Ice melting in fresh water (left) and salt water (right). Photo by “Forschungsschwerpunkt Alpiner Raum”, University of Innsbruck.

And the station was a big success, the students were all interested, asked many questions and were excited about the colored melt water sinking and not sinking. :-)  I even managed to “steal” some students from the neighboring station of my dear meteorology colleagues. That was something I was particularly proud of as they could offer a weather station, lots of fun instruments to play with and a projector to show all of their fancy data on a big screen. (Actually, I also abandoned my station for a while to check out their weather balloon.)

Anyway, I had a lot of fun that day and could definitely relate to Mirjams enthusiasm for this kind of teaching. I can’t wait for the next opportunity to share some of those simple yet cool experiments with interested students. I will bring my own ice though!


Dangers of blogging, or ice cubes melting in fresh water and salt water

When students have read blog posts of mine before doing experiments in class, it takes away a lot of the exploration.

Since I was planning to blog about the CMM31 course, I had told students that I often blogged about my teaching and asked for their consent to share their images and details from our course. So when I was recently trying to do my usual melting of ice cubes in fresh water and salt water experiment (that I dedicated a whole series on, details below this post), the unavoidable happened. I asked students what they thought – which one would melt faster, the ice cube in fresh water or in salt water. And not one, but two out of four student groups said that the ice cube in fresh water would melt faster.

Student groups conducting the experiment.

Since I couldn’t really ignore their answers, I asked what made them think that. And one of the students came out with the complete explanation, while another one said “because I read your blog”! Luckily the first student with the complete answer talked so quickly that none of the other – unprepared – students had a chance to understand what was going on, so we could run the experiment without her having given everything away. But I guess what I should learn from this is that I have taken enough pictures of students doing this particular experiment so that I can stop alerting them to the fact that they can oftentimes prepare for my lectures by reading up on what my favorite experiments are. But on the upside – how awesome is it that some of the students are motivated enough to dig through all my blog posts and to even read them carefully?

For posts on this experiment have a look a post 1 and 2 showing different variation of the experiment, post 3 discussing different didactical approaches and post 4 giving different contexts to use the experiment in.