Tag Archives: Hadley cell

Thermal forcing vs rotation tank experiments in more detail than you ever wanted to know

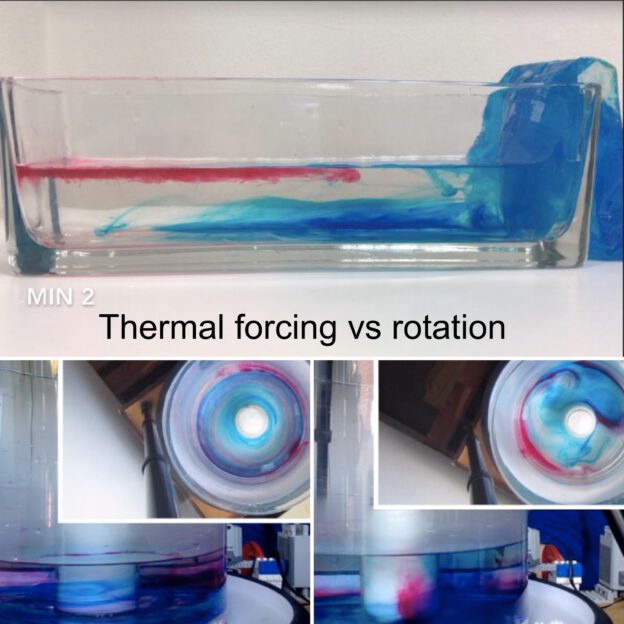
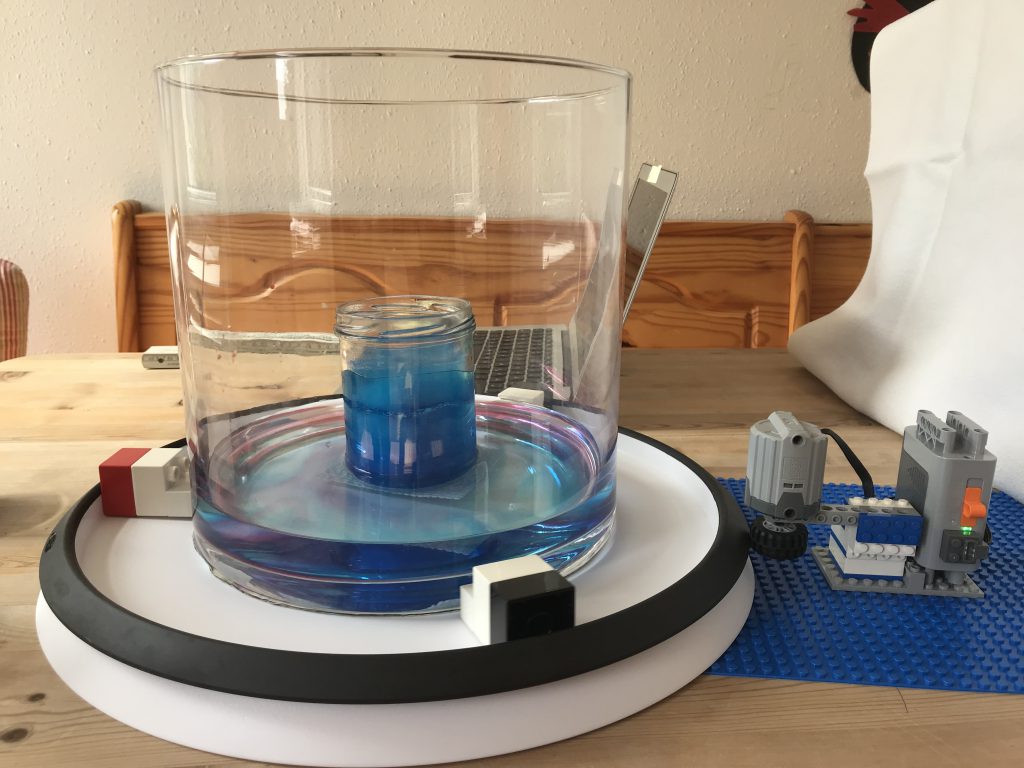
This is the long version of the two full “low latitude, laminar, tropical Hadley circulation” and “baroclinic instability, eddying, extra-tropical circulation” experiments. A much shorter version (that also includes the end cases “no rotation” and “no thermal forcing”) can be found here.

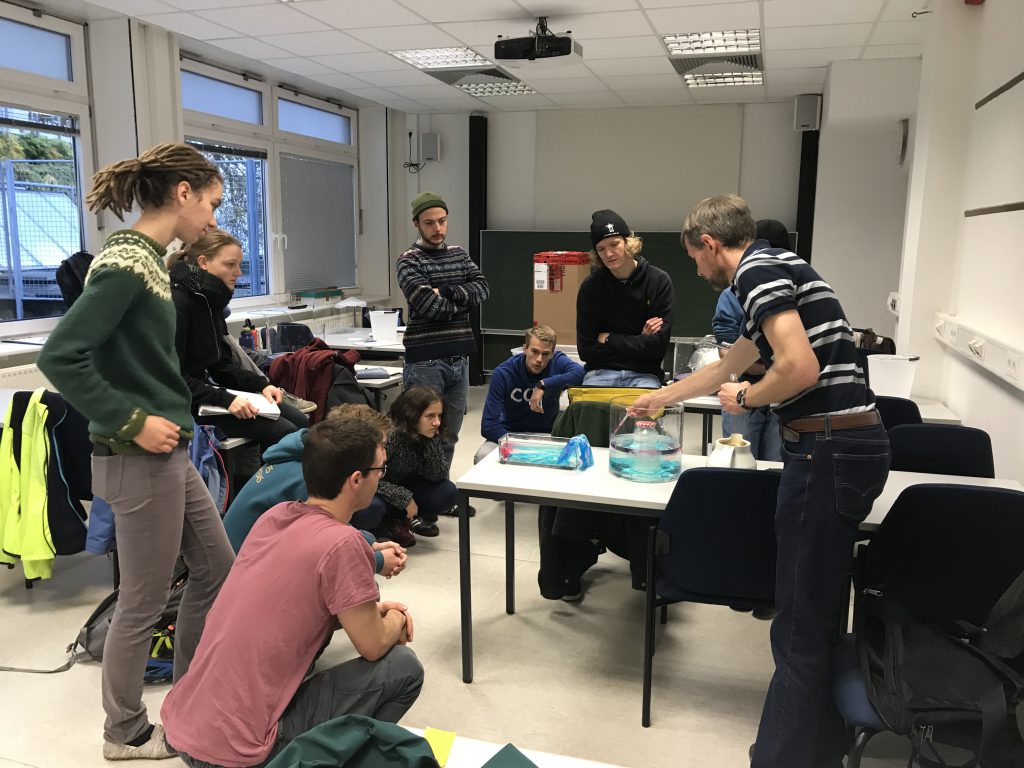
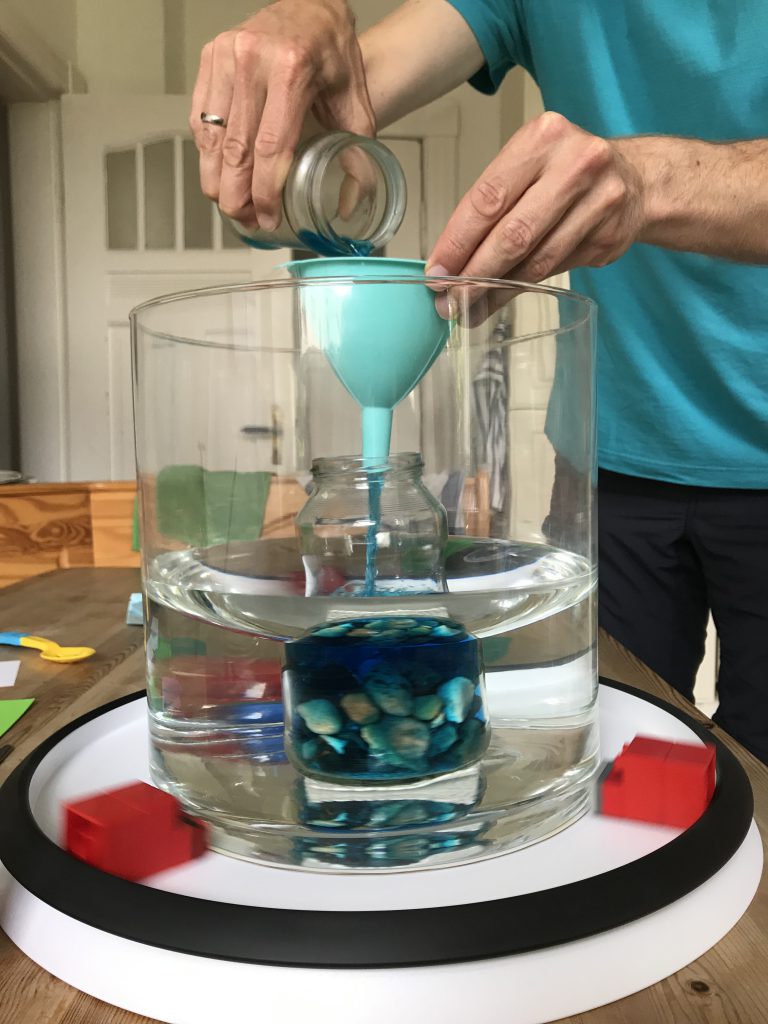
Several of my friends were planning on teaching with DIYnamics rotating tables right now. Unfortunately, that’s currently impossible. Fortunately, though, I have one at home and enjoy playing with it enough that I’m

  1. Playing with it
  2. Making videos of me playing with it
  3. Putting the videos on the internet
  4. Going to do video calls with my friends’ classes, so that the students can at least “remote control” the hands-on experiments they were supposed to be doing themselves.

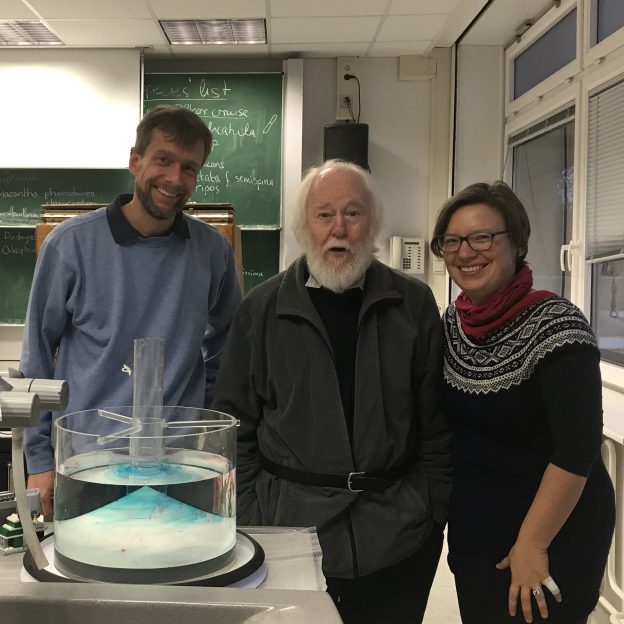
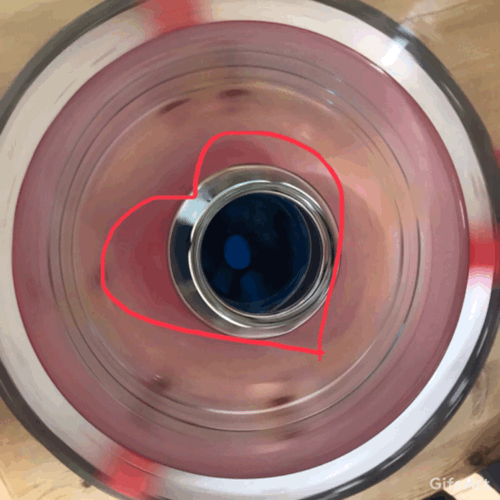
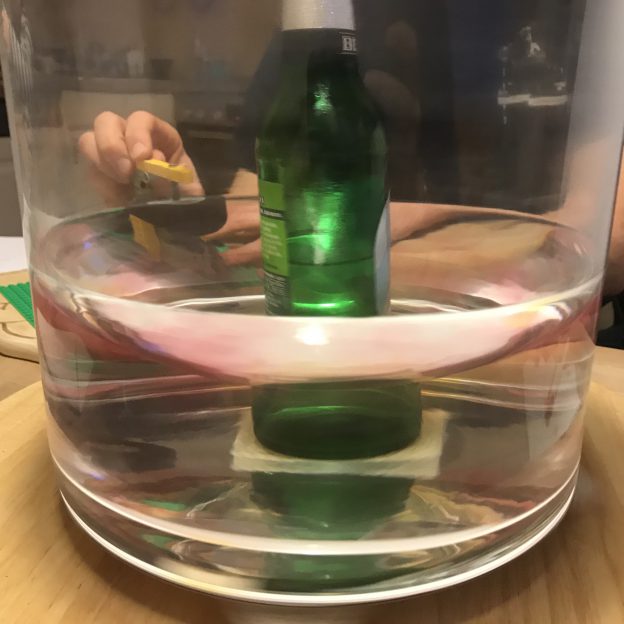
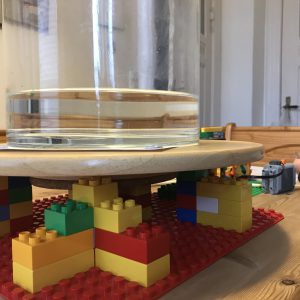
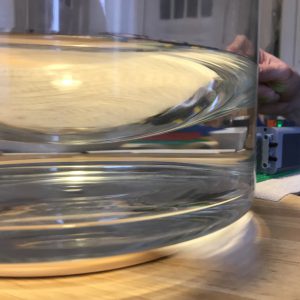
Here is me introducing the setup:

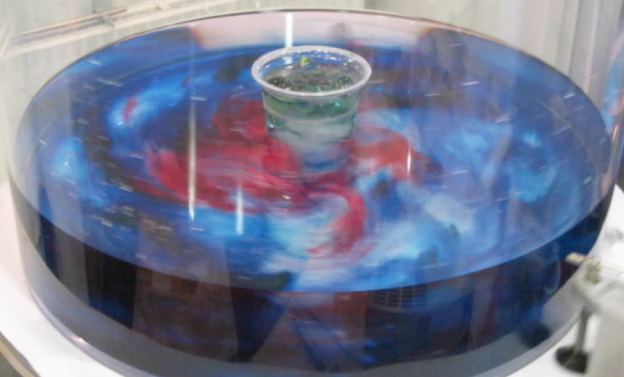
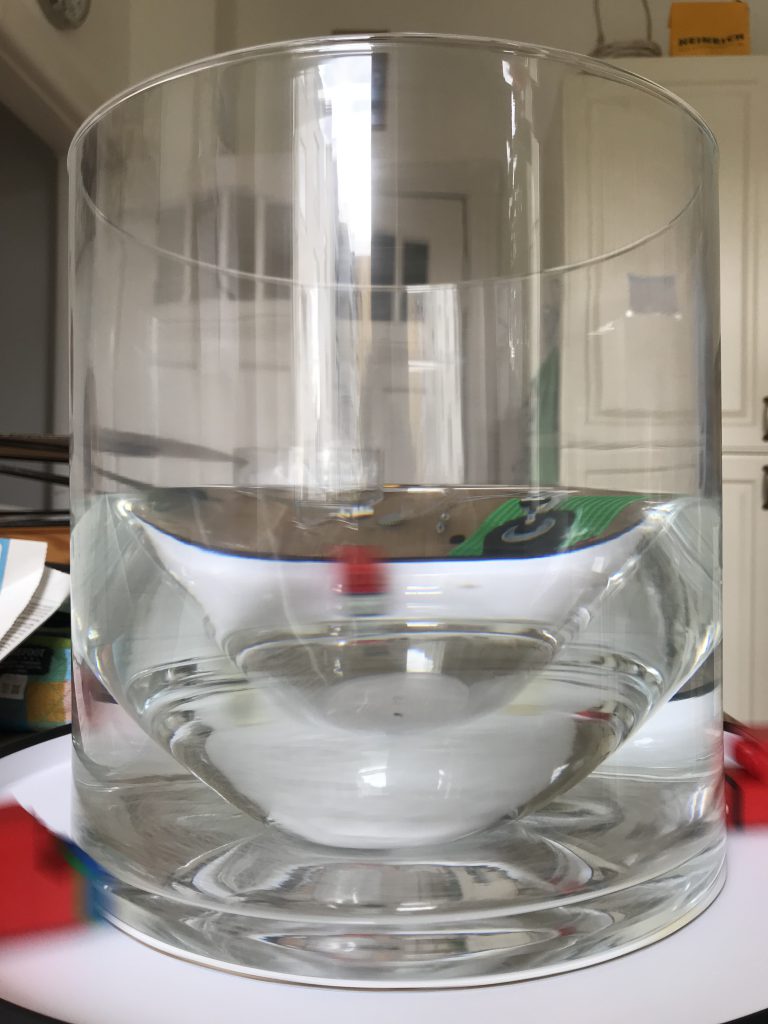
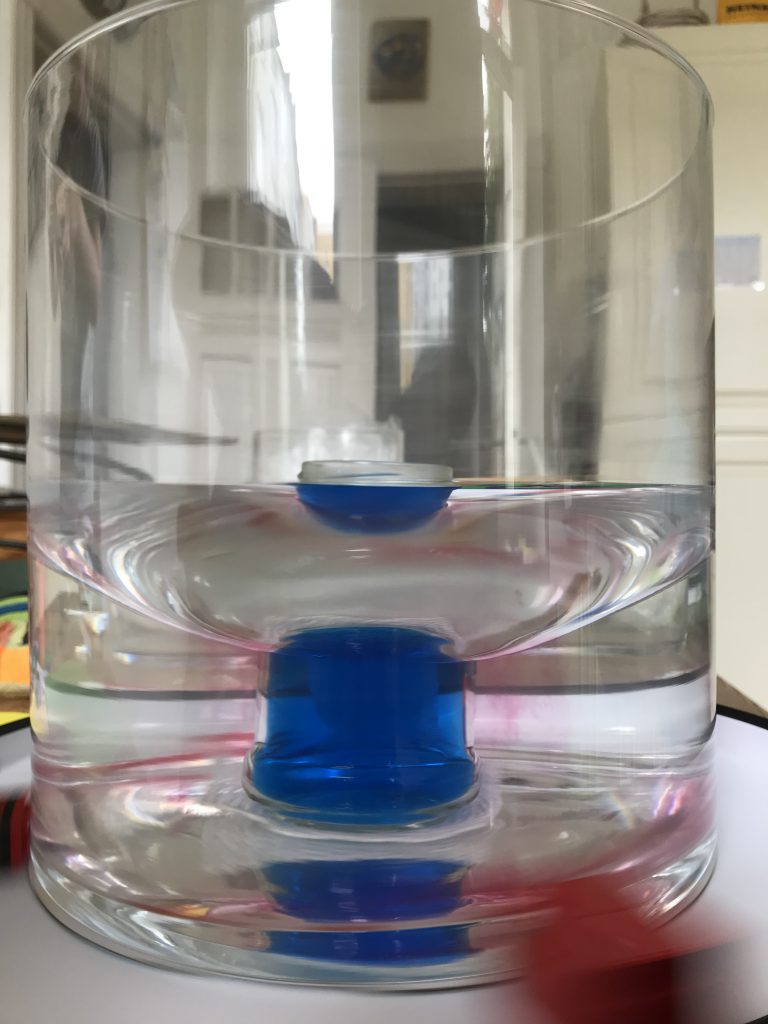
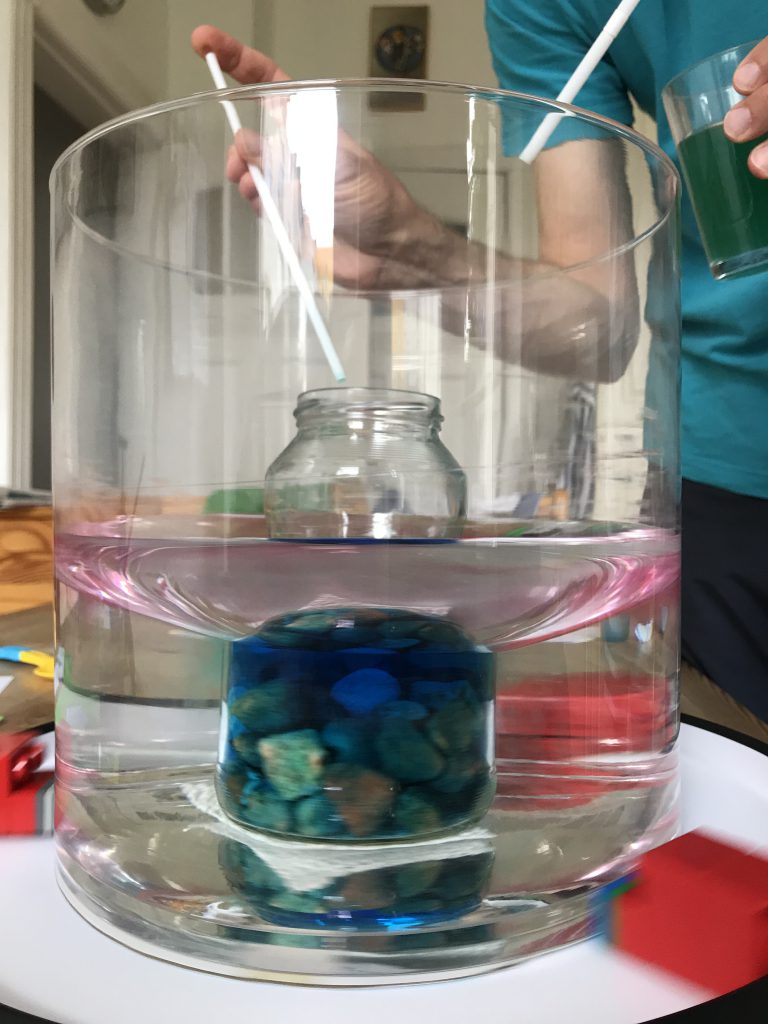
Today, I want to share a video I filmed on thermal forcing vs rotation. To be clear: This is not a polished, stand-alone teaching video. It’s me rambling while playing. It’s supposed to give students an initial idea of an experiment we’ll be doing together during a video call, and that they’ll be discussing in much more depth in class. It’s also meant to prepare them for more “polished” videos, which are sometimes so polished that it’s hard to actually see what’s going on. If everything looks too perfect it almost looks unreal, know what I mean? Anyway, this is as authentic as it gets, me playing in my kitchen. Welcome! :-)

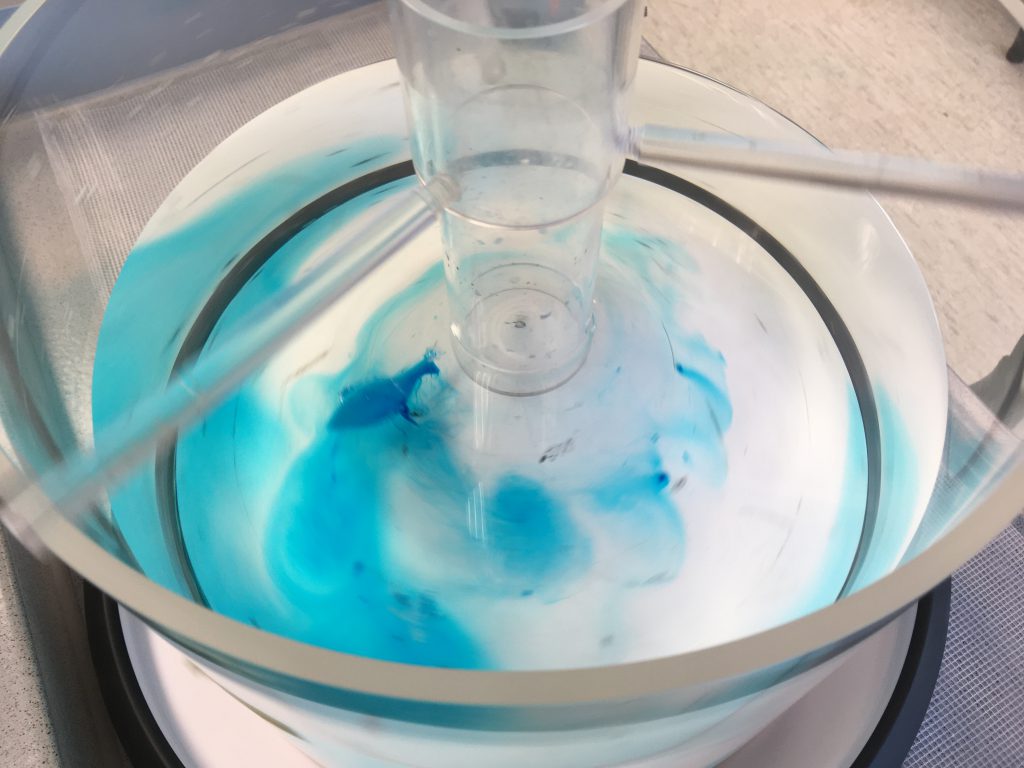
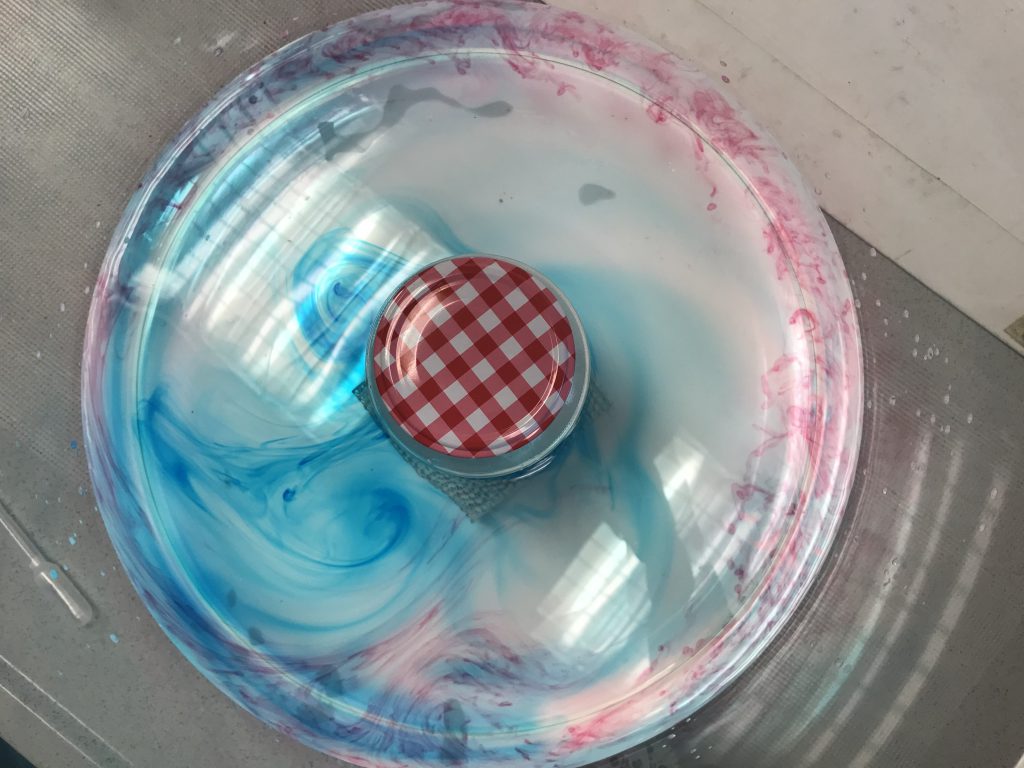
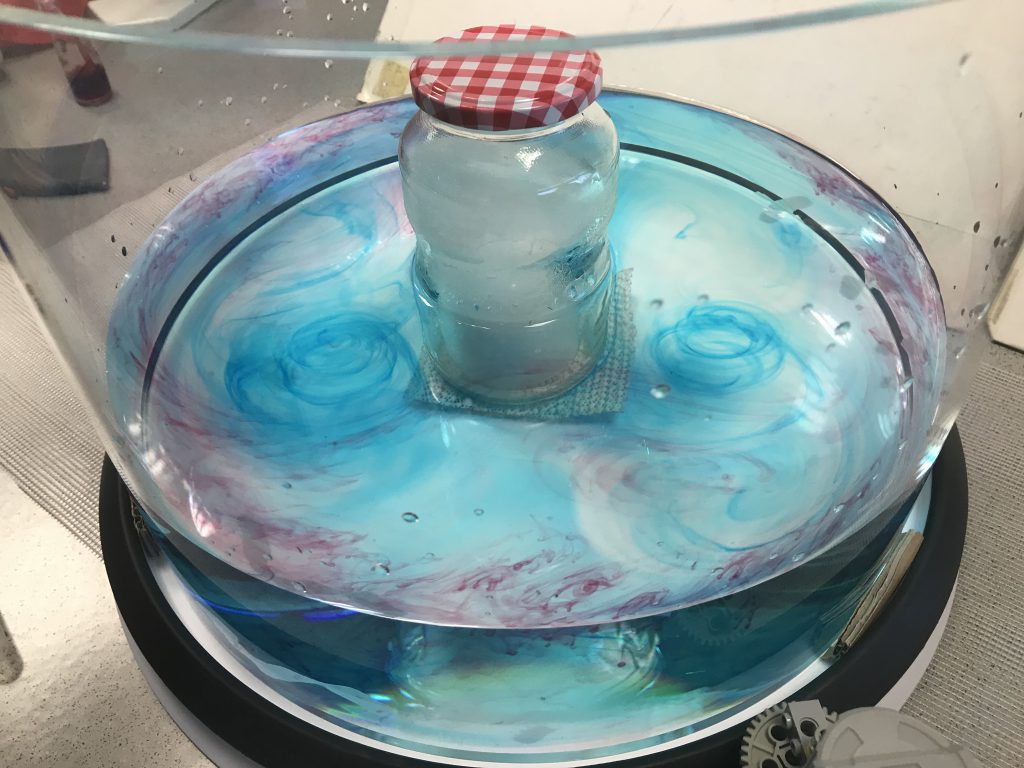
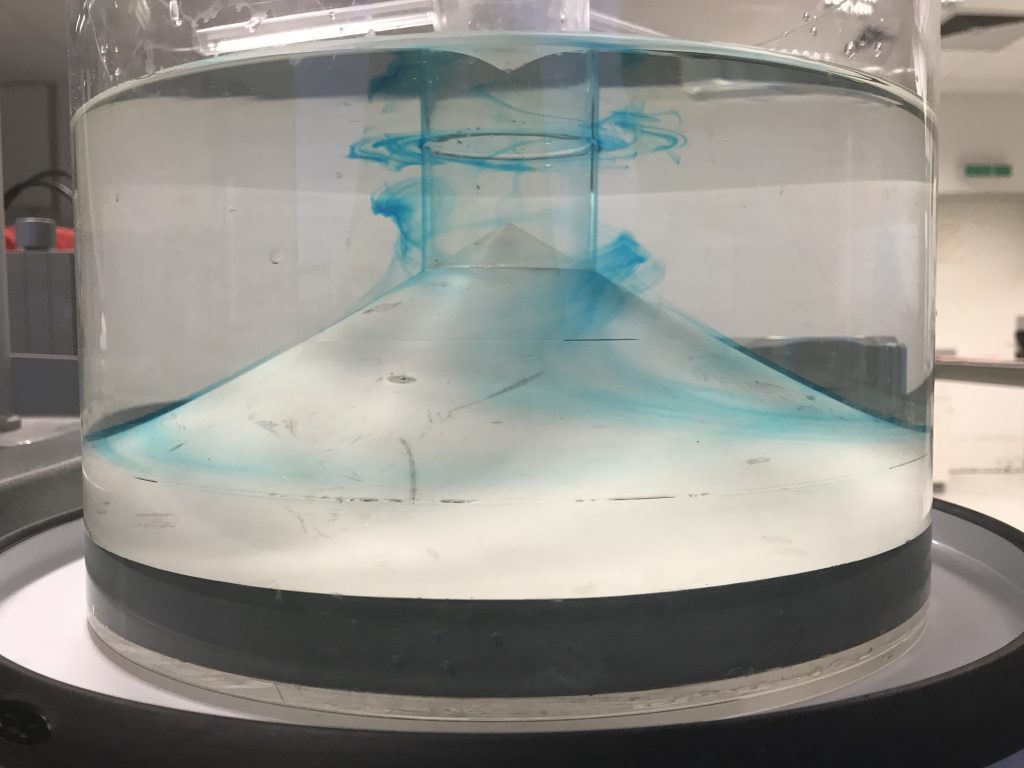
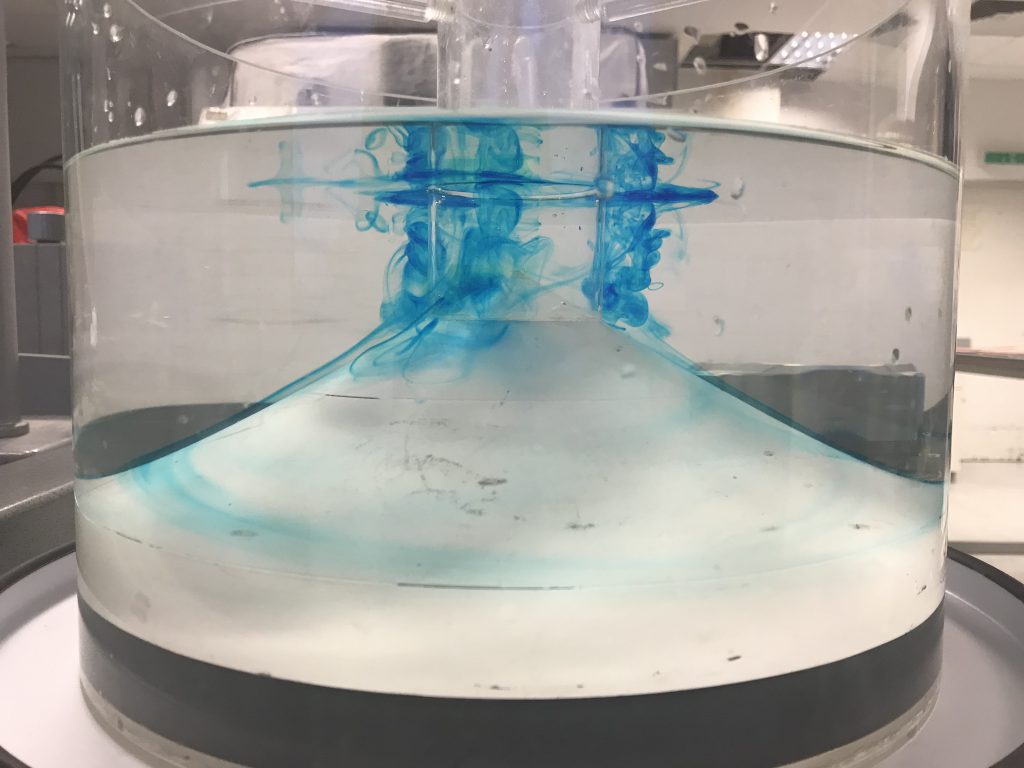
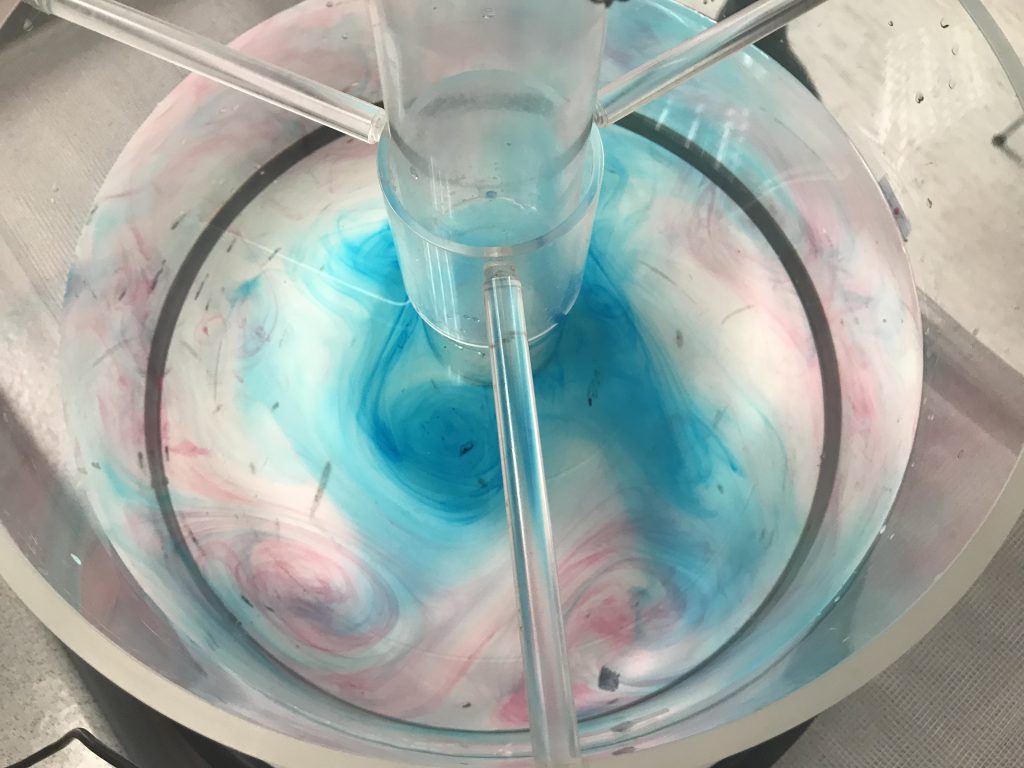
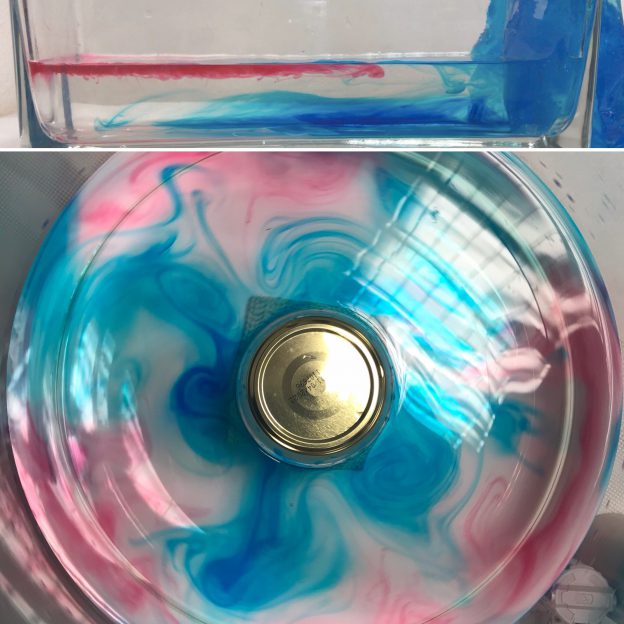
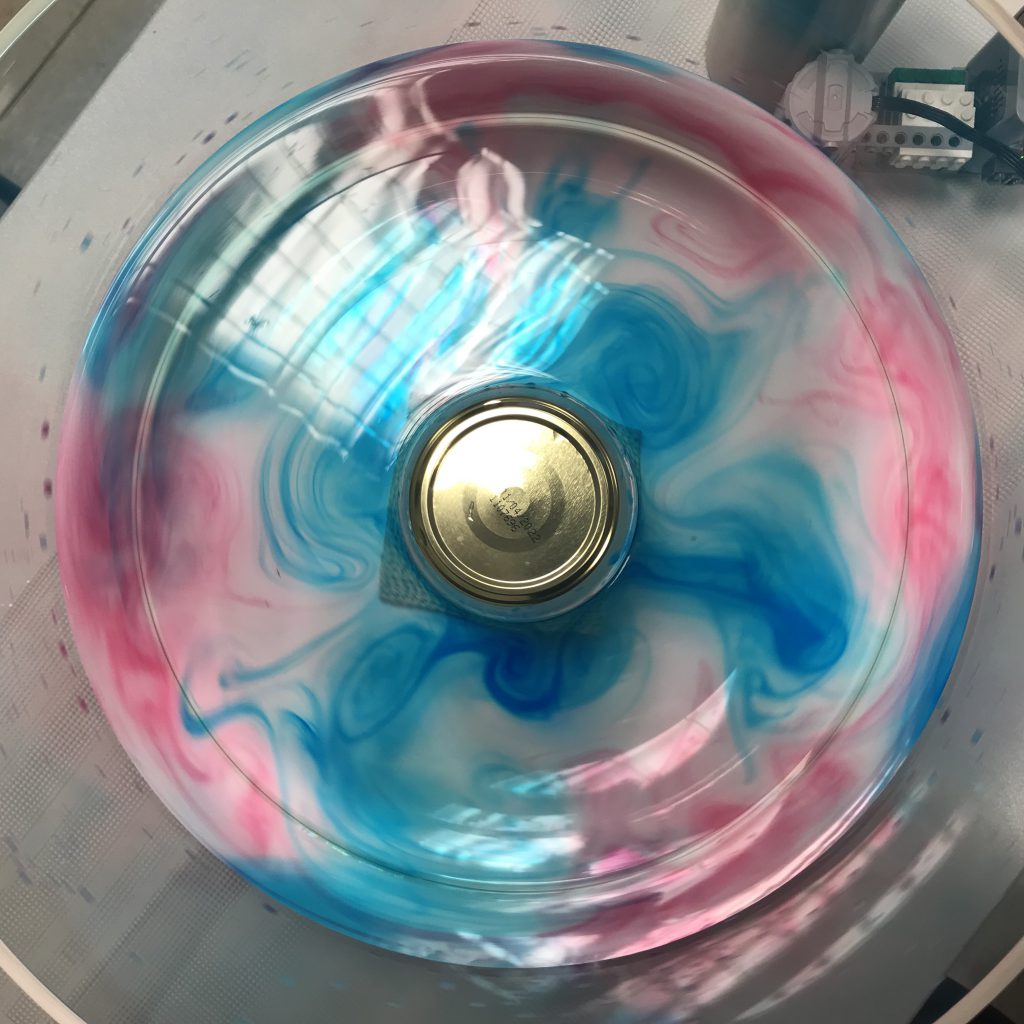
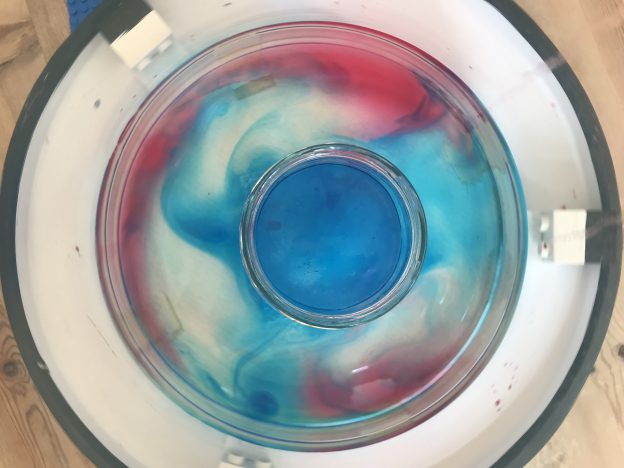
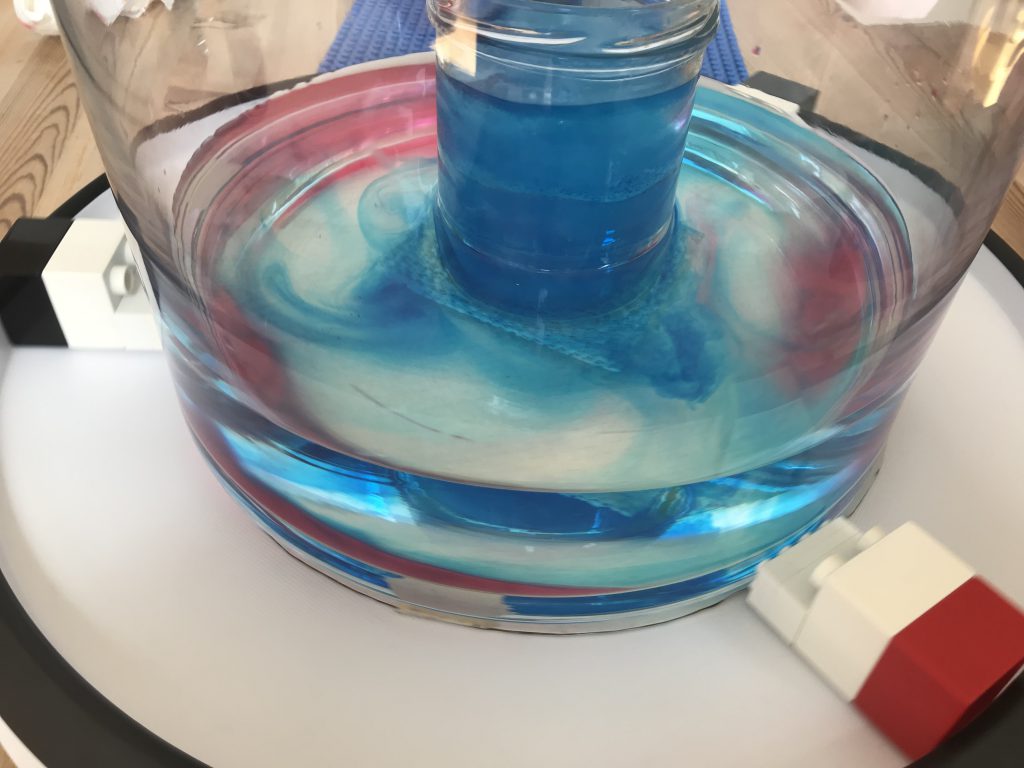
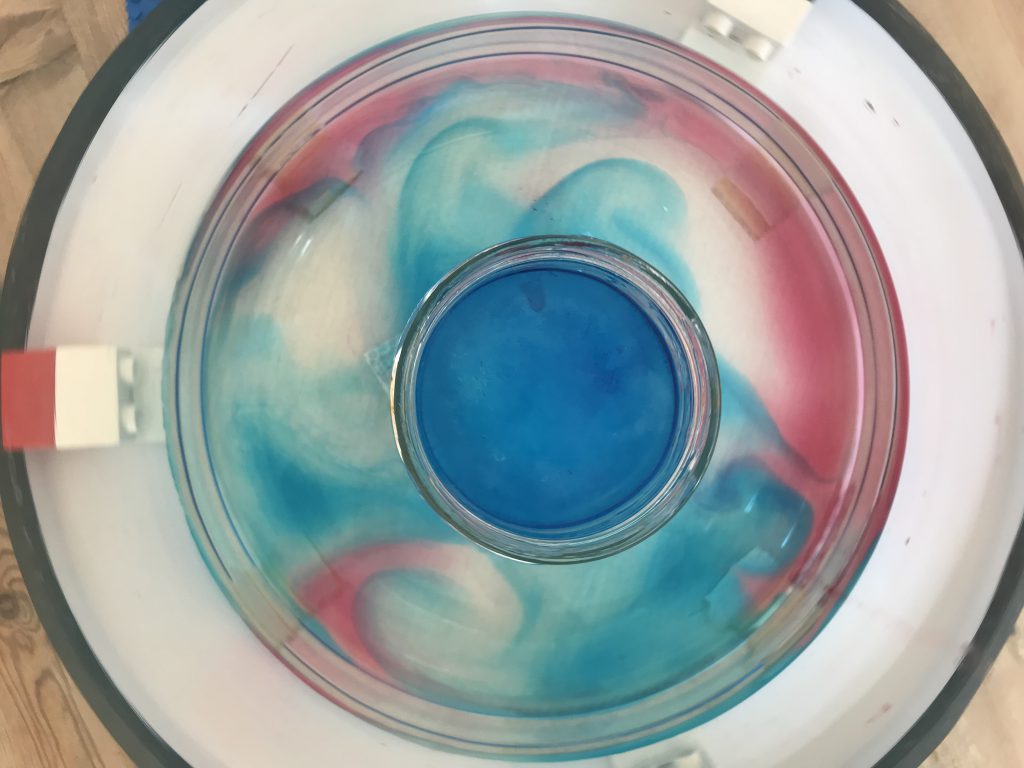
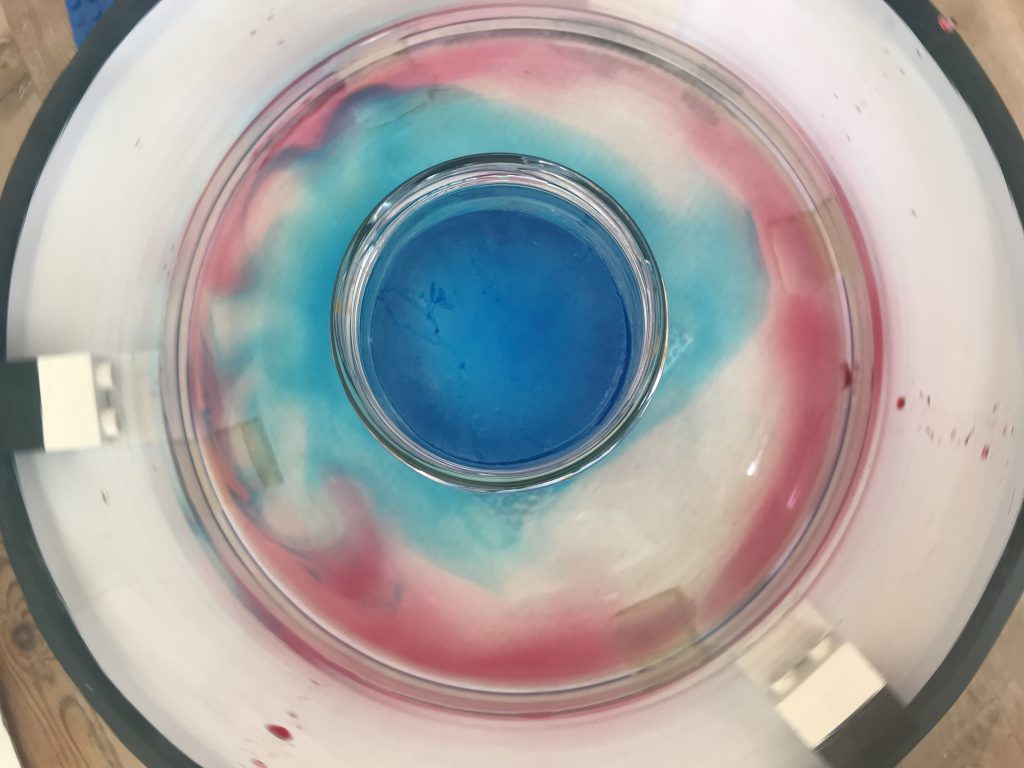
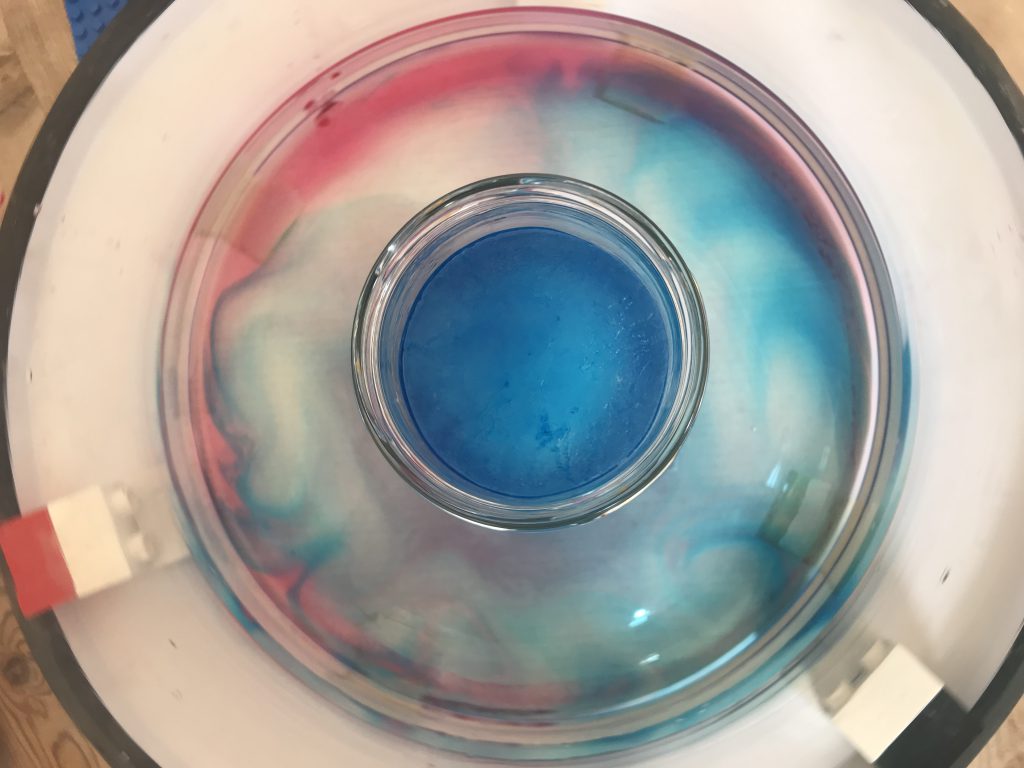
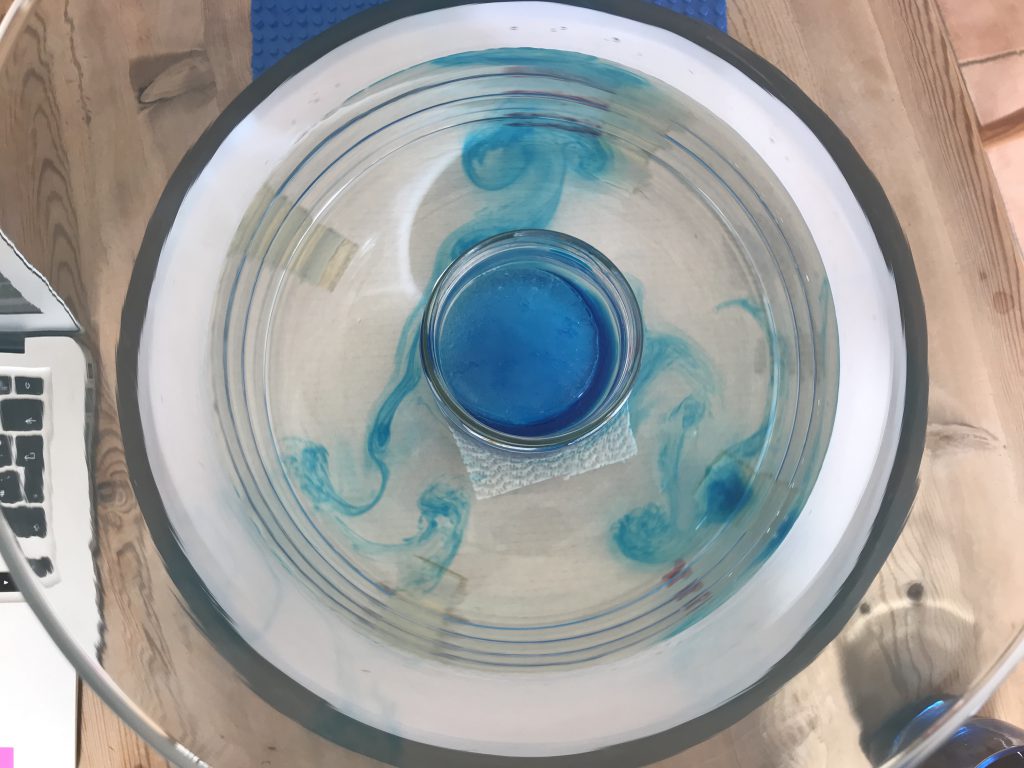
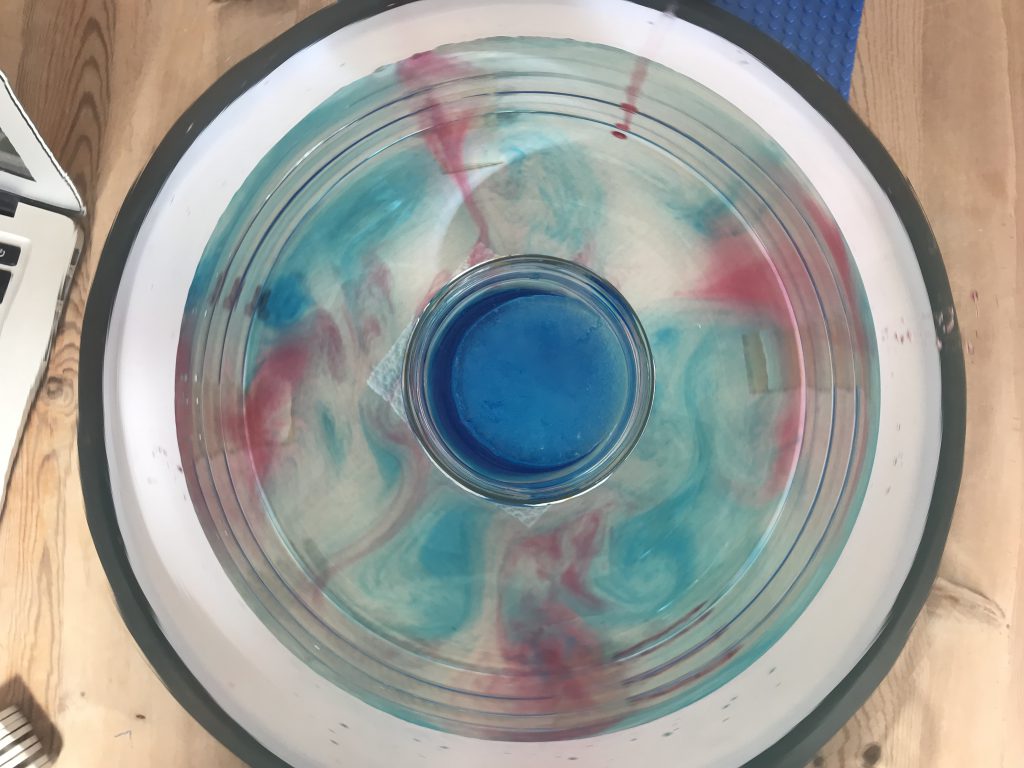
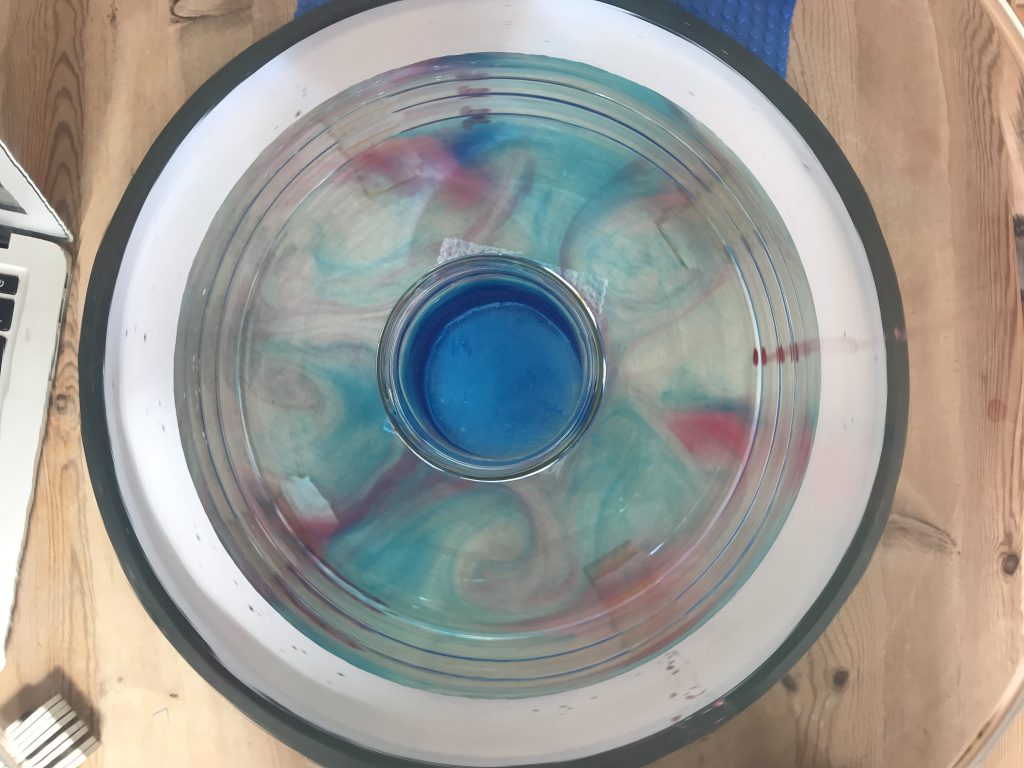
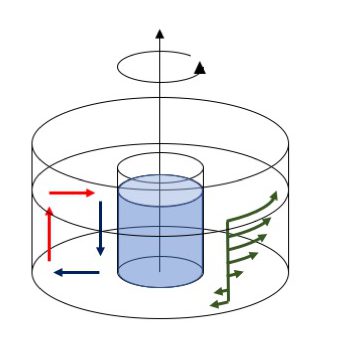
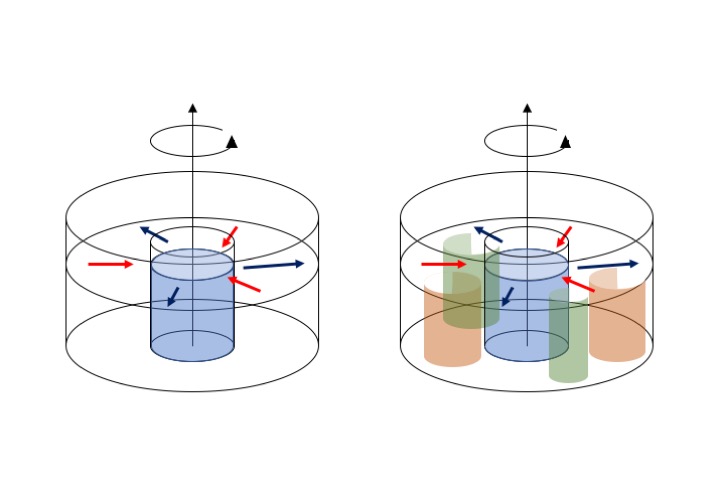
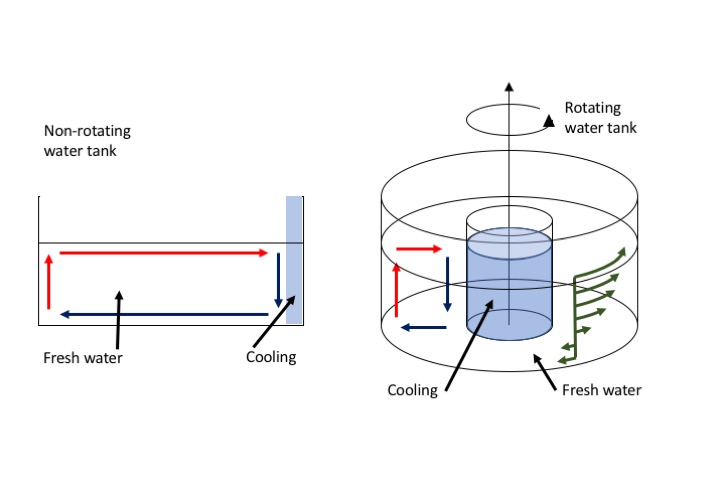
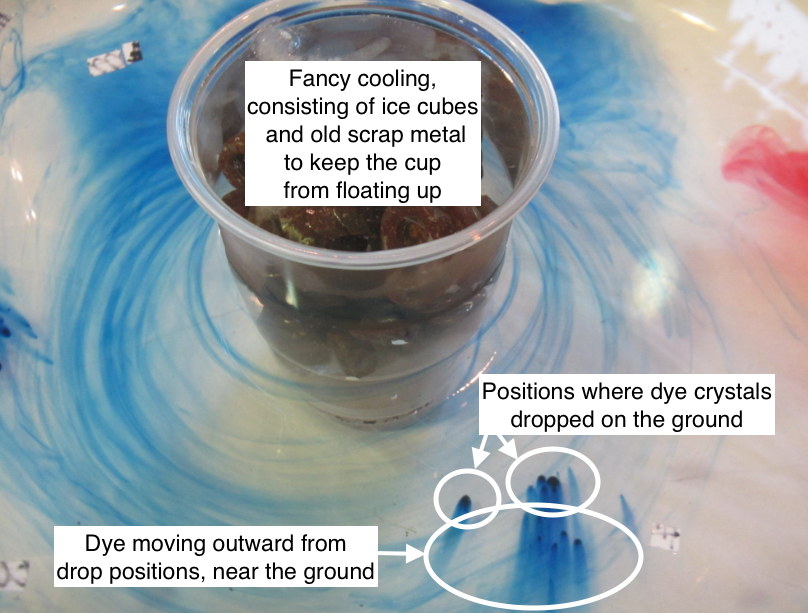
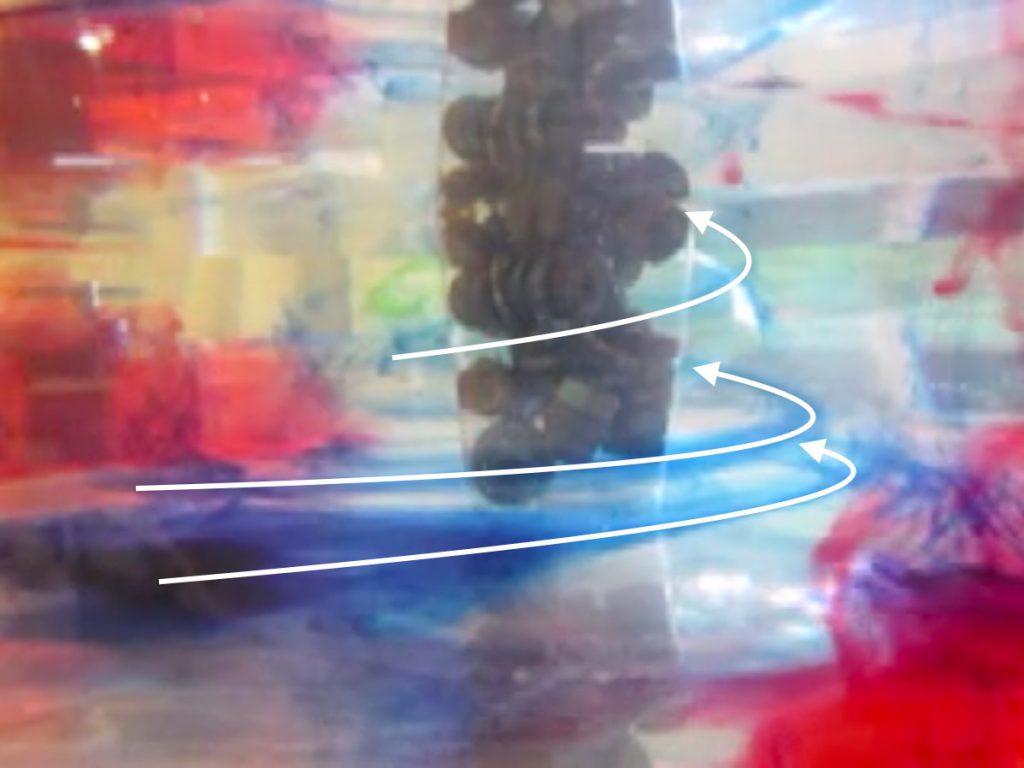
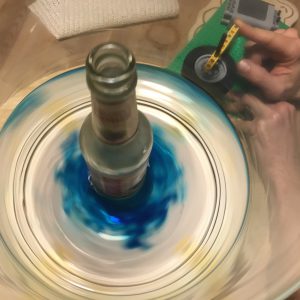
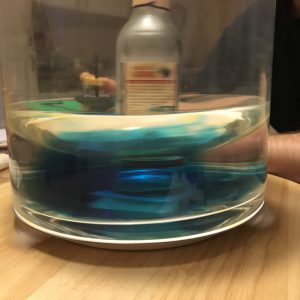
In the video, I am showing the two full experiments: For small rotations we get a low latitude, laminar, tropical Hadley circulation case. Spinning faster, we get a baroclinic instability, eddying, extra-tropical case. And as you’ll see, I didn’t know which circulation I was going to get beforehand, because I didn’t do the maths before running it. I like surprises, and luckily it worked out well!

Thermal forcing vs rotation

The first experiment we ever ran with our DIYnamics rotating tank was using a cold beer bottle in the center of a rotating tank full or lukewarm water. This experiment is really interesting because, depending on the rotation of the tank, it will display different regimes. For small rotations we get a low latitude, laminar, tropical Hadley circulation case. Spinning faster, we get a baroclinic instability, eddying, extra-tropical case. Both are really interesting, and in the movie below I am showing four experimentsm ranging from “thermal forcing, no rotation”, over two experiments which include both thermal forcing and rotation at different rates to show both the “Hadley cell” and “baroclinic instability” case, to “no thermal forcing, just rotation”. Enjoy!

Rotating tank experiments on a cone

I had so much fun playing with rotating tank experiments on a cone this afternoon! And with Torge Martin (who I have the awesome #DryTheory2JuicyReality project with) and Rolf Käse (who got me into tank experiments with an amazing lab course back in 2004, that I still fondly remember). We tried so many different things, that I will at some point have to describe in detail, but for now I just need to share the excitement ;-)

Here, for example, a blue fish-shaped ice cube. This experiment is pretty much the topographic Rossby wave experiment described here, except now we aren’t on an inclined plane, but on a cone. Which is basically an infinitely long inclined plane — the ice cube doesn’t encounter a boundary as it travels west, it just goes round and round the tank until it melts. And look at the cool Rossby waves!

Then we did another one of our favourite experiments, the Hadley cell circulation. What was really fascinating to observe was how turbulence the turbulence that was introduced by dripping dye into the tank changed scales. At first, we had the typical 3D pattern with plumes shooting down. But over time, the pattern became more and more organized, larger, and 2D. See below: The blue dye had been in the tank for a little longer than the red dye, so the structures look completely different. But interesting to keep that in mind when interpreting structures we observe!

Here is another view of the same experiment. Since we are cooling in the middle and rotating very slowly (about 3 rotations per minute), the eddy structures aren’t completely 2D, but they are influenced by an overturning component.

This looks even cooler when done on a cone. Can you see how there is both an overturning component (i.e. the plumes running down the slope) and then still a strong column in the middle?

This just looks so incredibly beautiful!

And one last look on the eddies that develop. We saw that there are cyclonic eddies happening in the center of the tank and anti-cyclonic eddies at the edge. Since we are on a cone, I could imagine that it’s just due to conservation of vorticity. Stuff that develops near the center and moves down the slope needs to spin cyclonically since the columns are being stretched, and on the other hand things that develop near the edge must move up the slope, thus columns being compressed. What do you think? What would be your explanation?

Thermal forcing in a non-rotating vs rotating case: Totally different results

On Thursday, I wrote about the thermally driven overturning circulation experiment that Torge and I did as past of our “dry theory 2 juicy reality” experiments, and mentioned that it was a non-rotating experiment in a class about rotating fluid dynamics.

I showed you the rectangular tank, but we also used a cylindrical tank with cooling in the middle that is a rotational symmetric version of the “slice” in the rectangular tank. In both cases we see the same: Cold water sinks and spreads at the bottom and is then replaced by warmer water.

But when we start turning the cylindrical tank with the cooling in the middle, cool things start to happen. I’ve blogged about that experiment before, but here is a pic of the circulation that develops. Instead of an overturning, we now get heat transport via eddies!

This is actually a really nice way to show again how hugely important the influence of rotation is on the behaviour of the ocean and atmosphere!

Baroclinic instabilities / Hadley cell circulation in a tank

The DIYnamics-inspired turntable that Torge and myself have been working on for our “dry theory to juicy reality” project is finally working well!

This is what the setup now looks like (how simple is that?!) and we had an exciting morning testing different experiments!

The one experiment that we have been using as test case in all our previous sessions is the Baroclinic Instability / Hadley cell circulation. There are sketches of the setup and the expected circulation in this blogpost, so just a quick reminder: We place a cold core in the center of our tank (here a glass with blue ice in it), spin the tank (at approximately 20rpm) into solid body rotation, and introduce dye (blue towards the center, red towards the outer edge of the tank).

And what happens then is just beautiful: We get 2D instabilities that transport cold (blue) water outwards and warmer (room-temperature, red) water towards the center of the tank.

We’ve run the experiment three times with different water levels (and once with Southern Hemisphere rotation just for fun) and it worked beautifully each time.

I find it always fascinating how there is hardly any mixing between the red and blue curtains (and there shouldn’t be any because rotating flows become 2D (as shown here)).

Just look at how the dye curtains form when we first add the blue dye…

And then a little later added some red dye…

And then let the field develop.

So I think we’ve got this experiment down and can run it with the students once the semester starts up again in October! :-)

Combining rotation of a water tank with a temperature gradient: A Hadley cell circulation demo!

Yesterday, we combined a thermally-driven overturning circulation with the effects of rotation, and thus created a Hadley cell circulation. And while the tank was turning faster than we would have liked, we still managed to create a circulation that largely resembles the sketch below: An axially-symmetric overturning circulation (with cold water, indicated by blue arrows, moving down near the cooling in the middle and then outwards, and warmer water moving up along the outer rim and then towards the middle of the tank) which induces the thermal wind flow (sketched in green: Fast surface current in the direction of rotation but even faster than the tank is rotating, and slow bottom flow in the opposite direction).

But what would happen if we increased the tank’s rotation rate? It would make the induced azimuthal flow, the thermal wind, faster too, until it eventually becomes unstable and breaks down into eddies. And then, the experiment (first blogged about a long time ago) looks similar to this one: Lots and lots of eddies that are now rigid vertically and move as Taylor columns!

Heat exchange between the cold core and the warmer areas towards the rim of the tank now doesn’t happen via overturning any more, but looks something like sketched below: We now have radial currents bringing warm water towards the middle (red) and cold water away from it (blue), and the eddies that create those currents are coherent over the whole depth of the tank.

This is actually a really nice demonstration of the circulation in mid- and high latitudes where the weather is determined by baroclinic instabilities, i.e. weather systems just like the eddies we are showing here.

Btw, having two different experiments both represent the same Hadley cell circulation isn’t a contradiction in itself: On Earth, the Coriolis parameter changes with latitude, but in the tank, the Coriolis parameter is the same throughout the tank. So depending on what latitude we want to represent, we need to change the tank’s rotation rate.

Here is an (old) movie of the experiment, and I can’t wait for our own tanks to be ready to produce a new one!


Combining a slowly rotating water tank with a temperature gradient: A thermal wind demonstration!

Setting up an overturning circulation in a tank is easy, and also interpreting the observations is fairly straightforward. Just by introducing cooling on one side of a rectangular tank a circulation is induced (at least for a short while until the tank fills up with a cold pool of water; see left plot of the image below).

But now imagine an axially symmetric setup where the cooling happens in the middle. What will happen to that overturning circulation if the tank is set into rotation (see right plot above)?

First, let’s check there is an overturning circulation. We can see that there is when we look at dye crystals that sank to the bottom of the tank: Dye streaks are moving outwards (and anti-clockwise) from where the crystals dropped on the ground, so at least that part of the overturning circulation is there for sure. If our tank were taken to represent the Hadley cell circulation in the atmosphere, this bottom flow would be the Trade winds.

Now, in addition to having water sink in the middle of the tank, spread radially outwards, and returning by rising near the outer edge of the tank and flowing back towards the middle, a secondary circulation is induced, and that’s the “thermal wind”. The thermal wind, introduced by the temperature gradient from cold water on the inside of the tank to warmer waters towards the rim, tilts columns that would otherwise stay vertically.

You see that in the image below: Dye dropped into the tank does not sink vertically, but gets swirled around the cold center in a helix shape, indicated in the picture below by the white arrows. In that picture, the swirls are tilted very strongly (a lot stronger than we’d ideally have them tilted). The reason for that is that we just couldn’t rotate the tank as slowly as it should have been, and the higher the rotation rate, the larger the tilt. Oh well…

So this is the current pattern that we observe: An overturning circulation (sketched with the red arrows representing warmer water and the blue arrows representing colder waters below), as well as the thermal wind circulation (indicated in green) with stronger currents near the surface (where the water is moving in the same direction as the rotating tank, but even faster!) and then a backward flow near the bottom. The velocities indicated here by the green arrows are what ultimately tilted our dye streaks in the image above.

The thermal wind component arises because as the overturning circulation moves water, that water carries with it its angular momentum, which is conserved. So water being brought from the rim of the tank towards the middle near the surface HAS to move faster than the tank itself the closer it gets to the middle. This flow would be the subtropical jets in the Hadley cell circulation if out tank were to represent the atmosphere.

Here is an old video of the experiment, first shown 5 years ago here. I’m looking forward to when Torge’s & my rotating tanks are ready so we can produce new videos and pictures, and hopefully being able to rotate the tank even more slowly than we do here (but that was the slowest possible rotation with the setup we had at that time). I promise you’ll see them here almost in realtime, so stay tuned! :-)

Working on our own affordable rotating table for oceanographic experiments!

Inspired by the article “Affordable Rotating Fluid Demonstrations for Geoscience Education: the DIYnamics Project” by the Hill et al. (2018), Joke, Torge and I have been wanting to build an affordable rotating table for teaching for a while now. On Saturday, we met up again to work on the project.

This post is mainly to document for ourselves where we are at and what else needs to happen to get the experiments working.

New this time: New rotating tables, aka Lazy Susans. After the one I’ve had in my kitchen was slightly too off-center to run smoothly, we bought the ones recommended by the DIYnamics project. And they work a lot better! To center our tank on the rotating table and keep it safely in place, we used these nifty LEGO and LEGO Duplo contraptions, which worked perfectly.

We also used a LEGO contraption to get the wheel close enough to drive the rotating table. The yellow line below shows where the rim of the rotating table’s foot needs to sit.

And this is how the engine has to be placed to drive the rotating table.

First attempt: Yes! Very nice parabolic surface! Very cool to see time and time again!

Now first attempt at a Hadley cell experiment: A jar with blue ice is placed at the center of the tank. Difficulties here: Cooling sets in right away, before the rotating tank has reached solid body rotation. That might potentially mess up everything (we don’t know).

So. Next attempt: Use a jar (weighted down with stones so it doesn’t float up) until the tank has reached solid body rotation, then add blue ice water

Working better, even though the green dye is completely invisible…

We didn’t measure rotation, nor did we calculate what kind of regime we were expecting, so the best result we got was “The Heart” (see below) — possibly eddying regime with wavenumber 3?

Here is what we learned for next time:

  • use better dye tracers and make sure their density isn’t too far off the water in the tank
  • use white  LEGO bricks to hold the tank in place (so they don’t make you dizzy watching the tank)
  • measure the rotation rate and calculate what kind of regime we expect to see — overturning or eddying, and at which wave number (or, even better, the other way round: decide what we want to see and calculate how to set the parameters in order to see it)
  • use white cylinder in the middle so as to not distract from the circulation we want to see; weigh the cylinder down empty and fill it with ice water when the tank has reached solid body rotation
  • give the circulation a little more time to develop between adding the cold water at the center and putting in dyes (at least 10 minutes)
  • it might actually be worth reading the DIYnamics team’s instruction again, and to buy exactly what they recommend. That might save us a lot of time ;-)

But: As always this was fun! :-)

P.S.: Even though this is happening in a kitchen, I don’t think this deserves the hashtag #kitchenoceanography — the equipment we are using here is already too specialized to be available in “most” kitchens. Or what would you say?

My first attempt at building a rotating table for kitchen oceanography using LEGO

Inspired by the article “Affordable Rotating Fluid Demonstrations for Geoscience Education: the DIYnamics Project” by the Hill et al. (2018), I spent a fun Sunday afternoon with my friends Joke and Torge in their kitchen, playing with Legos, water and food dye.

Turns out building a rotating table isn’t as easy as we had hoped, because my Lazy Susan’s axle is unfortunately really off centre (how did I never notice before?), which makes it pretty difficult to drive it with a grinding wheel, and the LEGO motor we were using only has one speed (which would have to be regulated by changing the diameter of the gears). That makes it really difficult to spin up a tank at rest if you go at it zero to full force…

But we got it to spin! Look at the cool paraboloid surface!

Next issue, though: my awesome glass vase which looks like it should work well as a tank has a really irregular bottom, which makes it very difficult to have anything stand in the centre without too much of a wobble. Also, for the Hadley Circulation experiment we were trying to set up here, when do you add in the cooling in the center? Would be best to do it after the tank is spun up, but that is such a pain to do! And I messed up the dye here, too.

But at least you can see a little bit of what it will be like when we are done, right?

Next time:

  • better Lazy Susan
  • better lighting
  • think about how to film it, therefore either have a co-rotating camera or a white background

And then it will be almost ready to be used in teaching. Well, almost…

Funny how tank experiments that you think should be quick and easy to set up & run always take sooo much longer than expected. But it’s so much fun that I really don’t mind! :-)

Hadley cell circulation – slow rotation

In order to not be in the eddying regime, this time we are rotating our tank as slowly as possible.

Since we ran the Hadley cell experiment the other day, I’ve been obsessed with running it again, this time with the slowest rotation possible in order to visualize a different flow regime – one were the heat transport happens through an overturning circulation rather than through eddies.

Unfortunately the camera we had mounted above the tank only started up halfway through the experiment (no idea how that happened!), so today you’ll only get snippets of this experiment. But all the more reason for us to run it again soon!

And I promise you’ll get a discussion of the differences between this and the Hadley cell experiment with the higher rotation rate soon. I just don’t have the time or mental space to write more than a couple of incoherent sentences while I’m still at the JuniorAkademie