Tag Archives: eddies

Eddy generation and optics.

Eddies. Dips in the surface and shadows on the ground.

I always get really fascinated by watching how eddies are generated by obstacles in a fluid. But it is especially exciting when you don’t only see the eddies because you see how they deform the surface, but when the water is clear enough so you can see the “shadows” on the ground!

IMG_1266

Of course, the dark spots you see aren’t shadows, strictly speaking. As light enters the water from the air, it is being refracted. And since the eddies’ surface imprints are dips in the surface, light is being refracted away from the perpendicular, leading to a less-well lit area – the dark spots.

But isn’t it fascinating to watch how eddies form when the water passes the stick and stones in the water when there is absolutely nothing going on upstream?

Currents caused by thrusters

Or: fast inflow into nearly stagnant water body

Did you ever notice how when certain ferries dock, they stop, already parallel to the dock, a couple of meters away from the dock and then just move sideways towards the dock? Usually they don’t even move passenger ferries any more, just use thrusters to keep them steady while people get on and off.

MVI_0977

Currents caused by thrusters of a harbor ferry in the port of Hamburg

But why this weird sideward motion?

One reason is the Coanda effect – the effect that jets are attracted to nearby surfaces and follow those surfaces even when they curve away. You might know it from putting something close to a stream of water and watching how the stream gets pulled towards that object, or from a fast air stream that can lift ping pong balls. So if the ship was moving while using the thrusters, the jets from the thrusters might just attach themselves to the hull of the ship and hence not act perpendicularly to the ship as intended.

But I think there is a secret second reason: Because it just looks awesome :-)

Vortex street

Do you use a tide chart to find the best time for your Saturday walk, too?

I showed you a vortex street on a plate formed by pulling a paint brush through sugary water as an example. Now today I want to show you the real thing: Instead of stagnant water and a moving object, I bring to you the flowing Elbe river and a bollard!

IMG_0820

Watch how vortices with alternating spin are shed every three or four seconds!

Shear flow

Kelvin-Helmholtz instabilities in a shear flow in Elbe river.

Last week I talked about how I wanted to use the “Elbe” model in teaching. Here is another idea for an exercise:

On the picture below you see Kelvin-Helmholtz instabilities. They might be kinda hard to make out from the picture, but there is a movie below where they are a bit easier to spot.

MVI_0791

Kelvin-Helmholtz instabilities the boundary layer of Elbe river

Anyway, this is what they look like: Kind of like the ones we saw off Jan Mayen in 2012.

Breaking_wave_Jan_Mayen

Kelvin-Helmholtz instability off Jan Mayen

Kelvin-Helmholtz instabilities occur in shear flows under certain conditions. And those conditions could be explored by using a tool like Elbe. And once students get a feel for the kind of shear that is needed, why not try to reproduce a flow field that causes something similar to the instabilities seen in the movie below?

Vortex streets on a plate

You might think that three hours of canoe polo on a Saturday morning would be enough water for the day, but no.  As when I did the experiment for the “eddies in a jar” post a while back, sometimes I just need to do some cool oceanography. So last Saturday, this is what I did:
Screen shot 2015-02-21 at 4.38.32 PMI took a plate, mixed some sugar, silvery water color, and water, pulled some stuff through the water and that was pretty much it. As a first order approximation, pulling an object through a stagnant water body is the same as the water body moving past a stationary object. And since it is usually pretty difficult to visualize flow around stationary objects (at least if you don’t want to pollute that little creek nor waste a lot of water). So this is really exciting.

Screen shot 2015-02-21 at 5.01.02 PM

Depending on the size of the object you pull through the water, and its speed, all kinds of different eddies develop. So fascinating! Watch the movie below to get an impression. (It’s really only an impression – it’s 2 minutes out of the 40 or so that I filmed ;-))

And for those of you who are always like “oh, I would love to, but I couldn’t possibly do this at home!”: This is what it looked like in my kitchen when I filmed the video above:Screen shot 2015-02-21 at 4.27.15 PM

The plate I am filming is the one underneath the camera (I love my gorilla grippy). My water colors from back when I was in primary school, a paint brush, a chop stick, the plate I tried first that turned out to not have enough contrast with the silver paint, a blanket because the tiles are cold to sit on. Oh, and the flowers that I have been meaning to put into nice pots for a couple of days now. So – no big mystery here! Go try! And let me know how it went.

Collapsing column

Or: This is what happens to a hetonic explosion experiment without rotation.

I’ve posted a lot while at JuniorAkademie a while back, so it is hard to believe there are still experiments from that time that I haven’t shown you. But I’ve probably only shown you about half the experiments we’ve done, and there are plenty more in the queue to see the light of day on this blog!

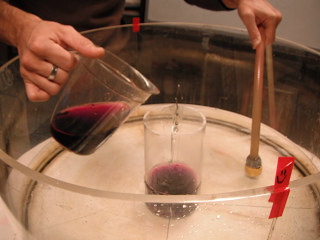
Today I want to talk about hetonic explosions (you know? The experiment on the rotating tank where a denser column of water at the center of the tank is released when the whole tank has reached solid body rotation). In Bergen, we used to show this experiment as a “collapsing column” experiment, the tilting of a frontal surface under rotation. For those cases, all the parameters of the experiment, e.g. the rotation rate, the density contrast, the water height, the width of the cylinder, were set up such as to ensure that one single column would persist in the middle of the tank. At JuniorAkademie, we’ve also run it in other setups, to form dipoles or quadrupoles. For a real hetonic explosion, we would typically go for even more eddies than that.

Today I want to show you this experiment under very special conditions: The no rotation case!

For all of you oceanographers out there who know exactly what that experiment will look like, continue reading nevertheless. For all of you non-oceanographers, who don’t know why some oceanographers might be disappointed by this experiment, continue reading, too!

You see, one of the fundamental assumptions we often make when teaching is that what is exciting to us, the instructor, is exciting to the students, too. And the other way round – that experiments that we might find boring will be boring the students, too. But I often find this to be completely wrong!

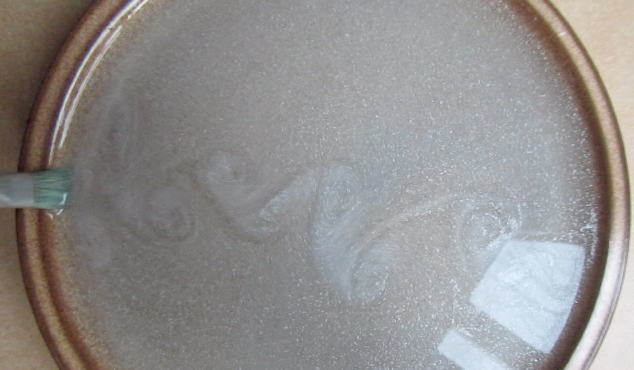
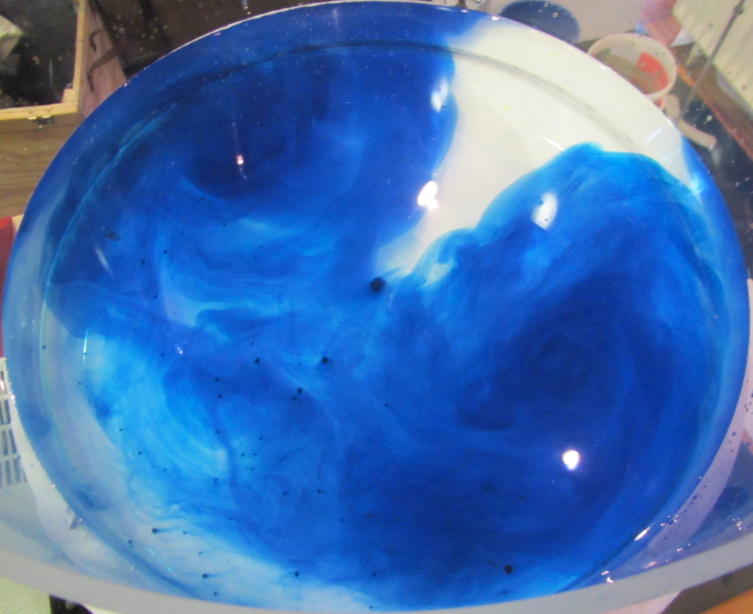
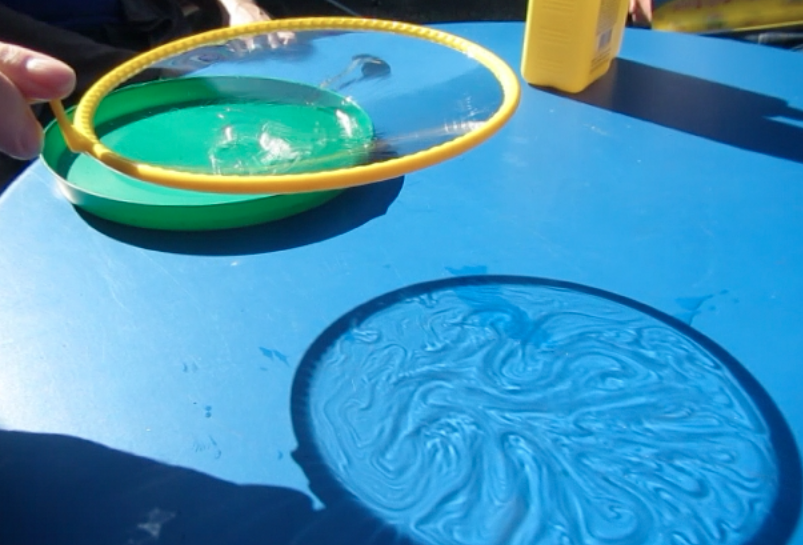
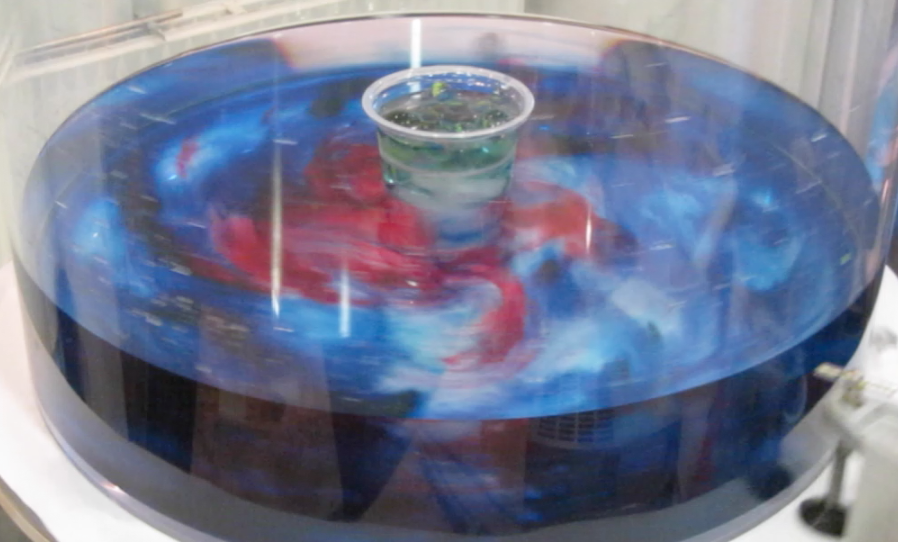
In case of the hetonic explosion experiment with no rotation, the experts know what will happen. We pull out the cylinder containing the denser water, so the denser water column will collapse and eventually form a layer of denser water underneath the rest of the water. We know that because we are aware of the differences between rotating and non-rotating systems. However, many students are not. And if you don’t have a strong intuition of how the water will behave, i.e. that in this case you will eventually have two layers, rather than a dense column surrounded by lighter water, it is not terribly exciting when you finally do the rotating experiment and – contrary to intuition – the dense water does not end up below the lighter water. So in order to show you in my next post what to be excited about, today I am showing you the normal, non-rotating experiment:

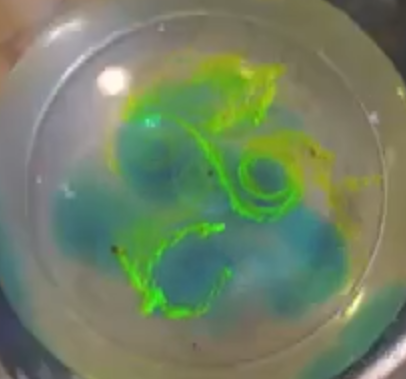
But note that the experiment is not nearly as boring as you might have thought! We had put a lot of vaseline at the bottom of the cylinder to prevent the denser water from leaking out, so when the cylinder was pulled up, it gave an impulse to the dense column, which ended up splitting up into a dipole upon hitting the wall of the tank. Still looks pretty cool, doesn’t it? And for this to be a good teaching video, I really should have continued filming until the layers had settled down. In my defense I have to say that we had a second experiment set up at the other rotating table that we wanted to run, so I had to get the cameras over to the other table… And you’ll see those movies in my next post!

Hadley cell experiment

Cooling and rotation combined. (deutscher Text unten)

I can’t believe I haven’t blogged about this experiment before now! Pierre and I have conducted it a number of times, but somehow the documentation never happened. So here we go today! Martin and I ran the experiment for our own entertainment (oh the peace and quiet in the lab!) while the kids were watching a movie. But now that we’ve worked out some of the things to avoid (for example too much dye!), we’ll show it to them soon.

This is a classical experiment on general atmospheric circulation, well documented for example in the Weather in a Tank lab guide. The movie below shows the whole experiments, though some parts are shown as time lapse.

Für unsere eigene Unterhaltung haben Martin und ich dieses Experiment gemacht, während die Kinder mit allen Gruppen gemeinsam einen Film gesehen haben. Himmlische Ruhe im Labor! Aber wir werden es bald auch der Gruppe vorführen.

Dieses klassische Experiment zeigt, wie die großskalige atmosphärische Zirkulation in der Hadley-Zelle angetrieben wird und ich weiß auch schon, wie wir es beim nächsten Mal noch eindrucksvoller hinbekommen als bei diesem Mal!

Hetonic explosion

Or, an experiment on this blog often known as “slumping column”. (deutscher Text unten)

If you don’t scale your tilting of frontal surfaces under rotation experiment correctly, you get a phenomenon called “hetonic explosion”: the formation of a cloud of baroclinic point vortices. From the densities, the rotation rate, the dimensions etc you can calculate the Rossby radius and determine how many eddies you will generate. In our case, though, the calculation went wrong by a factor 10 (9.81, to be precise) and what we ended up getting is shown below.

Watch the movie below for the whole experiment (though most of it in time lapse).

Heute haben wir ein sehr spannendes Experiment gemacht. In einem Drehtank hatten wir in der Mitte einen Zylinder mit gefärbten Salzwasser und außen herum klarer Süßwasser ins Gleichgewicht gedreht. Dann wurde der Zylinder entfernt und die Säule blauen Wassers musste ein neues Gleichgewicht finden.

Im Film oben zeigen wir das Experiment – zum Teil allerdings im Zeitraffer. Viel Spaß!

Tilting of a frontal surface under rotation

Eddy in a rotating tank.

This is an experiment that Pierre and I ran two years ago in Bergen but that – as I just realized – has not been featured on this blog before. Which is a pity, because it is a pretty cool experiment.

Under rotation, vertical fronts with different densities on either side can persist for a long time without leading to the density-driven adjustment shown in the non-rotating Marsigli experiment. This is what we demonstrate with this experiment.

In a not-yet-rotating tank, dyed salt water is filled into a centered cylinder while, at the same time, fresh water is filled in the tank outside of the cylinder.

This setup is then spun up for approximately half an hour. Then, the cylinder can be carefully removed and the column of dense water can adjust to the new conditions.

Screen shot 2012-03-09 at 5.50.07 PM

The rotating tank just as the cylinder is being removed

When the cylinder is being removed, disturbances are being introduced. Hence, several columns with sloping fronts develop in the rotating system.

Screen shot 2012-03-09 at 5.50.16 PM

Dense columns developing towards an equilibrium state in the rotating system.

This is what the rotating tank looks like from the side several minutes after the cylinder has been removed.

Screen shot 2012-03-09 at 5.50.26 PM

Side view of the sloping front around the dense column

Here are a couple of movies of this experiment. First a top view (note how you can see the deformation of the surface when you focus on the reflection of the ceiling lights on the water’s surface!):

Then a side view:

And finally (just because it’s fun) this is what it looks like when you switch off the rotation of the tank when you are done with the experiment: